Introduction
Are you tired of paying hefty cable bills just to watch your favorite TV shows? It’s time to cut the cord and switch to a TV antenna. Building your own TV antenna is a cost-effective solution that allows you to receive free over-the-air broadcasts. Not only will you save money, but you’ll also enjoy high-quality HD channels without any subscription fees.
In this step-by-step guide, we’ll show you how to make your own TV antenna using common household materials. Don’t worry if you’re not a DIY expert – this project is simple and requires no specialized skills. With a little time and effort, you’ll have a powerful antenna that can pull in signals from broadcast towers in your area.
By following this guide, you’ll be able to enjoy a wide variety of local channels, including news, sports, and entertainment options, all without the need for cable or satellite services.
Ready to get started? Let’s gather the materials you’ll need for this DIY TV antenna project.
Materials Needed
Before you start building your TV antenna, make sure you have the following materials:
- Coaxial cable: You will need a length of coaxial cable to connect your antenna to your TV. Choose a cable that is long enough to reach from your antenna to your television.
- Wire: Purchase a roll of thick wire, preferably copper or aluminum. This will be used to create the antenna elements.
- Wood or PVC pipe: You’ll need a sturdy material to serve as the frame for your antenna. You can use either wood or PVC pipe, depending on your preference and what is readily available.
- Connectors: Get connectors to attach the coaxial cable to the antenna elements and to connect the cable to your TV. F-type connectors are commonly used for this purpose.
- Screws and bolts: These will be needed to secure the antenna elements to the frame and to mount the antenna in place.
- Tools: Gather the necessary tools, such as wire cutters, pliers, a screwdriver, and a drill with appropriate drill bits.
Optional materials:
- Metal reflector: Adding a metal reflector behind the antenna elements can help improve signal reception. You can use any flat metal surface, such as aluminum foil or a baking sheet.
- Grounding wire: If you want to ensure safe and reliable operation, consider using a grounding wire to connect your antenna to a grounding rod.
- Antenna mast: If you plan to mount your antenna on a rooftop or in an elevated location, an antenna mast will be necessary to secure the antenna in place.
Now that you have all the necessary materials, it’s time to move on to the first step: gathering the materials and getting ready for the construction process.
Step 1: Gather the Necessary Materials
The first step in building your own TV antenna is to gather all the materials mentioned in the previous section. Having everything organized and within reach will make the construction process smoother and more efficient.
Start by locating the coaxial cable you purchased. Ensure that the cable is long enough to reach from your antenna’s location to your television. Measure the distance if needed, and consider any obstacles, such as walls or furniture, that might require additional cable length.
Next, gather the wire that will be used to create the antenna elements. Look for a roll of thick wire, preferably copper or aluminum, as these metals offer good conductivity for receiving signals.
If you haven’t already, choose a sturdy material to serve as the frame for your antenna. Wood and PVC pipe are common choices for antenna frames. If using wood, ensure it’s thick enough to hold the weight of the antenna elements without bending or breaking. If opting for PVC pipe, select the appropriate diameter for your antenna design.
Now, locate the connectors needed to attach the coaxial cable to the antenna elements and connect the cable to your TV. F-type connectors are commonly used in these applications and can be easily found at hardware stores or online.
Lastly, make sure you have the necessary screws and bolts to secure the antenna elements to the frame and to mount the antenna in its designated location. Double-check that you have all the tools required for the project, including wire cutters, pliers, a screwdriver, and a drill with suitable drill bits.
If you are opting for optional materials, such as a metal reflector, grounding wire, or an antenna mast, ensure you have them ready as well.
With all the materials gathered, you’re now ready to move on to the next step: measuring and cutting the wire to the proper length for your antenna design.
Step 2: Measure and Cut the Wire
Now that you have gathered all the necessary materials for your DIY TV antenna, it’s time to measure and cut the wire to the appropriate length for your antenna design. This step is crucial as the length of the wire will determine the antenna’s resonant frequency and optimal performance.
Start by referring to the antenna design you have chosen or the instructions provided with the design. Most DIY TV antenna designs require multiple wire elements of specific lengths. Measure each piece of wire according to the specifications provided, making sure to leave a little extra length for adjustments and connections.
Using a pair of wire cutters, carefully cut the wire to the desired lengths. Ensure that your cuts are clean and straight to maintain optimal performance. If needed, use a ruler or measuring tape to ensure accurate measurements.
It’s important to note that different antenna designs may require different wire lengths and configurations. Some designs may involve cutting multiple pieces of wire of varying lengths, while others may require bending or shaping the wire in specific ways.
Throughout the cutting process, double-check your measurements to avoid any mistakes that could affect the antenna’s functionality. Precision is key to achieving optimal signal reception, so take your time and be meticulous in your measurements.
Once all the wire elements have been cut to their specified lengths, you are ready to move on to the next step: stripping the ends of the wire to prepare them for connection to the frame and coaxial cable.
Step 3: Strip the Ends of the Wire
After measuring and cutting the wire to the desired lengths for your DIY TV antenna, it’s time to strip the ends of the wire. Stripping the wire involves removing the insulation from the tips of the wire, exposing the bare metal for better connectivity.
Start by carefully placing one end of a wire into a wire stripper tool. The wire stripper will have multiple holes with different sizes to accommodate various wire gauges. Choose the appropriate hole that matches the diameter of your wire.
Gently squeeze the wire stripper tool around the wire, ensuring a firm grip without applying excessive force. Rotate the wire stripper tool once or twice to score the insulation. Then, pull the wire stripper tool towards the end of the wire to remove the insulation. Be cautious not to cut or damage the actual wire while stripping the insulation.
Repeat this process for all the wire elements you have cut, stripping the insulation from both ends of each wire.
Once the insulation is removed, you will be left with exposed bare metal on the ends of the wire. These stripped ends will be used for connecting the wire to the frame of your antenna and for attaching the coaxial cable.
It’s crucial to ensure the stripped ends are clean and free from any debris or oxidation. Use a small piece of sandpaper or a wire brush to gently sand the bare metal ends of the wire, removing any oxidation or dirt. This will improve the conductivity and help establish solid connections.
With the wire ends properly stripped and prepared, you are now ready to move on to the next step: forming the frame for your DIY TV antenna.
Step 4: Form the Frame
Now that you have measured, cut, and stripped the wire for your DIY TV antenna, it’s time to form the frame that will hold the antenna elements in place. The frame provides stability and structure to ensure proper antenna functionality.
Start by assembling the wooden or PVC pipe components according to the design or instructions you’re following. If you’re using wood, secure the pieces together using screws or nails. If you opted for PVC pipe, use PVC connectors and adhesive to join the sections together securely.
Ensure that the frame is sturdy and stable, as it will need to withstand outdoor conditions and potential wind loads. Double-check the corners and joints to ensure they are properly aligned and reinforced.
Next, determine the placement and orientation of the antenna elements on the frame. Refer to your chosen design or instructions for specific placement guidelines. Typically, the elements will be evenly spaced and aligned to optimize signal reception.
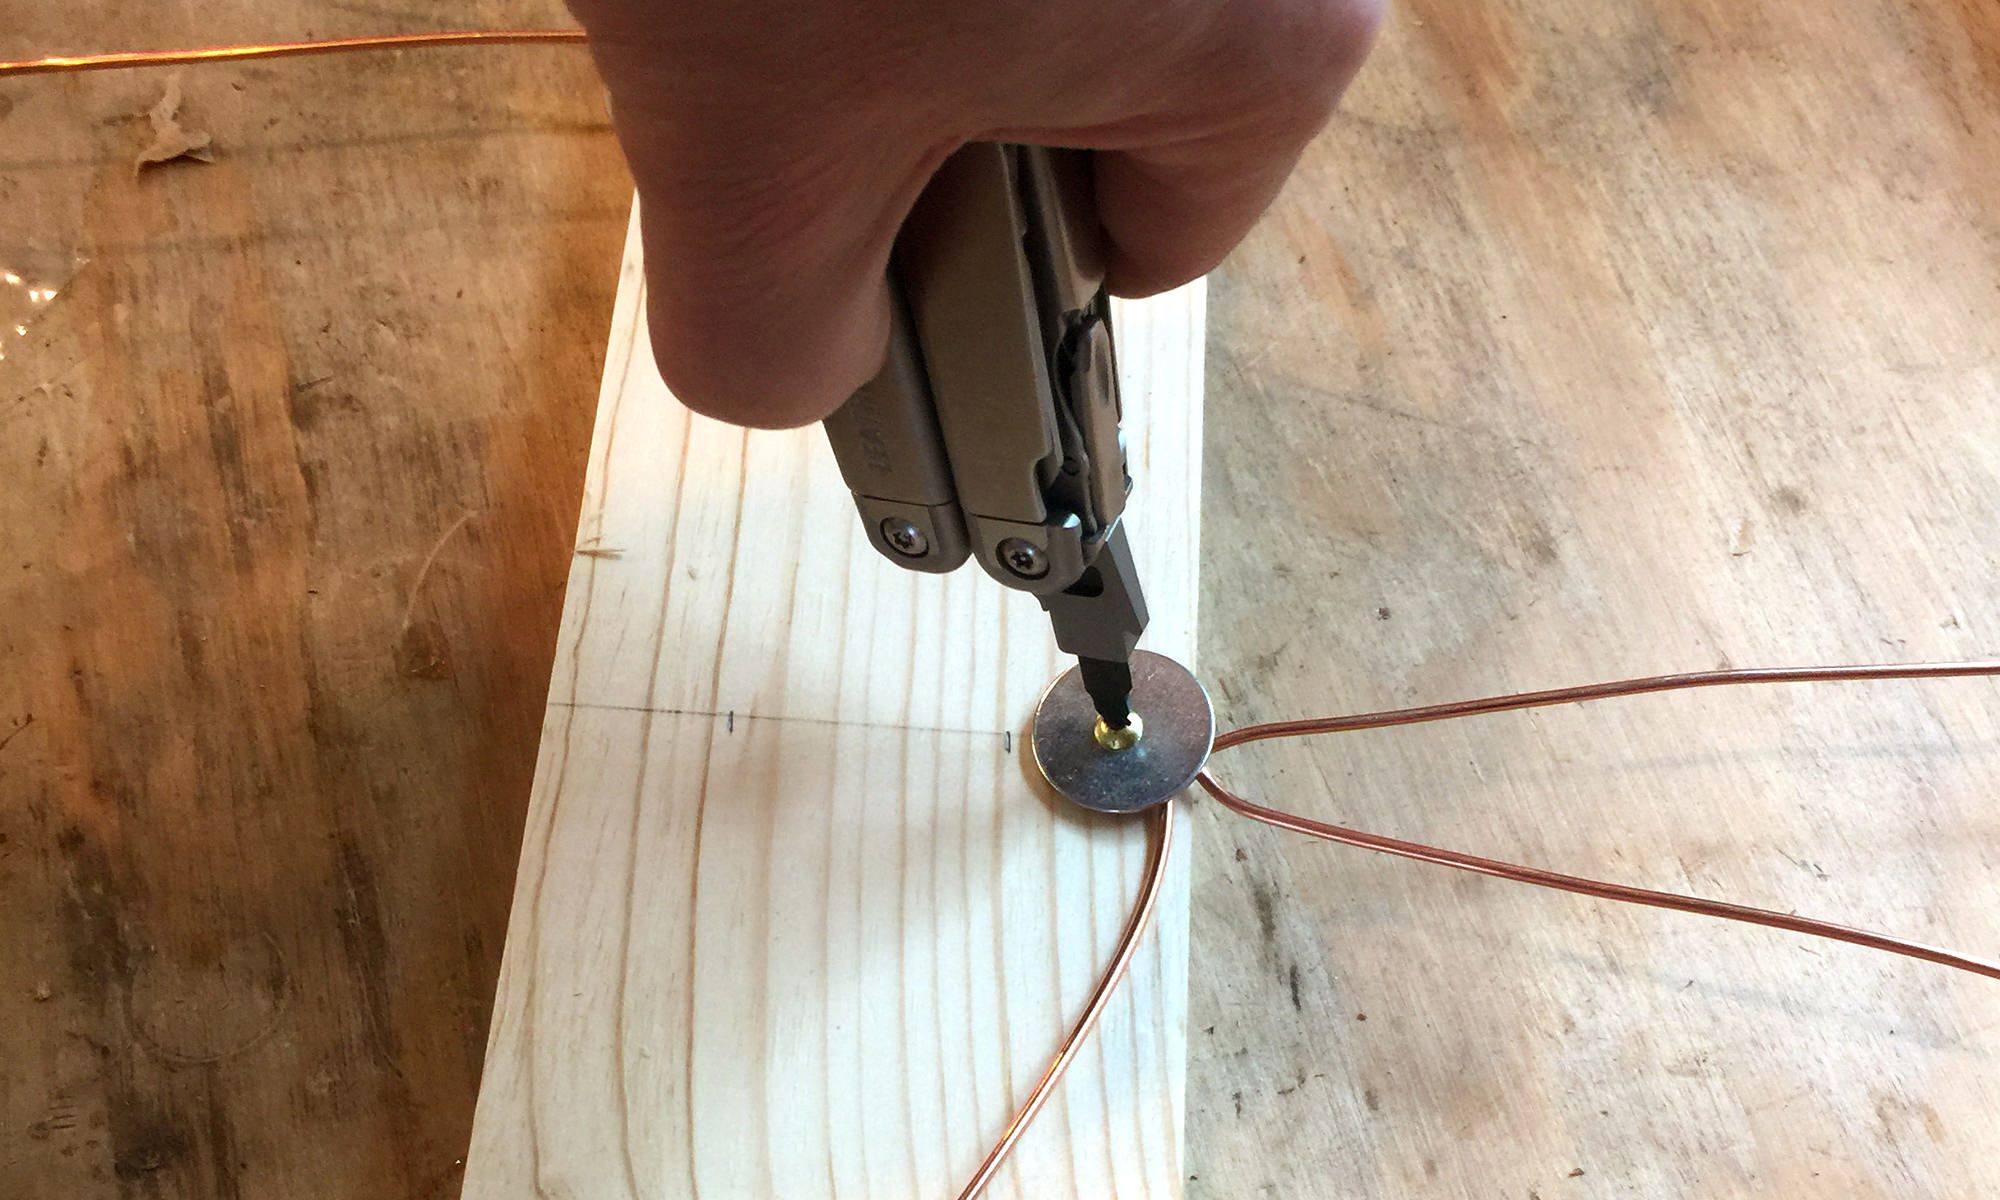
Using screws, bolts, or other suitable fasteners, attach the stripped ends of the wire elements to the frame. Make sure the wire elements are securely fastened to the frame and that there is good contact between the wire and the frame.
As you attach the wire elements, ensure they are straight and parallel to each other. Use a level or measurement tool to verify that the elements are aligned correctly for optimal signal reception.
If your design includes a metal reflector, such as aluminum foil or a baking sheet, attach it behind the wire elements to enhance the antenna’s performance. The reflector should be positioned to reflect any signal coming from the back of the antenna towards the front.
Take your time during this step to ensure that the frame is assembled correctly and that the wire elements are securely attached. The solidity of the frame and the alignment of the elements will greatly impact the antenna’s performance.
Once you have successfully formed the frame and attached the wire elements, you’re now ready to move on to the next step: connecting the coaxial cable to the antenna.
Step 5: Attach the Coaxial Cable
With the frame of your DIY TV antenna complete, it’s time to connect the coaxial cable, which will transmit the signal from the antenna to your television. Properly attaching and securing the coaxial cable is crucial for ensuring optimal signal reception and transmission.
Start by determining the desired location on the frame where the coaxial cable will be connected. Typically, this will be near the center or bottom of the antenna frame, depending on your design.
Take the coaxial cable and remove a few inches of the outer insulation using a cable stripper or a sharp knife. Be careful not to cut into the inner shielding or wires while stripping the outer insulation.
Once the outer insulation is stripped, carefully separate the inner shielding and wires from each other. You may need to untwist and separate the wires to expose the inner conductor, which is usually copper-colored and made of solid or braided wire.
Trim the inner conductor, leaving about 1/4 inch or as instructed by your connector. Ensure a clean cut with no frayed ends or stray wire strands.
Next, slide the connector onto the stripped end of the coaxial cable. Make sure the connector is securely fitted onto the cable, and that the inner conductor is properly aligned with the center pin of the connector.
Using a coaxial cable crimping tool, crimp the connector onto the cable, applying enough pressure to create a tight and secure connection. This step ensures that the connector is securely attached to the coaxial cable.
Once the connector is crimped onto the cable, attach the other end of the coaxial cable to the appropriate connection point on your antenna frame. Depending on your design, this may involve screwing or fastening the connector to a designated terminal on the frame.
Make sure the connection is tight and secure, allowing for a solid electrical connection between the coaxial cable and the antenna frame.
With the coaxial cable properly attached to the antenna, you’re now ready to move on to the next step: connecting the ground wire (optional) for enhanced safety and performance.
Step 6: Connect the Ground Wire
Connecting a ground wire to your DIY TV antenna is an optional step, but it can help improve both safety and overall antenna performance. The ground wire provides a path for electrical discharges, such as lightning, to safely dissipate into the ground, protecting your equipment and reducing the risk of damage.
If you choose to include a ground wire, follow these steps to connect it:
- Locate a suitable grounding point near your antenna. This can be a metal pipe driven into the ground, a grounding rod specifically designed for this purpose, or any other metal structure firmly connected to the Earth.
- Measure and cut a length of grounding wire that is long enough to reach from your antenna frame to the grounding point.
- Strip both ends of the grounding wire to expose the bare metal using a wire stripper tool.
- Attach one end of the grounding wire to a designated grounding terminal or grounding lug on the antenna frame. This can typically be achieved by securing the wire with a screw or bolt.
- Connect the other end of the grounding wire to the grounding point you identified earlier. Ensure a secure connection by wrapping the wire around the grounding point or using an appropriate connector.
- Double-check that all connections between the grounding wire, antenna frame, and grounding point are tight and secure.
By incorporating a ground wire into your DIY TV antenna setup, you add an extra layer of protection against electrical surges and potential damage during storms or lightning strikes. This grounding connection helps minimize the risk of equipment damage and ensures the safety of everyone in the vicinity.
With the ground wire properly connected (if you choose to include it), you’re now ready to move on to the next step: mounting the antenna in its designated location.
Step 7: Mount the Antenna
Now that your DIY TV antenna is constructed and all the necessary connections have been made, it’s time to mount the antenna in its designated location. The proper mounting of the antenna is crucial for optimal signal reception and a reliable television viewing experience.
When choosing the mounting location, consider the following factors:
- Clear line of sight: Ensure that the antenna has a clear line of sight to the broadcast towers in your area. Avoid obstructions such as buildings, trees, or other structures that could block the signal.
- Elevation: Mount the antenna as high as possible to maximize the signal reception. Rooftops, attics, or tall poles are ideal locations for optimal antenna performance.
- Stability: Make sure the mount provides stability and security for the antenna. If using a mast or pole, ensure it is securely fixed in place to withstand potential wind or weather conditions.
Once you have determined the best location, follow these steps to mount your DIY TV antenna:
- Position the antenna at the desired location, ensuring that it is level and aligned correctly.
- If using a mast or pole, secure it to the mounting surface using appropriate brackets, clamps, or screws.
- Attach the antenna to the mounting surface or mast, ensuring a secure connection. Follow the specific instructions provided with your antenna design or use suitable hardware to fasten the antenna to the mount.
- Tighten all bolts, screws, or clamps to ensure the antenna is firmly secured and stable.
Once the antenna is mounted, take a step back and assess its position. Ensure that it is facing the correct direction, pointing towards the broadcast towers in your area. You may need to refer to an online TV signal locator tool or consult local antenna installation guidelines to determine the proper direction.
With the antenna securely mounted in its designated location, you’re ready for the final step: testing the reception to enjoy free, over-the-air broadcast channels on your TV.
Step 8: Test the Reception
After successfully mounting your DIY TV antenna, it’s time to test the reception to ensure optimal performance and enjoy free, over-the-air broadcast channels on your television. Testing the reception allows you to fine-tune the antenna’s position and make any necessary adjustments for the best signal quality.
Follow these steps to test the reception of your DIY TV antenna:
- Connect the coaxial cable from the antenna to the “Antenna In” or similar input on your television.
- Turn on your television and go to the menu or settings to access the channel or input selection options.
- Select “Antenna” or “Air” as the input source for receiving over-the-air broadcasts.
- Initiate a channel scan on your television to search for available channels. This process may vary depending on your specific television model, so refer to the user manual for instructions.
- Allow the channel scan to complete, typically taking a few minutes. Your television will scan the airwaves and detect available channels.
- Once the scan is complete, navigate through the channels to see which ones are successfully received by your antenna. Make note of the channels and their respective signal strength.
During the testing process, you may need to adjust the position and orientation of your antenna to optimize the reception. Try small incremental adjustments, such as rotating the antenna slightly or repositioning it to maximize the signal strength of the desired channels.
Keep in mind that factors such as distance to broadcast towers, terrain, and interference can affect the reception quality. Experiment with different positions and orientations to find the sweet spot that offers the best reception for your specific location.
Once you have achieved satisfactory reception for your desired channels, secure the antenna in its optimized position and enjoy the free, high-quality over-the-air broadcasts on your television. Remember to periodically re-scan for channels, as new channels may become available or existing channels may change their frequencies.
By successfully testing the reception of your DIY TV antenna, you have completed the final step in the process. Sit back, relax, and enjoy the multitude of free channels now available to you!
Conclusion
Congratulations! You have successfully built your own DIY TV antenna and now have access to free over-the-air broadcasts. By following the step-by-step process outlined in this guide, you have created a cost-effective solution that allows you to enjoy high-quality HD channels without the need for expensive cable or satellite services.
Throughout the construction process, you have gathered the necessary materials, measured and cut the wire to the appropriate lengths, formed the frame, attached the coaxial cable, connected the ground wire (if applicable), mounted the antenna, and tested the reception. These steps have allowed you to create a personalized TV antenna tailored to your specific location and needs.
Remember, proper positioning and alignment of the antenna are critical factors in achieving optimal signal reception. Take the time to experiment with different orientations and mounting locations to find the sweet spot that offers the best reception for the available broadcast channels in your area.
Now that your antenna is up and running, you can enjoy a wide variety of local channels, including news, sports, and entertainment options. Say goodbye to expensive cable bills and hello to free, high-quality television.
Keep in mind that maintaining and adjusting your DIY TV antenna might be necessary from time to time, especially if there are changes in the surrounding environment or broadcast frequencies. Regularly check for any loose connections, damaged wires, or signs of corrosion to ensure optimal performance.
We hope that this guide has empowered you to take control of your TV viewing experience and save money in the process. Building your own TV antenna is a rewarding and budget-friendly project that provides excellent access to free, over-the-air channels.
Now sit back, relax, and enjoy your favorite shows with your DIY TV antenna! Happy viewing!