Introduction
Welcome to our guide on how to make a dust-resistant PC case. If you’re like most PC enthusiasts, you know the frustration that comes with opening up your computer and finding it filled with dust and debris. Dust can not only hinder your PC’s performance but also cause overheating and hardware failure. That’s why it’s important to take proactive measures to keep your PC case dust-free.
By following the steps outlined in this guide, you’ll be able to significantly reduce the amount of dust that accumulates in your PC case, ensuring optimal performance and longevity for your components.
While it may seem like an arduous task, making your PC case dust-resistant is actually quite simple and can be done without breaking the bank. With a little bit of time and effort, you can greatly minimize the amount of dust that enters your case and help maintain the overall cleanliness of your computer.
In the following sections, we’ll discuss the significance of having a dust-resistant PC case and guide you through the process of making your own. So, let’s get started and say goodbye to dusty PC internals!
Why Do You Need a Dust-Resistant PC Case?
Keeping your PC case free from dust and debris is crucial for several reasons. Let’s explore the top reasons why you need a dust-resistant PC case:
- Improved Performance: Dust buildup can restrict airflow within your PC case, leading to overheating issues. When components like your CPU or GPU get too hot, they tend to throttle performance to prevent damage. By having a dust-resistant case, you can maintain optimal airflow and ensure your components run at their best.
- Extended Lifespan of Components: Dust acts as an insulator, trapping heat and causing components to run hotter than normal. Over time, this excessive heat can significantly reduce the lifespan of your hardware. A dust-resistant case helps keep your components clean and cool, increasing their longevity.
- Prevention of Hardware Failure: Excessive dust buildup can lead to hardware failure, particularly in sensitive components such as fans, hard drives, and power supplies. Dust can clog fan blades, causing them to spin slower or even seize up completely. By minimizing dust in your PC case, you can reduce the risk of hardware malfunction.
- Easier Maintenance: A clean PC case not only looks better but also makes maintenance and upgrades easier. When your case is free from dust, it’s simpler to access and clean various components. This saves you time and effort when it comes to routine maintenance or upgrading your hardware.
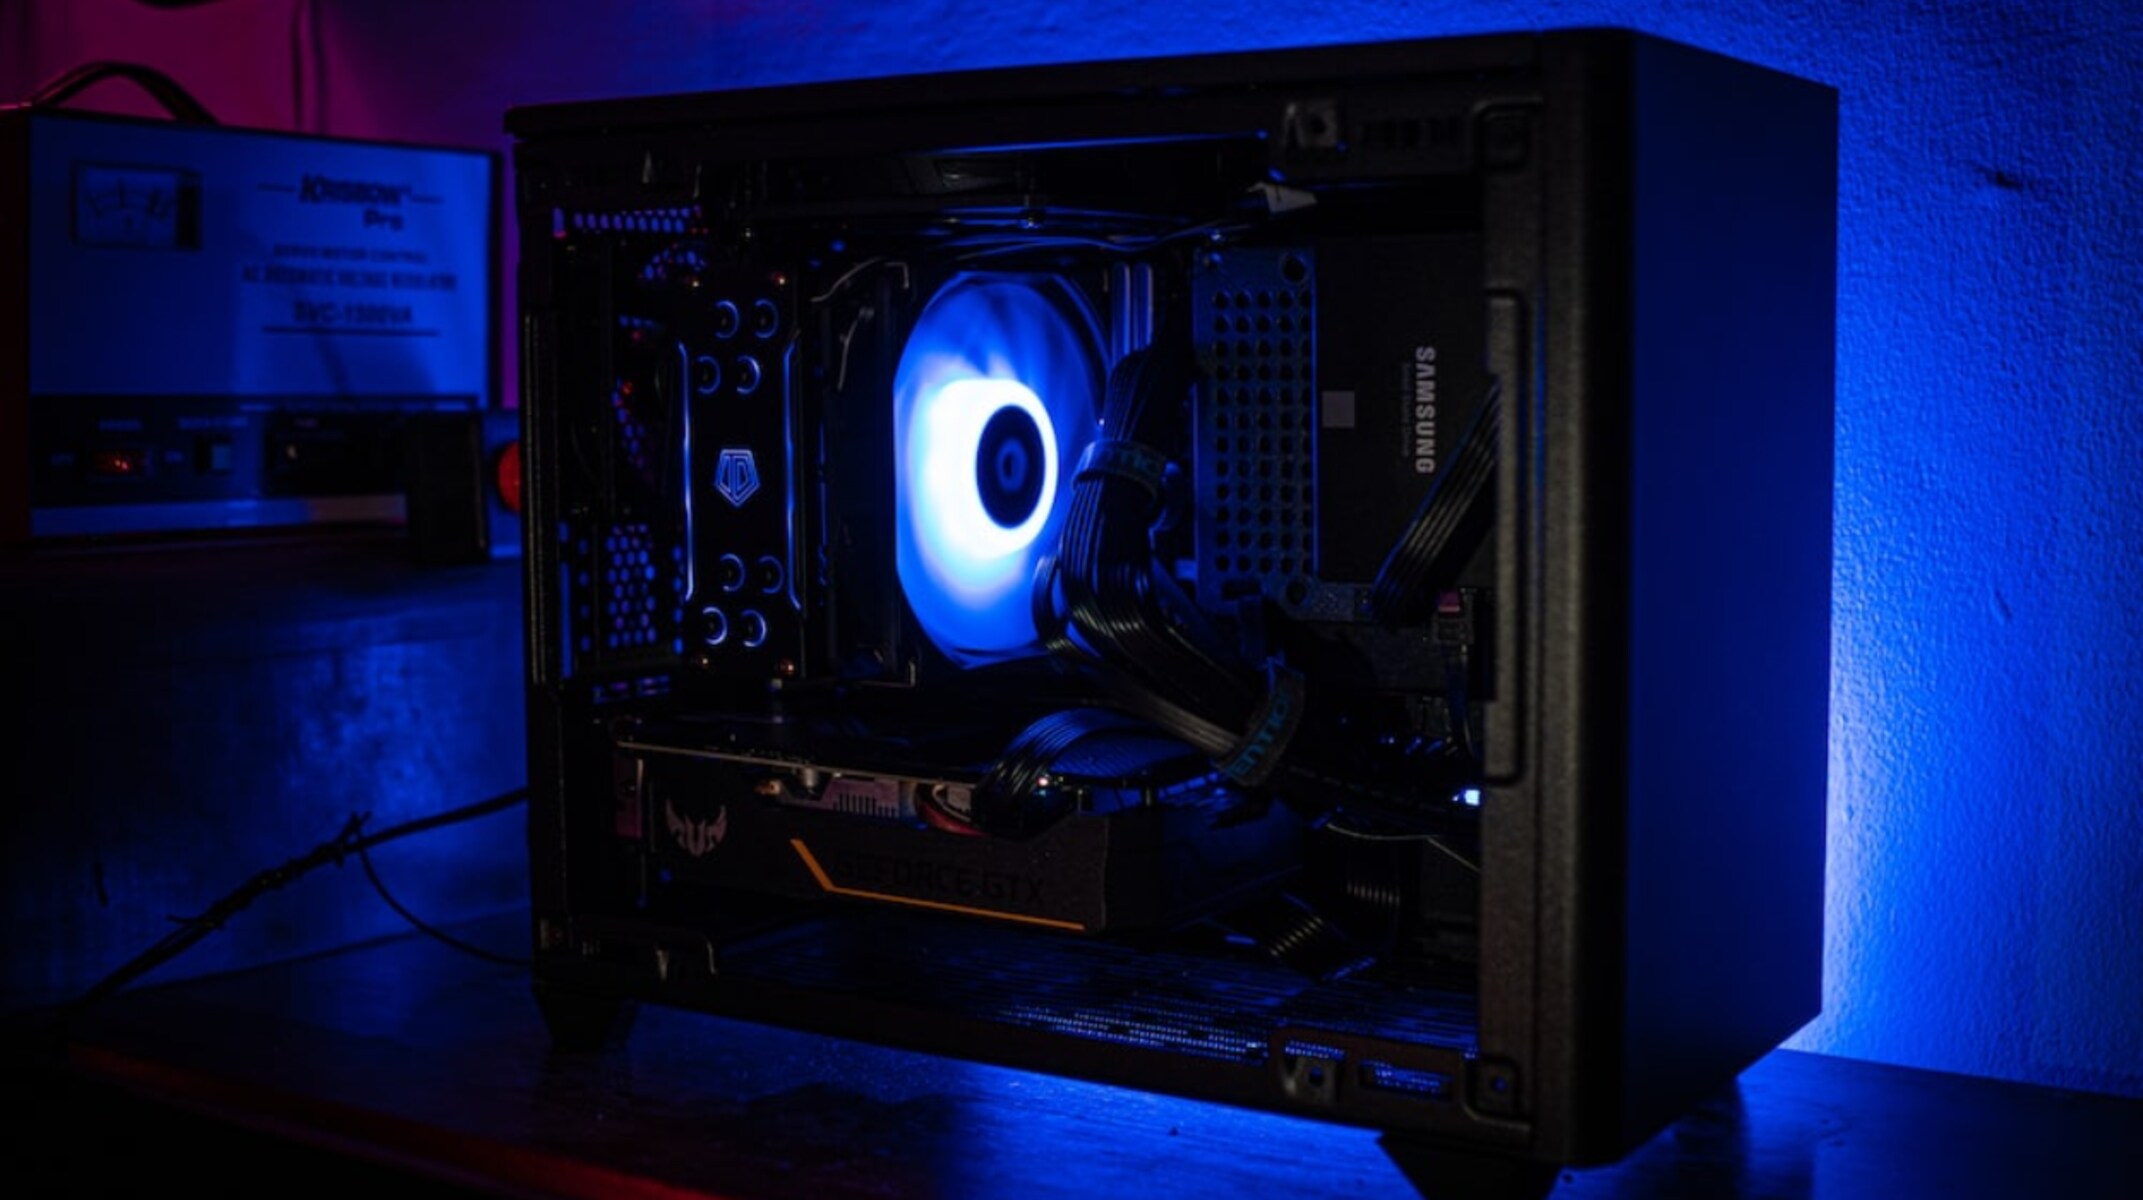
- Better Aesthetics: If you take pride in the appearance of your PC, a dust-resistant case is a must. Dusty components can make your PC look unappealing, especially if you have a transparent side panel or RGB lighting. By keeping your case dust-free, you can showcase your hardware in all its glory.
Now that you understand the importance of a dust-resistant PC case, let’s dive into the steps you can take to make your own and ensure a clean and efficient computer system.
Step 1: Choose the Right PC Case
When it comes to building a dust-resistant PC, selecting the right PC case is crucial. Here are some factors to consider:
- Dust Filters: Look for a case that comes with built-in dust filters. These filters are usually located on the intake vents and help prevent dust from entering the case. Make sure the filters are easily removable for cleaning purposes.
- Positive Pressure Design: Opt for a case that supports a positive pressure airflow setup. This means having more intake fans than exhaust fans, which helps to create a higher pressure inside the case. Positive pressure forces air out of any unfiltered gaps, reducing the amount of dust that can enter.
- Placement of Vents: Check the positioning of vents in the case. Ideally, the vents should be located away from the floor or other areas prone to dust accumulation. Avoid cases with bottom-mounted power supplies, as they can draw in dust from the floor.
- Cable Management: Consider a case with good cable management features. Proper cable management not only improves airflow but also reduces the number of dust-trapping areas inside the case.
- Size and Expandability: Choose a case that suits your needs in terms of size and expandability. Ensure it can accommodate your desired hardware components and has room for future upgrades, while still maintaining good airflow and dust resistance.
- Material: The choice of case material can also impact dust resistance. Cases made of more solid materials like steel tend to attract less dust compared to cases made of plastic or mesh. However, keep in mind that the overall ventilation design of the case plays a more significant role.
By carefully considering these factors, you can select a PC case that is not only aesthetically pleasing but also optimized for dust-resistance. Now that you have chosen the right case, let’s move on to the next step: installing dust filters.
Step 2: Install Dust Filters
Now that you have chosen a suitable PC case, the next step in making it dust-resistant is to install dust filters. Dust filters are an effective way to prevent dust particles from entering your case and clogging up your components. Here’s how you can install them:
- Identify the intake vents: Take a close look at your PC case and identify the intake vents. These are usually located on the front, top, and bottom of the case. Depending on your case model, there may also be vents on the side panel.
- Measure the vent dimensions: Measure the dimensions of each vent to determine the size of the dust filters needed. Most PC cases have standardized filter sizes, such as 120mm or 140mm, but it’s essential to double-check to ensure a proper fit.
- Purchase the appropriate dust filters: Once you have the measurements, purchase dust filters that match the size of your vents. These filters are usually made of fine mesh material that blocks dust particles while allowing airflow to pass through.
- Detach the intake fans (if necessary): Some cases may require you to detach the intake fans before installing the dust filters. Follow the manufacturer’s instructions to safely remove the fans if needed.
- Attach the dust filters: Carefully place the dust filters over the corresponding intake vents. The filters should fit securely and cover the entire vent area. Most filters come with magnetic or adhesive strips to keep them in place. Alternatively, some cases have built-in filter slots that you can slide the filters into.
- Reattach the intake fans (if applicable): If you removed the intake fans, reattach them to the case, making sure they align with the dust filters. Ensure that all connections are secure and the fans are properly seated.
- Repeat for all intake vents: Repeat the process for each intake vent on your PC case, including any side panel vents if applicable. It’s crucial to cover all intake points to maximize dust resistance.
Once you have installed dust filters on all intake vents, you have taken a significant step towards making your PC case dust-resistant. In the next step, we’ll explore how to optimize airflow to further enhance dust prevention.
Step 3: Optimize Airflow
To enhance the dust resistance of your PC case, it’s important to optimize airflow. A well-designed airflow system helps to keep the internal components cool and minimizes the accumulation of dust. Here are some tips to optimize airflow:
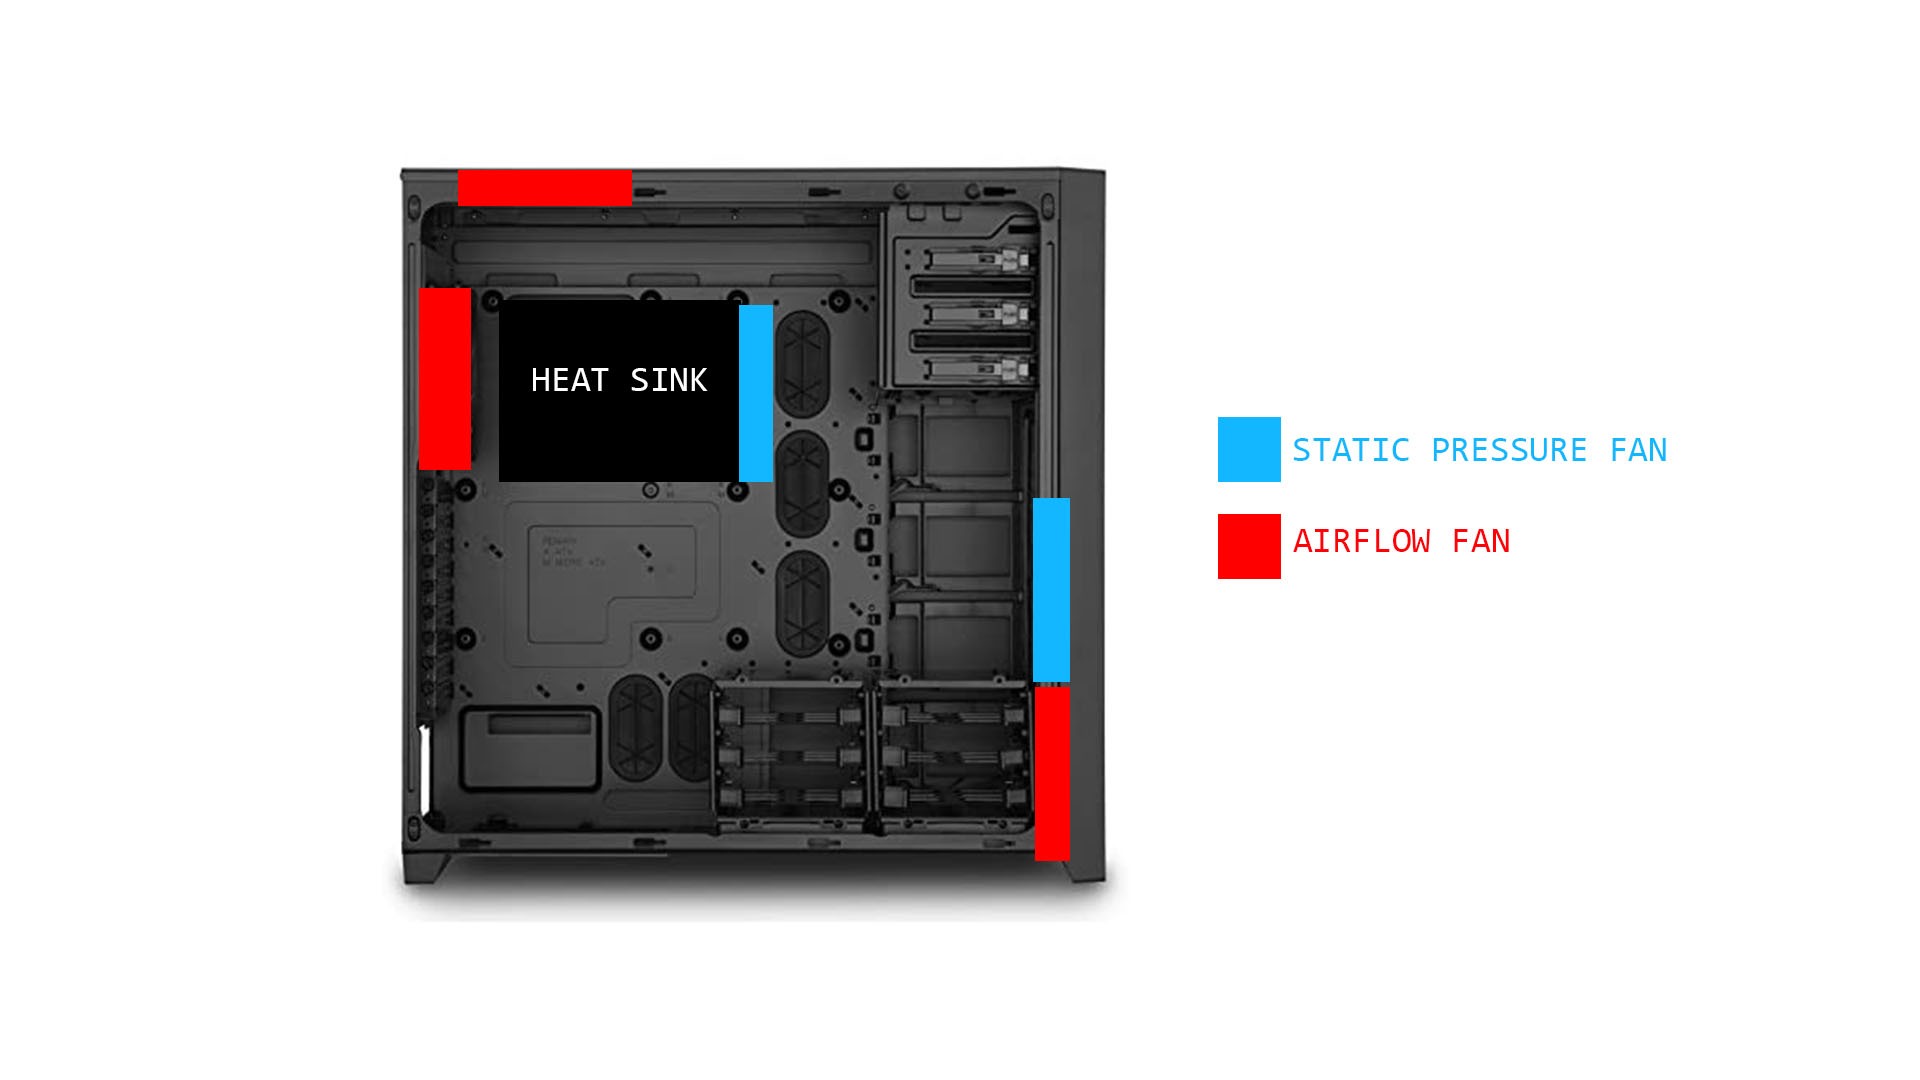
- Positioning of fans: Place fans strategically to promote a smooth airflow path. Intake fans should be positioned in the front or bottom of the case to bring in cool air, while exhaust fans should be placed at the rear or top of the case to expel hot air.
- Balance intake and exhaust: Maintain a balance between the number of intake and exhaust fans to create positive pressure inside the case. This positive pressure prevents dust from entering through unfiltered gaps or cracks.
- Dust filter maintenance: Regularly clean and maintain your dust filters to ensure optimum airflow. Clogged filters reduce airflow and hinder cooling performance. Depending on the level of dust accumulation, you may need to clean or replace the filters every few months.
- Cable management: Proper cable management not only improves aesthetics but also helps with airflow. Organize and route cables away from the main airflow path to avoid obstruction and reduce dust accumulation around cables.
- Remove unused drive bays: If your case has unused optical drive bays or hard drive cages, consider removing them. Removing unnecessary drive bays helps create unobstructed airflow and reduces potential areas for dust to settle.
- Use high-quality fans: Invest in high-quality fans with good static pressure and airflow capabilities. These fans ensure efficient cooling and help maintain positive pressure inside the case, reducing the chances of dust infiltration.
- Consider liquid cooling: Liquid cooling solutions, such as all-in-one (AIO) liquid coolers or custom loop systems, can help improve airflow by removing bulkier air coolers and creating a more streamlined interior. This can contribute to better dust resistance and overall cooling performance.
By implementing these airflow optimization techniques, you can create a well-ventilated and dust-resistant environment within your PC case. Let’s move on to the next step, where we’ll explore how to keep the case elevated for improved dust prevention.
Step 4: Keep the Case Elevated
Elevating your PC case can help minimize dust accumulation by reducing contact with the floor or other dust-prone surfaces. Here’s how you can keep your case elevated:
- Use a stand or riser: Invest in a stand or riser specifically designed for PC cases. These accessories elevate the case off the floor, providing better airflow and reducing dust intake from the ground.
- Place the case on a desk: If you have enough space on your desk, consider placing your PC case on it. This keeps the case elevated and away from dust particles that might be closer to the floor.
- Use rubber or foam feet: If using a stand or riser is not possible, attach rubber or foam feet to the bottom of your case. These feet elevate the case slightly and create a gap between the case and the surface it’s placed on, reducing dust intake.
- Avoid carpeted areas: If your computer setup is located in a carpeted room, consider moving it to a hard surface area. Carpets tend to accumulate more dust, which can be easily drawn into your PC case if it’s placed on or near the carpet.
- Regularly clean the surrounding area: Keep the area around your PC case clean and free from dust. Regularly dust and vacuum the room to minimize airborne particles that could settle on your case.
- Monitor humidity levels: High humidity can lead to a buildup of moisture and dust. Use a hygrometer to monitor the humidity levels in your computer room and maintain a suitable range (ideally between 40-60%) to reduce the risk of dust accumulation.
By keeping your PC case elevated, you can reduce the amount of dust that enters the case and settle on your components. This simple step, combined with the previous measures we’ve discussed, will contribute to a cleaner and more dust-resistant computer system.
Now that you’ve elevated your PC case, let’s move on to the final step: regular cleaning and maintenance.
Step 5: Regular Cleaning and Maintenance
Maintaining a dust-resistant PC case requires regular cleaning and maintenance to ensure optimal performance and longevity. Here are some steps to follow:
- Power off and unplug: Before cleaning your PC case, make sure to power it off and unplug it from the electrical outlet. This ensures your safety and prevents any accidental damage.
- Dust exterior surfaces: Use a soft, lint-free cloth or an anti-static brush to gently remove dust from the exterior surfaces of your PC case. Pay special attention to the vents, panels, and any crevices where dust might accumulate.
- Clean dust filters: Remove the dust filters from your PC case and clean them according to the manufacturer’s instructions. This typically involves rinsing them under running water or using compressed air to blow away the dust. Make sure to let them dry completely before reattaching them.
- Remove and clean components: If necessary, remove any easily detachable components, such as fans or dust-prone hardware like graphics cards. Use compressed air or a soft brush to remove dust from the components, ensuring all the dust is cleared from the heatsinks, fan blades, and other surfaces.
- Use a vacuum cleaner: You can use a vacuum cleaner with a brush attachment to gently remove dust from the interior of your PC case. Be cautious not to touch any sensitive components or delicate cables with the vacuum nozzle.
- Reassemble and check connections: Once the cleaning is complete, reassemble any components you removed, ensuring they are correctly seated. Check all cable connections to ensure they are secure and tidy up any cable management if needed.
- Schedule regular cleaning: Establish a regular cleaning schedule based on your environment and usage. Monthly or quarterly cleanings are generally recommended for optimal maintenance. Regular cleaning helps prevent excessive dust buildup and ensures your PC stays dust-resistant.
- Monitor internal temperature: Keep an eye on the internal temperature of your PC using software tools or hardware monitoring devices. High temperatures can be indicative of dust accumulation or airflow obstruction, requiring additional cleaning or adjustments to further enhance dust resistance.
By following these regular cleaning and maintenance practices, you can maintain a clean and dust-resistant PC case. Your components will perform optimally, and the risk of hardware failure due to dust will be minimized.
Congratulations! You have successfully completed all the steps to make your PC case dust-resistant. By implementing these measures, you’ll enjoy improved performance, extended hardware lifespan, and a cleaner and more efficient computer system.
Conclusion
Keeping your PC case dust-resistant is essential for maintaining optimal performance, longevity, and overall cleanliness of your computer system. By following the steps outlined in this guide, you can significantly reduce the amount of dust that accumulates in your PC case and ensure the best possible experience.
We started by emphasizing the importance of a dust-resistant PC case, highlighting how it improves performance, extends the lifespan of components, prevents hardware failure, and simplifies maintenance. We then delved into the step-by-step process of making a PC case dust-resistant.
First, we discussed the significance of choosing the right PC case, considering factors such as dust filters, positive pressure design, vent placement, cable management, size and expandability, and material. Next, we highlighted the importance of installing dust filters on the intake vents to prevent dust particles from entering the case.
We then explored the concept of optimizing airflow within the case. By strategically positioning fans, balancing intake and exhaust, maintaining dust filters, managing cables, and considering liquid cooling options, you can ensure efficient cooling and minimize dust accumulation.
Furthermore, we emphasized the importance of keeping the case elevated to reduce contact with dust-prone surfaces. Using stands or risers, placing the case on a desk, attaching rubber or foam feet, and avoiding carpeted areas can all contribute to better dust resistance.
Regular cleaning and maintenance were also highlighted as crucial steps in maintaining a dust-resistant PC case. By dusting exterior surfaces, cleaning dust filters, removing and cleaning components, vacuuming the interior, and checking connections, you can prevent excessive dust buildup and ensure optimum performance.
In conclusion, by implementing these steps and maintaining a regular cleaning schedule, you can enjoy a dust-resistant PC case that not only performs at its best but also stays clean and visually appealing. Say goodbye to dusty internals and hello to a cleaner and more efficient computer system!