Introduction
Welcome to this guide on how to lessen RAM usage on your Mac. If you’re experiencing slow performance or lag on your computer, it could be due to high RAM usage. Random Access Memory (RAM) is an essential component of your Mac that stores data that the computer needs to access quickly. When your RAM is being heavily used, it can slow down your system and affect your productivity.
Understanding how RAM usage works on your Mac is crucial to tackling this issue effectively. RAM allows your computer to run multiple applications simultaneously and stores temporary data for quick access. However, if your computer has insufficient RAM or if certain applications are using excessive memory, it can lead to performance problems.
In this article, we will explore various methods to free up RAM on your Mac and optimize its performance. We’ll discuss how to identify memory-hungry applications and processes, as well as provide practical solutions to reduce RAM usage.
By implementing the techniques outlined in this guide, you can enhance the overall efficiency of your Mac and ensure a smoother user experience. So, let’s dive in and discover how to lessen RAM usage on your Mac!
Understanding RAM Usage on Mac
Before we delve into the methods for lessening RAM usage on your Mac, it’s important to have a clear understanding of how RAM works on your system.
RAM (Random Access Memory) is a vital component of your Mac’s hardware that stores data that is actively used by the computer’s operating system and applications. It allows for quick access to data, resulting in faster program execution and overall system performance.
When you open an application or perform a task on your Mac, the operating system assigns a portion of the available RAM to store the necessary data and instructions for that specific task. The more applications you have running simultaneously, the more RAM will be allocated to each of them.
However, if your Mac’s RAM becomes overloaded, either due to too many applications running at once or memory-hungry processes, you may notice a significant slowdown in performance. This can lead to sluggish response times, freezing, and even crashes.
You can identify excessive RAM usage by checking the Activity Monitor, a built-in utility on your Mac that provides real-time information about system resources. In Activity Monitor, you can view the memory usage of each running process and identify any applications or processes that are consuming excessive RAM.
There are a few key terms to familiarize yourself with when monitoring RAM usage:
1. Wired Memory: This represents the RAM that is actively being used by the operating system and cannot be freed up.
2. Active Memory: This is the RAM currently being used by applications and processes that are actively running.
3. Inactive Memory: This refers to the RAM that was previously used by applications but is no longer being actively used.
4. Free Memory: This is the available RAM that is not currently being used by any application or process.
Understanding these categories can help you identify areas where RAM usage can be optimized. In the next section, we will explore various methods to free up RAM on your Mac and improve its performance.
Ways to Free up RAM on Mac
Now that we have a good understanding of RAM usage on Mac, let’s explore some effective methods to free up RAM and improve the performance of your system.
- Close Unnecessary Applications and Background Processes: One of the simplest ways to free up RAM is to close any unnecessary applications and background processes that are running in the background. To do this, go to the Apple menu and select “Force Quit” or use the keyboard shortcut Command+Option+Esc to bring up the Force Quit Applications window. Choose the applications or processes that you no longer need and click on the “Force Quit” button.
- Manage Startup Items: Some applications automatically launch at startup, consuming valuable system resources. To prevent this, go to System Preferences, click on “Users & Groups,” select your username from the left sidebar, and navigate to the “Login Items” tab. Here, you can remove any unnecessary applications from the startup list to reduce RAM usage.
- Clear System Caches: Over time, temporary files and caches can accumulate on your Mac, taking up valuable RAM. To clear these caches, open Finder, press Shift+Command+G, and enter “/Library/Caches” and “~/Library/Caches” in the text field. Delete the contents of these folders (excluding important files) to free up RAM.
- Disable Visual Effects: macOS comes with various visual effects such as animations, transparency, and motion effects that can consume a significant amount of RAM. To disable these effects and conserve RAM, go to System Preferences, click on “Dock & Menu Bar” or “Accessibility,” and untick the options that enable visual effects.
- Optimize Your Web Browser: Web browsers, especially if you have multiple tabs open, can consume a large amount of RAM. To optimize RAM usage in your browser, close unnecessary tabs, disable extensions or plugins that you don’t use, and consider using a lightweight browser like Safari or Firefox.
- Use Activity Monitor to Identify Resource-Hungry Processes: Activity Monitor is a powerful tool that allows you to monitor the RAM usage of each running process on your Mac. Launch the Activity Monitor by going to Applications > Utilities > Activity Monitor, and click on the “Memory” tab. From here, you can identify any processes that are consuming excessive amounts of RAM and take appropriate action.
- Upgrade Your RAM: If you’ve tried the above methods and are still experiencing performance issues due to low RAM, you may consider upgrading your Mac’s RAM. Check the specifications of your Mac model and consult with a professional to determine the maximum RAM capacity and compatible RAM modules for your system.
By implementing these methods, you can effectively free up RAM on your Mac and optimize its performance. Remember to regularly monitor your system’s RAM usage and adjust your usage accordingly to ensure smooth and efficient operation.
Close Unnecessary Applications and Background Processes
One of the simplest and most effective ways to free up RAM on your Mac is to close any unnecessary applications and background processes that are running. Many times, we have multiple applications open simultaneously, consuming a significant amount of RAM.
To close applications, first identify which ones you no longer need. Look for applications in your Dock, the bar at the bottom of your Mac’s screen, or use the Command+Tab shortcut to cycle through open applications. Keep in mind that some applications, like antivirus software or cloud storage applications, may run in the background even if you don’t have their windows open. These background processes can also contribute to high RAM usage.
To force quit an application, you have a few options:
- Go to the Apple menu in the top-left corner of your screen and select “Force Quit.” In the Force Quit Applications window, choose the applications you want to close and click on the “Force Quit” button.
- Use the keyboard shortcut Command+Option+Esc to bring up the Force Quit Applications window, then select the applications you want to close and click on the “Force Quit” button.
- Right-click on the application’s icon in the Dock and select “Quit” or use the Command+Q shortcut to close the application.
It’s important to note that force quitting an application will close all unsaved work, so make sure to save any important files before proceeding. Additionally, some applications may have background processes that automatically relaunch after being force quit. If this happens, you may need to adjust the application’s settings to prevent it from automatically reopening.
By closing unnecessary applications and background processes, you can free up significant amounts of RAM on your Mac. This will allow your system to allocate more resources to the applications you are actively using, resulting in improved performance and responsiveness.
Regularly monitor your system’s RAM usage and make it a habit to close applications that you don’t need. By adopting this practice, you’ll ensure that your Mac operates more efficiently and that you have the necessary resources available for the tasks you’re currently working on.
Manage Startup Items
When you start up your Mac, certain applications may automatically launch and run in the background. These startup items can consume valuable system resources, including RAM, which can slow down your computer’s performance. By managing these startup items, you can reduce the amount of RAM used during startup and improve overall system responsiveness.
To manage startup items on your Mac, follow these steps:
- Click on the Apple menu in the top-left corner of your screen and select “System Preferences.”
- In the System Preferences window, click on “Users & Groups” (or “Users & Accounts” in older macOS versions).
- Select your username from the list on the left side of the window.
- Navigate to the “Login Items” tab. Here, you’ll see a list of applications that are set to launch during startup.
- Review the list of applications and identify any unnecessary ones that you don’t need to launch automatically.
- To remove an application from the startup list, select it and click on the “-” (minus) button below the list.
- If you want to add an application to the startup list, click on the “+” (plus) button, navigate to the application, and select it.
It’s important to exercise caution when removing startup items as some applications may require them to function properly. If you’re unsure about a particular application, it’s best to leave it in the startup list or consult the application’s documentation or support resources for guidance.
By managing your startup items, you can prevent unnecessary applications from consuming valuable RAM during startup. This allows your Mac to allocate more resources to the applications you’re actively using, resulting in improved system performance and faster startup times.
Remember to periodically review your startup items and make adjustments as needed. As your usage patterns change and you install new applications, it’s important to keep your startup items optimized for maximum efficiency.
By reducing the number of applications that launch at startup, you’ll free up RAM and improve the overall performance of your Mac. Take control of your startup process and enjoy a faster and smoother computing experience.
Clear System Caches
Over time, your Mac accumulates temporary files and system caches that can take up valuable storage space and contribute to high RAM usage. Clearing these caches can help free up RAM and improve the performance of your system.
Here’s how you can clear system caches on your Mac:
- Open Finder, either by clicking on the Finder icon in the Dock or by pressing Command+Space and typing “Finder” in Spotlight.
- With Finder open, press Shift+Command+G to bring up the “Go To Folder” window.
- In the “Go To Folder” window, type “/Library/Caches” (without quotes) and press Enter or click on the “Go” button.
- This will take you to the system cache folder. Here, you’ll find various folders representing different applications and system processes that store cached data.
- Select all the folders or files in the system cache folder and move them to the Trash by either dragging them or right-clicking and selecting “Move to Trash.”
- Next, press Shift+Command+G again to open the “Go To Folder” window, and this time type “~/Library/Caches” (without quotes) and press Enter or click on the “Go” button.
- This will take you to your user cache folder. Again, select all the folders or files and move them to the Trash.
- Once you’ve cleared out both the system and user cache folders, empty the Trash by right-clicking on the Trash icon in the Dock and selecting “Empty Trash.”
Clearing system caches can help remove unnecessary and outdated temporary files, speeding up your Mac and freeing up RAM. However, it’s important to note that clearing caches may cause some applications to take slightly longer to launch the next time you use them. This is because the cache will need to be rebuilt.
It’s also worth mentioning that while clearing system caches can provide a temporary boost in performance, it’s not a long-term solution. Over time, caches will accumulate again as you use your Mac. However, periodically clearing them can help maintain optimal system performance.
By clearing system caches on your Mac, you can reclaim valuable storage space, reduce the strain on your RAM, and improve the overall performance of your system. Make this a part of your regular maintenance routine to keep your Mac running smoothly.
Disable Visual Effects
macOS comes with various visual effects, such as animations, transparency, and motion effects, that enhance the user interface and provide a visually appealing experience. However, these visual effects can consume a significant amount of RAM and impact the overall performance of your Mac. Disabling or reducing these effects can help free up RAM and improve system responsiveness.
Follow these steps to disable visual effects on your Mac:
- Click on the Apple menu in the top-left corner of your screen and select “System Preferences.”
- In the System Preferences window, click on “Accessibility.”
- In the left sidebar, select “Display.”
- In the Display preferences, check the box next to “Reduce motion” to minimize the animations and motion effects.
- Next, click on the “Display” tab at the top of the window.
- Here, you can adjust the transparency of various elements, such as the menu bar and dock, by moving the slider to the left to reduce transparency.
In addition to reducing visual effects through the Accessibility settings, you can also disable some specific effects through the Dock and Menu Bar preferences:
- Click on the Apple menu and select “System Preferences.”
- In the System Preferences window, click on “Dock & Menu Bar.”
- You can uncheck the options for “Automatically hide and show the Dock” and “Animate opening applications” to reduce visual effects related to the Dock.
- Under the “Appearance” tab, you can choose the “Graphite” option to have a less vibrant color scheme, which can help reduce visual distractions.
Disabling or reducing visual effects on your Mac can help free up RAM that would otherwise be used to render these effects. By doing so, you can improve system performance and responsiveness, especially on older Mac models or those with limited RAM.
Keep in mind that disabling visual effects may make your Mac’s user interface appear less visually dynamic. However, the trade-off is worth it for the boost in performance, particularly if you frequently work with resource-intensive applications or have limited available RAM.
Experiment with different levels of visual effects until you find a balance that suits your preferences and delivers the desired performance on your Mac.
Optimize Your Web Browser
Web browsers are essential tools for accessing the internet, but they can also be resource-intensive, consuming a significant amount of RAM, especially when you have multiple tabs open or use extensions. Optimizing your web browser can help reduce its impact on your Mac’s RAM usage and improve overall performance.
Here are some tips to optimize your web browser:
- Close Unnecessary Tabs: Having numerous tabs open in your browser can quickly eat up your available RAM. Close any tabs that you’re not actively using to free up resources.
- Disable or Remove Extensions: Browser extensions offer additional functionality but can impact RAM usage. Disable or remove any unnecessary or unused extensions to reduce the strain on your browser and improve performance.
- Use a Lightweight Browser: Consider using a lightweight browser like Safari or Firefox instead of heavier alternatives. These browsers are optimized for better resource management and can be more efficient in terms of RAM usage.
- Clear Browsing Data: Regularly clearing your browser’s cache, cookies, and browsing history can help improve performance. This will prevent the accumulation of unnecessary data that can impact RAM usage.
- Disable Auto-Play Videos: Many websites have auto-play videos that can consume significant resources. Check your browser settings and disable auto-play to prevent these videos from impacting your RAM usage.
- Keep Your Browser Updated: Browser updates often include performance improvements and bug fixes. Keep your browser up to date to ensure you’re benefiting from the latest optimizations and enhancements.
Remember that optimized web browsing involves a combination of managing tabs, extensions, and browser settings. By adopting these practices, you can reduce RAM usage, improve browsing speed, and enhance the overall performance of your Mac.
It’s also worth noting that certain websites and web applications may consume more resources than others. If you notice specific websites causing high RAM usage, consider closing unnecessary tabs or using browser tools to suspend those tabs, thereby conserving resources.
By implementing these optimizations, you can enjoy a smoother and more efficient browsing experience while minimizing the impact on your Mac’s RAM and system performance.
Use Activity Monitor to Identify Resource-Hungry Processes
Activity Monitor is a powerful utility built into macOS that allows you to monitor the performance and resource usage of your Mac. By using Activity Monitor, you can identify resource-hungry processes that may be consuming excessive amounts of RAM and other system resources.
To open Activity Monitor, follow these steps:
- Go to the Applications folder in Finder or use Spotlight (Command+Space) to search for “Activity Monitor.”
- Click on the Activity Monitor app to launch it.
Once you have Activity Monitor open, you’ll see a list of processes currently running on your Mac. Here’s how you can use Activity Monitor to identify resource-hungry processes:
- Click on the “Memory” tab to sort the processes by their memory usage, with the most memory-intensive processes at the top.
- Review the list and look for processes that are using significant amounts of memory.
- If you notice a process that you don’t recognize or one that seems to be consuming an excessive amount of memory, you can select it and click on the “X” button in the toolbar to force quit the process. However, exercise caution when force quitting processes, as some may be critical for your computer’s operation.
Activity Monitor also provides additional useful information about each process, such as CPU usage, energy impact, and disk activity. This can help you gain further insights into the performance of your Mac and identify potential bottlenecks.
Keep in mind that some processes, such as system processes or background services, are essential for your Mac to function properly. It’s important to focus on processes that are using a disproportionate amount of memory relative to their importance.
By periodically monitoring Activity Monitor and identifying resource-hungry processes, you can take appropriate action to optimize your Mac’s performance. However, it’s worth noting that certain resource-intensive tasks, such as video editing or running virtual machines, may require a higher amount of system resources and may not necessarily indicate a problem.
Use your judgment and consider the context of your usage when evaluating processes in Activity Monitor. With a bit of monitoring and management, you can ensure that your Mac’s resources are allocated efficiently and that your system operates smoothly.
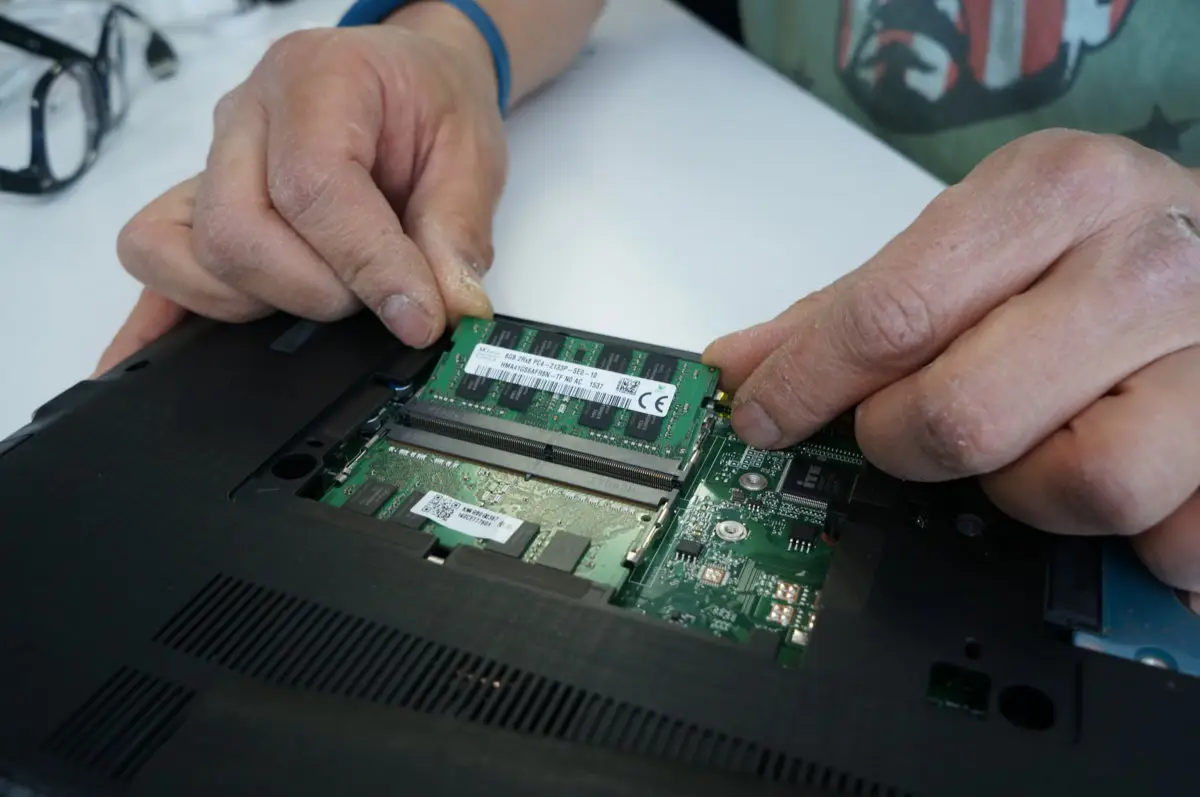
Upgrade Your RAM
If you have tried the previous methods to lessen RAM usage on your Mac but are still experiencing performance issues, upgrading your RAM can provide a significant boost in system performance. RAM upgrades can increase the amount of available memory, allowing your Mac to handle more tasks simultaneously and improving overall responsiveness.
Before upgrading your RAM, it’s important to understand the limitations and specifications of your Mac. You can find this information by following these steps:
- Click on the Apple menu in the top-left corner of your screen and select “About This Mac.”
- In the Overview tab, you’ll find information about your Mac’s model, processor, and currently installed RAM.
- Take note of the “Memory” section, which will display the total amount of RAM installed and the number of memory slots in your Mac.
- Consult the specifications for your specific Mac model to determine the maximum RAM capacity it supports and the type of RAM module required.
In general, upgrading your RAM involves purchasing compatible RAM modules and installing them in the available memory slots on your Mac. However, not all Mac models have upgradeable RAM. Some newer Mac models have soldered RAM that cannot be replaced or upgraded.
If your Mac is upgradeable, consider these tips when upgrading your RAM:
- Purchase RAM modules from reputable manufacturers that are compatible with your Mac model. Consult Apple’s official documentation or seek assistance from an authorized service provider for recommendations.
- Ensure that you purchase the correct type and speed of RAM for your Mac. Matching the specifications of the existing RAM modules is essential for compatibility and optimal performance.
- Follow the proper installation instructions for your specific Mac model. If you are unsure, it is recommended to have the RAM installation performed by a professional or authorized service provider.
By upgrading your RAM, you can provide your Mac with more headroom to run demanding applications and multitask more efficiently. This can result in smoother performance, faster response times, and an overall improved computing experience.
However, it’s worth mentioning that upgrading your RAM may have limitations or be cost-prohibitive, especially for older Mac models. In such cases, it may be more practical to consider upgrading to a newer Mac model that comes with more RAM installed.
Before making any decisions, carefully assess your needs and budget, and consider consulting with an Apple expert or authorized service provider for guidance on the best approach for your specific situation.
Conclusion
Managing RAM usage on your Mac is essential for maintaining optimal performance and improving overall system responsiveness. By following the methods outlined in this guide, you can effectively free up RAM and enhance your Mac’s efficiency.
We began by understanding the basics of RAM usage on a Mac, learning how RAM is allocated to applications and processes. We then explored various techniques to minimize RAM usage, including closing unnecessary applications and background processes, managing startup items, clearing system caches, disabling visual effects, optimizing web browsers, utilizing Activity Monitor, and considering a RAM upgrade.
Each of these methods plays a critical role in ensuring that your Mac utilizes its resources efficiently, resulting in smoother multitasking, faster application performance, and an overall more enjoyable computing experience.
It’s important to note that the effectiveness of these methods may vary depending on your specific Mac model, operating system version, and usage patterns. It’s recommended to explore and implement the methods that are most relevant to your situation.
Regularly monitoring your system’s RAM usage and making necessary adjustments can help prevent performance degradation and maintain your Mac’s longevity. Remember to balance your need for multitasking with the resources available on your Mac to ensure optimal performance.
Finally, be mindful of other factors that can impact system performance, such as storage capacity, CPU usage, and application optimization. A holistic approach to maintaining your Mac can lead to a more efficient and productive computing environment.
By following these tips and leveraging the tools available to you, you can effectively lessen RAM usage on your Mac and enjoy a smoother, more responsive computing experience for years to come.