Introduction
Setting up a server rack is a critical task for any business or organization that relies on a network infrastructure. A well-planned and properly organized server rack can help optimize performance, ensure efficient management of equipment, and improve overall productivity.
However, the process of layout out a server rack can be quite daunting, especially for those who are unfamiliar with server infrastructure and cabling. It requires careful consideration of various factors like equipment placement, cable management, cooling, and maintenance.
In this article, we will guide you through the essential steps involved in laying out a server rack. We will explore the considerations you need to keep in mind, the right equipment to choose, and how to plan and organize the rack effectively. Additionally, we will provide tips on cooling and airflow management, labeling and documentation, as well as regular maintenance and troubleshooting.
By following the recommendations and best practices outlined in this article, you can ensure that your server rack is set up in a way that maximizes efficiency, minimizes downtime, and facilitates easy management and expansion of your network infrastructure.
So, let’s dive into the details and learn how to layout your server rack for optimal performance and productivity.
Considerations before setting up a server rack
Before diving into the physical setup of a server rack, it’s important to analyze and consider several factors to ensure a smooth and efficient deployment. Taking the time to plan and evaluate your specific requirements will save you time and headaches down the line. Here are some key considerations:
1.1 Available space: Measure the available space where you plan to install the server rack. Consider not only the physical dimensions but also factors like accessibility and ventilation. Make sure there’s enough room for equipment and technicians to work comfortably.
1.2 Weight capacity: Determine the weight capacity of the server rack and its individual shelves. Consider the weight of your current equipment, as well as any future expansion plans. Be mindful not to exceed the weight limits to avoid structural issues or equipment damage.
1.3 Power requirements: Assess the power requirements of your server equipment. Consider factors like power consumption, voltage, and any redundant power supply needs. Ensure that the server rack has sufficient power distribution units (PDUs) and power backups to meet your needs.
1.4 Connectivity: Evaluate the networking requirements of your equipment. Determine the number and type of network connections needed, such as ethernet ports, fiber optic cables, or other specialized connections. Make sure the server rack has adequate cable management solutions and access points for easy connectivity.
1.5 Security: Consider the security needs of your server rack. Evaluate if you require physical security measures such as locking doors, security cameras, or biometric access control. Additionally, ensure that the location of the server rack is suitable in terms of access control and protection from environmental factors.
1.6 Future scalability: Anticipate and plan for future growth and scalability. Choose a server rack that can accommodate additional equipment and expansion modules without major modifications. Consider factors like vertical space for additional rack units and sufficient cable management options for future cable runs.
1.7 Compliance and regulations: Depending on the industry you operate in, there may be specific compliance and regulatory requirements that your server rack needs to adhere to. Ensure that your chosen server rack complies with relevant standards and regulations.
By considering these factors, you can ensure that your server rack setup aligns with your needs and supports your current and future infrastructure requirements. Taking the time to plan and evaluate will help you avoid costly mistakes and facilitate a successful server rack deployment.
Choosing the right server rack
Choosing the right server rack is a crucial step in the setup process, as it directly impacts the stability, functionality, and scalability of your network infrastructure. When selecting a server rack, consider the following factors:
2.1 Rack size: Server racks come in various sizes, typically measured in rack units (U). Determine the number of server units you need to accommodate and choose a rack with sufficient vertical space to accommodate your current and future equipment.
2.2 Mounting options: Server racks offer different mounting options, such as front mounting or rear mounting. Consider your equipment’s specific requirements and choose a rack that provides the appropriate mounting options for easy installation and maintenance.
2.3 Rack material: Look for server racks made from durable materials like steel or aluminum. Ensure that the construction is sturdy enough to handle the weight and demands of your equipment.
2.4 Cable management: Pay attention to the cable management features of the server rack. Look for options that provide cable routing and segregation, such as vertical and horizontal cable management panels, to maintain a neat and organized setup. This will help with airflow and ease troubleshooting.
2.5 Cooling options: Consider the cooling options available in the server rack. Look for features like fans, ventilation panels, or even built-in cooling systems to ensure that your equipment stays within optimal operating temperatures. Proper cooling is essential for preventing overheating and ensuring the longevity of your hardware.
2.6 Accessibility: Evaluate the accessibility features of the server rack. Look for features like removable side panels, hinged doors, or sliding racks, which facilitate easy access for equipment installation, maintenance, and upgrades.
2.7 Security features: Consider the security features provided by the server rack. Look for options like locking doors, integrated keypads, or biometric access control systems to protect your equipment from unauthorized access and tampering.
2.8 Vendor reputation: Research and select a reputable vendor when purchasing a server rack. Read reviews, check customer feedback, and ensure that the vendor offers reliable customer support and warranty options.
By thoroughly considering these factors, you can choose a server rack that meets your current and future needs. Remember to assess your requirements, evaluate different options, and choose a rack that provides the necessary features for efficient operation, scalability, and security.
Planning the layout of your server rack
Planning the layout of your server rack is a critical step to ensure efficient organization, optimal performance, and ease of management. A well-designed layout will facilitate troubleshooting, minimize cable clutter, and promote proper airflow. Here are some key considerations when planning your server rack layout:
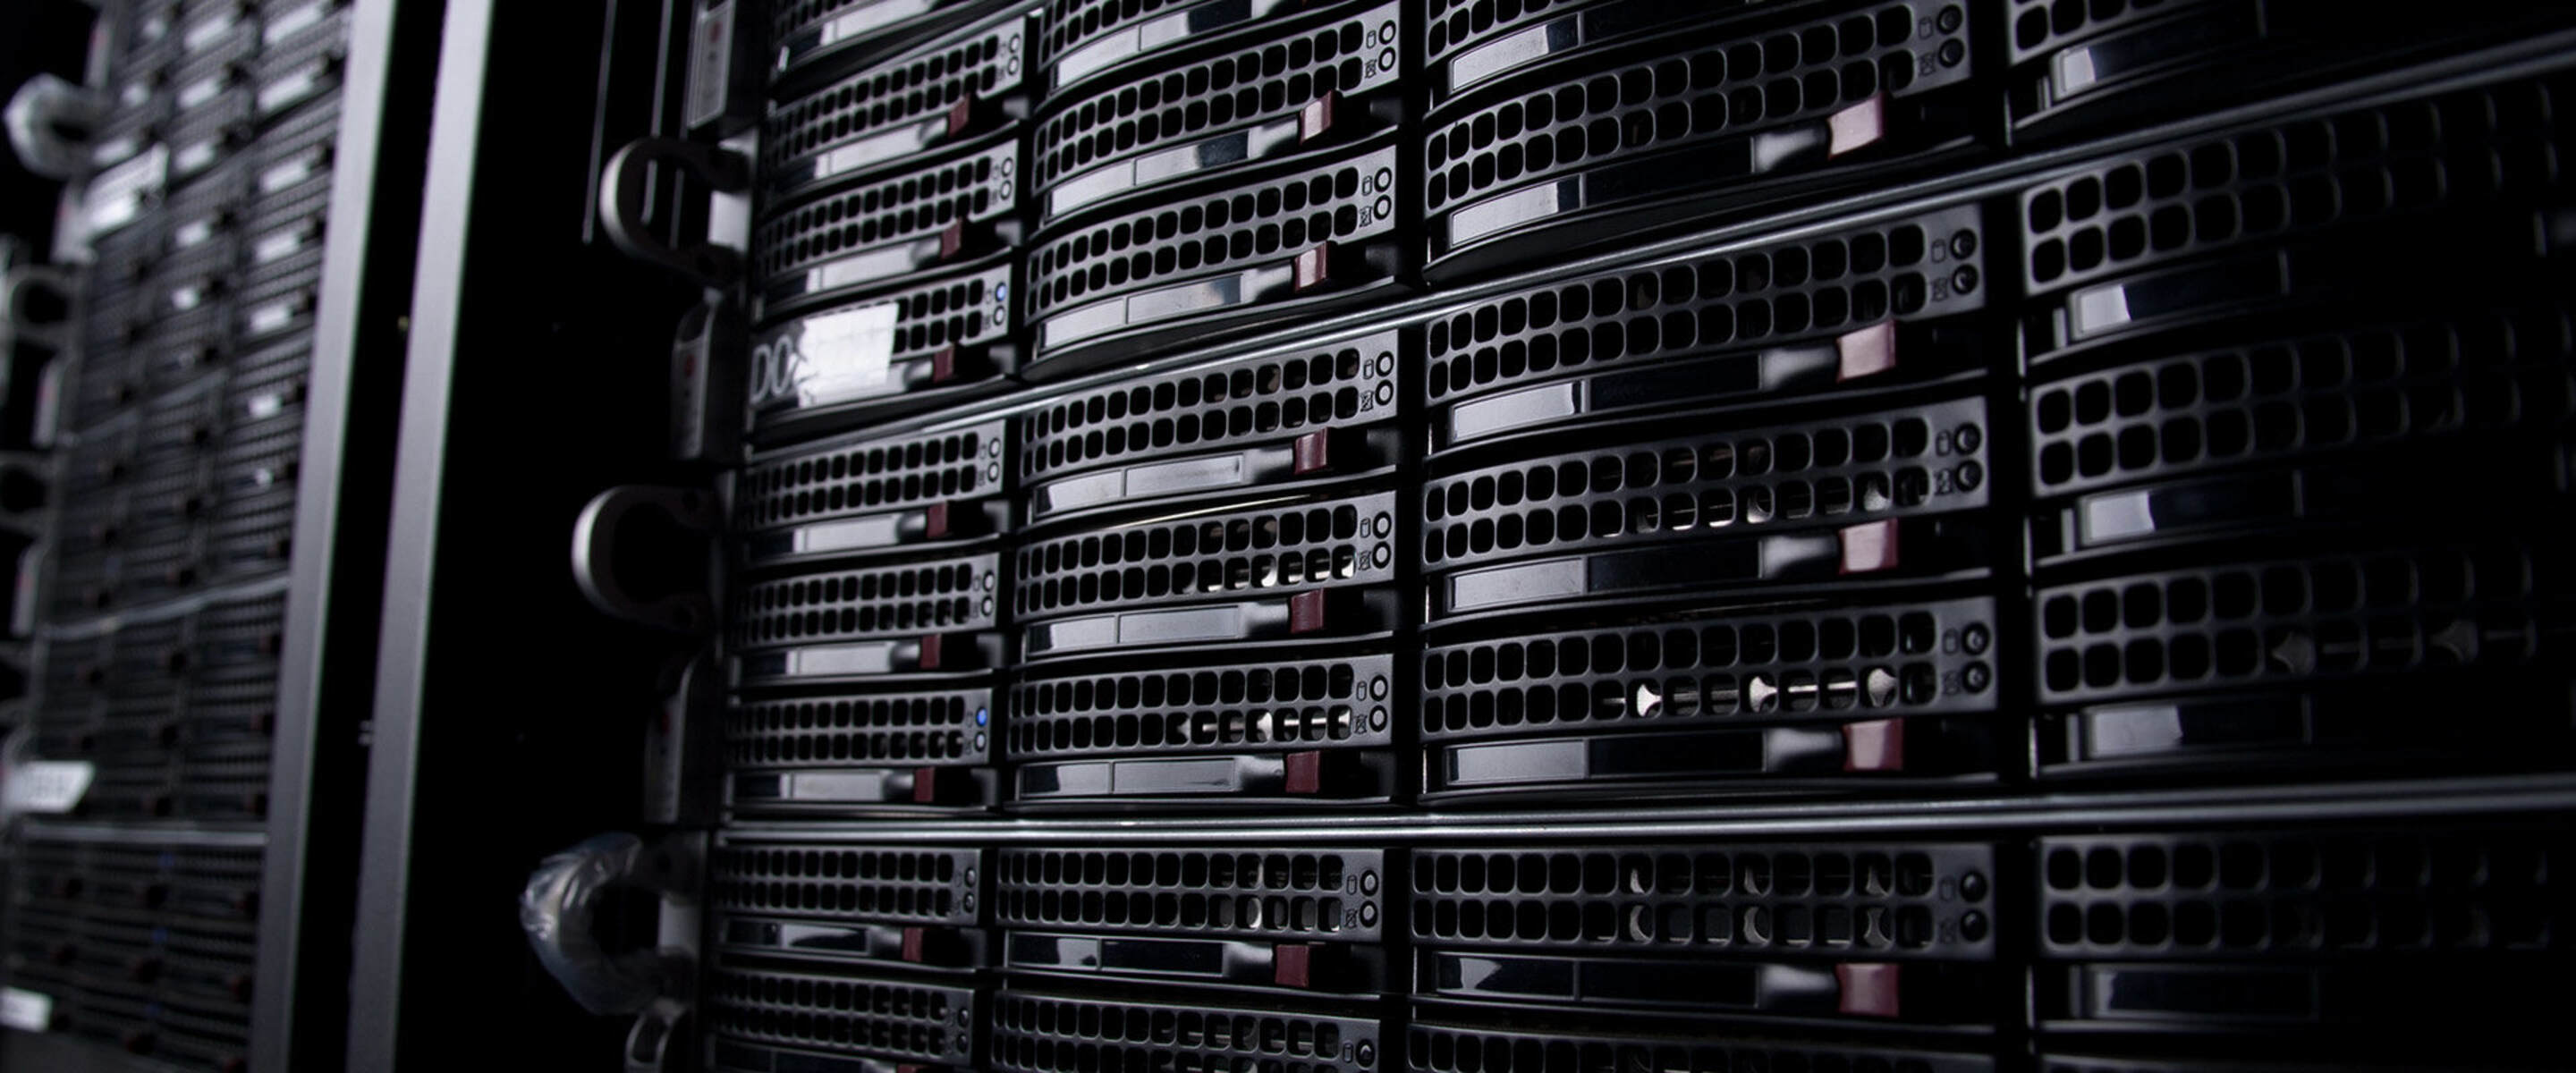
3.1 Equipment placement: Strategically place your equipment within the server rack. Consider factors like weight distribution, accessibility for maintenance, and the order in which equipment should be installed to facilitate cable management. Place heavier equipment at the bottom to ensure stability.
3.2 Server rack zoning: Divide your server rack into logical zones to separate and organize different types of equipment. For example, you can dedicate specific sections for servers, switches, power distribution units (PDUs), and storage devices. This zoning helps with easy identification, troubleshooting, and maintenance.
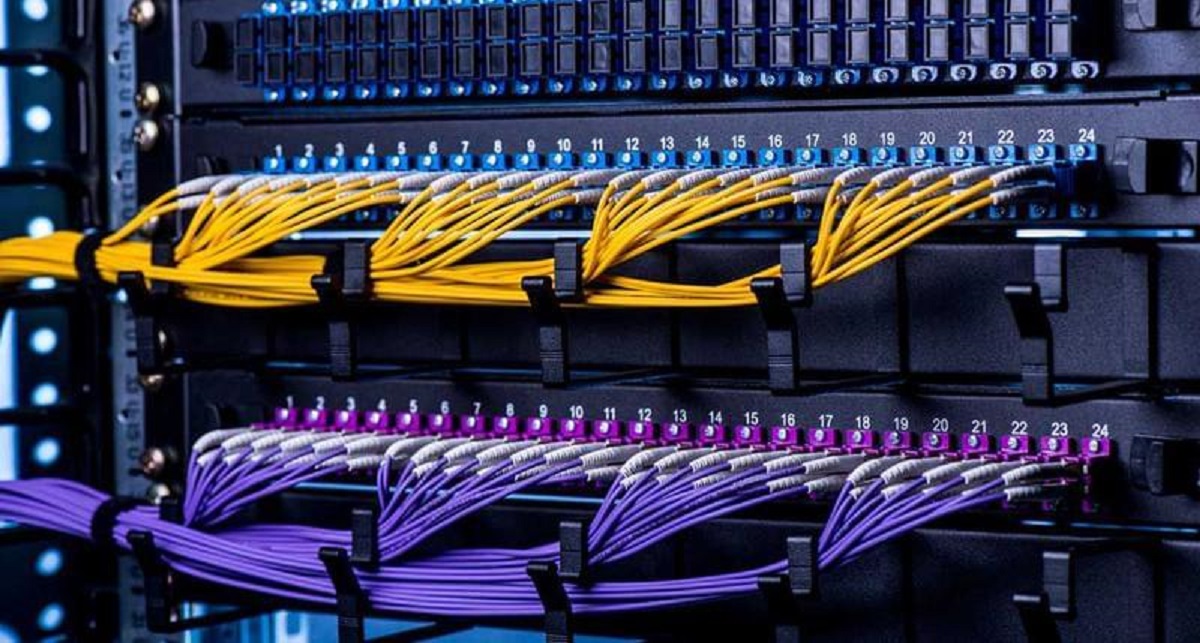
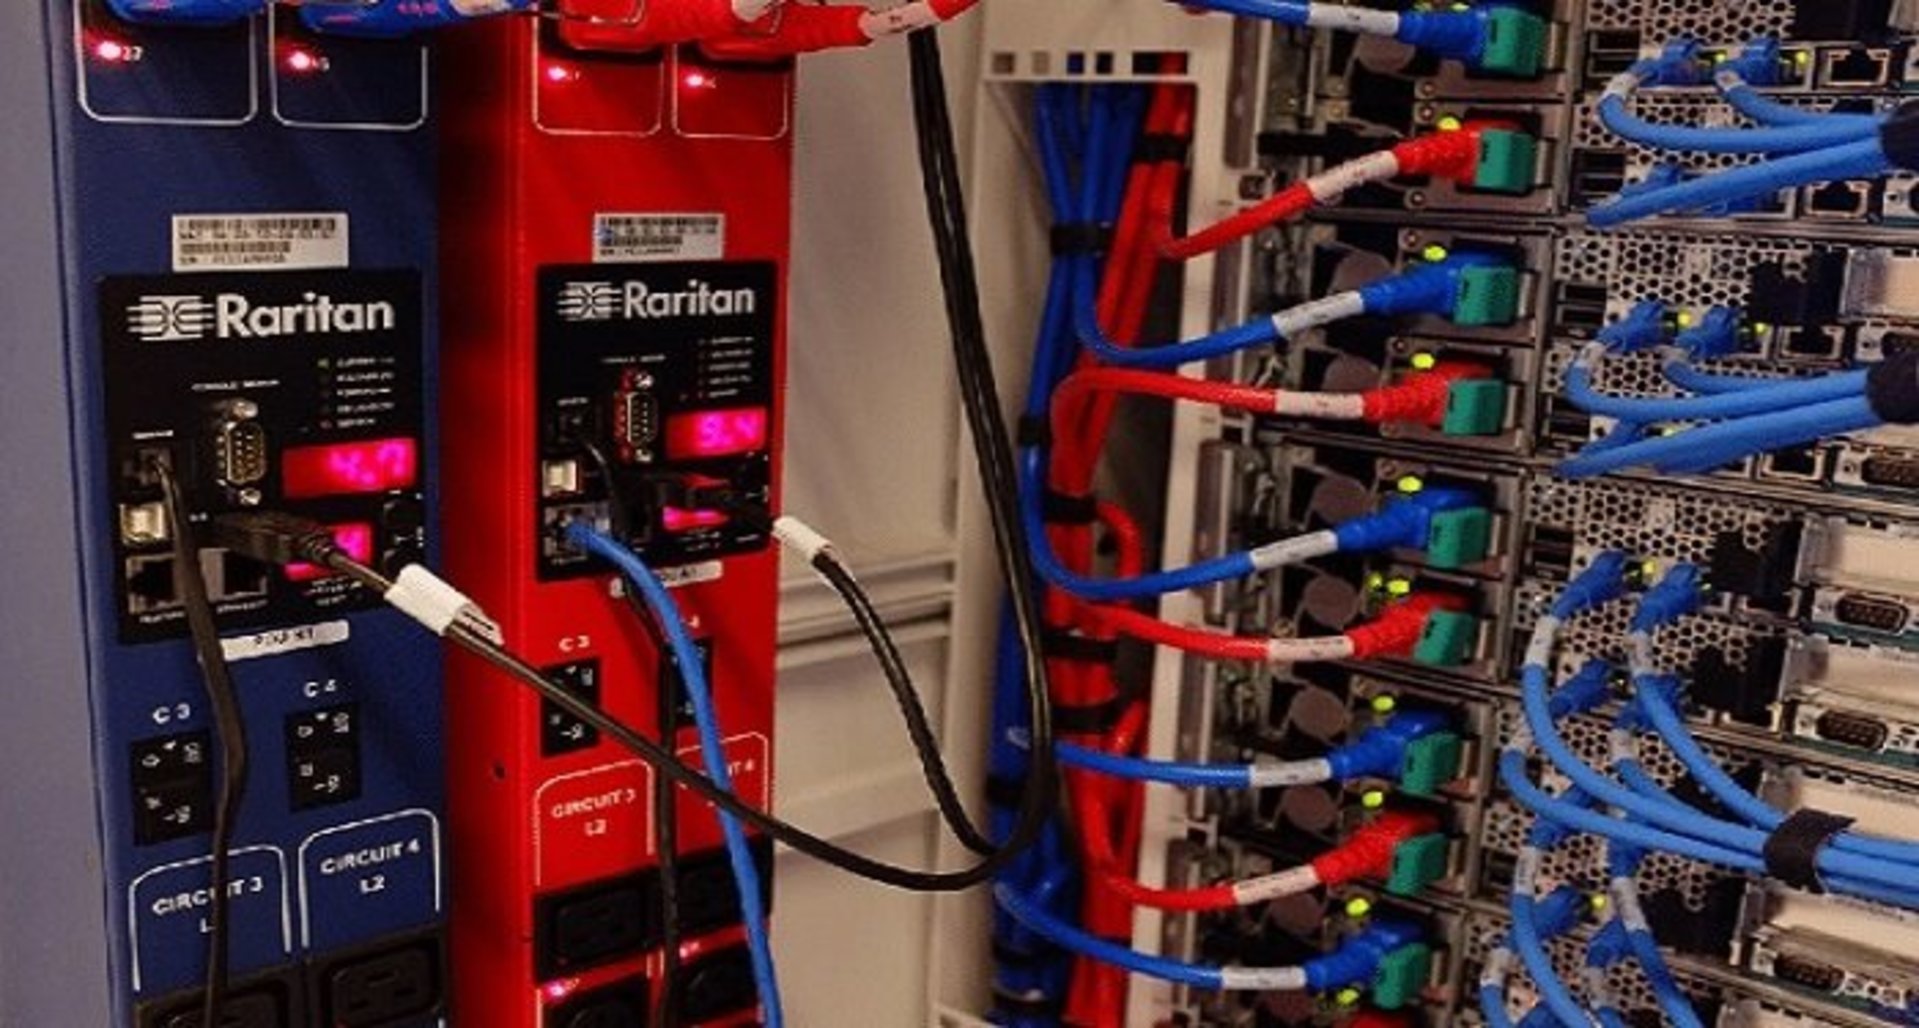
3.3 Cable management: Plan and implement an effective cable management system to avoid tangled and messy cables. Use cable management panels, racks, or trays to route cables neatly. Label and color-code cables for easy identification. Implement horizontal and vertical cable managers to keep cables organized and separate power and data cables to minimize interference.
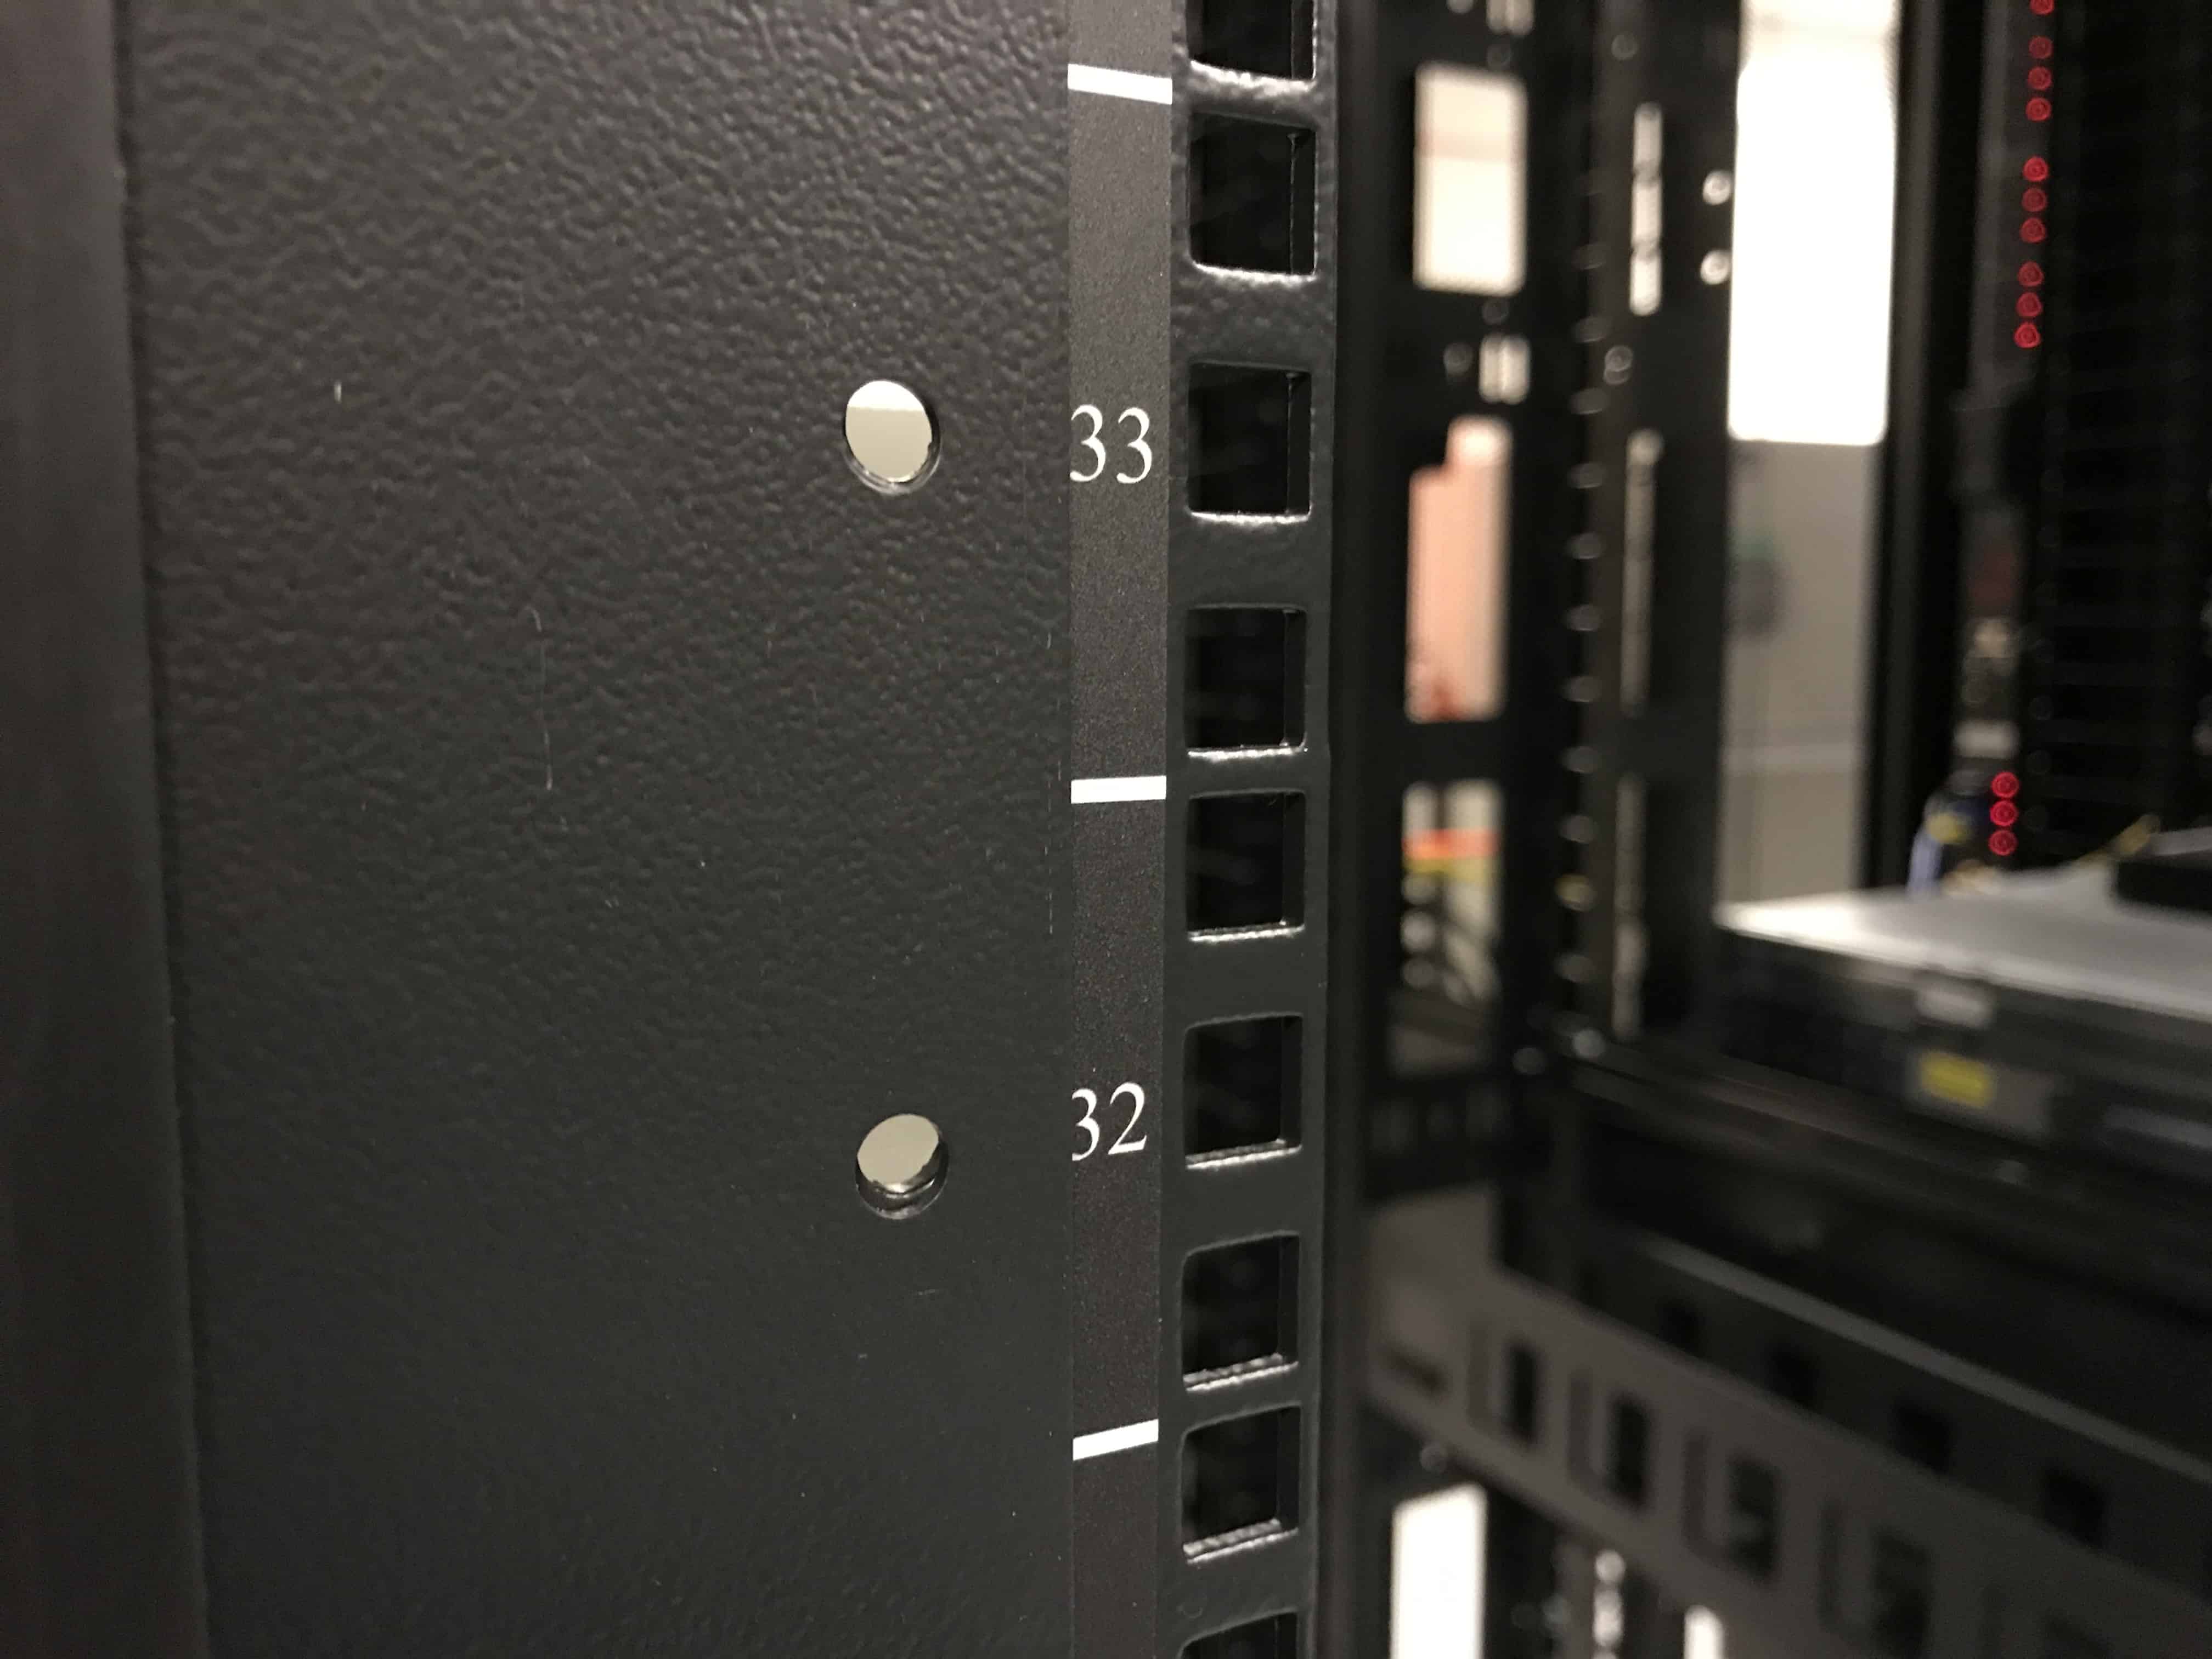
3.4 Rack unit alignment: Align the equipment within the rack using the standard rack unit (U) measurements. This allows for easier installation, replacement, and maintenance. Ensure that each piece of equipment is properly aligned and secured in the designated rack units.
3.5 Front and rear clearance: Leave sufficient clearance space at the front and rear of the server rack for maintenance and airflow. Plan for easy removal and replacement of equipment by providing enough space for accessing cables, ports, and other connectors. Leave at least a few inches of clearance to allow for proper ventilation and airflow.
3.6 Airflow management: Consider the airflow within the server rack to prevent overheating. Place equipment with front-facing exhausts at the rear to allow for better air circulation. Use fans, ventilation panels, and blanking panels to promote proper airflow and reduce hot spots.
3.7 Expansion and scalability: Factor in future expansion when planning the layout. Leave space for additional equipment or expansion modules if needed. Consider how your layout can accommodate new technology, larger equipment, or additional server units as your business grows.
3.8 Documentation: Document your server rack layout, including the location of each piece of equipment, cable connections, and any special configurations or settings. This documentation serves as a reference for troubleshooting, maintenance, and future upgrades.
By carefully planning the layout of your server rack, you can create an organized and efficient setup that allows for easy management, better airflow, and improved overall performance. Take into account the specific needs of your infrastructure and adapt the layout accordingly to ensure a smooth and optimized server rack setup.
Organizing cables in the server rack
Properly organizing the cables in your server rack is essential for efficient management, improved airflow, and easier troubleshooting. Messy and tangled cables can lead to errors, increased downtime, and hinder maintenance and upgrades. Here are some tips for effectively organizing the cables in your server rack:
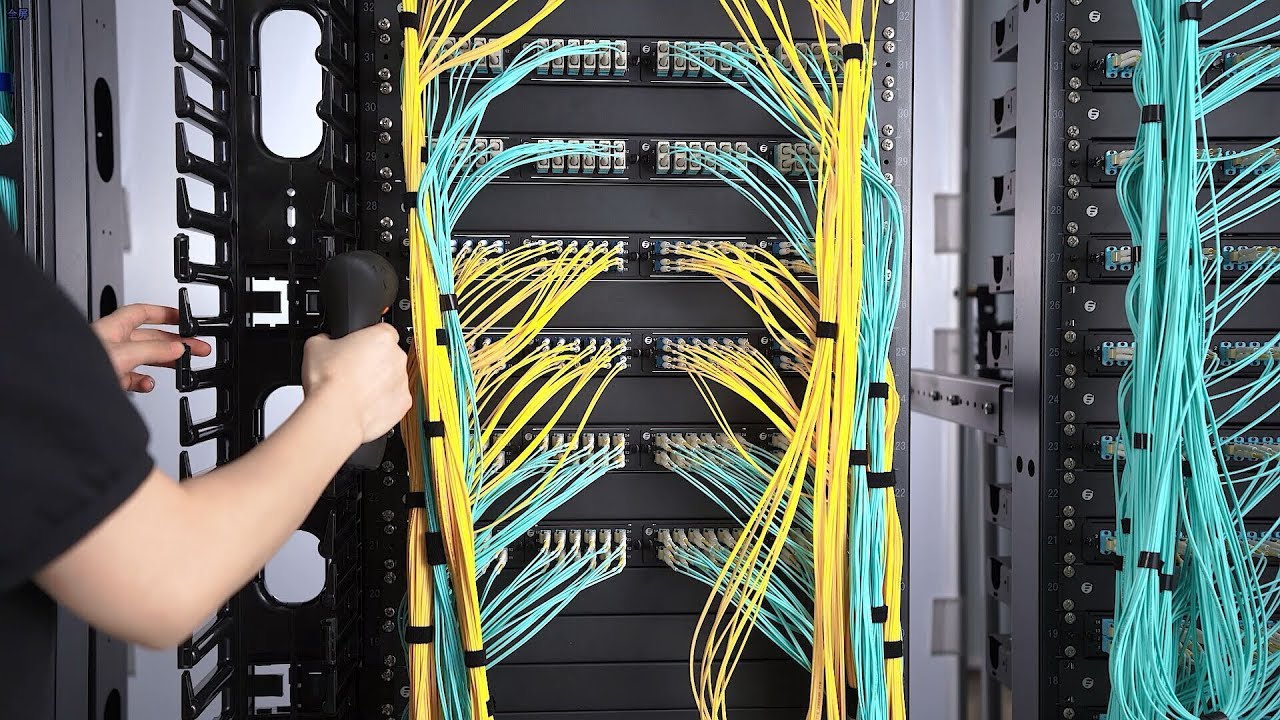
4.1 Use cable management solutions: Invest in cable management solutions like cable management panels, racks, or trays. These help route and organize cables, keeping them neat and separated. Use horizontal and vertical cable managers to create defined paths for cables.
4.2 Label and color-code cables: Labeling and color-coding cables is crucial for quick identification during maintenance or troubleshooting. Use labels or tags to mark each cable with relevant information, such as its destination, purpose, or device connected to. Color-coding cables based on their type or purpose further simplifies cable identification.
4.3 Separate power and data cables: Keep power and data cables separate to minimize interference and prevent potential data corruption or equipment damage. Use different routing paths for power and data cables and avoid running them side by side.
4.4 Plan for cable slack: Leave enough slack in cables to allow for easy movement of equipment or future adjustments. Excess cable length can be neatly organized using cable management solutions or by coiling and securing with hook-and-loop fasteners.
4.5 Bundling and tying cables: Bundle cables together using cable ties, Velcro straps, or cable sleeves. This helps minimize cable clutter and keeps them organized. Avoid using zip ties as they are difficult to undo when making changes or additions.
4.6 Proper cable routing: Route cables along designated paths within the server rack. Use cable routing guides or clips to ensure that cables are properly organized and protected. Keep cables away from ventilation panels, hot equipment, or any moving parts to avoid damage or overheating.
4.7 Document cable connections: Document the connections and routing of each cable within the server rack. This documentation serves as a reference for maintenance, troubleshooting, and future modifications. Consider using digital tools or software for easy access and updates.
4.8 Regular cable maintenance: Periodically inspect and organize cables in the server rack. Check for any loose connections, damaged cables, or signs of wear and tear. Replace or repair cables as necessary to maintain a clean and efficient cable setup.
By implementing these cable organization practices, you can achieve a clean and organized server rack, improving airflow, reducing the risk of errors, and simplifying maintenance. Investing time and effort in organizing cables pays off by ensuring a well-managed and efficient network infrastructure.
Installation of servers and equipment in the rack
The proper installation of servers and equipment in your rack is crucial for optimal performance, accessibility, and maintenance. Following best practices for installation ensures that your equipment is securely mounted, reduces the risk of damage or accidents, and facilitates efficient operation. Here are some key steps to consider when installing servers and equipment in your rack:
5.1 Mounting the equipment: Start by placing the server or equipment in the appropriate rack unit and align it with the mounting holes. Ensure that it is supported by the rack’s mounting rails or shelves. Use the appropriate screws or mounting hardware provided by the manufacturer to securely fasten the equipment in place.
5.2 Cable connections: Connect the necessary cables to the server or equipment. Follow the manufacturer’s instructions and ensure that the cables are securely plugged into their respective ports. Use cable management solutions to organize and route the cables neatly, avoiding any strain or tension on the connectors.
5.3 Power connections: Connect the power cables to the equipment, taking care to match the correct voltage and power requirements. Double-check the connections to ensure they are secure and properly grounded. Distribute the power evenly across the power distribution units (PDUs) and avoid overloading any individual circuit or outlet.
5.4 Rack stability: Ensure that the rack remains stable and level during the equipment installation process. Check that it is properly anchored to the floor or secured to a stable structure. Regularly inspect the rack’s stability to prevent any tilting or shifting that could lead to accidents or damage to the equipment.
5.5 Accessibility and labeling: Arrange the servers and equipment in a logical order that allows for easy accessibility and maintenance. Label each server or piece of equipment with relevant information such as its purpose, IP address, or configuration details. This labeling system helps in troubleshooting and quick identification.
5.6 Ventilation and cooling: Ensure that there is adequate airflow and ventilation around the installed equipment. Leave enough clearance space between servers and other components to allow for proper airflow and prevent overheating. Position fans or ventilation panels strategically to ensure efficient cooling.
5.7 Documentation: Document the installation details, including the server or equipment specifications, rack unit placement, cable connections, and any specific configurations. This documentation serves as a valuable resource for future maintenance, upgrades, or troubleshooting.
5.8 Test and configure: Once the servers and equipment are installed, thoroughly test and configure them to ensure proper functionality. Verify network connectivity, check for any errors or conflicts, and perform any necessary software configurations. Test the equipment under typical workload conditions to ensure stability and performance.
By following these installation best practices, you can ensure that your servers and equipment are properly installed, secure, and easily accessible. Taking the time to install and configure the equipment correctly lays a foundation for a well-organized and efficient server rack setup.
Proper cooling and airflow management in the server rack
Adequate cooling and efficient airflow management are crucial for maintaining the optimal performance and longevity of your server rack equipment. Poor airflow and inadequate cooling can lead to overheating, equipment failure, and reduced overall efficiency. Here are some key considerations for ensuring proper cooling and airflow management in your server rack:
6.1 Positioning of equipment: Arrange the servers and other equipment in a way that allows for proper airflow within the rack. Ensure that there is enough space between equipment to promote air circulation and prevent hot spots. Place equipment with front-facing exhausts at the rear of the rack to facilitate better airflow.
6.2 Ventilation panels and fans: Install ventilation panels or fans in strategic locations to improve air circulation within the server rack. These panels and fans help prevent heat buildup by expelling hot air and allowing cool air to enter. Consider using fans with variable speeds to adjust airflow based on equipment load.
6.3 Blanking panels: Use blanking panels to fill any empty spaces in the server rack. These panels help prevent recirculation of hot air, improve airflow, and maintain proper temperature levels. Ensure that the blanking panels are properly installed and cover all open spaces in the rack.
6.4 Cable management: Organize and manage cables properly to avoid blocking airflow paths. Keep cables away from vents, fans, or equipment exhausts. Utilize cable management solutions such as cable trays, rings, or clips to route and secure cables to maintain a tidy and organized layout.
6.5 Temperature monitoring: Implement temperature monitoring systems within the server rack to continuously monitor the environment. Install temperature sensors or use environmental monitoring software to track temperature fluctuations. This allows for proactive measures to be taken in case of any abnormal temperature rises.
6.6 Environmental factors: Consider the ambient temperature and humidity levels in the room where the server rack is located. Ensure that the room is adequately cooled and has proper ventilation systems in place. Avoid placing the rack near heat sources or in areas with high humidity that could impact equipment performance.
6.7 Regular maintenance: Regularly inspect the server rack for any dust accumulation or obstructions that may impede proper airflow. Clean the rack and its components to remove dust and debris. Check and replace fans or ventilation panels that are not functioning properly. Conduct maintenance to ensure optimal cooling efficiency.
6.8 Scalability: Plan for future scalability and growth when designing the cooling and airflow management in your server rack. Leave room for additional cooling devices, such as fans or cooling units, if required. Consider the potential increase in heat dissipation as you add more equipment or expand your infrastructure.
By implementing proper cooling and airflow management strategies, you can ensure that your server rack operates at optimal temperatures, reduces the risk of equipment failure, and prolongs the lifespan of your hardware. Paying attention to these considerations will help maintain a stable and efficient environment for your network infrastructure.
Labeling and documentation of server rack components
Labeling and documentation play a crucial role in effectively managing and maintaining your server rack components. Clear labeling and comprehensive documentation help streamline operations, facilitate troubleshooting, and enhance overall efficiency. Here are some key aspects to consider when labeling and documenting server rack components:
7.1 Labeling equipment: Label each server and equipment in your rack with relevant information such as device name, IP address, serial number, and location within the rack. Use durable and easily readable labels or tags that won’t fade over time. This labeling system helps in quick identification and reduces the chance of errors during maintenance or upgrades.
7.2 Cable labeling: Labeling cables is essential for easy identification and troubleshooting. Use color-coded labels or tags to distinguish between different types of cables, such as power cables, network cables, or fiber-optic cables. Label both ends of the cables to ensure clarity and ease of use.
7.3 Ports and connectors: Label the ports and connectors on servers, switches, and other equipment within the server rack. Clearly mark the purpose, type, or function of each port. This helps technicians quickly identify and connect cables to the correct ports, reducing potential errors and simplifying cable management.
7.4 Rack unit identification: Label the rack units (U) on the front and rear of the rack to denote the height of the equipment within the rack. This makes it easier to determine the exact location of each component and facilitates installation, removal, and maintenance.
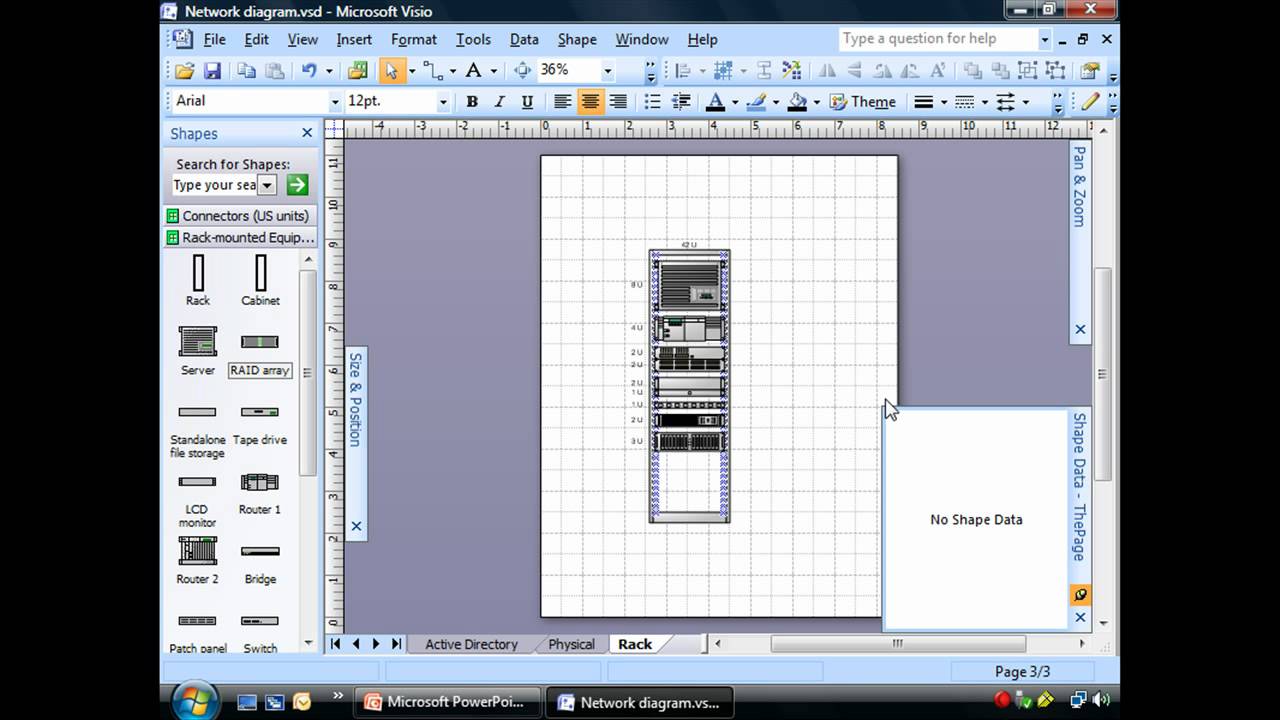
7.5 Rack diagram: Create a detailed rack diagram that visually represents the layout of your server rack. Include information like the placement of equipment, power connections, cable routing paths, and any special configurations. This diagram serves as a valuable reference for technicians, reducing downtime during troubleshooting or maintenance.
7.6 Asset tracking: Implement an asset tracking system to document and keep a record of all equipment within the server rack. Include information such as purchase date, warranty details, and maintenance history. This helps with inventory management, equipment replacement planning, and budgeting for future upgrades.
7.7 Document changes and updates: Regularly update your documentation whenever changes are made to the server rack components. Add new equipment, replace outdated documentation, and make note of any configurations or modifications. Keeping an up-to-date documentation system ensures accuracy and facilitates future maintenance or upgrades.
7.8 Backup and access: Ensure that your documentation is securely backed up and accessible to authorized personnel. Consider using digital documentation tools, cloud storage, or collaborative platforms to centralize the information and enable easy access, even remotely. Protect sensitive information with appropriate access controls.
By establishing a thorough labeling and documentation process for your server rack components, you create a foundation for efficient management, troubleshooting, and maintenance. Consistent and accurate labeling, combined with comprehensive documentation, enhances overall organization and saves time and effort in the long run.
Regular maintenance and troubleshooting tips
Regular maintenance and effective troubleshooting are essential to keep your server rack running smoothly, minimize downtime, and ensure optimal performance of your network infrastructure. By implementing a proactive approach, you can identify and resolve issues before they escalate. Here are some tips for regular maintenance and troubleshooting:
8.1 Schedule routine inspections: Establish a regular maintenance schedule to inspect the server rack components. Check for any signs of physical damage, loose connections, or unusual noises. Ensure that cooling systems, such as fans or ventilation panels, are operating correctly and free from dust or debris buildup.
8.2 Monitor temperature and humidity: Continuously monitor temperature and humidity levels within the server rack. Implement environmental monitoring systems or use sensors to detect any fluctuations. Maintain optimal temperature and humidity conditions to prevent equipment overheating or damage.
8.3 Update firmware and software: Regularly update firmware and software on servers, switches, and other network equipment. These updates often include bug fixes, security patches, and performance enhancements. Stay up to date with manufacturer recommendations and best practices for updating firmware and software.
8.4 Perform backups: Regularly back up critical data and configurations for all servers and equipment in the rack. This ensures that in the event of a failure or data loss, you can quickly restore services and minimize downtime. Test the backups periodically to ensure their integrity and reliability.
8.5 Document changes: Document any changes made to the server rack components, including hardware modifications, firmware updates, or network configuration changes. This documentation serves as a reference point for troubleshooting and helps maintain an accurate record of the rack’s history.
8.6 Conduct cable maintenance: Regularly inspect and organize cables within the server rack. Check for any damaged or frayed cables and replace them promptly. Reorganize cables as necessary to maintain proper airflow, prevent cable strain, and ensure efficient cable management.
8.7 Test connectivity and performance: Periodically test network connectivity and performance within the server rack. Use network monitoring tools to detect any anomalies or bottlenecks. Conduct stress tests or performance benchmarks to identify any issues and make necessary adjustments for optimal network performance.
8.8 Document and resolve issues: Keep a record of any issues discovered during maintenance or troubleshooting. Log details of the problem, steps taken to resolve it, and any changes made. This documentation helps in identifying recurring issues and provides a reference for future troubleshooting efforts.
8.9 Seek professional assistance when needed: If you encounter complex or persistent issues that are beyond your expertise, do not hesitate to seek professional assistance from a qualified IT specialist or network administrator. They can provide expert guidance and troubleshooting to address the problem effectively.
By implementing regular maintenance practices and following effective troubleshooting strategies, you can ensure the smooth operation of your server rack. Proactive maintenance and prompt issue resolution help prevent major failures, minimize downtime, and optimize the performance of your network infrastructure.
Conclusion
Setting up and maintaining a server rack requires careful planning, organization, and attention to detail. By considering the various factors before setting up the rack, choosing the right equipment, planning the layout, organizing cables, installing servers and equipment properly, managing cooling and airflow, and maintaining regular upkeep, you can create an efficient and reliable network infrastructure.
From considering available space and power requirements to planning for future scalability, each step plays a critical role in ensuring the optimal performance and longevity of your server rack. Effective cable management, proper cooling, and airflow management are essential for preventing issues related to cable clutter and overheating, while labeling and documentation help facilitate troubleshooting and maintenance tasks.
Regular maintenance and proactive troubleshooting are vital for identifying and addressing issues promptly, minimizing downtime, and ensuring the smooth operation of your server rack. By adhering to best practices, such as scheduling routine inspections, monitoring temperature and humidity levels, performing backups, and staying up to date with firmware and software updates, you can mitigate risks and maintain a stable and secure network environment.
In conclusion, a well-designed and properly maintained server rack lays the foundation for a robust and efficient network infrastructure. By following the guidelines provided in this article, you can optimize performance, enhance security, and maximize the utilization of your server rack. Stay vigilant, adapt to technological advancements, and continuously improve your server rack setup to meet the changing needs of your organization.