Introduction
Welcome to the world of home server racks! If you are someone who values efficiency, organization, and seamless connectivity, setting up a home server rack is a game-changer. Whether you’re a tech enthusiast, a small business owner, or simply someone who wants to optimize their home network, a server rack provides a centralized and professional solution.
Imagine having all your networking equipment, servers, and cables neatly organized in a dedicated space, ensuring easy access, better airflow, and reduced clutter. A well-designed home server rack not only enhances the aesthetics of your home but also facilitates efficient data management, improved network performance, and the flexibility to expand as your needs grow.
With the increasing number of internet-connected devices in our homes, such as smart TVs, gaming consoles, home automation systems, and security cameras, having a stable and reliable network infrastructure is paramount. A home server rack offers the perfect solution for managing and securing these devices, allowing you to streamline your home network and enjoy a seamless digital experience.
In this article, we will explore the benefits of setting up a home server rack, guide you through the planning process, help you choose the right server rack for your needs, and provide step-by-step instructions on assembling and installing your own server rack. By the end of this article, you’ll have all the knowledge and confidence you need to embark on your home server rack journey.
So, whether you’re a seasoned IT professional or a tech-savvy homeowner looking to take control of your network, let’s dive into the world of home server racks and discover the power of centralized organization and improved connectivity.
Benefits of Setting Up a Home Server Rack
Setting up a home server rack offers a multitude of benefits that can greatly enhance your technology infrastructure and overall digital experience. Let’s explore some of the key advantages:
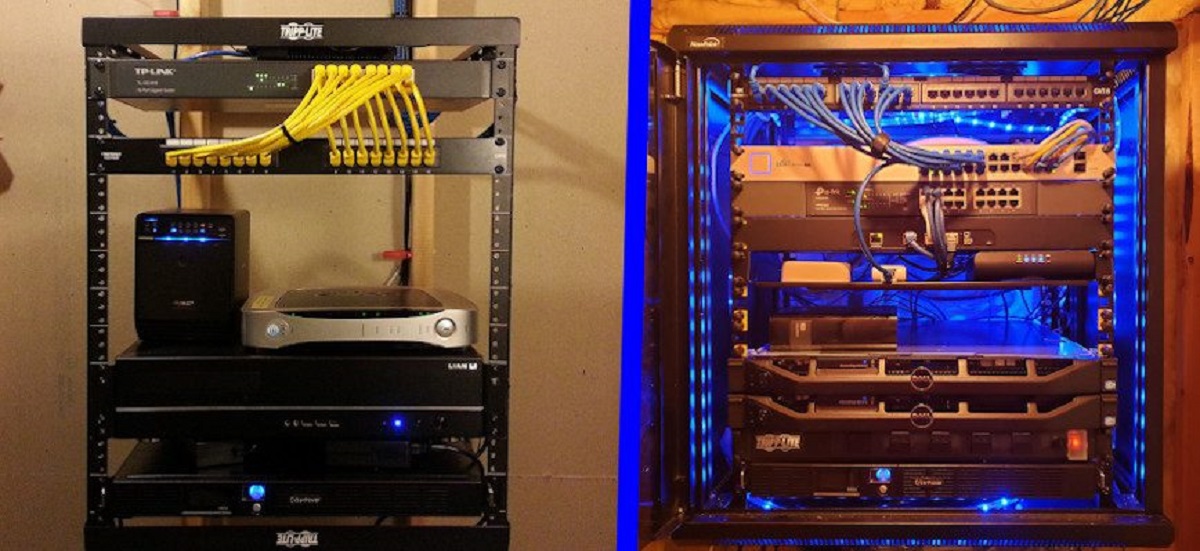
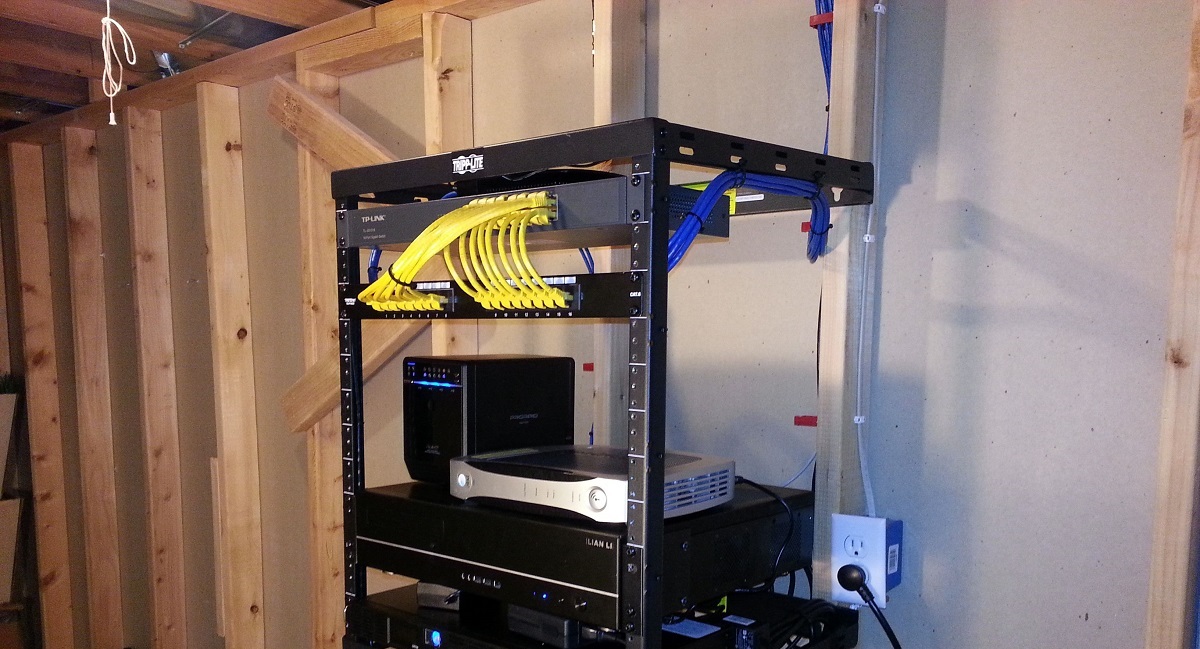
- Centralized Organization: A home server rack provides a dedicated space to house all your networking equipment, servers, and cables, ensuring everything is neatly organized and easily accessible. No more tangled cables, misplaced devices, or cluttered spaces. With a server rack, you can keep your equipment in one central location, making it convenient to manage and maintain.
- Improved Network Performance: By centralizing your networking equipment, you can optimize your network’s performance. A well-designed server rack allows for efficient ventilation and airflow, preventing overheating and ensuring smooth operation. This leads to improved network stability, faster data transfer speeds, and reduced latency.
- Enhanced Security: A home server rack offers a secure and controlled environment for your servers and networking devices. By keeping them all in one place, you can easily monitor and protect your network from potential security threats. Additionally, server racks often come with lockable cabinets, adding an extra layer of physical security to your valuable equipment.
- Flexibility and Scalability: A server rack provides the flexibility to expand and scale your network as your needs grow. With a modular design, you can easily add or replace equipment, making it future-proof. This is especially beneficial for small businesses or individuals who anticipate their technology requirements changing over time.
- Reduced Downtime: With a well-organized and properly maintained server rack, troubleshooting and resolving issues become more efficient. You can quickly identify and address any connectivity or equipment problems, minimizing network downtime and ensuring uninterrupted access to your digital resources.
- Professional Aesthetics: Let’s face it, messy cables and scattered networking equipment can be an eyesore. A home server rack provides a sleek and professional appearance to your technology setup. It eliminates cable clutter, making your space look cleaner and more organized. Whether you have a home office, a media room, or even a dedicated server room, a server rack adds a touch of professionalism to your environment.
These are just a few of the many benefits of setting up a home server rack. From organization and improved performance to security and scalability, a server rack can elevate your technology infrastructure to new heights. So, let’s move on to the next step in our journey: planning your home server rack setup.
Planning Your Home Server Rack Setup
Proper planning is crucial when it comes to setting up a home server rack. Taking the time to carefully plan your setup will ensure that you choose the right equipment, allocate sufficient space, and account for any specific requirements you may have. Here are the key factors to consider during the planning phase:
- Available Space: Assess the available space in your home where you intend to install the server rack. Measure the dimensions of the area to ensure that the chosen rack will fit comfortably. Consider any height restrictions, nearby obstructions, or ventilation requirements that may impact the placement of the rack.
- Equipment Requirements: Determine the equipment you plan to install in the server rack. Take an inventory of your networking devices, servers, switches, patch panels, power strips, and any other hardware you will need to accommodate. This will help you determine the size and capacity of the server rack required to house all your equipment.
- Adequate Power Supply: Ensure that you have access to a reliable power source near the location of your server rack. Depending on the number and power requirements of your devices, you may need to install additional electrical outlets or consider a rack with integrated power distribution units (PDUs) to support your equipment.
- Consider Future Expansion: Anticipate future growth and consider the scalability of your server rack setup. If you expect to add more devices or expand your network in the future, choose a rack that offers sufficient space and ease of expansion. Investing in a rack with modular features and adjustable rails will allow for easy additions or replacements of equipment as your needs evolve.
- Cable Management: Plan for efficient cable management to avoid a tangled mess of wires inside your server rack. Consider using cable management accessories such as cable trays, hooks, or zip ties to keep your cables organized and properly routed. This will not only improve the aesthetics but also assist with troubleshooting and maintenance tasks.
- Security Considerations: Assess the security needs of your home server rack setup. Determine if you require additional physical security measures such as lockable cabinets or even surveillance cameras to protect your valuable equipment. Implementing access control mechanisms, such as biometric locks or keycard systems, can also enhance the overall security of your server rack.
By carefully considering these factors during the planning phase, you can ensure that your home server rack setup meets your specific requirements and is prepared for future growth. Once you have a clear plan in place, it’s time to move on to the next step: choosing the right server rack for your needs.
Choosing the Right Server Rack
When it comes to setting up a home server rack, choosing the right rack is essential. There are several factors to consider to ensure that your chosen rack meets your needs and accommodates your equipment effectively. Here are some key considerations when selecting a server rack:
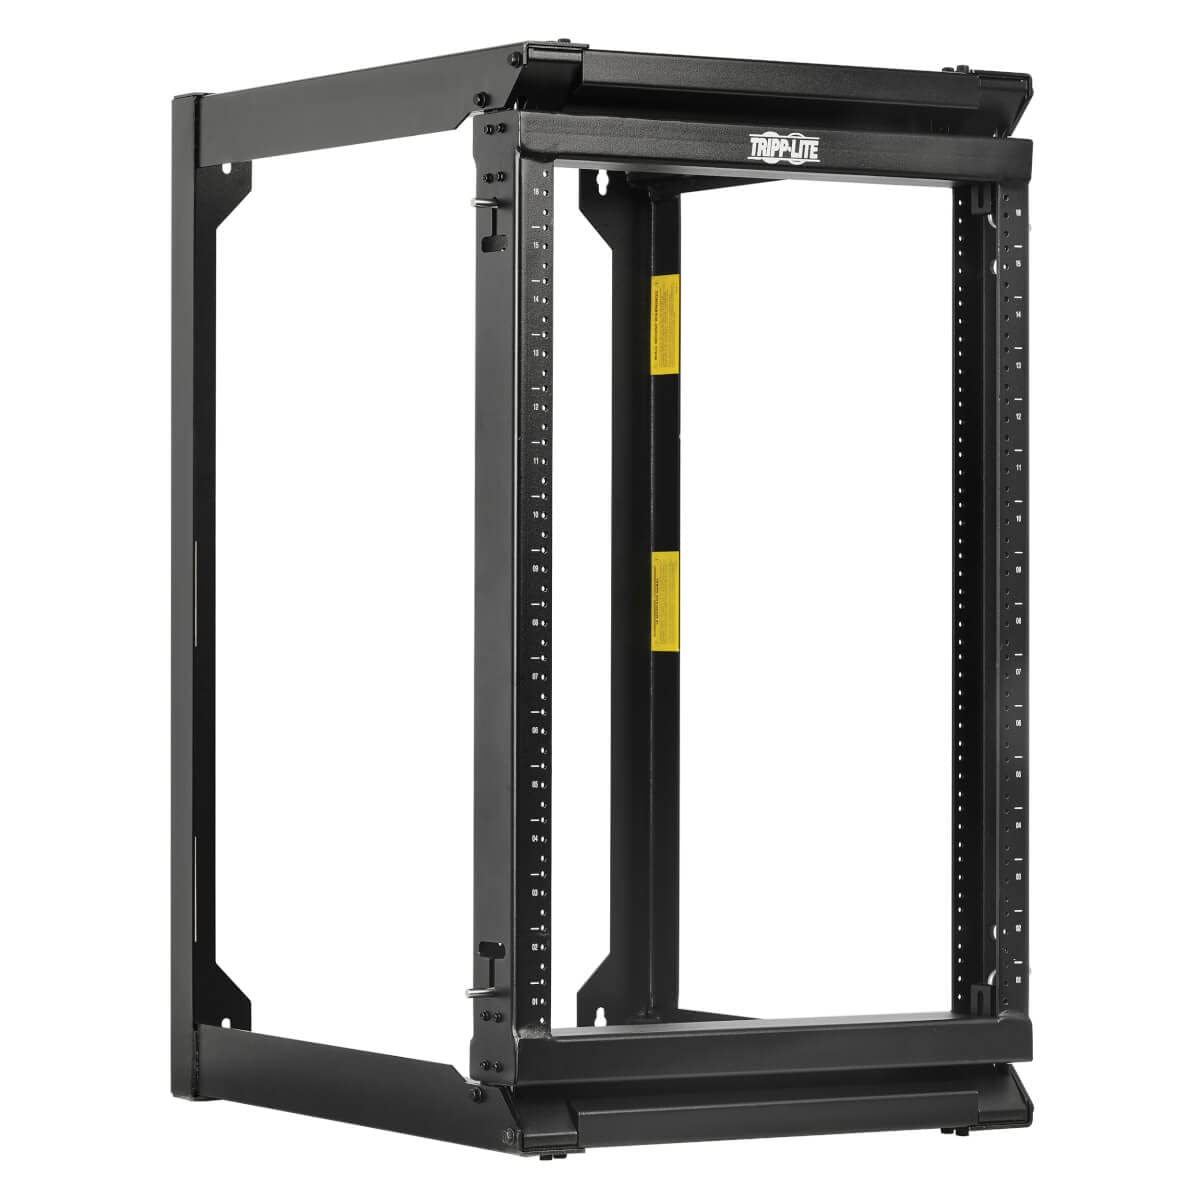
- Rack Size and Capacity: Determine the size and capacity requirements for your server rack based on the equipment you plan to install. Consider the height, width, and depth of the rack to ensure that it can accommodate all your devices. Additionally, check the weight capacity of the rack to ensure it can support the combined weight of your equipment.
- Mounting Options: Evaluate the mounting options available with the server rack. Choose between rack-mount or wall-mount options based on the available space and your specific needs. Rack-mount options are ideal for larger setups with multiple devices, while wall-mount options are suitable for smaller setups with limited space.
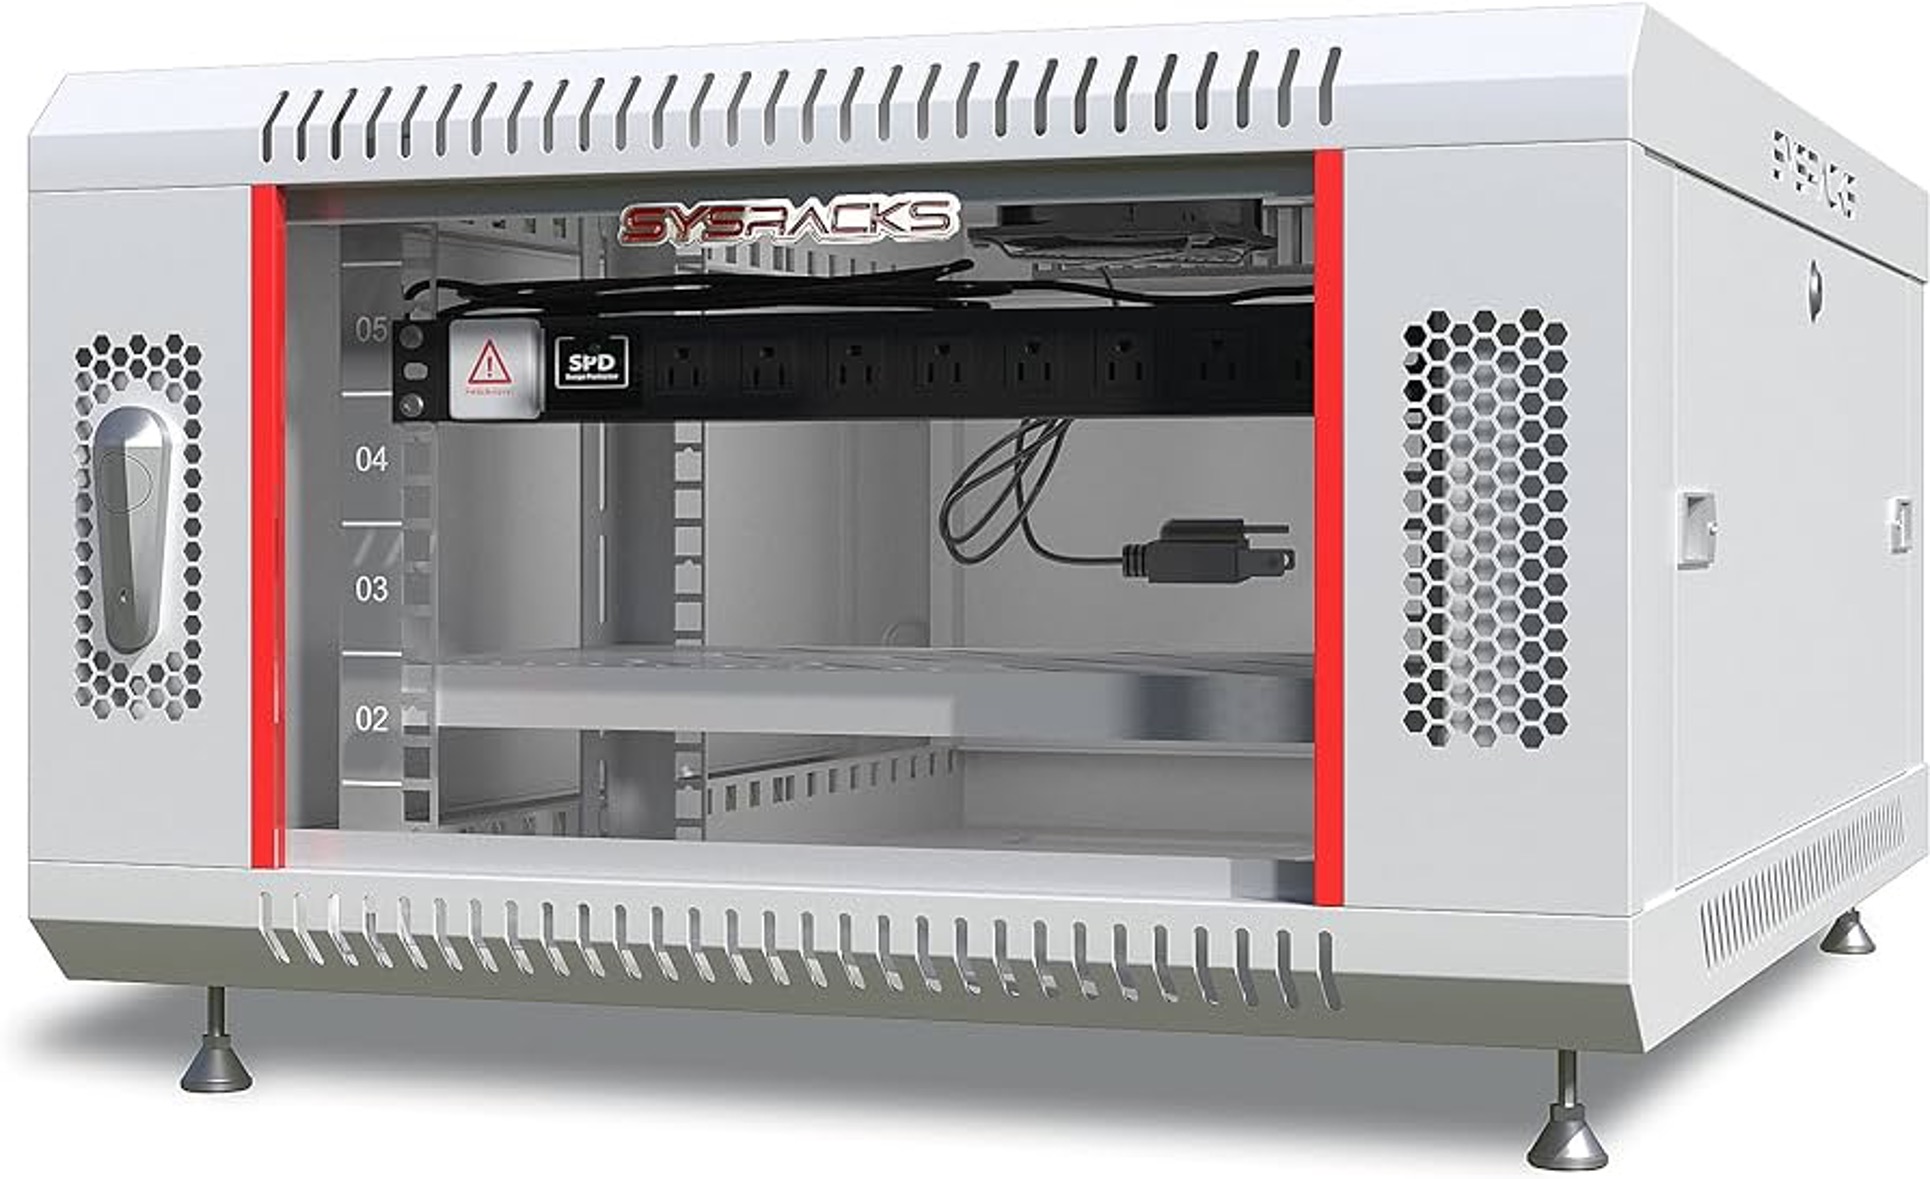
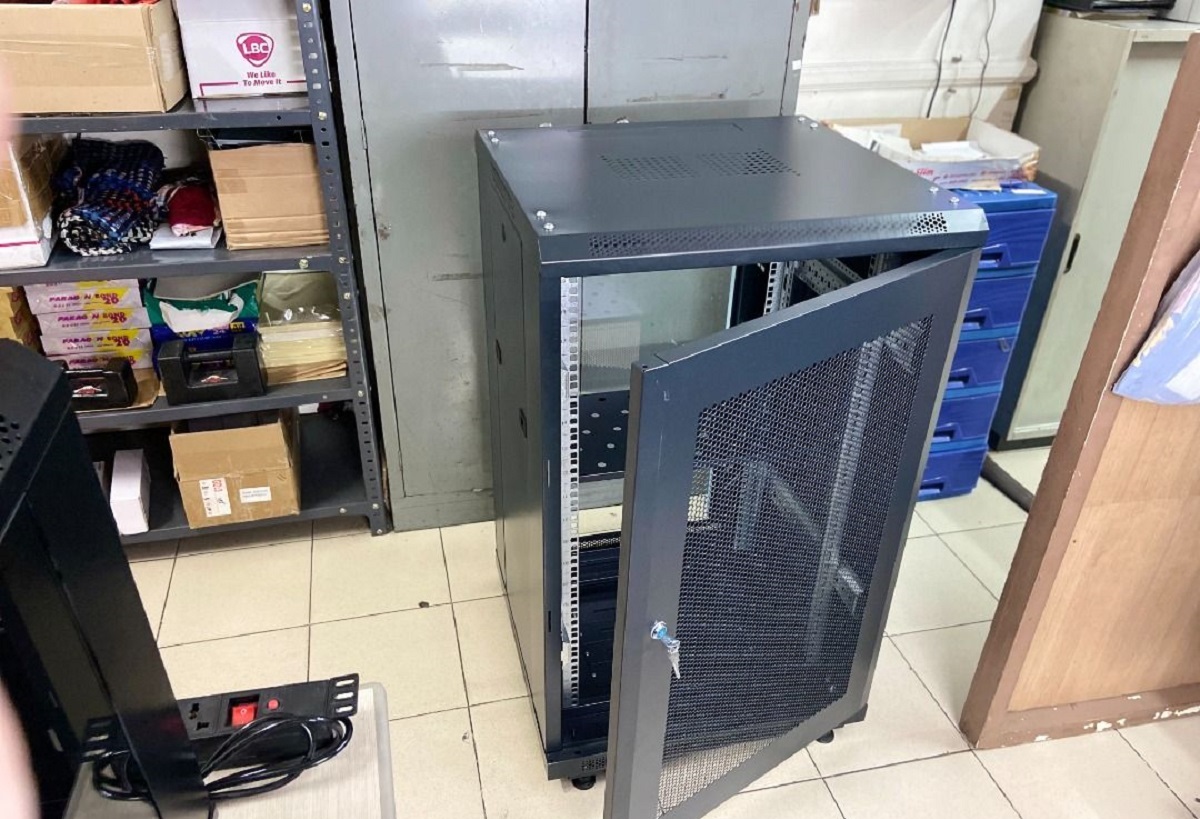
- Ventilation and Cooling: Look for a server rack that offers proper ventilation to prevent overheating. Features such as perforated front and rear doors, vented side panels, and fan mounts allow for improved airflow and heat dissipation. Adequate cooling is crucial to ensure the optimal performance and longevity of your devices.
- Cable Management: A server rack with built-in cable management features will simplify your setup and keep your cables organized. Look for racks with cable management options such as cable trays, cable rings, or brush strips that help route and manage your cables effectively. This will not only improve the aesthetics but also aid in troubleshooting and maintenance tasks.
- Security Features: Consider the security features available with the server rack. Look for racks with lockable doors or side panels to restrict access to your equipment. Additionally, some racks offer optional security enhancements like combination locks or biometric access controls to further protect your valuable devices.
- Scalability and Flexibility: Evaluate the scalability and flexibility of the server rack. Choose a rack that allows for easy expansion and reconfiguration as your network grows or technology requirements change. Look for racks with adjustable rails, modular design, and compatibility with accessories that can accommodate future additions or modifications.
Taking these factors into consideration will help you choose the right server rack that meets your requirements and ensures optimal functionality for your home server setup. Once you have selected the perfect server rack, it’s time to move on to the exciting part – assembling and installing your home server rack.
Assembling and Installing a Home Server Rack
Now that you have chosen the right server rack for your needs, it’s time to assemble and install it in your desired location. Follow these step-by-step instructions to ensure a smooth installation process:
- Gathering the Necessary Tools and Equipment: Before you start, make sure you have all the tools and equipment you will need, such as a screwdriver, cable management accessories, and any specific hardware that may come with your server rack.
- Preparing the Area for the Server Rack: Clear the area where you plan to install your server rack. Remove any obstacles and ensure there is enough space for the rack to fit comfortably. If necessary, install additional ventilation or power outlets to support your equipment.
- Assembling the Server Rack: Follow the manufacturer’s instructions to assemble the server rack. Start by attaching the vertical posts to the base, ensuring they are secure and stable. Then, install any additional shelves or accessories according to your setup requirements.
- Mounting Equipment and Servers: Carefully mount your networking equipment, servers, and other devices into the server rack. Use the appropriate screws or mounting hardware provided with the rack to secure them in place. Ensure that all devices are properly aligned and adequately spaced within the rack.
- Running Network Cables: Route your network cables neatly and effectively. Use cable management accessories like cable trays or hooks to keep the cables organized and avoid tangling. Connect the cables to the appropriate ports on your networking devices, ensuring a secure and stable connection.
- Organizing and Managing Cables: Once all the cables are connected, take the time to organize and manage them properly. Bundle and label the cables using cable ties or color-coded tags. This will make future maintenance, troubleshooting, and upgrades much easier.
- Testing and Troubleshooting: Before finalizing the installation, test the functionality of your home server rack setup. Check the connectivity of all devices, perform speed tests, and ensure proper airflow and cooling. Troubleshoot any issues that arise, such as loose connections or incorrect configurations.
By following these steps, you will be able to assemble and install your home server rack effectively. Remember to refer to the manufacturer’s instructions for any specific guidelines related to your rack model. Once the rack is fully installed and operational, you can enjoy the benefits of a well-organized and efficient home network.
Step 1: Gathering the Necessary Tools and Equipment
Before you begin assembling and installing your home server rack, it’s essential to gather all the necessary tools and equipment. Having the right tools at hand will ensure a smooth and efficient installation process. Here are some tools and equipment you will need:
- Screwdriver: A screwdriver is a must-have tool for assembling the server rack and securing the devices in place. Make sure you have a variety of screwdriver types such as Phillips-head and flat-head, as different equipment may require different types of screws.
- Level: A level is useful for ensuring that your server rack is installed straight and level. This will provide stability and proper alignment for your equipment.
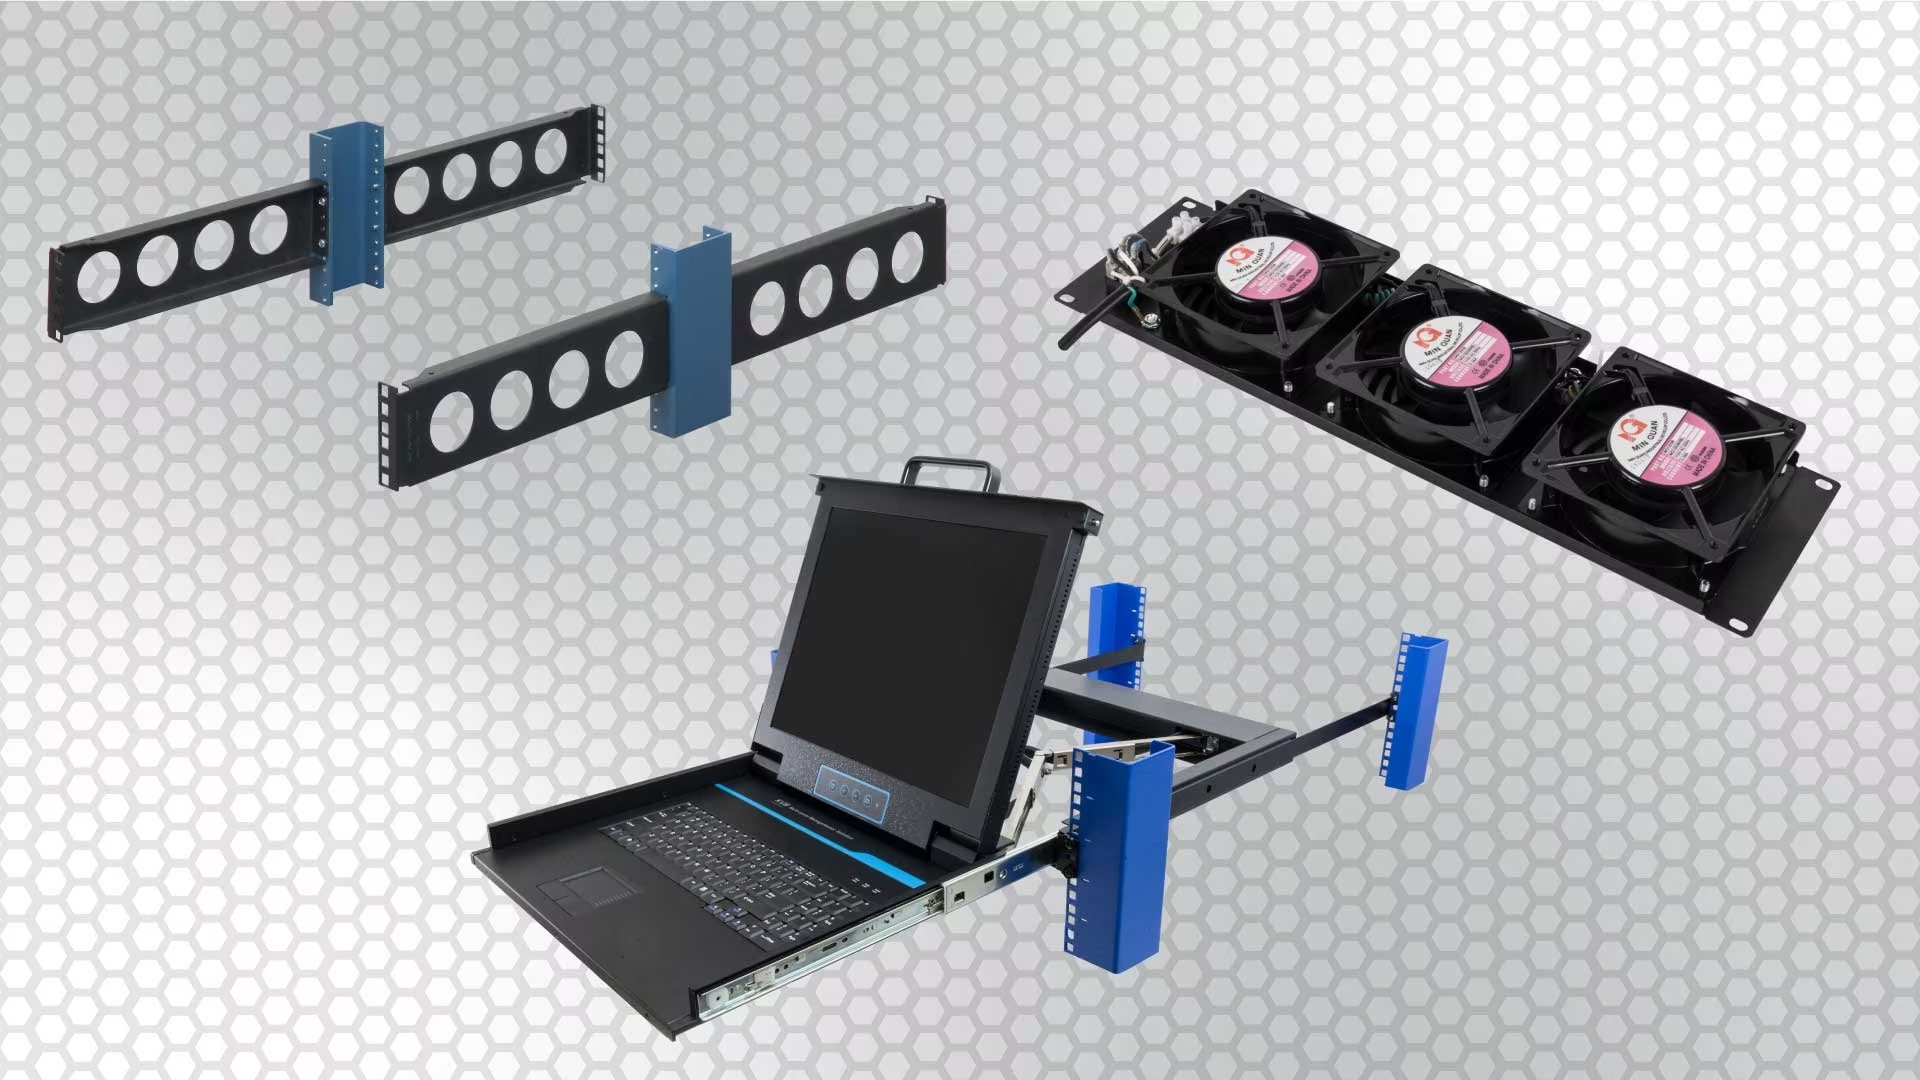
- Cable Management Accessories: Cable management is crucial for maintaining an organized and clutter-free server rack. Gather cable management accessories such as cable ties, zip ties, cable clips, cable trays, or cable management panels. These accessories will help you bundle and route the cables neatly, reducing the risk of tangles and making future maintenance easier.
- Rack Mounting Hardware: Depending on your server rack and the devices you plan to install, you may need specific rack mounting hardware. This could include cage nuts, screws, mounting brackets, or rails, supplied by the manufacturer of your server rack.
- Labeling Materials: Labeling is essential for identifying and organizing cables and devices within the server rack. Gather labeling materials such as adhesive labels, marker pens, or label makers to clearly identify and label each cable, device, or port for easy identification and troubleshooting.
- Power Tools (Optional): Depending on the complexity of your server rack installation, you may find it helpful to have power tools such as an electric drill or impact driver. These tools can speed up the assembly process and make it easier to secure the rack to the floor or wall if needed.
- Additional Accessories: Depending on your specific requirements, you may need additional accessories such as patch cables, cable testers, cable management grommets, or rack-mount power distribution units (PDUs) to ensure proper functionality and organization within your server rack.
Gather all these tools and equipment before you begin the installation process. Ensure that they are easily accessible and in good working condition. Having the necessary tools at hand will save you time and effort during the assembly and installation of your home server rack.
Step 2: Preparing the Area for the Server Rack
Before you start assembling and installing your home server rack, it is important to properly prepare the area where it will be placed. This preparation ensures that the server rack is installed in an optimal location and provides a secure and efficient environment for your networking equipment. Follow these steps to prepare the area:
- Clear the Space: Begin by clearing the area where you plan to install the server rack. Remove any furniture, objects, or debris that may obstruct or interfere with the installation process. Creating a clean and open space will make it easier to position the rack and access the equipment.
- Measure the Dimensions: Measure the dimensions of the available space to ensure that your chosen server rack will fit comfortably. Take accurate measurements of the height, width, and depth of the area. Consider any height restrictions or nearby obstructions that may affect the installation of the rack.
- Provide Adequate Ventilation: Proper ventilation is essential for optimal performance and longevity of your equipment. Make sure the area where you plan to install the server rack has adequate airflow. Avoid placing the rack in a confined space or near heat sources such as radiators or heating vents. Consider installing additional ventilation options such as fans or air conditioning if necessary.
- Ensure Stability: Ensure that the floor or wall where the server rack will be installed is stable and can support the weight of the rack and the equipment it will hold. If you’re installing a floor-standing rack, check that the floor is level and can handle the weight. If you’re opting for a wall-mounted rack, make sure the wall is sturdy and properly reinforced to support the rack and equipment.
- Check for Power Accessibility: Verify that there is access to a reliable power source near the installation area. This will ensure that you can easily connect and power your networking equipment. Consider installing additional power outlets or surge protectors if necessary, taking into account the power requirements of your devices.
- Consider Cable Routing: Plan the routing of your network cables to avoid potential obstacles or interference. Identify the optimal path for running cables from the server rack to the networking devices. Take into consideration the length of the cables and the necessary clearance to maintain cable organization and prevent any tripping hazards.
By properly preparing the area before installing your home server rack, you can ensure a smooth installation process and create an environment that promotes optimal performance and longevity for your networking equipment. Once the area is prepared, you can proceed to the next step of assembling the server rack.
Step 3: Assembling the Server Rack
After preparing the area, it’s time to assemble the server rack itself. The assembly process may vary based on the specific make and model of your server rack, so be sure to consult the manufacturer’s instructions for detailed guidance. However, here are some general steps to help you through the assembly process:
- Unpack the Components: Start by unpacking the server rack components and organizing them in a clear and accessible area. Make sure you have all the required parts, including the main frame, vertical posts, shelves, screws, and any additional accessories that come with the rack.
- Attach the Vertical Posts: Position the main frame of the server rack in the desired location. Take the vertical posts and attach them to the base of the rack following the manufacturer’s instructions. Ensure that they are securely fastened to provide stability and support for your equipment.
- Install Additional Shelves and Accessories: Depending on your specific requirements, install any additional shelves, drawers, or other accessories that come with your server rack. Follow the provided instructions to properly attach and align each component. Take note of any weight restrictions or load capacities specified by the manufacturer.
- Secure the Rails (If Applicable): If your server rack includes adjustable rails for mounting devices, attach them to the vertical posts. Most racks have slots or screw holes that allow you to adjust the position of the rails to accommodate different-sized devices. Follow the instructions carefully to ensure proper alignment and stability.
- Level the Rack: Once the main components are assembled, use a level to ensure that the server rack is straight and level. Adjust the placement if necessary to maintain stability and prevent any tilting or imbalance that could affect the performance or longevity of your equipment.
- Double-Check Connections: Before proceeding to mount your equipment, double-check all connections and screws to ensure they are tight and secure. This will further reinforce the stability of the server rack and provide a safe environment for your devices.
Remember to follow the manufacturer’s instructions closely throughout the assembly process, as specific requirements and guidelines may vary. By carefully assembling the server rack, you will create a solid foundation for installing your networking equipment and organizing your cables. Once the server rack is fully assembled, you can proceed to the next step of mounting the equipment and servers.
Step 4: Mounting Equipment and Servers
With the server rack fully assembled, it’s time to mount your networking equipment and servers securely. Properly mounting your devices will ensure stability, promote efficient airflow, and make future maintenance and troubleshooting easier. Follow these steps to mount the equipment and servers:
- Review Equipment Placement: Before mounting any equipment, plan the layout within the server rack. Determine where each device will be positioned based on factors such as cable management, airflow, and accessibility for maintenance. Consider the weight and size of each device to ensure proper weight distribution and stability.
- Attach Mounting Brackets or Rails: Depending on the design of your server rack and the devices you are mounting, you may need to attach mounting brackets or rails to the rack. Follow the manufacturer’s instructions to securely fasten the brackets or rails in the desired positions.
- Align Devices: Carefully align each device or server with the mounting brackets or rails. Ensure that the screw holes on the devices align with the corresponding holes on the brackets or rails. Take caution not to force or apply excessive pressure when aligning the devices.
- Secure Devices in Place: Once aligned, use the appropriate screws or mounting hardware (often provided with the server rack or devices) to secure each device in place. Tighten the screws firmly, but avoid overtightening to prevent damage to the equipment. Repeat this step for each device you are mounting within the rack.
- Double-Check Connections: After securing the devices, double-check the connections to ensure they are secure and properly seated. Verify that cables are connected to their appropriate ports on the devices and are not being pinched or strained. This will reduce the risk of connectivity issues and ensure reliable operation.
- Test Equipment Functionality: Once all devices are mounted, it’s a good practice to test the functionality of each device. Power on the devices and verify that they are functioning as expected. Check network connectivity, access the device interfaces, and ensure that all indicators and LEDs are functioning properly.
By following these steps, you can safely and securely mount your networking equipment and servers within the server rack. Properly mounted devices improve airflow, reduce the risk of damage, and make it easier to manage and organize your network. With the equipment in place, you can now focus on running network cables to establish connectivity within your home server rack, which will be covered in the next step.
Step 5: Running Network Cables
Running network cables is a critical step in setting up your home server rack. Properly organized and connected cables ensure efficient data transmission and reliable network connectivity. Follow these steps to effectively run network cables within your server rack:
- Plan Cable Routes: Before running any cables, plan the routes within the server rack. Identify the optimal path for each cable, considering factors such as cable length, proximity to devices, and cable management. Avoid running cables across or near areas where they may be pinched, kinked, or damaged.
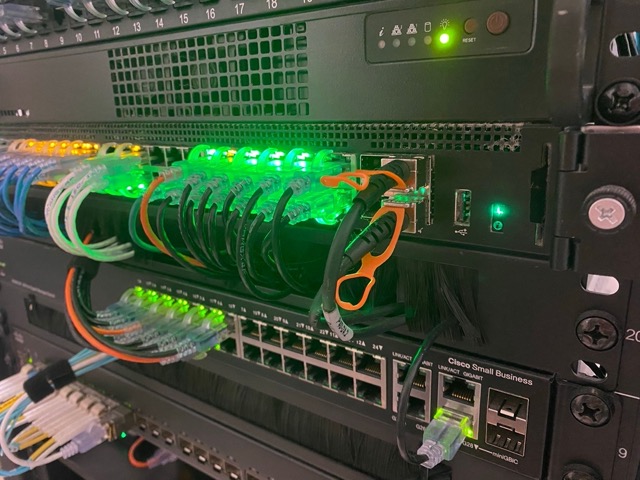
- Use Cable Management Accessories: Maintain cable organization and minimize clutter by utilizing cable management accessories such as cable trays, hooks, or cable ties. These accessories help route and secure cables within the server rack, reducing the risk of tangling or accidental disconnections. Proper cable management also facilitates easier cable tracing and maintenance in the future.
- Measure Cable Lengths: Measure and cut the network cables to the appropriate lengths for each run. It’s crucial to have the right cable length to avoid excess slack or strain on the connectors. Aim for a neat and tidy appearance with just enough slack for movement and flexibility.
- Dress and Bundle Cables: Bundle and dress the network cables within the server rack. Use cable ties or Velcro straps to keep cables together and prevent them from obstructing airflow or impeding access to devices. Consider labeling or color-coding the cables to facilitate identification and troubleshooting.
- Connect Cables to Devices: Connect one end of each network cable to the appropriate port on the networking device (e.g., server, switch, patch panel). Ensure a secure connection by firmly inserting the cable connector into the port. Avoid placing excessive strain on the connectors by allowing some slack in the cable runs.
- Organize Patch Panels: If you have a patch panel in your server rack, connect the other end of each network cable to the corresponding port on the patch panel. Follow color-coding or labeling conventions to maintain consistency and ease of tracing cables. Dress and secure the patch panel cables to ensure a neat and organized appearance.
- Test Network Connectivity: Once all the cables are connected, it’s essential to test network connectivity. Verify that each network device is communicating effectively and that data is being transmitted without issues. Perform network tests, check for connectivity errors, and troubleshoot any connectivity problems that may arise.
By carefully running and organizing network cables within your server rack, you can establish reliable connections and create a well-structured network infrastructure. Taking the time to plan and execute proper cable management will make future maintenance and troubleshooting tasks more efficient.
Step 6: Organizing and Managing Cables
Once the network cables are in place, it’s important to focus on organizing and managing them within your home server rack. Proper cable management not only improves the aesthetics of your setup but also enhances functionality and maintenance. Follow these steps to effectively organize and manage the cables:
- Bundle and Group Cables: Start by bundling similar cables together. Group cables that serve the same purpose or connect to the same devices. This makes it easier to identify and trace specific cables when needed. Use cable ties, Velcro straps, or cable management panels to secure the bundled cables.
- Label or Color-Code Cables: To further facilitate cable identification, consider labeling or color-coding cables. Use adhesive labels or colored tags to mark each cable or use colored cable sleeves. Ensure that labels or tags are placed near the connectors for easy visibility and readability.
- Route Cables Neatly: Route cables along dedicated cable management paths or channels within the server rack. Use cable management accessories, such as cable trays, clips, or hooks, to guide cable routes. Avoid running cables near power cables or other sources of potential interference to minimize signal degradation.
- Leave Slack for Movement: Allow for some slack in the cable runs to accommodate any movement or future adjustments. This prevents cables from becoming too taut and risking damage to the connectors or strain on the equipment. However, be mindful not to leave excessive slack that may obstruct access or create cable management issues.
- Separate Power and Data Cables: Whenever possible, try to separate power and data cables to minimize the chances of electromagnetic interference. Route power cables away from data cables, ensuring they are physically separated. If they must cross paths, try to cross them at right angles to reduce the chances of interference.
- Document the Cable Layout: Keep a record or document the cable layout within your server rack. This can be a simple diagram or spreadsheet indicating the purpose and destination of each cable. It will serve as a useful reference for future troubleshooting, maintenance, or when making changes to your network setup.
- Regularly Inspect and Reorganize: Periodically inspect and reorganize the cables within your server rack. Over time, cables may become loose, tangled, or need adjustments due to equipment changes. Regularly tidy up cable bundles, replace worn-out cable ties, and ensure that labels or color-coding remain readable.
Taking the time to organize and manage your cables not only improves the overall appearance of your home server rack but also allows for easier maintenance, troubleshooting, and future additions or modifications. A well-organized rack with properly managed cables contributes to a more efficient and reliable network infrastructure.
Step 7: Testing and Troubleshooting
After setting up and organizing your home server rack, it’s crucial to thoroughly test and troubleshoot the network connectivity and equipment functionality. Proper testing ensures that your network is operating reliably and efficiently. Follow these steps to test and troubleshoot your home server rack:
- Power on the Devices: Power on all the devices within your server rack, including servers, switches, and other networking equipment. Verify that each device is receiving power and initializing properly.
- Check Network Connectivity: Test the network connectivity by pinging devices and accessing network resources. Ensure that each device can communicate with others within the network. Perform network tests that involve transferring files, streaming media, or running applications to verify the performance of your network.
- Verify Internet Connectivity: If your home server rack is connected to the internet, confirm that your internet connection is active and stable. Check that devices can access websites, download files, and perform other online activities without issues.
- Monitor Network Performance: Utilize network monitoring tools to measure and assess the performance of your network. Look for any bottlenecks, high latency, or packet loss that could impact network performance. Monitoring tools can help identify potential issues and allow you to optimize your network settings for better performance.
- Identify and Resolve Connectivity Issues: If any devices are not communicating or experiencing connectivity issues, troubleshoot the problem systematically. Check the physical connections, ensure that cables are securely connected, and inspect network settings on each device. Resolve any issues, such as incorrect IP configurations or firewall settings, to restore proper connectivity.
- Test Redundancy and Failover: If your network architecture includes redundancy or failover configurations, test them to ensure they are functioning as intended. Simulate a failure in one device or network link and verify if the backup or failover mechanism kicks in seamlessly.
- Perform Regular Maintenance: Regularly maintain your home server rack by checking for software updates, firmware updates, and security patches for all devices within the rack. Maintain proper ventilation and cleanliness within the rack to prevent heat buildup and dust accumulation.
- Document and Update Network Information: Keep a record of the network information, including IP addresses, device configurations, and login credentials. Update this documentation whenever changes are made to the network. Having accurate and up-to-date network documentation simplifies future troubleshooting and maintenance tasks.
By diligently testing and troubleshooting your home server rack, you can identify and address any issues that may arise. This ensures that your network runs smoothly, providing the reliability and performance you desire. Regular maintenance and documentation updates will keep your network in optimal condition as you continue to utilize and modify your home server rack setup.
Conclusion
Setting up a home server rack is a significant undertaking that can greatly enhance your technology infrastructure and streamline your network. With proper planning, careful assembly, and effective cable management, you can create a centralized and organized space for your networking equipment and servers.
By investing the time and effort into setting up a home server rack, you can enjoy various benefits. These include centralized organization, improved network performance, enhanced security, flexibility for future expansion, reduced downtime, and a more professional aesthetic.
Throughout the process, it’s important to gather the necessary tools, prepare the installation area, carefully assemble the server rack, mount equipment and servers securely, run network cables efficiently, organize and manage cables effectively, and thoroughly test and troubleshoot the network connectivity and equipment functionality.
Remember to consult the manufacturer’s instructions for specific guidance and maintain good documentation of your network setup for future reference. Regular maintenance and updates ensure the continued reliability and performance of your home server rack.
Setting up a home server rack requires time, attention to detail, and technical knowledge, but the benefits far outweigh the effort. By creating an organized and efficient network infrastructure, you can maximize productivity, minimize downtime, and take full control of your digital experience.
So, take the first step and start planning your home server rack setup today. Transform your home network into a well-structured, high-performing environment that will meet your present needs and adapt to future technological advancements.