Introduction
Welcome to our guide on how to install an SSD into your laptop. Upgrading to a solid-state drive (SSD) can significantly boost your laptop’s performance, giving you faster boot times, improved application loading speeds, and overall enhanced responsiveness. Whether you’re a tech enthusiast or someone looking to breathe new life into your aging laptop, this step-by-step tutorial will guide you through the process of installing an SSD.
Before we dive into the installation process, it’s important to understand what an SSD is and why it’s a worthwhile investment. Unlike traditional hard disk drives (HDDs) that use spinning platters and mechanical components, SSDs rely on NAND-based flash memory, which provides faster data access and transfer speeds. This means your laptop will be able to retrieve and process information more quickly, resulting in a smoother and more efficient computing experience.
Additionally, SSDs are more durable than HDDs because they have no moving parts that can easily break or fail. This makes them ideal for laptops, especially if you often travel or use your laptop on the go. With an SSD installed, you won’t have to worry as much about accidental bumps or drops potentially damaging your data.
Upgrading to an SSD can be a game-changer for your laptop, and thankfully, the installation process is relatively straightforward. In this guide, we’ll walk you through each step, from choosing the right SSD for your laptop to formatting and initializing it for use. So, without further ado, let’s dive into the wonderful world of SSD upgrades and get your laptop running faster than ever before!
Step 1: Choose the right SSD for your laptop
The first step in installing an SSD into your laptop is to choose the right SSD for your specific model. Not all laptops are compatible with every type of SSD, so it’s essential to do some research and ensure compatibility.
The two key factors to consider when selecting an SSD are the form factor and the interface. The form factor refers to the physical size and shape of the SSD, while the interface determines how it connects to your laptop.
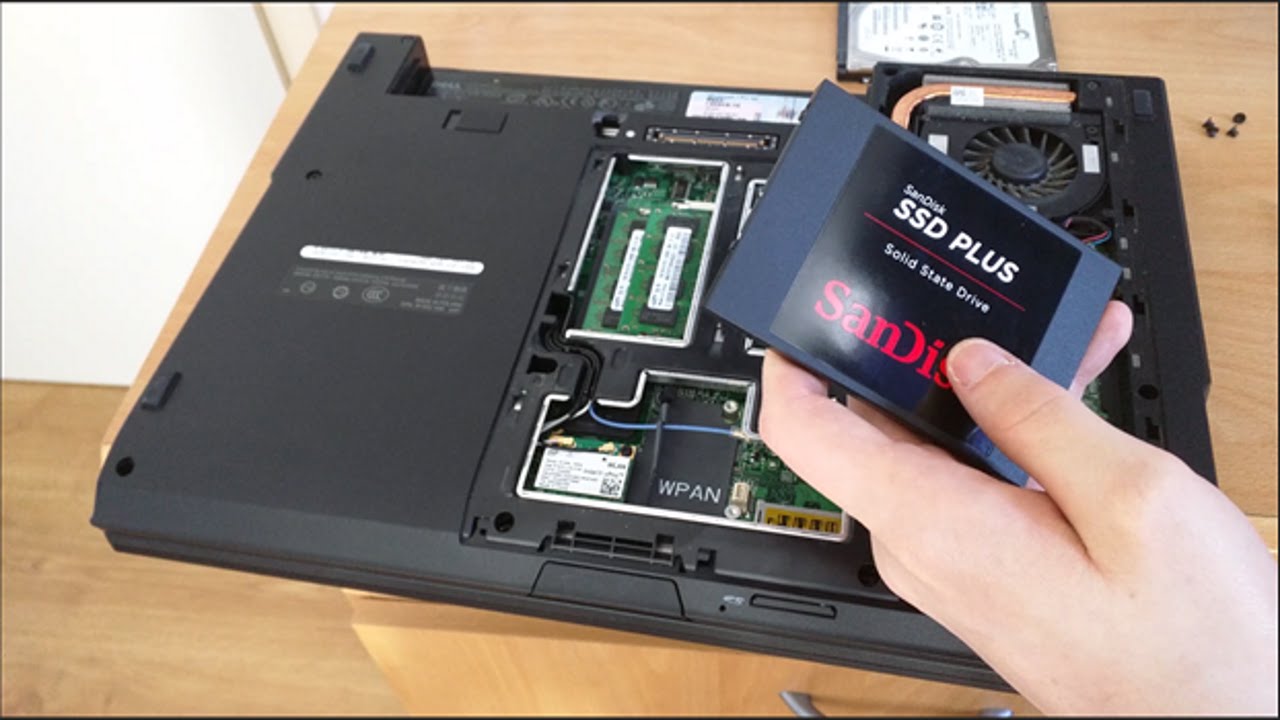
Most laptops use either a 2.5-inch SATA SSD or an M.2 SSD. 2.5-inch SATA SSDs are similar in size to traditional laptop hard drives and connect through a SATA interface. They are a common choice for older laptops that have traditional hard drive bays.
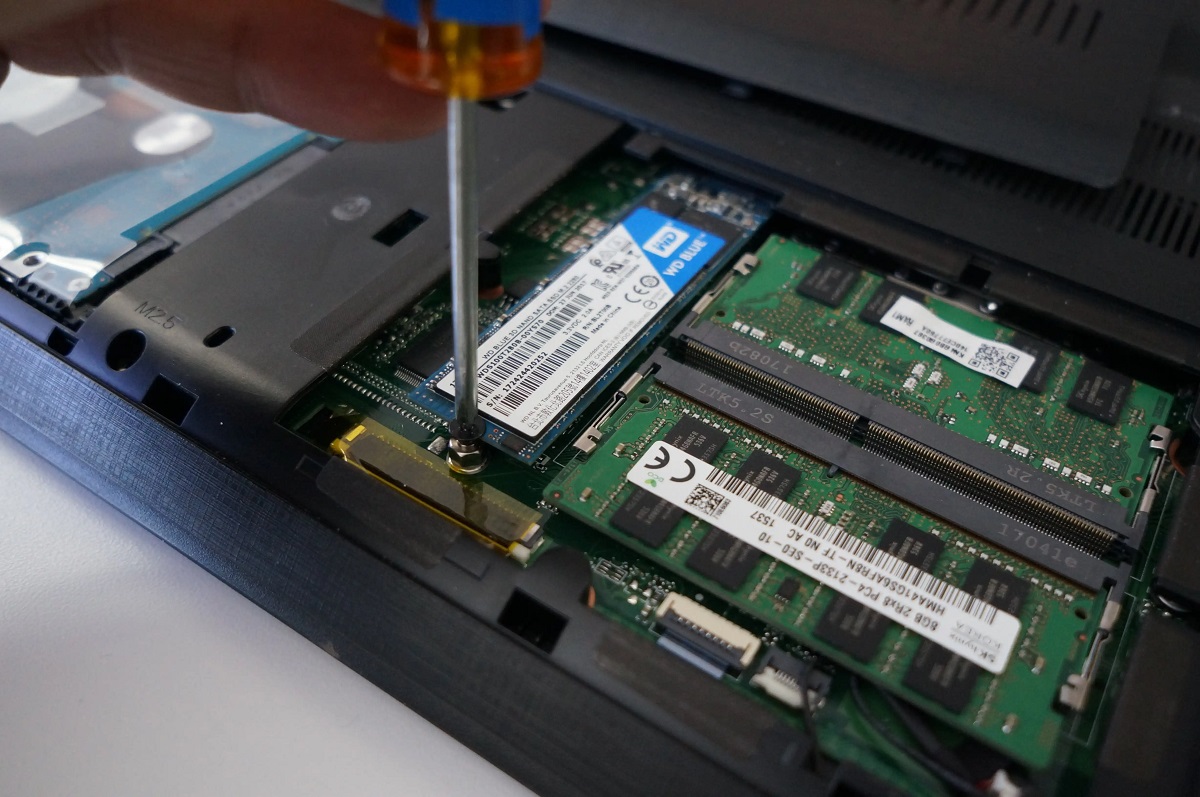
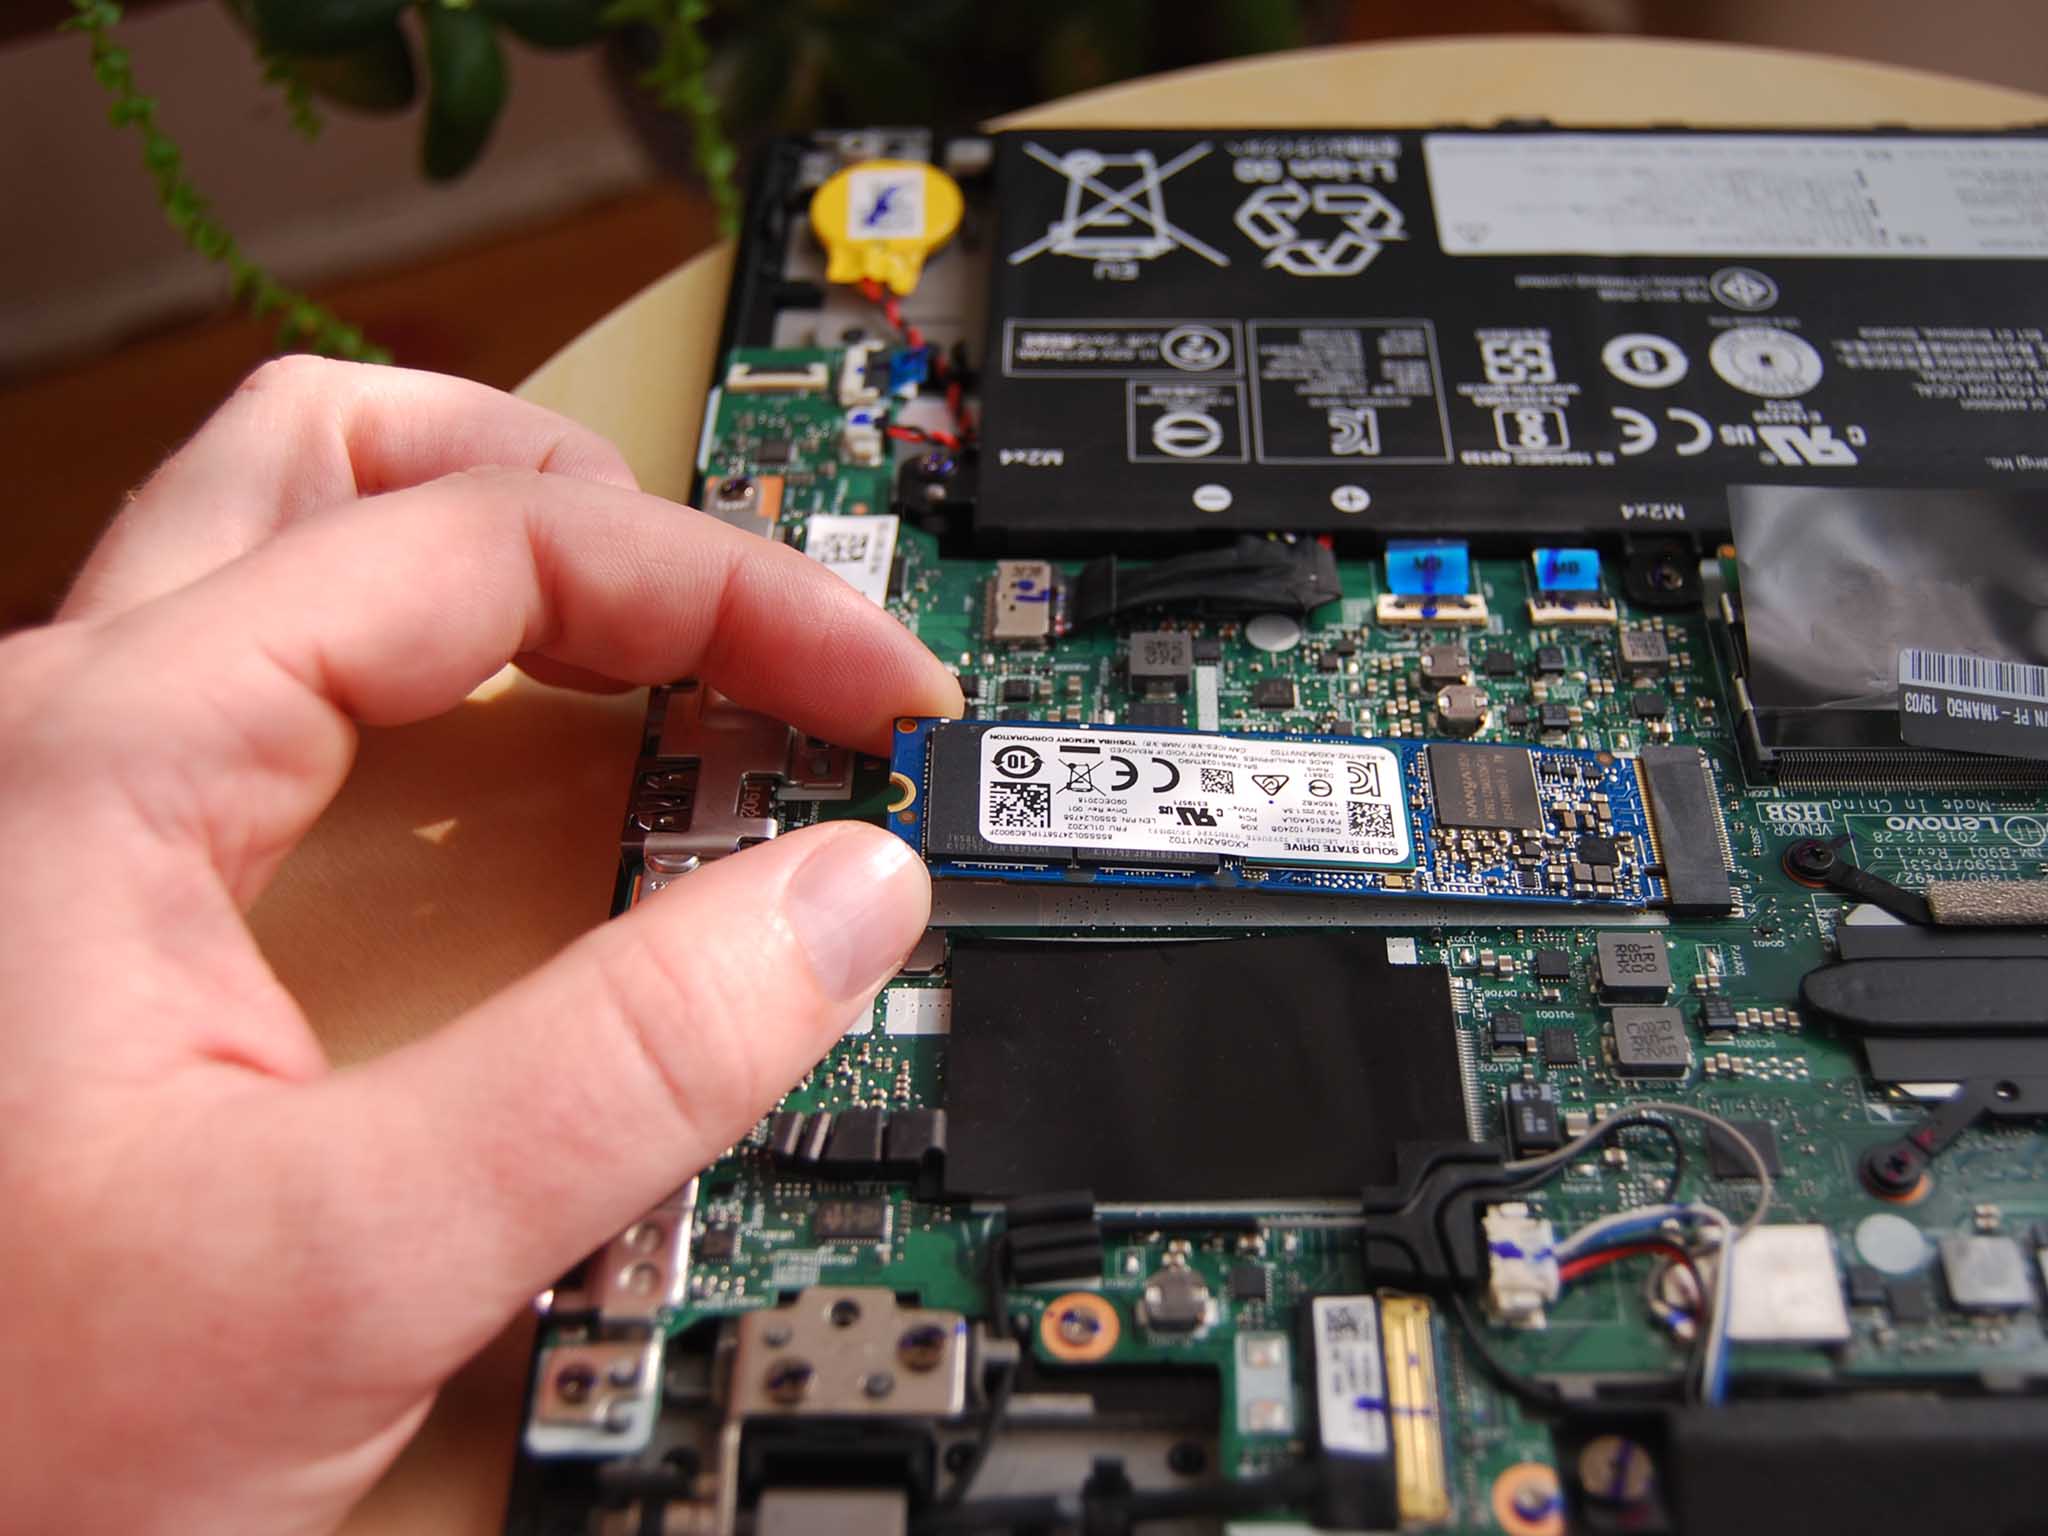
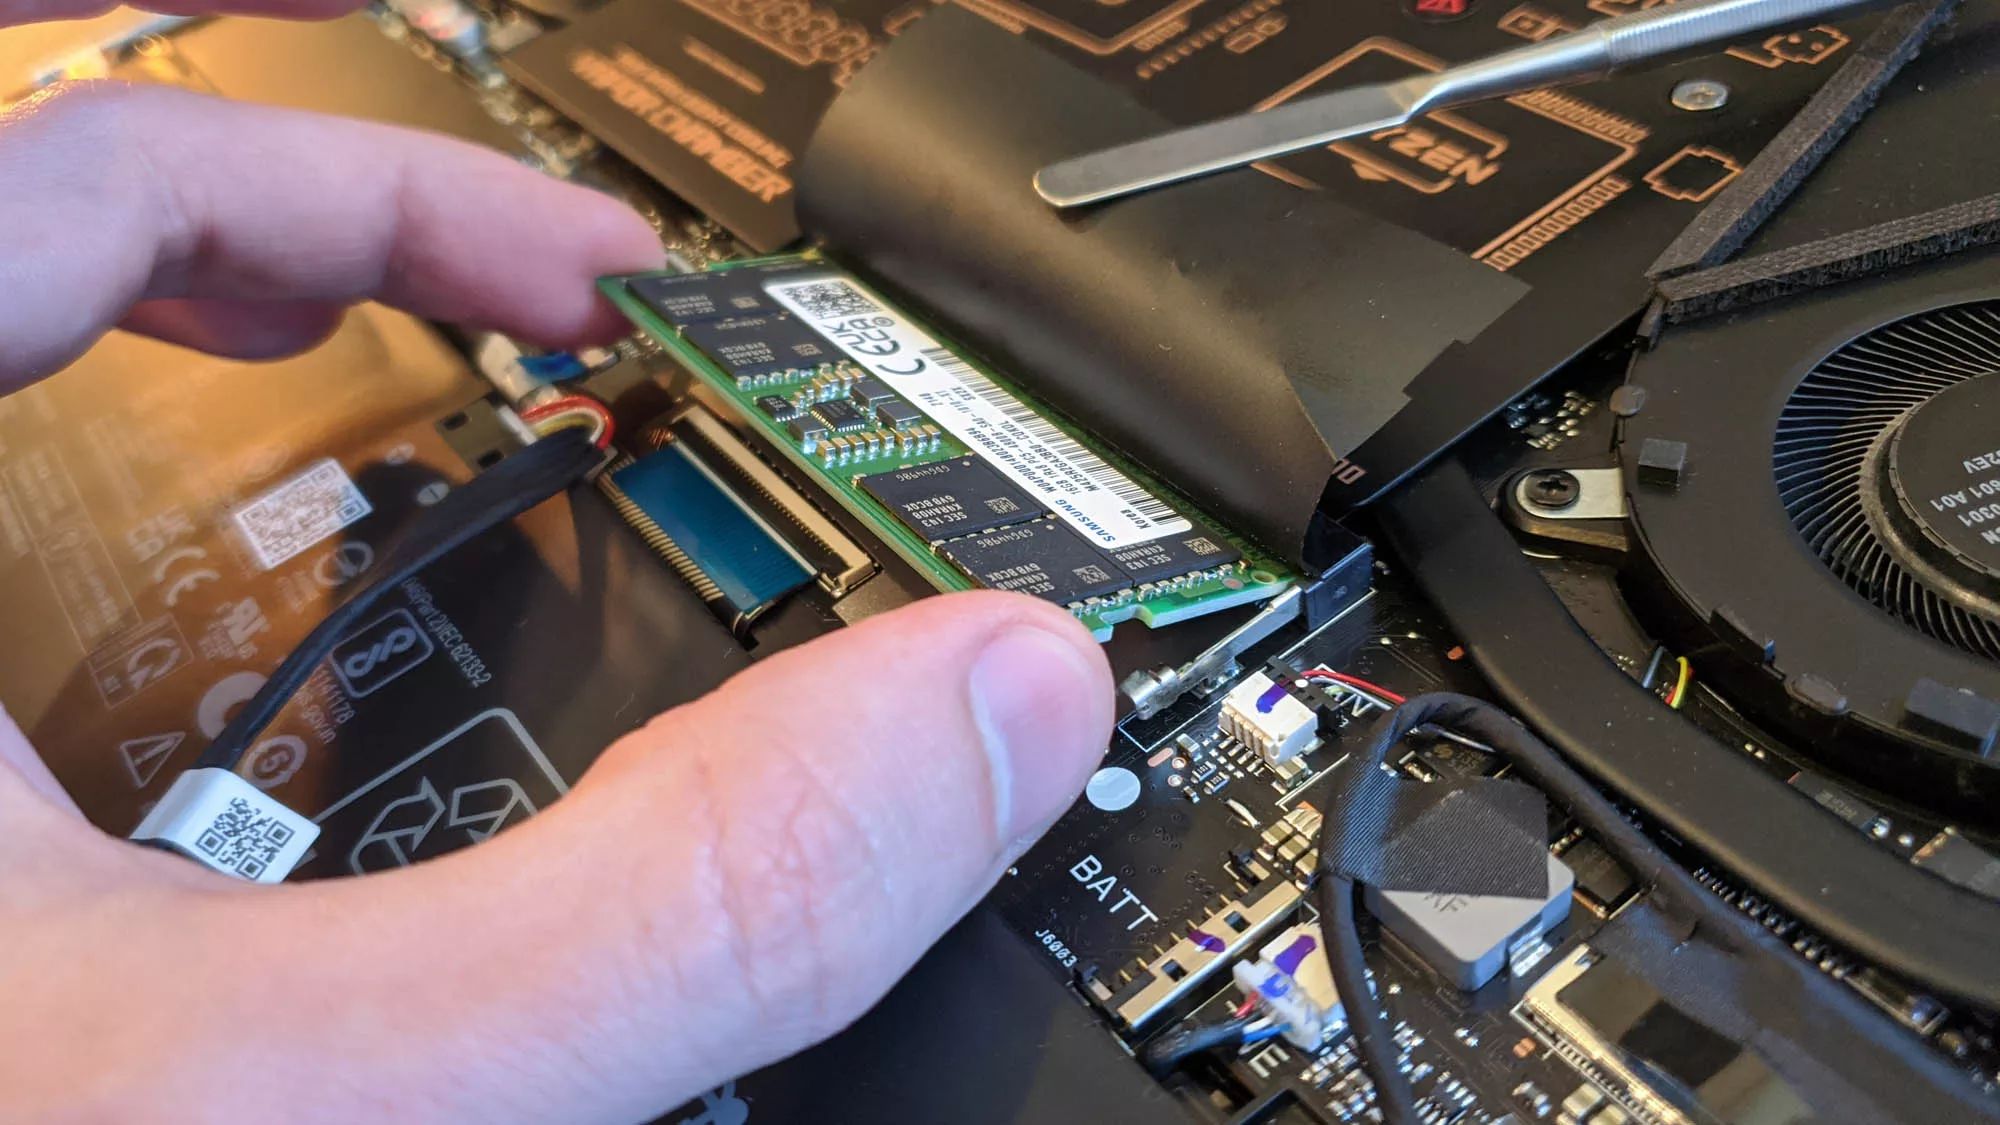
M.2 SSDs, on the other hand, are smaller and connect directly to the motherboard via an M.2 slot. They are becoming increasingly popular, especially in newer laptops that prioritize slim and lightweight designs. M.2 SSDs come in different lengths and widths, so make sure to check the size supported by your laptop.
Once you’ve determined the suitable form factor and interface, you’ll need to consider the capacity and performance of the SSD. SSDs come in various storage capacities, ranging from 120GB to multiple terabytes. Consider your storage needs and budget when choosing the capacity.
Performance-wise, SSDs with higher read and write speeds will generally provide faster boot times and application loading times. Look for SSDs with good sequential read and write speeds, as well as random read and write speeds, for optimal performance.
Before making a purchase, it’s always a good idea to read reviews and compare different SSD models. Pay attention to reliability, warranty, and user feedback to ensure you’re buying a high-quality SSD that will last for years to come.
Remember that SSD installation varies depending on the laptop model, so it’s crucial to consult your laptop’s user manual or manufacturer’s website to ensure compatibility. In some cases, you may need additional accessories, such as an adapter or bracket, to properly install the SSD.
Now that you have a better understanding of how to choose the right SSD for your laptop, you’re ready to move on to the next step: backing up your data.
Step 2: Back up all your data
Before proceeding with the SSD installation, it’s crucial to back up all your important data. This ensures that you won’t lose any files during the process.
There are several methods you can use to back up your data. One option is to manually copy your files to an external storage device, such as a USB flash drive or an external hard drive. Simply connect the storage device to your laptop and copy and paste the files you want to save.
Another option is to use cloud storage services, such as Google Drive, Dropbox, or OneDrive. These services allow you to upload your files to the cloud, ensuring that they’re safely stored and accessible from any device with an internet connection. Most cloud storage providers offer free storage plans, but if you have a large amount of data, you may need to upgrade to a paid plan.
If you prefer an automated backup solution, you can use backup software. There are plenty of reputable backup software options available, such as Acronis True Image, EaseUS Todo Backup, and Macrium Reflect. These tools allow you to schedule regular backups and restore your data easily in case of any unforeseen issues.
Regardless of the method you choose, make sure to back up all your personal files, documents, photos, and any other data that you want to keep. It’s better to be safe than sorry!
Once you’ve completed the backup process and double-checked that all your important data is securely saved, you can proceed to the next step: shutting down your laptop and removing the battery.
Step 3: Shut down your laptop and remove the battery
Now that you’ve backed up your data, it’s time to shut down your laptop and prepare it for the SSD installation process.
The first step is to save any open files or documents and close all running applications. This ensures that no active processes interfere with the installation process.
Next, click on the “Start” menu and select the “Shut Down” option to power off your laptop properly. Allow it a few moments to completely shut down before proceeding.
Once your laptop is powered down, you’ll need to locate and remove the battery. For most laptops, the battery is located on the bottom of the device and secured in place by one or more latches or screws. Refer to your laptop’s user manual or the manufacturer’s website for specific instructions on how to remove the battery.
If your laptop has a non-removable battery, you can skip this step and proceed to the next one. Just make sure your laptop is completely turned off before moving on.
Removing the battery ensures that there is no power running through the laptop while you’re performing the SSD installation. This minimizes the risk of electrical shock and protects both you and the laptop from any potential damage.
Once you’ve successfully shut down your laptop and removed the battery, you’re ready to move on to the next step: unscrewing and opening up the laptop case.
Step 4: Unscrew and open up the laptop case
With the laptop powered down and the battery removed, it’s time to open up the laptop case to gain access to the internal components.
As every laptop model is different, the exact process of opening the case may vary. However, the general steps remain consistent.
Start by flipping your laptop over and locating the screws that secure the bottom cover in place. There may be several screws, typically located along the edges of the case or underneath rubber pads that you’ll need to peel off gently. Use a small screwdriver that fits the screw heads, and carefully unscrew them.
Remember to keep track of the screws and their placement, as they may differ in size or length. Consider placing them in a small container or using a magnetic mat to prevent them from getting lost.
Once you’ve successfully removed all the screws, it’s time to pry open the laptop case. Use a plastic pry tool or a flathead screwdriver covered in a cloth to prevent scratching the case. Insert the tool into the small gaps between the top and bottom covers, and gently apply outward pressure to release the clips securing the case.
Work your way around the entire perimeter of the case, carefully freeing the clips one by one. Take your time and be patient to avoid damaging any internal components or breaking the clips.
Once the clips have been released, you should be able to separate the top and bottom covers of the laptop. However, be cautious as there may still be ribbon cables or connectors attached between the two parts. These need to be carefully disconnected before fully separating the case.
Refer to your laptop’s user manual or manufacturer’s website for specific guidance on disconnecting cables or connectors. Usually, they can be detached by gently pulling them straight out from their sockets or by releasing latches.
After disconnecting any necessary cables, you can completely remove the top cover and set it aside. Now you have full access to the internal components of your laptop, including the existing hard drive that you’ll be replacing with the SSD.
In the next step, we’ll guide you through locating the hard drive bay and removing the existing hard drive to make way for the SSD installation.
Step 5: Locate the hard drive bay and remove the existing hard drive
Now that you’ve opened up the laptop case, it’s time to locate the hard drive bay and remove the existing hard drive.
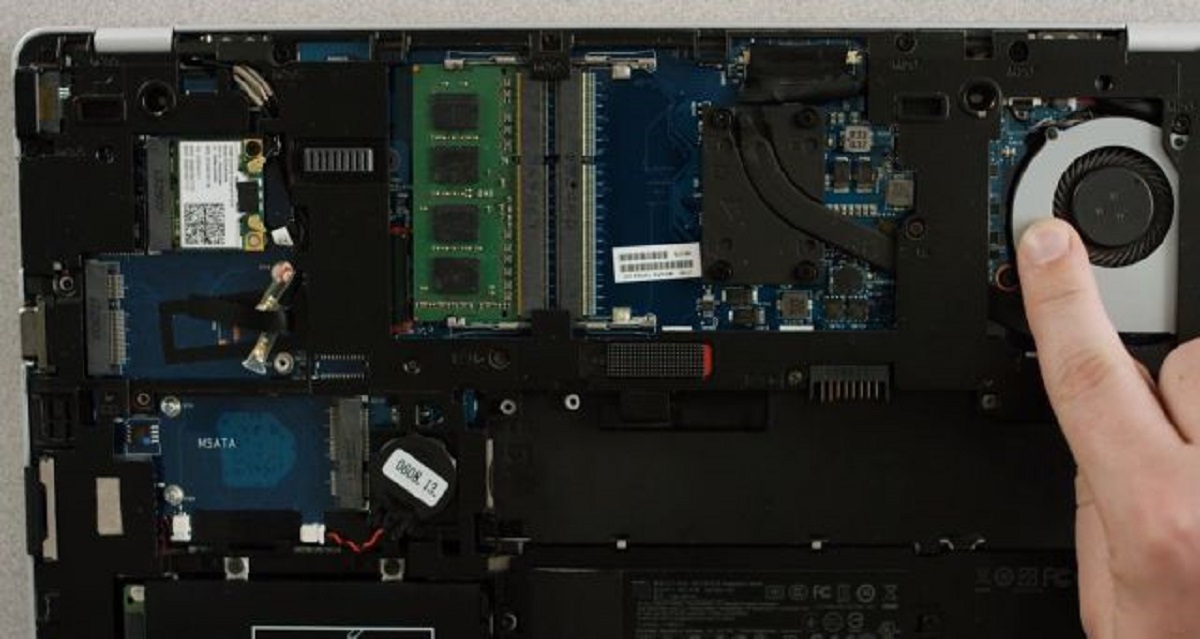
The hard drive bay is the area where the current hard drive is installed. It’s usually a small rectangular or square compartment specifically designed to hold the hard drive securely.
The location of the hard drive bay can vary depending on the laptop model. In most cases, it is positioned towards the bottom or side of the laptop, near the center or one of the corners. However, for certain laptop models, the hard drive bay may be located underneath the keyboard, requiring additional steps for access.
Locating the hard drive bay can be done by referring to your laptop’s user manual or manufacturer’s website, where you’ll find detailed instructions and diagrams specific to your model.
Once you’ve located the hard drive bay, you’ll need to carefully disconnect any cables or connectors attached to the current hard drive. These cables may include the data cable (SATA or M.2) and power cable. Refer to the user manual or manufacturer’s instructions to ensure you disconnect them correctly.
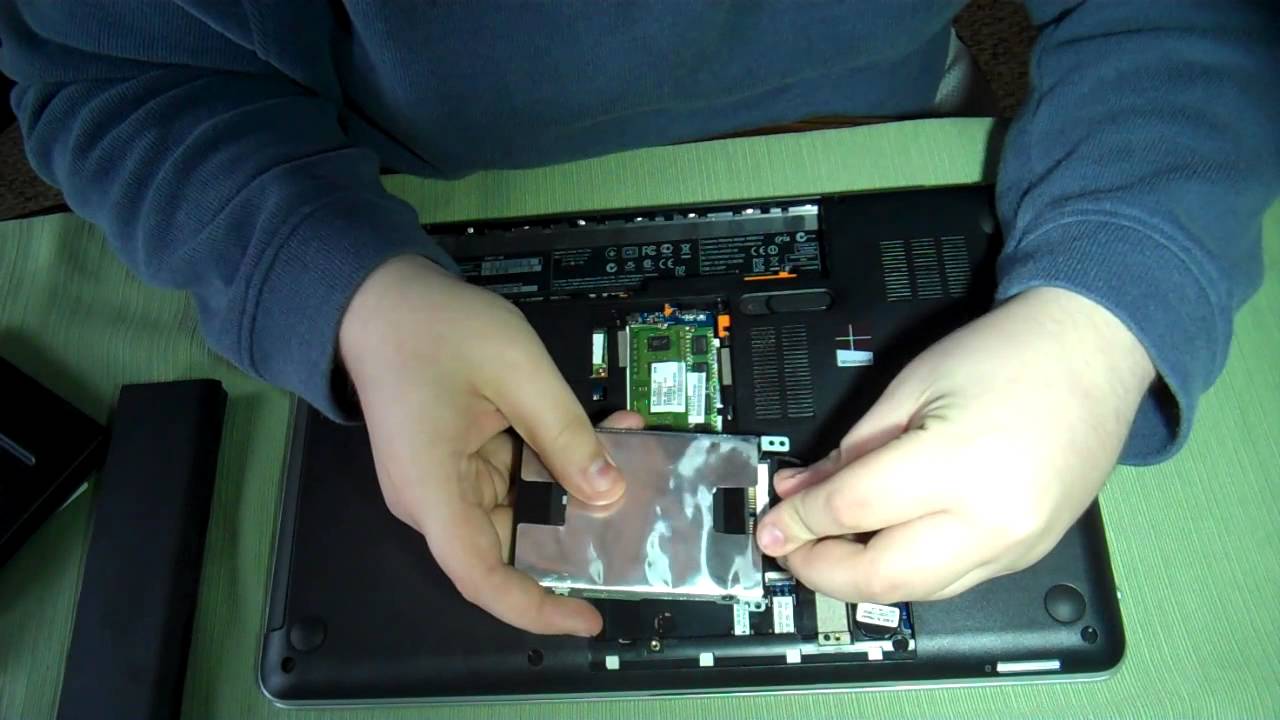
After disconnecting the cables, you’ll find the hard drive secured in place by screws or brackets. These can typically be removed using a small screwdriver or a suitable tool. Note the placement of screws and brackets to make reinstallation easier later on.
Gently remove the screws or brackets and carefully take out the existing hard drive from the bay. Set it aside in a safe place, as you may need it later for transferring data or as a backup storage device.
With the existing hard drive removed, you have made room for the installation of the new SSD. Before proceeding to the next step, ensure that the hard drive bay is clean and free from any dust or debris. This ensures proper installation and prevents any interference or damage to the SSD.
In the next step, we’ll guide you through the process of installing the SSD into the hard drive bay.
Step 6: Install the SSD into the hard drive bay
Now that you’ve removed the existing hard drive, it’s time to install the SSD into the hard drive bay.
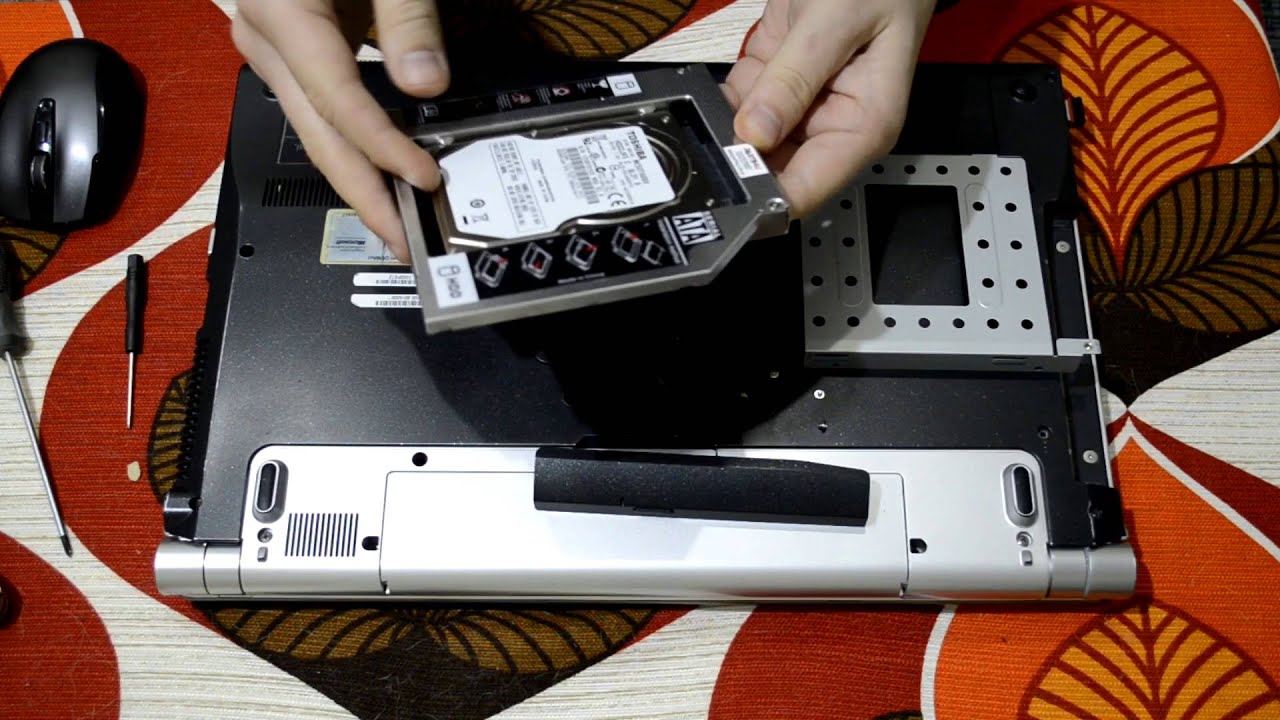
First, take your new SSD and carefully align it with the connectors in the hard drive bay. Pay attention to the orientation of the SSD, ensuring that the connectors on the SSD match the corresponding ports in the bay.
Once aligned, gently slide the SSD into the bay, applying even pressure until it is fully inserted. Be mindful not to force it in or use excessive pressure, as this could damage the SSD or the connectors.
Depending on your laptop model, the SSD may slide into a slot or fit onto a bracket within the bay. Some laptops may require you to secure the SSD with screws, brackets, or securing clips. Consult your laptop’s user manual or manufacturer’s instructions to determine the specific installation method.
If your SSD connects via a data cable, ensure that it securely plugs into the corresponding port. For SATA SSDs, this would be a SATA data connector, while M.2 SSDs insert directly into the M.2 slot.
Likewise, if your SSD requires a power connection, ensure that it is properly connected. This may involve plugging in a power cable or securely attaching the appropriate power connector to the SSD.
Double-check that the SSD is firmly seated in the bay and that all connections are secure. The SSD should be in a stable position with no loose parts or cables.
Before proceeding to the next step, take a moment to verify that the SSD installation is complete and that everything is properly connected and secured. This ensures a smooth installation process and avoids any complications down the line.
Now that the SSD is successfully installed into the hard drive bay, you’re ready to move on to securing the SSD in place in the next step.
Step 7: Secure the SSD in place
After installing the SSD into the hard drive bay, the next step is to secure it properly to ensure it stays in place during use.
Depending on your laptop model, there are various ways to secure the SSD. Some laptops have specific brackets or trays designed to hold the SSD securely in the bay, while others may require the use of screws or securing clips.
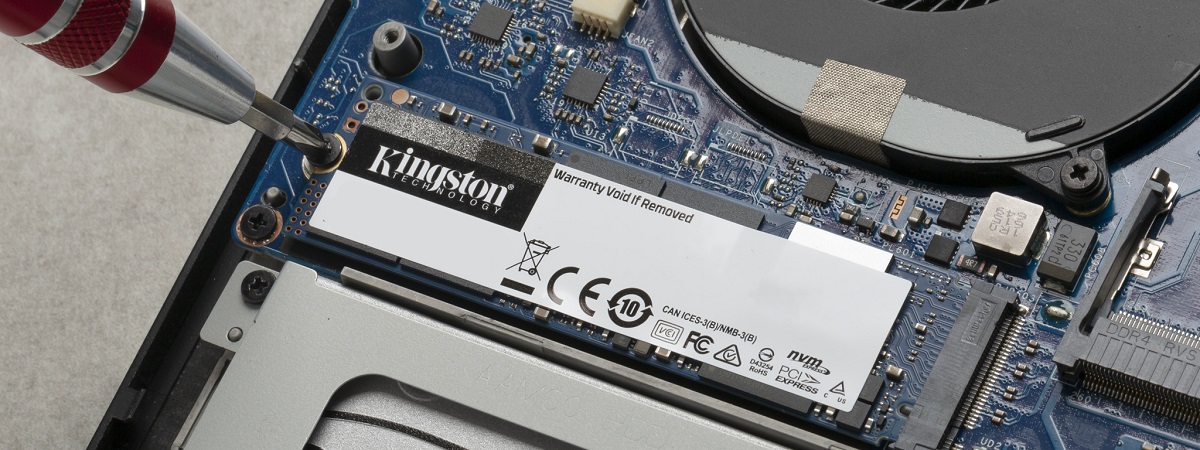
If your laptop has a bracket or tray, carefully align the SSD with the corresponding screw holes or slots on the bracket. Once aligned, insert the screws into the holes and tighten them evenly to secure the SSD in place. Take care not to overtighten the screws as this may damage the SSD or the bracket.
If your laptop doesn’t have a specific bracket or tray, you may need to use screws or securing clips to secure the SSD directly to the hard drive bay. Refer to your laptop’s user manual or manufacturer’s instructions for guidance on the appropriate method.
When using screws, align the holes on the SSD with the corresponding holes on the hard drive bay. Insert the screws and tighten them evenly until the SSD is firmly secured. Again, be cautious not to overtighten the screws.
Alternatively, securing clips can be used to hold the SSD in place. These clips may need to be attached to the SSD or the hard drive bay, depending on your laptop’s design. Carefully follow the instructions provided by the manufacturer to properly secure the SSD using clips.
Once the SSD is securely fastened, give it a gentle shake or tap to ensure that it doesn’t move or rattle within the hard drive bay. If it feels loose, double-check your installation and make any necessary adjustments to properly secure the SSD.
Confirm that all connections are still intact and that the SSD is in the correct position. Take a moment to inspect the overall setup and ensure that everything is properly aligned and secured.
By properly securing the SSD in place, you minimize the risk of any movement or disconnection during use, ensuring reliable and stable performance.
In the next step, we’ll guide you through closing up the laptop case and screwing it back together.
Step 8: Close up the laptop case and screw it back together
With the SSD securely installed, it’s time to close up the laptop case and screw it back together. This step ensures that all the internal components are protected and properly secured.
Begin by aligning the top cover of the laptop with the bottom cover. Take care to match any tabs, connectors, or screw holes present on both pieces.
Gently press the top cover down onto the bottom cover, applying even pressure along the edges. Ensure that the two pieces fit together snugly and that there are no gaps or misalignments.
Once the top and bottom covers are aligned, it’s time to screw them back together. Locate the screw holes on the bottom cover that correspond to the screw holes on the top cover.
Begin by inserting one screw into a hole, but refrain from fully tightening it. Instead, loosely screw it in place. Repeat this process for all the remaining screws, ensuring each screw is initially tightened partially.
Once all the screws have been inserted and lightly tightened, go back and tighten each screw fully, but be careful not to overtighten as it may damage the laptop’s casing or strip the screw threads. Begin with the center screws and work your way out towards the corners.
As you tighten the screws, periodically check the alignment of the laptop case to ensure it remains flush and properly aligned. Make any necessary adjustments before fully tightening all the screws.
Finally, perform a visual inspection to ensure all screws are securely fastened, and double-check that nothing is obstructing the case or the SSD. The laptop case should be secure and tightly closed without any loose or protruding parts.
Once you’re confident that the laptop case is secure, give the laptop a gentle shake or tap to confirm that there are no rattling or loose components inside.
By properly closing up the laptop case and screwing it back together, you’re ensuring the internal components, including the newly installed SSD, stay protected and secure during use.
In the next step, we’ll guide you through replacing the battery and powering on your laptop with the newly installed SSD.
Step 9: Replace the battery and power on your laptop
Now that you’ve closed up the laptop case, it’s time to put the finishing touches on the installation by replacing the battery and powering on your laptop.
If you removed the laptop’s battery earlier, carefully slide it back into its designated compartment. Ensure that it is inserted in the correct orientation and fully seated. Press down gently on the battery until it clicks into place or is securely held by any latches or locks.
If your laptop has a non-removable battery, you can skip this step and proceed to powering on your laptop.
Once the battery is in place, connect the power adapter to your laptop and plug it into a power source. This ensures that your laptop has a stable power supply during the startup process.
Now, press the power button to boot up your laptop. The power button is usually located somewhere on the keyboard or near the edge of the laptop. Press and hold the button for a few seconds until the laptop powers on.
During the startup process, the laptop may take a little longer than usual to boot up as it detects the new hardware, specifically the newly installed SSD. This is normal and should only happen the first time you boot up your laptop after the installation.
If your laptop successfully boots up and you see the operating system’s login screen or desktop, congratulations! Your laptop is now powered on and running with the newly installed SSD.
To further ensure that the SSD is recognized and functioning properly, you can head to your operating system’s disk management utility. This will allow you to verify that the SSD is detected and allocate any necessary formatting or initialization that may be required.
With the battery replaced and your laptop powered on, you can now enjoy the benefits of your upgraded laptop with improved performance and faster data access. Congratulations on successfully completing the installation!
In the next step, we’ll guide you through the process of formatting and initializing the SSD for use.
Step 10: Format and initialize the SSD
Now that your laptop is powered on with the newly installed SSD, it’s important to format and initialize the SSD to ensure it is ready for use.
Formatting and initializing the SSD involves preparing it for your operating system to recognize and utilize it as a storage device. The exact process may vary depending on your operating system, so we’ll provide general guidance here.
In Windows, you can format and initialize the SSD using the Disk Management utility. To access this utility, right-click on the “Start” button and select “Disk Management” from the menu. Find the SSD in the list of drives displayed and take note of its disk number.
Right-click on the SSD and choose the “Format” option. Select the desired file system (such as NTFS) and provide a name for the new volume or partition. Follow the prompts to complete the formatting process.
Once the SSD is formatted, it’s time to initialize it. Right-click on the SSD again and choose the “Initialize Disk” option. Select the appropriate disk type (usually “MBR” or “GPT”) and follow any additional instructions provided.
After initializing the SSD, it should be recognized by your operating system and ready for use. You can now assign a drive letter to the SSD to make it easily accessible in File Explorer.
If you’re using a Mac, you can format and initialize the SSD through the Disk Utility. Launch Disk Utility from the Applications folder or by searching for it in Spotlight. Select the SSD from the list of drives and choose the “Erase” option.
In the formatting window, select the desired file system (such as APFS or Mac OS Extended) and provide a name for the drive. Click on the “Erase” button to begin the formatting process.
Once the formatting is complete, the SSD will be ready to use. You can now close the Disk Utility and start using your SSD.
Keep in mind that formatting and initializing the SSD will erase any existing data on it. Therefore, make sure you have backed up all necessary files before proceeding.
With the SSD formatted and initialized, it’s now fully recognized by your operating system and ready to provide fast and reliable storage for your laptop.
In the next step, we’ll guide you through the process of restoring your data from the backup to the newly installed SSD.
Step 11: Restore your data from the backup
Now that you have a freshly formatted and initialized SSD, it’s time to restore your data from the backup you created earlier.
The exact method of restoring your data will depend on how you backed it up. Here are a few common methods:
Manual Backups: If you manually copied your files to an external storage device, simply connect the device to your laptop, open the storage device, and copy the files back to their original locations on the SSD. You can use File Explorer on Windows or Finder on Mac to navigate the file system and drag and drop the files.
Cloud Storage: If you used a cloud storage service, such as Google Drive or Dropbox, simply sign in to the service on your laptop and download the files you backed up. Most cloud storage services have desktop applications that sync your files automatically, making it a seamless process.
Backup Software: If you used backup software to create an automated backup, open the software and follow the steps to restore your data. This typically involves selecting the backup you want to restore from and specifying the location to restore the files to on the SSD.
Regardless of the method you used, take your time to ensure that all important files and data are properly restored. Double-check folders, documents, photos, and any other files that are crucial to your workflow or personal use.
If you encounter any issues while restoring your data or if some files are missing, refer to your backup method’s documentation or support resources for guidance on troubleshooting and recovering the files. Additionally, you can reach out to the software or service provider for assistance.
Once you’ve confirmed that all your data has been successfully restored to the SSD, take a moment to organize your files and ensure everything is in its proper place. This will help you maintain a more organized and efficient workflow going forward.
Congratulations! You have now completed the process of restoring your data to the newly installed SSD. Your laptop is now ready to deliver faster performance and improved storage capabilities.
In the final step, we’ll provide some troubleshooting tips for common issues that may arise during or after the installation process.
Step 12: Troubleshooting common issues
Although SSD installation is generally a straightforward process, there may be some common issues that you might encounter. Here are a few troubleshooting tips to help you resolve these problems:
SSD Not Detected: If your SSD is not being recognized by your laptop, double-check the connections. Ensure that the data cable or M.2 slot is securely connected to the SSD. Additionally, verify that the SSD is properly installed in the hard drive bay and all connections are secure.
Compatibility Issues: If you’re experiencing compatibility issues, make sure that the SSD you chose is compatible with your laptop. Double-check the form factor and interface requirements of your laptop and compare them to the specifications of the SSD. Consult your laptop’s user manual or the manufacturer’s website for compatibility information.
Data Transfer Issues: If you’re facing difficulties transferring your data from the backup to the SSD, ensure that the backup files are intact and accessible. Double-check that you’re using the correct method to restore your data, whether it’s manual copying, cloud storage, or backup software. If necessary, consult the documentation or seek support from the backup software or service provider.
Performance Issues: If you notice slower performance or limited capacity on your SSD, check if you have properly formatted and initialized the drive. Confirm that the correct file system and partition settings are selected during the formatting process. Additionally, ensure that your laptop’s BIOS and SSD firmware are up to date, as outdated firmware can impact performance.
Hardware Damage: If you encounter any physical damage during the installation process, such as broken connectors or bent pins, it’s important to seek professional assistance. Contact your laptop manufacturer’s customer support or take your laptop to a certified technician who can assess and repair the damage.
Remember, if you’re unsure about any aspect of the installation process or troubleshooting the issues, it’s always a good idea to seek guidance from professionals or consult the support resources provided by the manufacturer of your laptop or SSD.
By following these troubleshooting tips, you can overcome common issues that may arise during or after the SSD installation process. With persistence and patience, you’ll be able to enjoy the benefits of your newly installed SSD without any hindrances.
Well done! You’ve successfully completed the installation process and troubleshooting. Enjoy the improved speed and performance of your laptop with the newly installed SSD!
Conclusion
Congratulations on successfully installing an SSD into your laptop! By following the steps outlined in this guide, you have transformed your laptop into a more efficient and powerful machine. The faster boot times, improved application loading speeds, and enhanced responsiveness provided by the SSD will greatly enhance your overall computing experience.
Throughout the installation process, you learned how to choose the right SSD for your laptop, back up your data, shut down your laptop and remove the battery, unscrew and open up the laptop case, locate the hard drive bay and remove the existing hard drive, install the SSD into the hard drive bay, secure the SSD in place, close up the laptop case and screw it back together, replace the battery and power on your laptop, format and initialize the SSD, restore your data from the backup, troubleshoot common issues, and overcome hurdles that may arise along the way.
Remember, patience and attention to detail are key when performing an SSD installation. Take your time, follow the instructions carefully, and refer to your laptop’s user manual or manufacturer’s website whenever necessary.
With your newly installed SSD, your laptop’s performance has received a significant boost. Enjoy the improved speed and efficiency and take full advantage of the increased storage capabilities. Don’t forget to periodically check for firmware updates for your SSD to ensure optimal performance and compatibility.
If you found this guide helpful, please feel free to share it with others who may also benefit from upgrading their laptops with an SSD installation. By spreading the knowledge, we can help more people enhance their computing experience.
Thank you for choosing this guide to assist you in installing an SSD into your laptop. May your laptop now soar to new heights with the power of solid-state storage!


