Introduction
Welcome to the world of web development! If you’re eager to get started on building your own websites or applications, you’ll need to have the right tools in place. One crucial tool that you’ll need is npm. Npm, which stands for Node Package Manager, is an essential component of the Node.js ecosystem and it enables you to easily manage and install packages and dependencies for your projects.
In this article, we’ll guide you through the process of installing npm in Windows. Whether you’re new to programming or a seasoned developer, this step-by-step guide will help you get npm up and running on your Windows machine in no time. So, let’s dive in!
Before we get started, it’s essential to ensure that you have a few prerequisites in place to make the installation process seamless. Firstly, make sure you have a Windows operating system installed on your machine. Additionally, you’ll need administrative access to your computer as we’ll be making system-level changes. Finally, being familiar with basic command line usage will be advantageous, although not required.
Now that we have the prerequisites covered, let’s move on to the installation process. We’ll break it down into four simple steps, taking you from downloading Node.js to verifying the installation.
Prerequisites
Before we proceed with the installation of npm on Windows, there are a few prerequisites you need to have in place. These prerequisites will ensure a smooth installation process. Here’s what you’ll need:
- Windows Operating System: Ensure that you have a Windows operating system installed on your machine. Npm is compatible with Windows 7, Windows 8, Windows 10, and their respective server variants.
- Administrative Access: You’ll need administrative access to your computer to install npm. Being an administrator allows you to make system-level changes that are necessary for the installation process.
- Node.js: Npm is bundled with Node.js, so you’ll need to have Node.js installed on your machine. If you haven’t installed Node.js yet, don’t worry. Our next step will guide you through the process.
Having these prerequisites in place will ensure that the installation process goes smoothly and without any hiccups. Once you have them covered, you’re now ready to move on to the next step, which is downloading Node.js.
Step 1: Download Node.js
The first step in installing npm on Windows is to download Node.js. Npm is bundled with Node.js, so by installing Node.js, you’ll automatically have npm installed on your system. Here’s how you can download Node.js:
- Visit the official Node.js website at https://nodejs.org/en/download/.
- On the downloads page, you’ll see two versions available for download: LTS (Long-Term Support) and Current. It’s recommended to download the LTS version as it provides stability and widespread community support.
- Choose the appropriate Windows installer based on your system architecture (32-bit or 64-bit). If you’re unsure about your system architecture, you can check it by right-clicking on the ‘This PC’ or ‘My Computer’ icon on your desktop and selecting ‘Properties’.
- Once you click on the installer, the download will begin.
- After the download is complete, navigate to the location where the installer file was saved and double-click on it to run the installer.
- Follow the installation wizard’s instructions to install Node.js. You can keep the default settings during the installation process.
- Once the installation is complete, you’ll have Node.js and npm installed on your Windows machine.
Congratulations! You’ve successfully downloaded and installed Node.js, which also includes npm. With Node.js installed, you’re now ready to move on to the next step, which is running the installer.
Step 2: Run the Installer
Now that you have downloaded Node.js, it’s time to run the installer and complete the installation process. The installer will guide you through the necessary steps to set up Node.js and npm on your Windows machine. Here’s how you can run the installer:
- Locate the Node.js installer file that you downloaded in the previous step.
- Double-click on the installer file to run it. This will launch the Node.js installation wizard.
- Review the license agreement and click on the “Next” button to proceed.
- Choose the destination folder where you want Node.js to be installed. It’s recommended to keep the default location.
- Select the components you want to install. By default, Node.js and npm will be selected. You can also choose to install additional tools if required.
- Choose the Start Menu folder where shortcuts for Node.js will be created. You can keep the default name or customize it as per your preference.
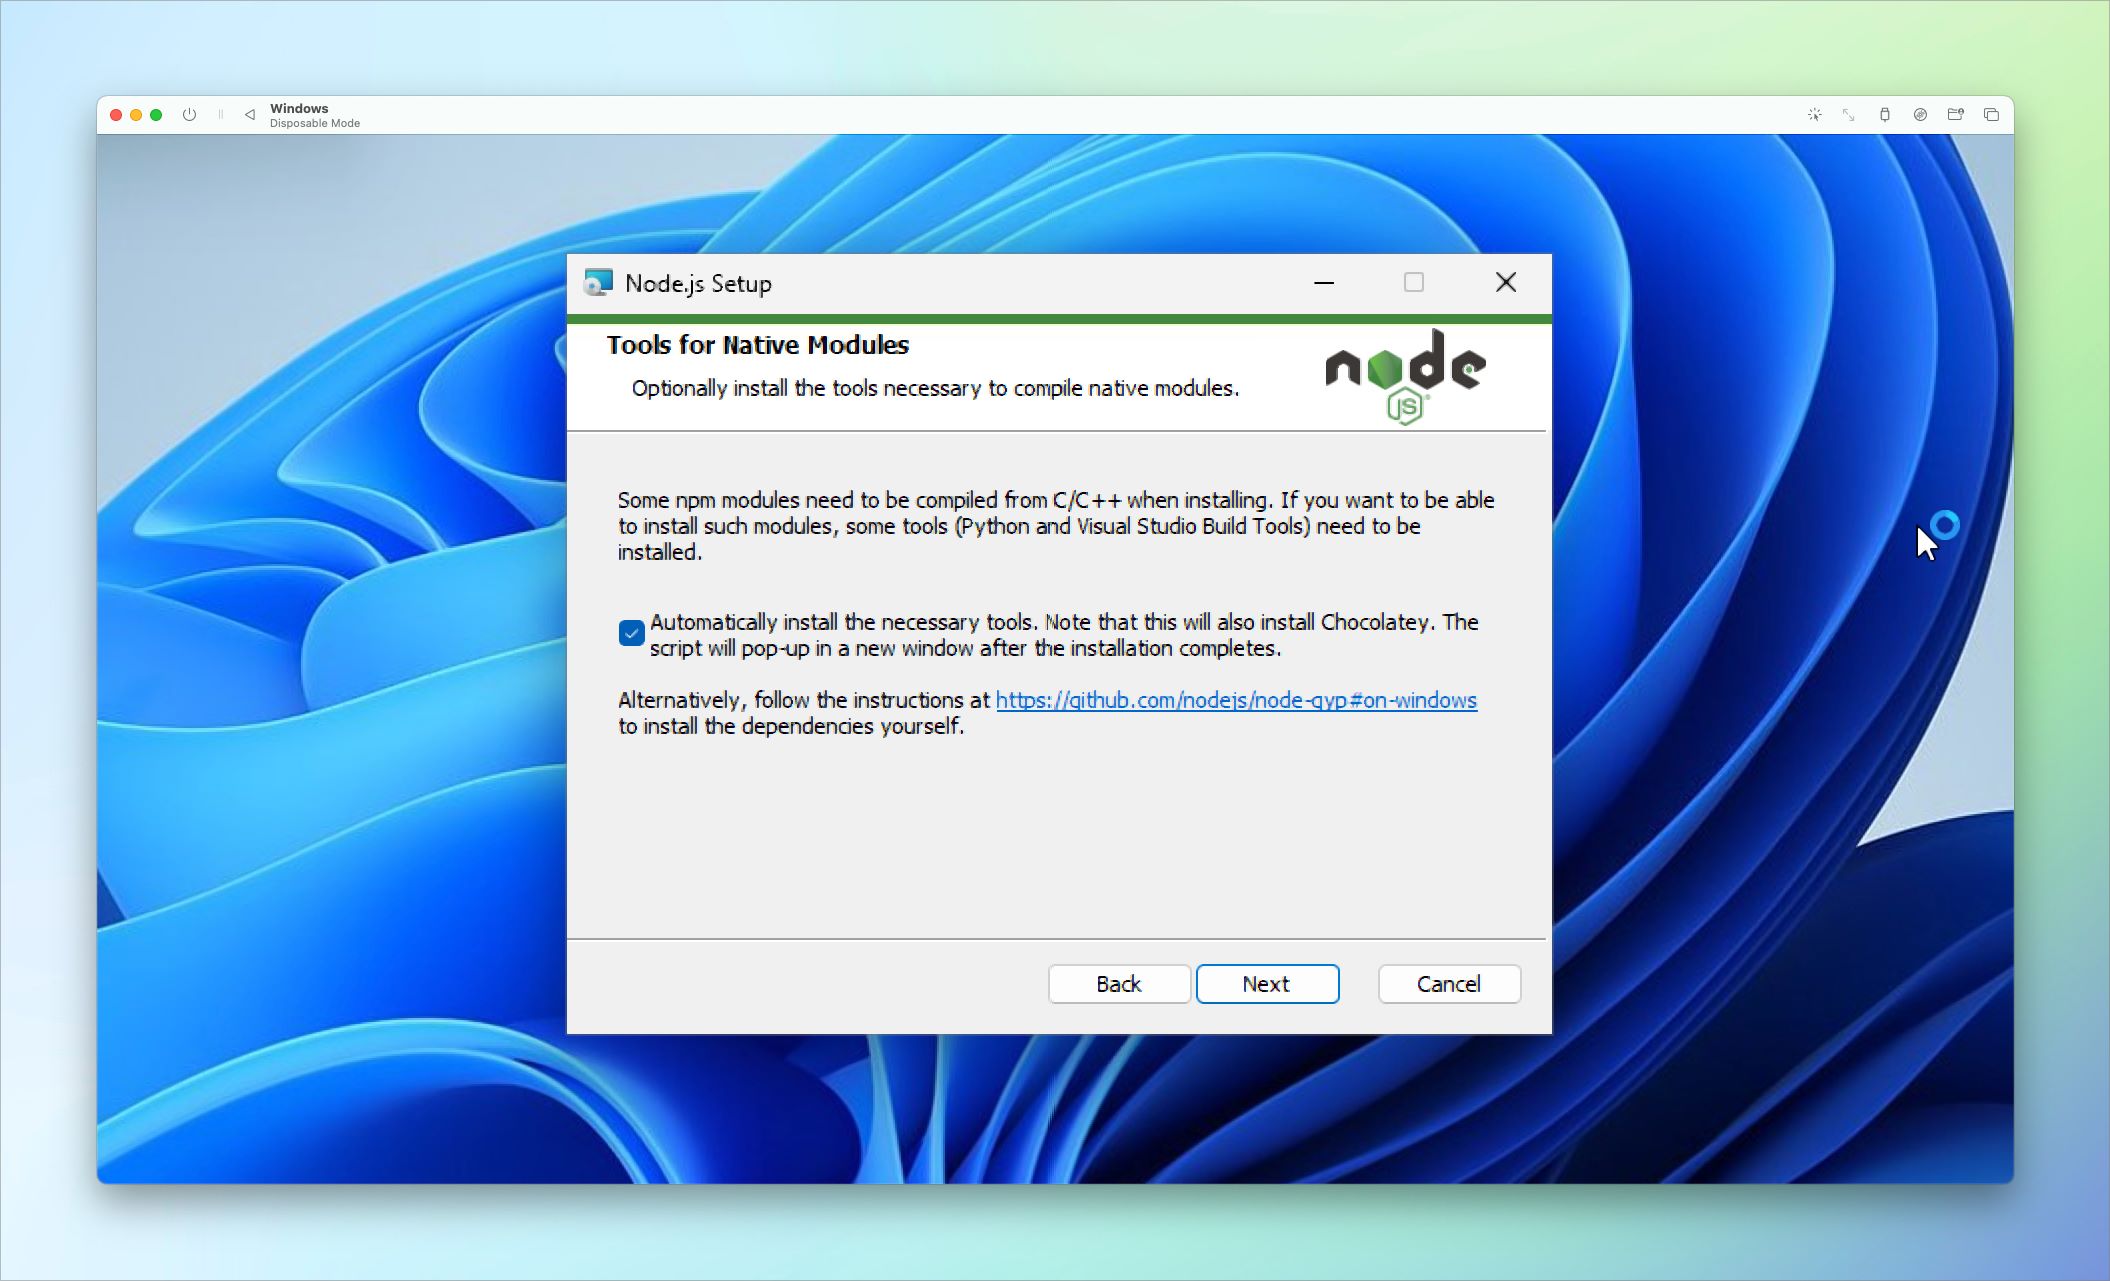
- Specify whether you want to automatically install necessary tools or manually configure them later. Select the option that suits your needs.
- Review the summary of your selections and click on the “Install” button to start the installation process.
- Wait for the installation to complete. This may take a few minutes.
- Once the installation is finished, you’ll see a “Completed” status. Click on the “Next” button to exit the installer.
That’s it! You have successfully run the Node.js installer and completed the installation process. Node.js and npm are now installed on your Windows machine. In the next step, we’ll see how you can configure the npm cache folder (optional) to customize its behavior.
Step 3: Configure the Npm Cache Folder (Optional)
By default, npm uses a cache folder to store downloaded packages and their dependencies. This cache folder helps to improve the installation and update process by allowing npm to use locally stored packages instead of downloading them again. However, you have the option to configure the npm cache folder to a different location if desired. Here’s how you can do it:
- Open the command prompt by pressing the Windows key + R and typing “cmd” in the Run dialog. Press Enter to open the command prompt.
- In the command prompt, type the following command and press Enter:
npm config get cache - This command will display the current cache folder path on your system.
- If you want to change the cache folder location, type the following command and press Enter:
npm config set cache <new cache folder path> - Replace <new cache folder path> with the desired path for the new cache folder.
- For example, if you want to set the cache folder to a folder named “npm-cache” in your user directory, the command would look like this:
npm config set cache C:\Users\YourUserName\npm-cache - After running the command, npm will use the specified folder as the cache folder for downloaded packages.
Note that configuring the npm cache folder to a different location is optional, and the default location should work fine for most users. However, if you want to customize the cache folder location, these steps will guide you through the process.
Now that you have successfully configured (or chosen to keep the default) the npm cache folder, you’re ready for the final step: verifying the installation. Let’s proceed to the next section to ensure everything is set up correctly.
Step 4: Verify the Installation
After completing the installation process of npm on Windows, it’s crucial to verify that it was successful. This will ensure that npm is functioning correctly and ready for use in your web development projects. Here’s how you can verify the installation:
- Open the command prompt by pressing the Windows key + R and typing “cmd” in the Run dialog. Press Enter to open the command prompt.
- In the command prompt, type the following command and press Enter:
npm -v - This command will display the version of npm installed on your system. If you see a version number, it means npm is installed and functioning properly.
- You can also verify the installation of Node.js by typing the following command and pressing Enter:
node -v - This command will display the version of Node.js installed on your system. If you see the version number, it means Node.js is installed successfully.
- Additionally, you can test npm by creating a sample project. Navigate to a directory where you want to create the project using the command prompt and run the command:
npm init - Follow the prompts to create a new npm project. Once the project is initialized, you can see a new
package.jsonfile in your project’s directory. - If you’re able to create a new project with npm without any errors, it means the installation and configuration of npm were successful.
By following these steps, you can easily verify that npm and Node.js are installed correctly on your Windows machine. If you encounter any issues during the verification process, make sure you’ve followed the installation steps accurately and consider checking the official documentation for troubleshooting assistance.
Congratulations! You have successfully installed and verified the installation of npm on your Windows machine. You’re now ready to start utilizing the power of npm for managing packages and dependencies in your web development projects.
Conclusion
Congratulations! You have successfully installed npm on your Windows machine. With npm up and running, you now have the power to manage packages and dependencies for your web development projects with ease. By following the step-by-step guide in this article, you have acquired the necessary knowledge to set up and verify the npm installation.
Remember, npm is an essential tool in the Node.js ecosystem and is widely used by developers worldwide. It allows you to easily install and manage libraries, frameworks, and other reusable code packages, making your development process more efficient and productive.
Throughout the installation process, you have learned how to download Node.js, run the installer, configure the npm cache folder (optional), and verify the installation. These steps ensure that npm is ready to use with your projects, providing a solid foundation for your web development journey.
Now that you have npm installed, feel free to explore the vast npm registry with thousands of packages available for your projects. You can also create your own packages and share them with the community, contributing to the open-source ecosystem.
Remember to keep your npm installation up to date by regularly checking for updates and installing the latest version when available. This will ensure that you have access to the latest features, bug fixes, and security patches.
Thank you for following this guide on installing npm in Windows. We hope you found it helpful and informative. Happy coding!