Introduction
Welcome to our step-by-step guide on how to install the Mz-Rpa2560/0S0 Solid State Drive (SSD) to your computer. Upgrading to an SSD can significantly enhance the performance and speed of your system, allowing for faster boot times, improved data transfer rates, and quicker access to applications and files. Whether you are a tech enthusiast or a beginner, this guide will provide you with the necessary instructions to successfully install your new SSD.
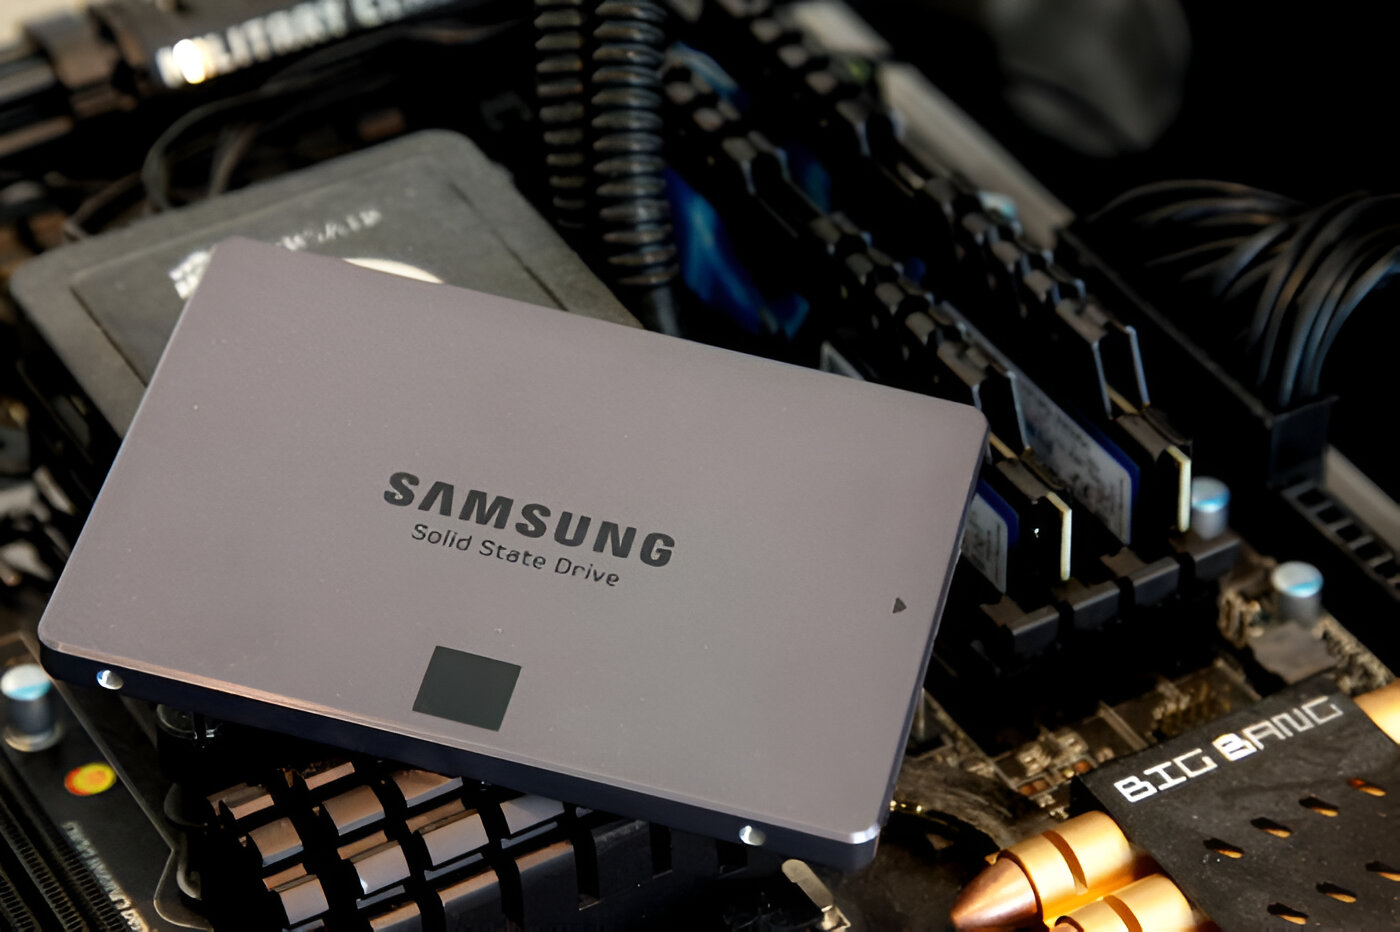
SSDs have become increasingly popular in recent years due to their numerous advantages over traditional hard drives. Unlike hard drives, SSDs utilize flash memory technology to store and retrieve data, resulting in faster read and write speeds and improved durability. The Mz-Rpa2560/0S0 SSD is known for its exceptional performance, reliability, and storage capacity, making it an excellent choice for upgrading your computer.
Before diving into the installation process, it’s important to note that this guide assumes you have a basic understanding of computer hardware and are comfortable working with the internal components of your system. If you are uncertain or hesitant, it is always recommended to seek the assistance of a professional to avoid any potential damage to your computer.
In the following steps, we will guide you through the process of gathering the necessary tools and materials, preparing your computer for the SSD installation, removing the old hard drive (if applicable), installing the Mz-Rpa2560/0S0 SSD, connecting it to the motherboard, securing it in place, reassembling your computer, and finally installing the operating system and optimizing the SSD for optimal performance.
Let’s get started with the first step: gathering the required tools and materials.
Step 1: Gather the required tools and materials
Before you begin the installation process, it’s important to gather all the necessary tools and materials. Having everything prepared in advance will help streamline the installation and ensure a smooth progression. Here’s a list of items you will need:
- Phillips screwdriver: A small to medium-sized Phillips screwdriver will be needed to remove and secure screws during the installation process.
- Anti-static wristband: This optional but highly recommended accessory helps prevent electrostatic discharge (ESD) from damaging sensitive components. It’s particularly useful if you are working in a static-prone environment.
- SSD mounting bracket or adapter: Depending on your system, you may need a mounting bracket or adapter to secure the Mz-Rpa2560/0S0 SSD in the available drive bay. Check your computer’s specifications to determine if an adapter is necessary.
- SATA cable: You will need a SATA cable to connect the SSD to the motherboard. Ensure you have a spare SATA cable available, or consider purchasing one if needed.
- SATA power connector: The SSD will require power, so make sure you have an available SATA power connector from your power supply unit (PSU).
- SSD cloning software (optional): If you are replacing your existing hard drive with the SSD, you may want to clone your data and operating system to the new drive. In this case, you will need SSD cloning software. This step is optional but recommended to preserve your data.
By gathering these tools and materials beforehand, you will be fully prepared to tackle the installation process without any interruptions or delays. Once you have everything ready, you can move on to the next step: preparing your computer for the SSD installation.
Step 2: Prepare the computer for SSD installation
Before installing the Mz-Rpa2560/0S0 SSD, it’s crucial to properly prepare your computer to ensure a successful installation. Here are the steps to follow:
- Backup your data: It’s always a good practice to back up your important files and data before making any hardware changes to your computer. This ensures that if anything goes wrong during the installation process, your data will remain safe.
- Power down your computer: Shut down your computer and unplug it from the power source. This will prevent any electrical hazards and protect your system from accidental damage.
- Open the computer case: Depending on your computer model, you may need to remove a side panel or access panel to gain access to the internal components. Refer to your computer’s documentation or look for online resources for specific instructions on how to open your particular computer case.
- Locate an available drive bay: Identify an available drive bay where you can install the Mz-Rpa2560/0S0 SSD. Most modern cases have dedicated 2.5-inch SSD mounting points or slots. If your case does not have this feature, you may need to use a mounting bracket or adapter to secure the SSD.
- Identify the SATA ports on the motherboard: Locate the SATA ports on your motherboard. These will be used to connect the SSD to the motherboard. Usually, SATA ports are color-coded, with SATA 6Gbps ports being a faster option. Consult your motherboard’s user manual to identify the exact location of the SATA ports.
- Ensure available power connections: Check if your power supply unit (PSU) has an available SATA power connector. The SSD will require power, so make sure you have a spare cable available to connect it.
- Ground yourself: To prevent electrostatic discharge (ESD) from damaging your components, it’s important to ground yourself before handling any internal parts. You can do this by wearing an anti-static wristband or by touching a metal surface on the case.
By following these steps, you will ensure that your computer is properly prepared for the installation of the Mz-Rpa2560/0S0 SSD. Once you have completed these preparations, you are ready to move on to the next step: removing the old hard drive (if applicable).
Step 3: Remove the old hard drive
If you are replacing your old hard drive with the Mz-Rpa2560/0S0 SSD, you will need to remove the old drive from your computer. Before proceeding, make sure you have backed up any important data from the old hard drive. Here’s how to remove the old hard drive:
- Locate the old hard drive: Identify the location of the old hard drive inside your computer case. It is typically mounted in a drive bay or secured with screws.
- Disconnect the necessary cables: Carefully unplug the SATA data cable and power connector from the back of the old hard drive. Take note of how the cables are connected so you can easily reconnect them later.
- Remove any mounting screws: If the old hard drive is secured with mounting screws, use a screwdriver to remove them. Keep the screws in a safe place for later use, if needed. Some drive bays may also have tool-less mechanisms that require releasing a latch or sliding mechanism to remove the drive.
- Slide or lift out the old hard drive: Once all the cables and screws are disconnected, carefully slide or lift out the old hard drive from the drive bay. Be gentle and avoid any sudden movements to prevent damage to the drive or other components.
Once you have successfully removed the old hard drive, set it aside in a safe place or consider securely erasing the data before disposing of it. Now that the old drive has been removed, you are ready to proceed to the next step: installing the Mz-Rpa2560/0S0 SSD.
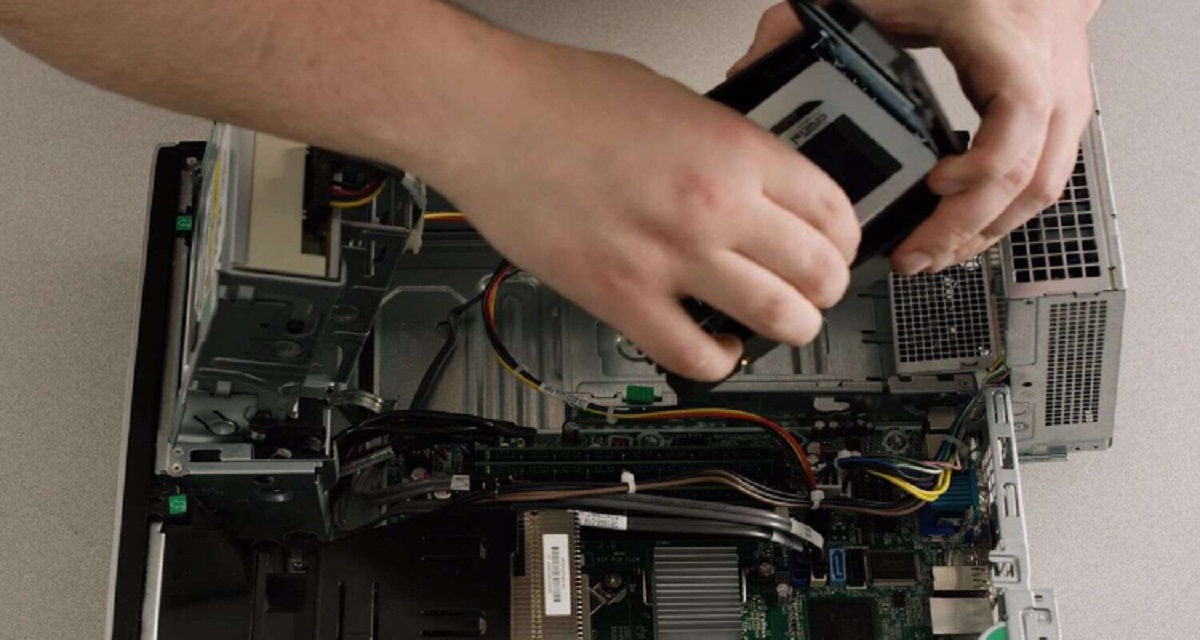
Step 4: Install the Mz-Rpa2560/0S0 SSD
With the old hard drive removed, it’s time to install the Mz-Rpa2560/0S0 SSD into your computer. Follow these steps to ensure a smooth installation:
- Locate the SSD mounting point: Identify the drive bay or mounting point where you will be installing the Mz-Rpa2560/0S0 SSD. If your computer case has dedicated 2.5-inch SSD slots, simply align the SSD with the slot.
- Secure the SSD: Depending on your case and available options, you may need to use a mounting bracket or adapter to secure the SSD in place. Align the screw holes on the SSD with the screw holes on the bracket or adapter, then use screws to secure it firmly.
- Ensure proper orientation: Pay attention to the orientation of the SSD. The SATA connectors on the SSD should line up with the SATA ports on the motherboard. This ensures a proper connection.
It’s important to note that some SSDs may require additional connectors or screws for installation. Refer to your SSD’s manual or consult the manufacturer’s website for specific instructions regarding your particular model.
Once the Mz-Rpa2560/0S0 SSD is securely installed in the drive bay, you can move on to the next step: connecting the SSD to the motherboard.
Step 5: Connect the SSD to the motherboard
Now that the Mz-Rpa2560/0S0 SSD is securely installed in the drive bay, it’s time to connect it to the motherboard. Follow these steps to ensure a proper connection:
- Locate the SATA ports on the motherboard: Identify the SATA ports on the motherboard. These ports are usually labeled and can be found near the edge of the motherboard. Refer to your motherboard’s manual if you need assistance in locating them.
- Grab a SATA cable: Retrieve a SATA cable that is long enough to reach from the SSD to the SATA port on the motherboard. Ensure that the cable is in good condition and not damaged.
- Connect one end of the SATA cable to the SSD: Insert one end of the SATA cable into the SATA connector on the SSD. Make sure it is securely inserted and fully seated in the connector.
- Connect the other end of the SATA cable to the motherboard: Attach the other end of the SATA cable to an available SATA port on the motherboard. Again, make sure it is securely connected and fully seated in the port.
It’s important to note that some motherboards may have different SATA ports, such as SATA2 and SATA3. If possible, connect the SSD to a SATA3 (SATA 6Gbps) port to take advantage of its higher data transfer speed.
Once the SSD is connected to the motherboard, you can proceed to the next step: securing the SSD in place.
Step 6: Secure the SSD in place
After connecting the Mz-Rpa2560/0S0 SSD to the motherboard, it’s essential to secure it in place to prevent any movement or damage. Follow these steps to ensure that the SSD is firmly secured:
- Check for a mounting bracket or adapter: If your computer case has a dedicated 2.5-inch SSD slot or mounting point, the SSD may already be securely held in place. In this case, no further steps are required.
- Use screws or mounting mechanisms: If your case doesn’t have a dedicated SSD slot, you can use screws or mounting mechanisms to secure the SSD. Depending on your case and available options, you may need to use the screws provided with the case or a mounting bracket/adapter. Align the screw holes on the SSD with the corresponding holes on the bracket/adapter and tighten the screws gently until the SSD is firmly secured.
It’s crucial to be careful not to overtighten the screws as it may damage the SSD or the mounting components. Ensure that the SSD is snugly fitted and does not move when lightly nudged.
Additionally, make sure that the SATA and power connections to the SSD are not under strain or pulling on the ports, as this can cause connectivity issues. Adjust the cables if necessary to ensure a comfortable and secure fit.
Once the Mz-Rpa2560/0S0 SSD is securely in place, you can proceed to the next step: reassembling your computer.
Step 7: Reassemble the computer
Now that the Mz-Rpa2560/0S0 SSD is securely installed and the connections are in place, it’s time to reassemble your computer. Follow these steps to put all the components back together:
- Replace the side panel or access panel: If you removed a side panel or access panel to access the internal components, carefully slide it back into place. Ensure that it aligns properly and is secured in its original position.
- Reconnect any cables: Make sure to reconnect any cables that were disconnected during the installation process. This includes power cables, data cables, and any other peripheral cables that were removed.
- Tighten any screws: If you loosened or removed any screws to access the internal components, double-check that they are tightened securely. Ensure that all screws are properly inserted and fastened, but be careful not to overtighten them.
- Check for loose connections: Before moving on, carefully inspect all connections and make sure they are secure. Give each cable a gentle tug to ensure it is firmly seated.
It’s important to take your time during the reassembly process and pay attention to detail. Ensure that all components are properly aligned and connected to avoid any issues when powering on the computer.
Once you have reassembled your computer, you can proceed to the next step: installing the operating system on the Mz-Rpa2560/0S0 SSD.
Step 8: Install the operating system on the SSD
With the Mz-Rpa2560/0S0 SSD securely installed and the computer reassembled, it’s time to install the operating system onto the SSD. Follow these steps to complete the installation:
- Create a bootable installation media: You will need a bootable installation media, such as a USB flash drive or a DVD, that contains the operating system installation files. If you don’t have one, you can create it using a separate computer or download the appropriate software from the official website of the operating system you wish to install.
- Connect the installation media: Insert the bootable installation media into the appropriate drive on your computer. If using a USB flash drive, insert it into a USB port. If using a DVD, insert it into the DVD-ROM drive.
- Restart the computer: Power on the computer and immediately access the boot menu. The key to access the boot menu may vary depending on your computer manufacturer, but common keys to try include F2, F10, F12, or the Esc key. Refer to your computer’s manual or manufacturer’s website for specific instructions on how to access the boot menu.
- Select the bootable installation media: In the boot menu, select the bootable installation media from the available options. Use the arrow keys to navigate and the Enter key to select.
- Follow the on-screen prompts: The installation process will vary depending on the operating system you are installing. Follow the on-screen prompts to select the installation language, agree to the terms and conditions, and choose the SSD as the installation location.
- Complete the installation: Once you have made all the necessary selections, continue with the installation process and wait for it to complete. This may take some time, so be patient. Follow any additional prompts, such as setting up user accounts and configuring settings, as needed.
Once the operating system installation is complete, you have successfully installed the operating system on the Mz-Rpa2560/0S0 SSD. Congratulations! Now, let’s move on to the next step: updating drivers and software.
Step 9: Update drivers and software
After installing the operating system on the Mz-Rpa2560/0S0 SSD, it’s crucial to update the necessary drivers and software to ensure optimal performance and compatibility. Follow these steps to update your drivers and software:
- Visit the manufacturer’s website: Go to the official website of your computer’s manufacturer or the manufacturer of the individual components, such as the motherboard or graphics card.
- Locate the support or downloads section: Look for a support or downloads section on the website where you can find driver and software updates.
- Select the appropriate model and operating system: Choose your specific computer model and the operating system that you have installed on your system.
- Download and install the latest drivers: Download the latest drivers for your motherboard, graphics card, network adapter, and other components. Install each driver by following the instructions provided by the manufacturer. Be sure to restart your computer if prompted to complete the installation.
- Update software: Apart from drivers, it’s important to update any software programs on your computer. This includes antivirus software, web browsers, productivity tools, and any other applications you frequently use. Check for updates within each program or visit the official website to download the latest versions.
- Restart your computer: Once you have installed the necessary drivers and updated your software, it is recommended to restart your computer to ensure that all changes are applied and take effect.
Keeping your drivers and software up to date is crucial for maintaining compatibility, improving performance, and addressing any potential security vulnerabilities. It’s a good practice to periodically check for updates and download the latest versions to keep your system running smoothly.
With the drivers and software updated, you are now ready to move on to the final step: optimizing the Mz-Rpa2560/0S0 SSD for better performance.
Step 10: Optimizing the SSD for better performance
After installing and updating the necessary drivers and software, it’s time to optimize the Mz-Rpa2560/0S0 SSD for better performance. Follow these steps to ensure your SSD is functioning at its best:
- Enable TRIM: TRIM is a feature that helps maintain the performance and lifespan of your SSD. To enable TRIM, open the command prompt as an administrator and type the command “fsutil behavior set DisableDeleteNotify 0”. Press Enter to execute the command.
- Set the SATA mode to AHCI: AHCI (Advanced Host Controller Interface) mode is recommended for SSDs. To enable AHCI mode, restart your computer and access the BIOS settings by pressing the appropriate key (usually F2, F10, or Del) during the boot process. Look for the SATA configuration or storage options and change the mode to AHCI. Save the changes and exit the BIOS.
- Disable disk defragmentation: SSDs perform differently than traditional hard drives, so disk defragmentation is unnecessary and can even decrease the lifespan of your SSD. Disable automatic disk defragmentation in your operating system’s settings.
- Enable AHCI power management: In the power settings of your operating system, enable the AHCI power management options. This can help optimize power usage and extend the battery life of your system.
- Check for firmware updates: Visit the manufacturer’s website for your SSD and check if there are any firmware updates available. Firmware updates can often improve the stability and performance of your SSD. Follow the manufacturer’s instructions to install any available updates.
- Regularly check for drive health: Use reliable SSD health monitoring software to keep an eye on your SSD’s performance and overall health. This will allow you to identify any potential issues early on and take necessary actions.
By following these optimization steps, you can maximize the performance and lifespan of your Mz-Rpa2560/0S0 SSD. Remember to periodically check for firmware updates and monitor the health of your drive to ensure it continues to perform optimally.
Congratulations! You have now successfully installed, updated, and optimized your Mz-Rpa2560/0S0 SSD. Enjoy the improved speed and performance that your new SSD brings to your computer.
Conclusion
Congratulations on completing the installation of the Mz-Rpa2560/0S0 Solid State Drive (SSD) to your computer! By following the step-by-step guide, you have successfully upgraded your system and unlocked the benefits of faster performance, quicker boot times, and improved data transfer rates.
Throughout the installation process, you have learned how to gather the necessary tools and materials, prepare your computer, remove the old hard drive (if applicable), install the Mz-Rpa2560/0S0 SSD, connect it to the motherboard, secure it in place, and reassemble your computer. You have also installed the operating system on the SSD, updated drivers and software, and optimized the SSD for better performance.
Remember to periodically check for firmware updates for your SSD and monitor its health using reliable software. By staying proactive, you can ensure your SSD continues to perform optimally and bring you the best experience.
We hope that this guide has provided you with the knowledge and confidence to successfully install and optimize your new SSD. Enjoy the improved speed and responsiveness of your system, and make the most of the enhanced performance that the Mz-Rpa2560/0S0 SSD brings to your computing experience.
Thank you for choosing the Mz-Rpa2560/0S0 SSD and happy computing!