Introduction:
Welcome to the comprehensive guide on how to install a motherboard! Whether you’re building your own computer or replacing the motherboard in an existing system, this step-by-step tutorial will walk you through the process. Installing a motherboard may seem like a daunting task, but with the right tools, equipment, and a little patience, you’ll be able to successfully complete the installation.
A motherboard is the main circuit board in a computer that allows all other components to communicate with each other. It is crucial for the overall functionality and performance of your computer. By installing a new motherboard, you can upgrade your system and take advantage of the latest technologies and features.
In this guide, we will cover everything you need to know to properly install a motherboard. We’ll start by discussing the tools and equipment you’ll need for the installation process. Then, we’ll walk you through each step, from preparing the work area to connecting all the necessary components. Finally, we’ll provide some tips for troubleshooting and testing the motherboard to ensure it is working correctly.
Whether you’re a seasoned computer enthusiast or a beginner, this guide is designed to be accessible and straightforward. We’ll explain technical terms and concepts in a way that’s easy to understand, so you can confidently tackle the installation process. So, without further ado, let’s get started on installing your new motherboard!
Tools and Equipment Needed:
Before you start the motherboard installation process, it’s important to gather all the necessary tools and equipment. Having the right tools will make the installation smoother and ensure that you don’t encounter any unnecessary difficulties. Here are the essential items you’ll need:
- Screwdriver: A Phillips-head screwdriver is typically required to secure the motherboard to the computer case. Make sure to have one on hand with a size suitable for the screws used in your case.
- Thermal Paste (if not pre-applied): If your CPU cooler does not come with pre-applied thermal paste, you will need to have some available. Thermal paste helps to promote better heat transfer between the CPU and the cooler.
- Antistatic Wrist Strap: To protect your motherboard from electrostatic discharge (ESD), which can damage sensitive electronic components, it’s recommended to use an antistatic wrist strap. This strap grounds you, dissipating any built-up static electricity.
- Cable Ties: Having some cable ties, also known as zip ties, can be helpful for managing and organizing cables inside your computer case. This will prevent them from obstructing airflow and potentially interfering with the motherboard installation.
- Flashlight or Headlamp: A small flashlight or headlamp can come in handy, especially when working in dimly lit areas of the computer case or when inspecting small connectors or pins on the motherboard.
- Microfiber Cloth or Isopropyl Alcohol: It’s a good practice to have a microfiber cloth or isopropyl alcohol available to clean the CPU and CPU cooler surface before applying thermal paste. This ensures optimal thermal transfer between the CPU and cooler.
These tools and equipment are essential for a successful motherboard installation. Having them ready before you start will save you time and make the process smoother. Now that you’ve gathered the necessary tools, let’s move on to preparing the work area.
Step 1: Preparing the Work Area:
Before you begin the motherboard installation process, it’s important to prepare your work area. This will ensure that you have a clean, organized, and safe space to work in. Follow these steps to get your work area ready:
- Clear and clean your workspace: Start by removing any clutter or unnecessary items from your workspace. This will give you ample space to work on your computer without any obstructions. Wipe down the area to remove any dust or debris, as this can interfere with the installation process.
- Use an antistatic mat or a non-static surface: It’s highly recommended to use an antistatic mat or work on a non-static surface, such as a wooden table. These surfaces help prevent electrostatic discharge (ESD) that can damage sensitive electronic components. If you don’t have an antistatic mat, you can also use an antistatic wrist strap to ground yourself and mitigate the risk of static electricity.
- Set up proper lighting: Ensure that your work area is well-lit so that you can clearly see the components and connectors. If needed, use a small flashlight or a headlamp to illuminate dim areas within the computer case.
- Keep the motherboard’s manual handy: The motherboard’s manual is an invaluable resource that provides detailed instructions and diagrams specific to your motherboard model. Keep it nearby in case you need to refer to it during the installation process.
- Organize and lay out the components: Before you start, organize and lay out all the components and screws you’ll be using. This will help you locate them easily when you need them.
- Take necessary safety precautions: Ensure that your computer is powered off and unplugged from the electrical outlet. This prevents any accidental power surges or electrical shocks during the installation process.
By preparing your work area diligently, you’ll create an environment that is conducive to a smooth and successful motherboard installation. Now that your work area is ready, it’s time to gather the necessary components for the installation process.
Step 2: Gathering the Components:
Now that your work area is prepared, it’s time to gather all the components you’ll need for the motherboard installation. By having everything organized and readily available, you’ll be able to proceed with the installation smoothly. Here are the essential components you’ll need:
- Motherboard: Of course, the main component you’ll need is the motherboard itself. Make sure you have the correct form factor and socket type for your CPU.
- CPU (Central Processing Unit): The CPU is the brain of your computer. Ensure that it is compatible with the motherboard you have and handle it with care to avoid damaging the delicate pins on its underside.
- CPU Cooler: The CPU cooler keeps your CPU cool during operation. It can come in the form of an air cooler or a liquid cooler. Ensure that it is compatible with both your CPU and the motherboard you are installing.
- RAM (Random Access Memory): RAM provides temporary storage for data that the CPU needs to access quickly. Check your motherboard’s specifications to ensure compatibility with the type and speed of RAM you have.
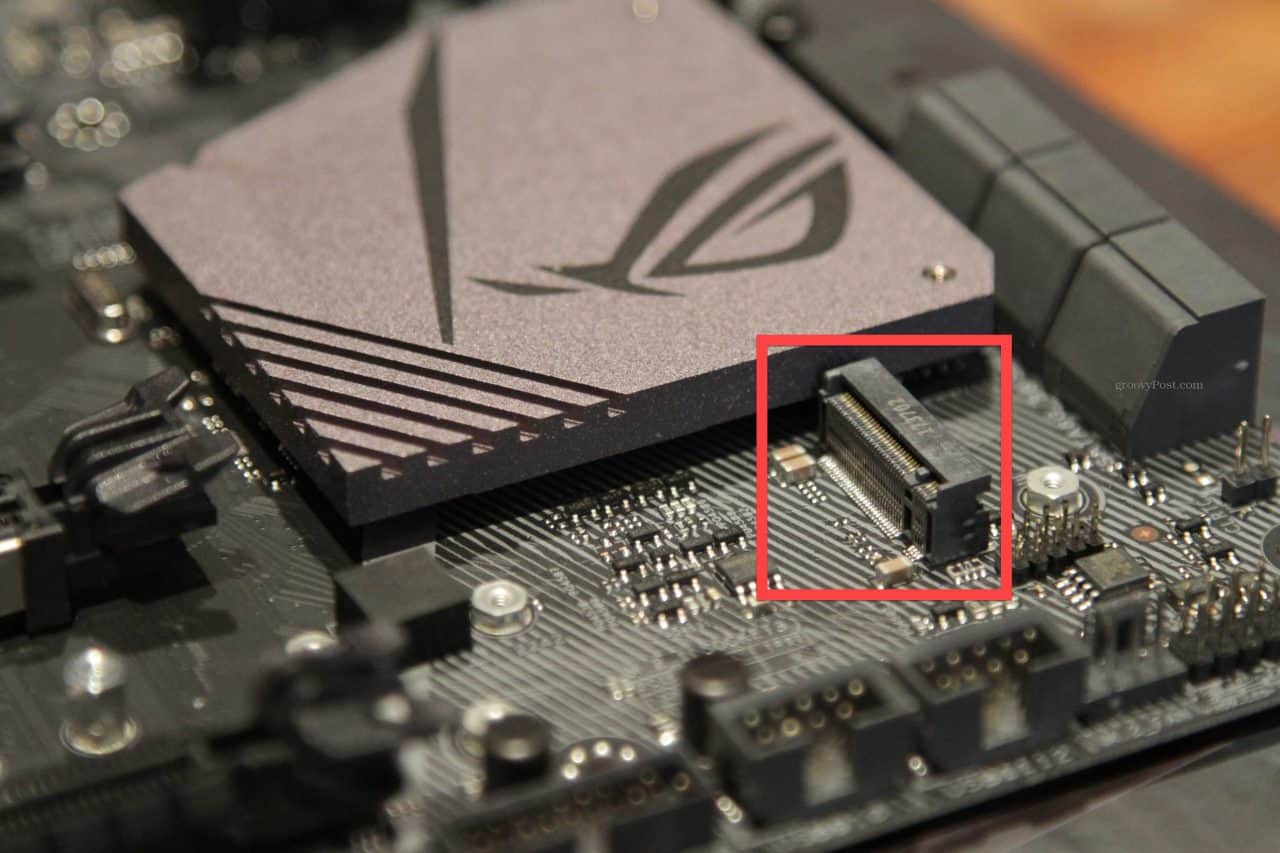
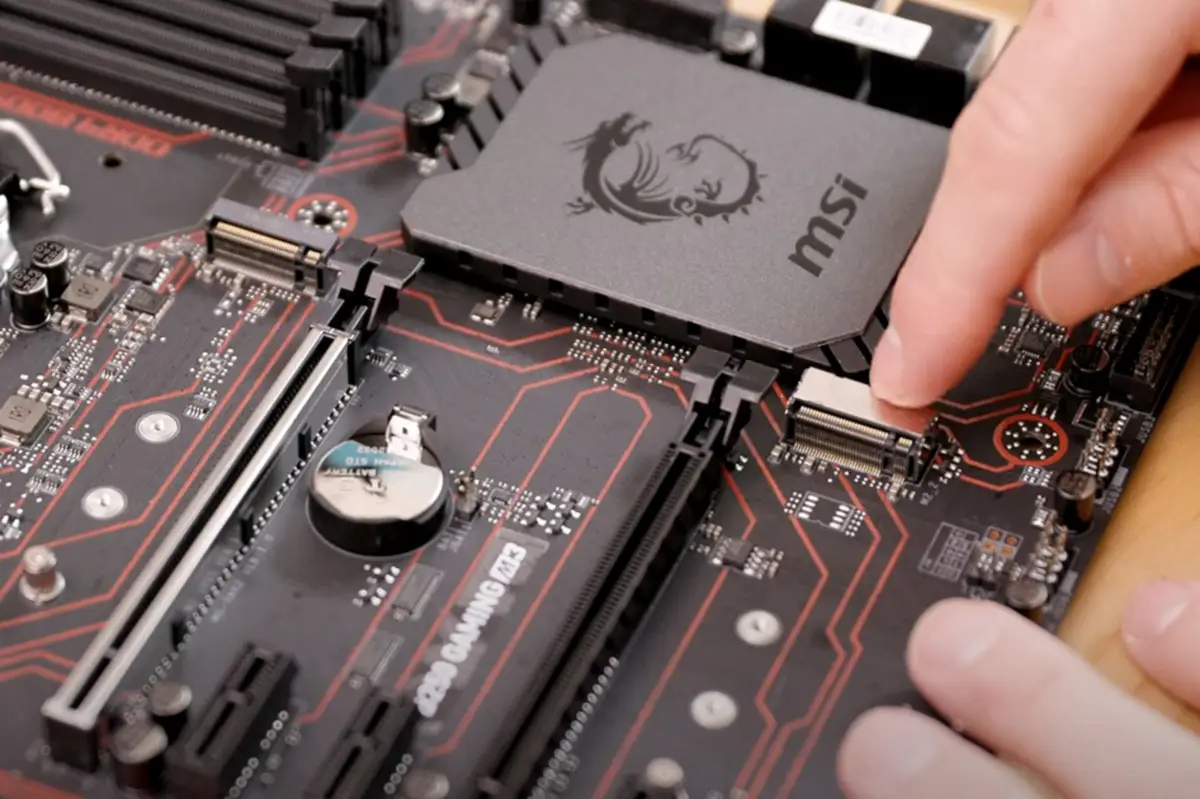
- Storage Devices: This includes hard drives (HDDs) and solid-state drives (SSDs) for storing your operating system, applications, and files. Ensure that your chosen storage devices are compatible with your motherboard’s SATA or M.2 slots.
- Power Supply Unit (PSU): The PSU supplies power to all the components in your computer. Ensure that it has the necessary wattage capacity to support your components.
- Graphics Card (optional): If you’re planning to use a dedicated graphics card for gaming or other resource-intensive tasks, ensure that it’s compatible with your motherboard and that you have the necessary PCIe slots.
- Peripherals: Gather any necessary peripherals, such as a monitor, keyboard, mouse, and speakers, to ensure that you can properly test your motherboard after installation.
Make sure to double-check the compatibility of all the components with your specific motherboard model. Refer to the motherboard’s manual or manufacturer’s website for detailed information. By gathering all the necessary components beforehand, you’ll streamline the installation process and avoid any unnecessary delays. With the components ready, you’re now ready to evaluate the motherboard compatibility in the next step.
Step 3: Evaluating the Motherboard Compatibility:
Before proceeding with the motherboard installation, it’s crucial to evaluate the compatibility of the motherboard with the other components you’ve gathered. This step ensures that all the components will work harmoniously together, minimizing the chances of compatibility issues or performance limitations. Here’s how you can evaluate the compatibility:
- CPU Compatibility: Check if the motherboard’s socket type matches the socket type of your CPU. Different CPUs use different socket types, so make sure they are compatible. Additionally, verify that the motherboard supports the specific model and generation of CPU you have.
- RAM Compatibility: Ensure that the motherboard supports the type of RAM you have, whether it’s DDR4, DDR3, or another variant. Check the supported memory speed and capacity of the motherboard to make sure it matches your RAM modules.
- Expansion Slots: If you plan to use a dedicated graphics card or other expansion cards, check if the motherboard has the necessary PCIe slots and compatibility for them. Also, consider if there is enough clearance in the case to accommodate the length of the graphics card.
- Storage Options: Verify that the motherboard has the required SATA ports or M.2 slots compatible with your storage devices. Consider the number of storage devices you plan to connect, such as HDDs or SSDs, and ensure the motherboard can accommodate them.
- Power Supply Compatibility: Check the power requirements of the motherboard and ensure that your power supply unit (PSU) can provide adequate power. Consider the connectors and wattage needed to support all the components connected to the motherboard.
- Form Factor: Confirm that the motherboard’s form factor (e.g., ATX, Micro-ATX, Mini-ITX) matches the case you’ll be using. The motherboard should physically fit into the case without any issues.
It’s essential to consult the motherboard’s manual, specification sheets, or the manufacturer’s website for precise compatibility information. Additionally, consider any specific features or functionalities you may require, such as USB ports, audio jacks, or networking capabilities, and ensure that the motherboard provides them.
By evaluating the compatibility of the motherboard with the other components, you can proceed with confidence, knowing that they are suitable for each other. This step ensures a smoother installation process and sets the foundation for optimal performance. Once you’ve confirmed compatibility, you can move on to the next steps in installing the motherboard.
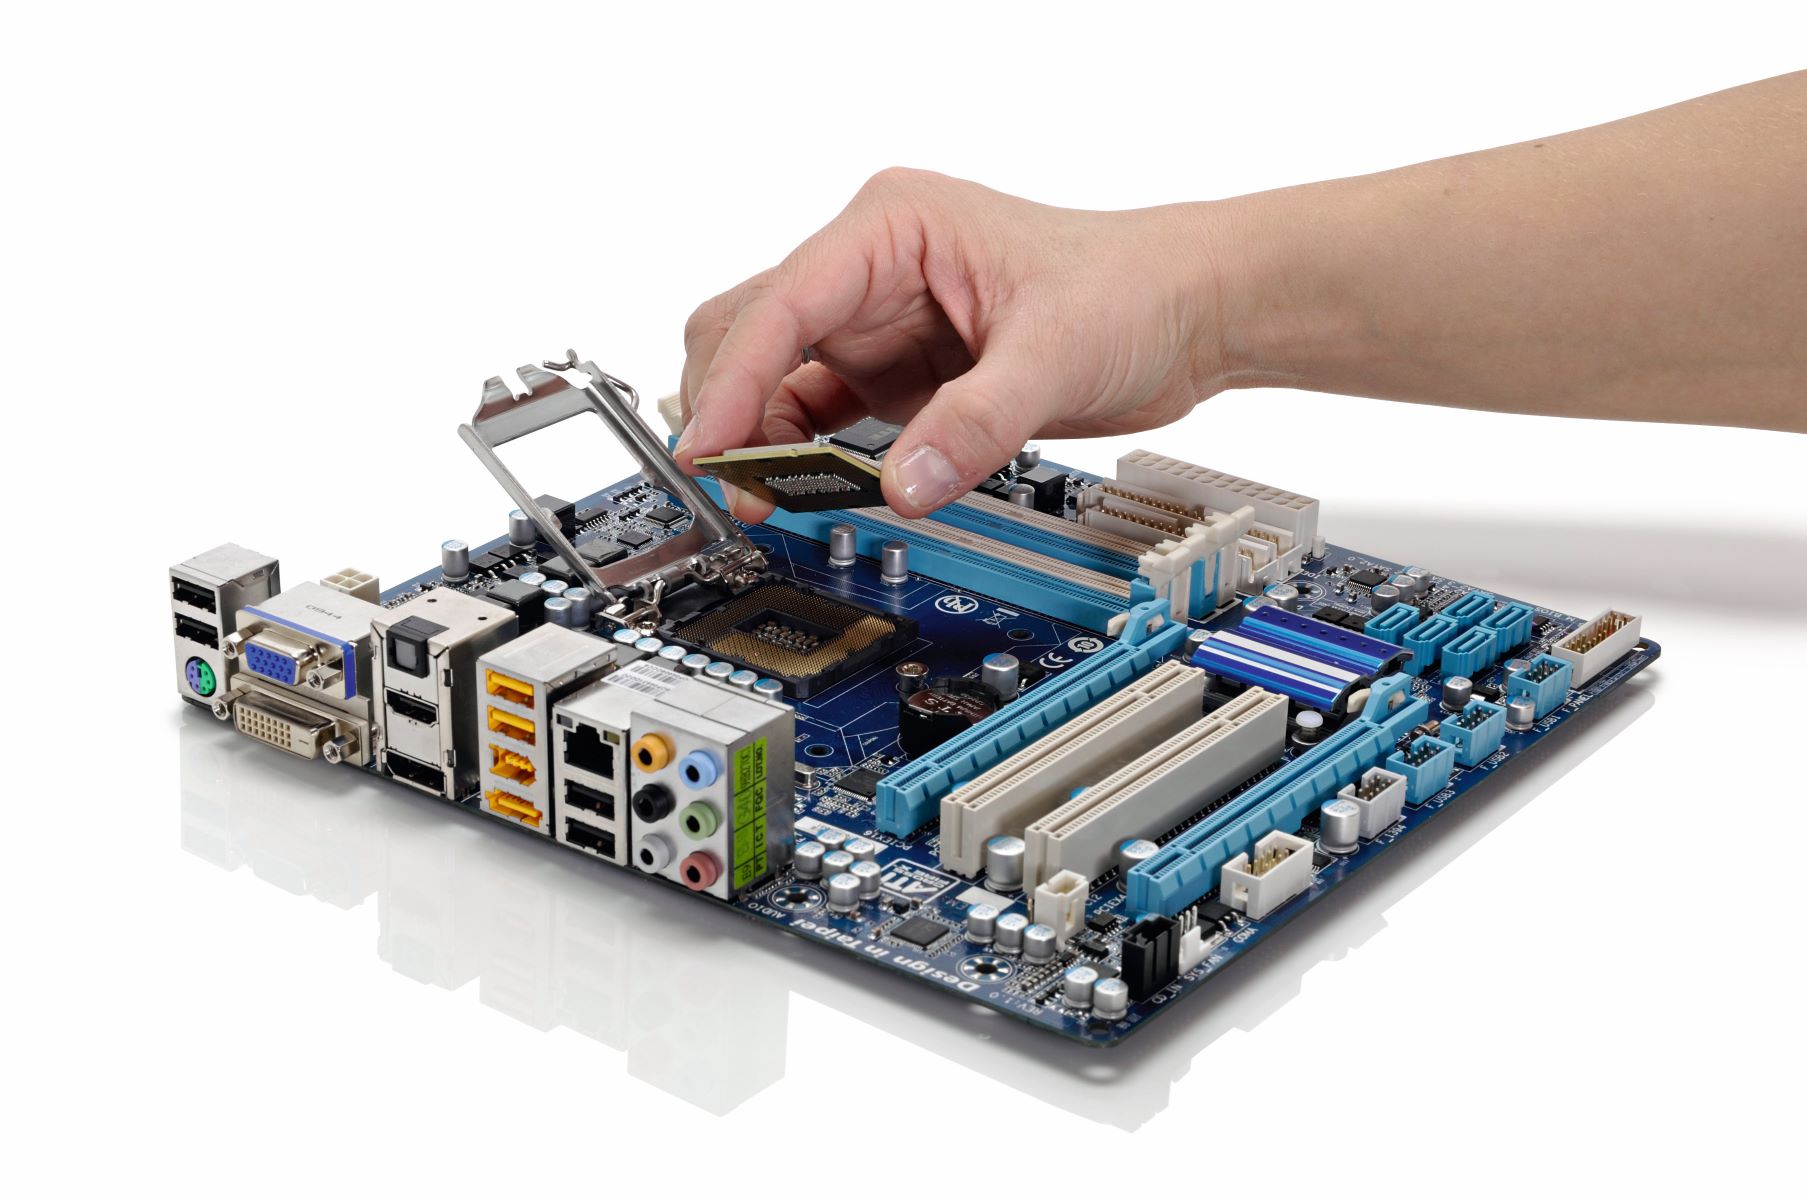
Step 4: Aligning and Inserting the CPU:
Aligning and inserting the CPU (Central Processing Unit) is a critical step in the motherboard installation process. The CPU is the brain of your computer, and it needs to be installed correctly to ensure optimal performance. Follow these steps to align and insert the CPU:
- Refer to the motherboard’s manual: Start by consulting the motherboard’s manual for specific instructions on how to install the CPU for your particular model. It will provide detailed diagrams and guidelines that are specific to your motherboard.
- Prepare the CPU socket: Lift the lever on the side of the CPU socket to release the retention mechanism. Gently remove the protective cover and set it aside for future use.
- Identify the CPU orientation: Look for the small golden triangle or notch on the CPU. This indicates the orientation of the CPU and corresponds to a similar marking on the CPU socket. Align the CPU correctly to ensure all pins match up.
- Carefully place the CPU: Holding the CPU by its edges, lower it into the CPU socket, ensuring that it aligns with the markings on the socket. Do not exert excessive pressure or force when inserting the CPU as this can damage the delicate pins.
- Secure the CPU: Once the CPU is properly aligned, gently press it down. The CPU should fit snugly into the socket. Use the lever on the socket to secure the CPU in place. Ensure that the lever is in its locked position, indicating that the CPU is securely fastened.
- Apply thermal paste (if not pre-applied): If your CPU cooler does not come with pre-applied thermal paste, you will need to apply a small amount. Follow the instructions in the CPU cooler’s manual for the correct method of applying the thermal paste on the CPU’s heat spreader.
It’s essential to handle the CPU with care and avoid touching the metallic contacts or pins to prevent any damage. Make sure your hands are clean and free of any static charge by using an antistatic wrist strap or regularly grounding yourself by touching a metal object.
By aligning and inserting the CPU correctly, you’ve completed a crucial step in installing the motherboard. The CPU is now securely in place, ready to be connected to the CPU cooler in the next step. Ensure that you follow the manufacturer’s guidelines for your specific motherboard model, as the installation process may vary slightly. With the CPU inserted, you’re ready to move on to the next step in the motherboard installation process.
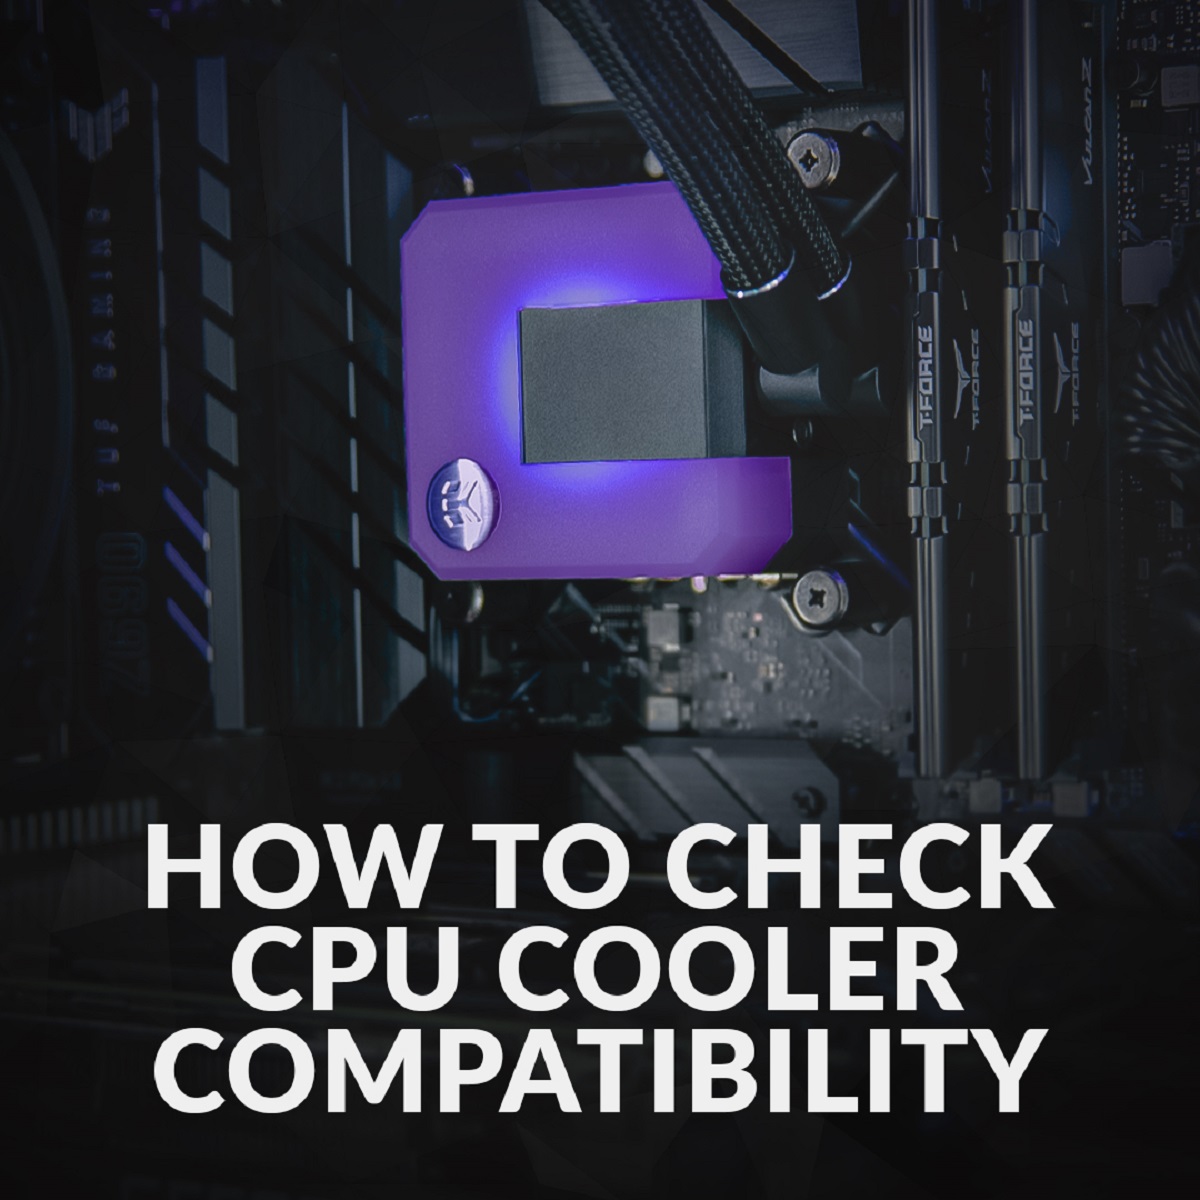
Step 5: Installing the CPU Cooler:
Installing the CPU cooler is a crucial step in the motherboard installation process as it helps to keep the CPU cool during operation. Excessive heat can cause stability issues and reduce the lifespan of your system, so proper installation of the CPU cooler is essential. Follow these steps to install the CPU cooler:
- Refer to the CPU cooler’s manual: Start by consulting the manual provided with your CPU cooler. It will provide specific instructions and diagrams that are specific to your cooler model.
- Prepare the CPU cooler: If your CPU cooler comes with a pre-installed or pre-applied thermal paste, you can skip this step. Otherwise, apply a small amount of thermal paste to the center of the CPU. Ensure your hands are clean and use a method recommended by the cooler’s manufacturer for even distribution of the thermal paste.
- Mount the CPU cooler: Carefully position and align the CPU cooler’s base with the CPU. The cooler’s mounting brackets or screws should align with the corresponding holes around the CPU socket on the motherboard.
- Secure the CPU cooler: Depending on the type of CPU cooler you have, follow the manufacturer’s instructions to secure it in place. This may involve tightening screws or engaging fasteners to ensure a secure fit. Be careful not to overtighten the screws, as it can damage the motherboard or cause uneven pressure on the CPU.
- Connect the CPU cooler’s fan: If your CPU cooler has a fan, locate the fan header on the motherboard and plug the fan’s power cable into it. Ensure it is securely connected to provide adequate cooling for the CPU.
- Double-check the installation: Once the CPU cooler is securely mounted and the fan is connected, double-check that it is properly seated and level. Ensure that it does not obstruct any nearby components or connectors on the motherboard.
Properly installing the CPU cooler ensures that the CPU is adequately cooled, enhancing the overall performance and stability of your system. It’s crucial to follow the instructions provided by the CPU cooler’s manufacturer, as the installation process may vary depending on the cooler model you have.
With the CPU cooler installed, you’ve completed another important step in the motherboard installation process. The CPU is now equipped with a cooling solution, ready to move forward. In the next step, we will install the RAM modules onto the motherboard.
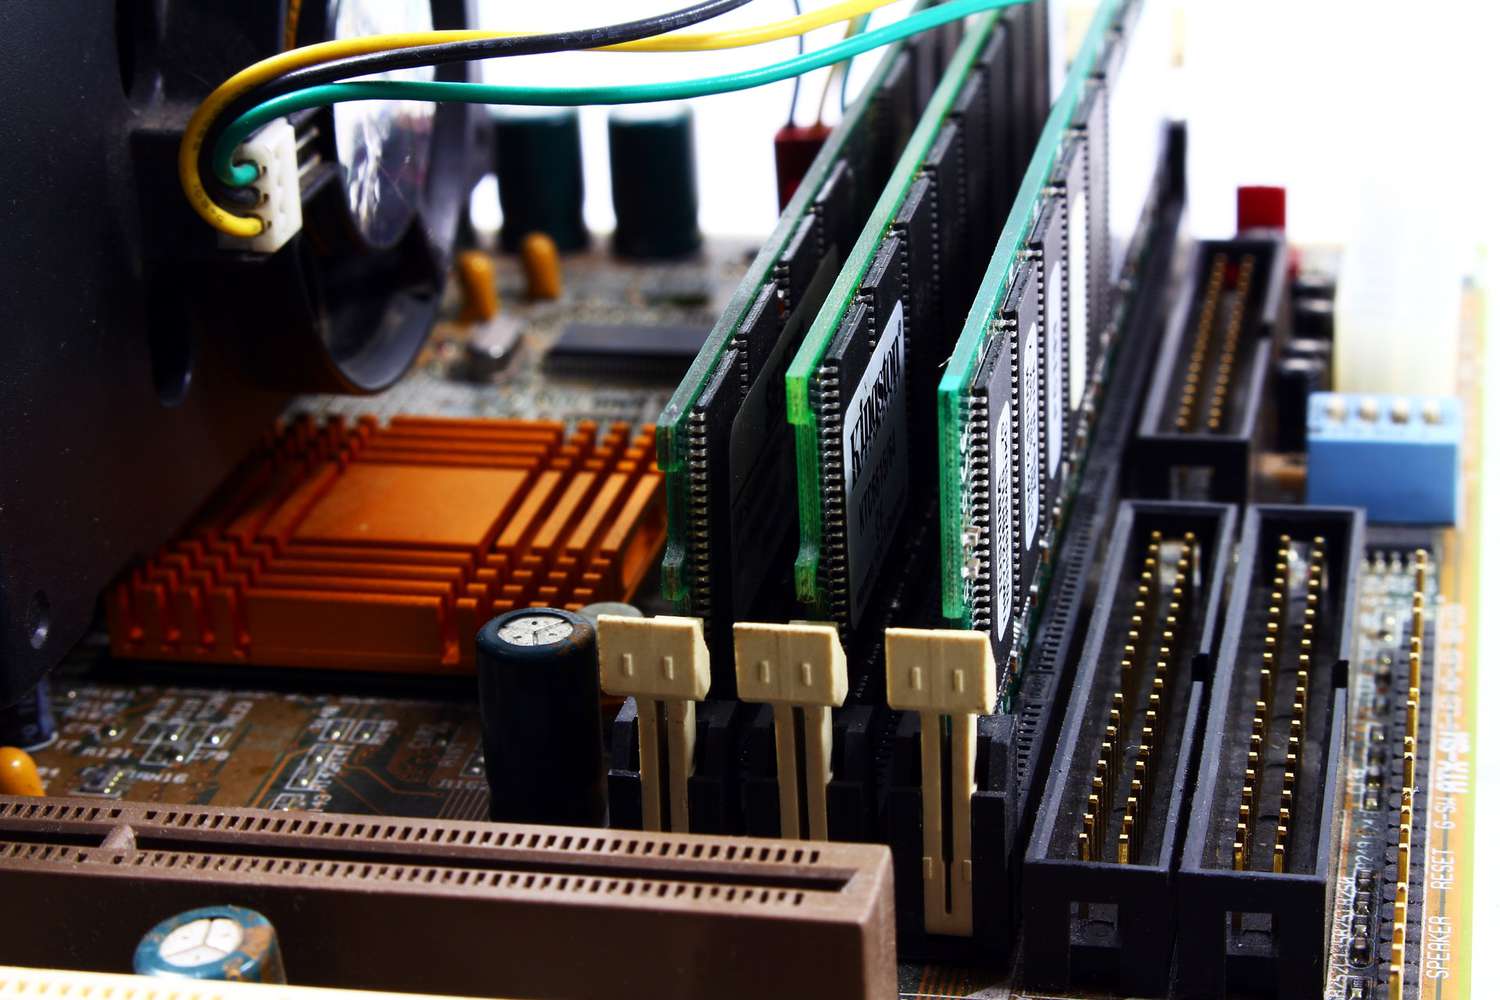
Step 6: Installing the RAM Modules:
Installing the RAM (Random Access Memory) modules is a crucial step in the motherboard installation process. RAM provides temporary storage for data that the CPU needs to access quickly, and installing it correctly ensures optimal system performance. Follow these steps to install the RAM modules:
- Refer to the motherboard’s manual: Start by consulting the motherboard’s manual for specific instructions on how to install the RAM modules for your particular model. It will provide detailed diagrams and guidelines that are specific to your motherboard.
- Prepare the RAM modules: RAM modules have notches on the bottom that match with the slots on the motherboard, allowing for proper alignment. Make sure to handle the modules by their edges to avoid any damage to the sensitive components.
- Identify the RAM slots: Most motherboards have multiple RAM slots, typically arranged in pairs. Refer to the motherboard’s manual to determine the recommended slot configuration for the number of RAM modules you have.
- Align and insert the RAM modules: Hold the RAM module by its edges and align the notch on the bottom with the corresponding key in the RAM slot. Gently but firmly press down on the module until you hear a click or feel it firmly seated in the slot. Repeat this process for each RAM module.
- Secure the RAM modules: Once the modules are inserted, apply gentle pressure on each end of the module to ensure it is fully seated and the locking clips on either side of the slot engage with the notches on the module. This ensures that the module is securely in place.
It’s essential to follow the recommended slot configuration outlined in the motherboard’s manual to optimize system performance. Installing the RAM modules in the correct slots allows for dual-channel or quad-channel memory modes, which improve data transfer speeds.
By correctly installing the RAM modules, you’ve taken another important step in the motherboard installation process. The RAM is now securely installed and ready to provide the necessary memory for your system. In the next step, we will mount the motherboard onto the computer case.
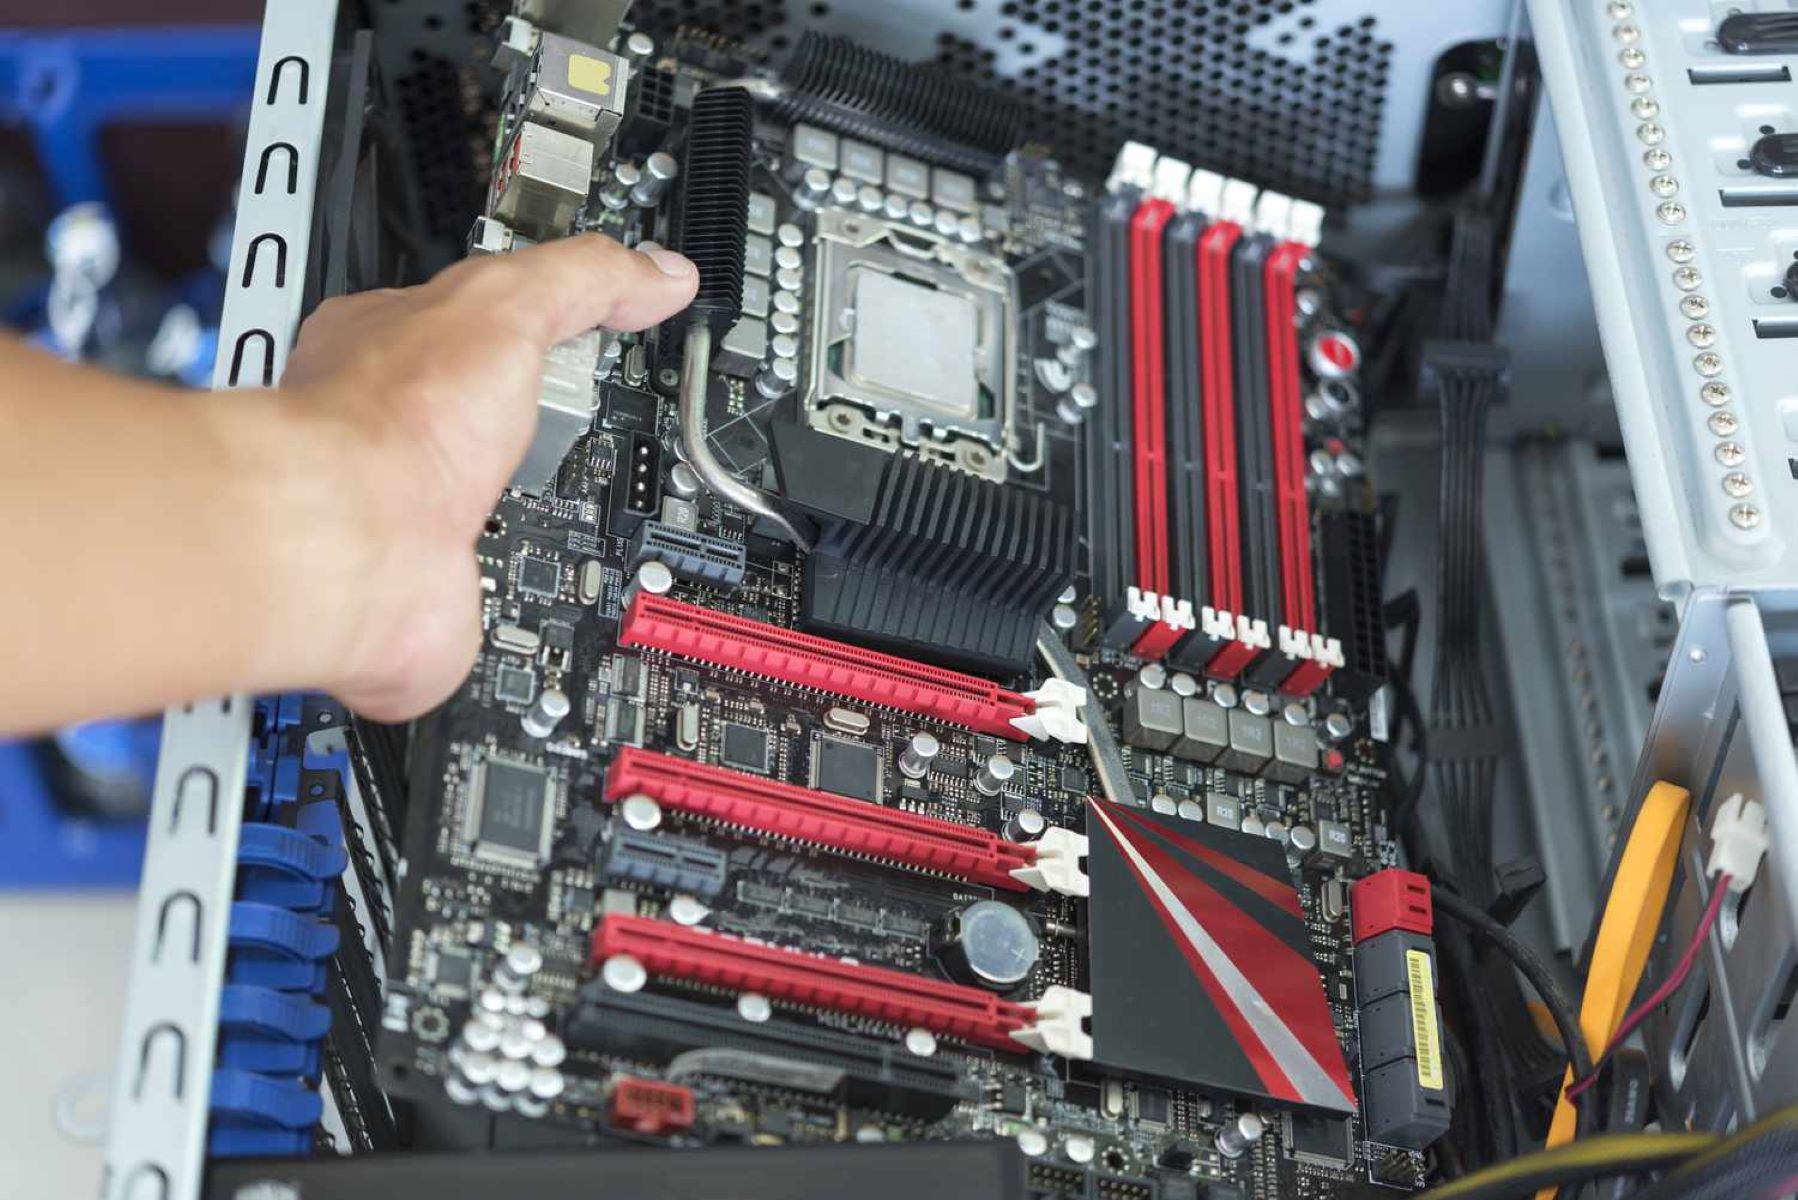
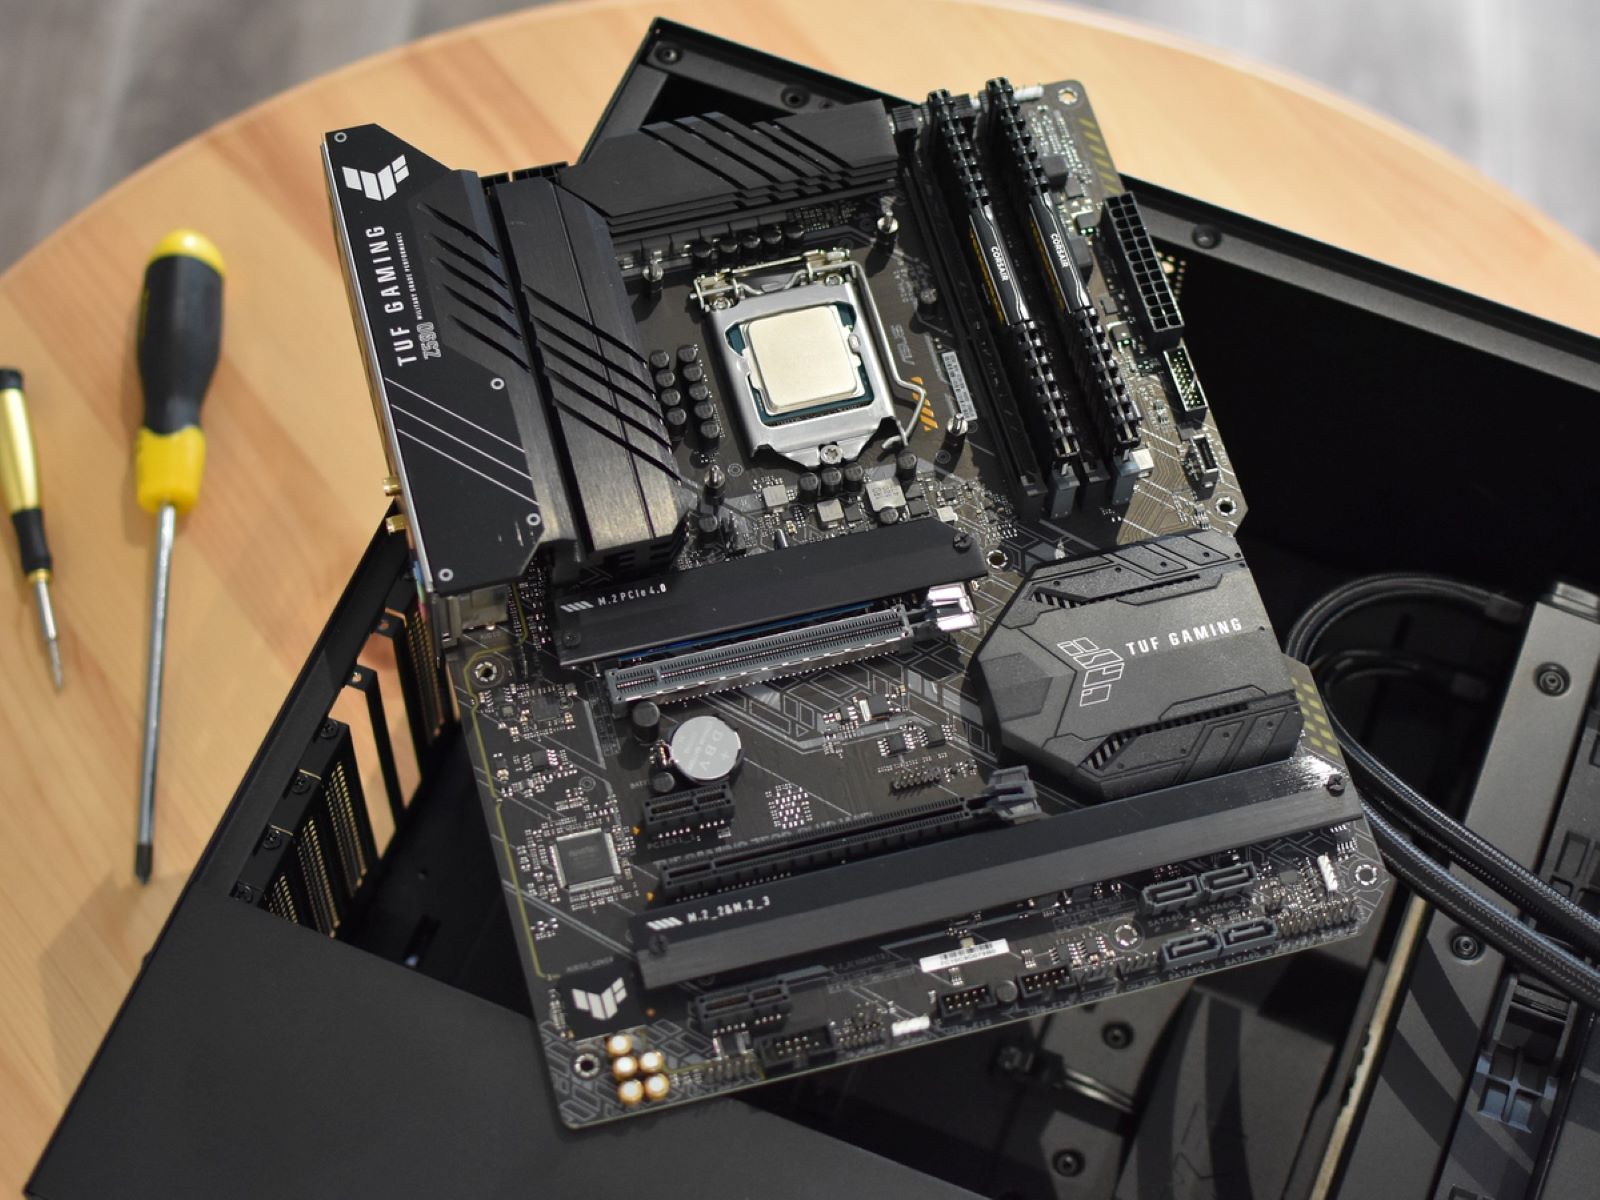
Step 7: Mounting the Motherboard:
Mounting the motherboard is a crucial step in the installation process as it provides a secure foundation for all the components. Properly mounting the motherboard ensures stability and prevents any potential damage. Follow these steps to mount the motherboard:
- Align the motherboard with the case: Place the motherboard onto the standoffs or mounting holes inside the computer case. Ensure that the I/O shield on the back of the motherboard aligns with the corresponding cutout on the case.
- Secure the motherboard: Once the motherboard is in position, use the provided screws to secure it to the case. Start with the corners and then gradually work your way around, ensuring that all the screws are tightened evenly. Do not overtighten the screws, as it can damage the motherboard.
- Double-check the alignment: Ensure that the motherboard is properly aligned and seated in the case. Check that the ports, slots, and connectors on the motherboard align with the corresponding cutouts and openings in the case.
- Connect the I/O Shield: After securing the motherboard, press the I/O shield firmly into place from the inside of the case. The shield should fit snugly, ensuring that the motherboard’s rear ports are properly aligned with the I/O shield cutouts.
It’s important to note that different cases and motherboards may have slight variations in mounting procedures. Refer to the motherboard’s manual and the case manufacturer’s instructions for any specific guidelines and recommendations.
By correctly mounting the motherboard, you provide a stable and secure foundation for all the components. The motherboard is now securely in place, ready to be connected to the power supply and other components in the next steps.
Step 8: Connecting the Power Supply:
Connecting the power supply to the motherboard is a crucial step in the installation process, as it provides the necessary power for your system to operate. Properly connecting the power supply ensures that all components receive the required power for optimal performance. Follow these steps to connect the power supply:
- Locate the main motherboard power connector: Identify the main power connector on the motherboard, typically a 24-pin or 20+4-pin connector. It’s usually located near the CPU socket or along one side of the motherboard.
- Connect the main power connector: Align the main power connector with the corresponding port on the motherboard. Ensure that the orientation of the connector matches the shape and alignment of the port. Gently but firmly press the connector into the port until it clicks into place.
- Optional: Connect the additional power connectors: Some motherboards may require additional power connections, such as an 8-pin CPU power connector or PCIe power connectors for graphics cards. Consult your motherboard’s manual to identify any additional power connectors and connect them accordingly.
- Connect the SATA power cables: If you have storage devices such as hard drives (HDDs) or solid-state drives (SSDs), connect the SATA power cables from the power supply to the corresponding ports on the storage devices.
- Manage the cables: Proper cable management is important to ensure adequate airflow and prevent any interference with other components. Use cable ties or Velcro straps to secure and organize the power supply cables, taking care not to obstruct fans or other components.
Make sure to consult your power supply’s manual for any specific instructions or recommendations regarding connecting the cables. Additionally, ensure that the power supply can provide adequate wattage to meet the power requirements of your components.
By correctly connecting the power supply, you’re now ready to provide the necessary power for your system. The motherboard is powered and ready to be connected to the front panel cables in the next step.
Step 9: Connecting the Front Panel Cables:
Connecting the front panel cables to the motherboard is an important step in the motherboard installation process. These cables consist of connectors for the power button, reset button, USB ports, audio jacks, and other front panel functions. Properly connecting these cables ensures that you can easily access and control the various features from the front of your computer. Follow these steps to connect the front panel cables:
- Refer to the motherboard’s manual: Start by consulting the motherboard’s manual for specific instructions on how to connect the front panel cables for your particular model. It will provide detailed diagrams and guidelines that are specific to your motherboard.
- Identify the front panel connectors: Locate the front panel connectors on the motherboard, usually found along the bottom edge. These connectors are labeled with abbreviations such as PWR (Power), RST (Reset), HDD LED (Hard Drive LED), PLED (Power LED), etc.
- Match the connectors with the cables: Identify the corresponding cables from the front panel. They are usually labeled or color-coded to indicate their function. Match the cable labels or colors with the labels on the motherboard to ensure proper alignment.
- Connect the cables: Carefully insert each front panel cable connector onto its corresponding pin or header on the motherboard. Make sure they are firmly connected and correctly aligned. Pay attention to the polarity of connectors such as LEDs; if they don’t light up initially, try reversing the connection.
- USB and Audio connectors: Connect the USB and audio cables from the front panel to their corresponding headers on the motherboard. USB headers are usually marked with USB, and audio headers are labeled with audio or have icons representing microphone and headphone.
- Double-check the connections: After connecting all the front panel cables, double-check their alignment and ensure that they are securely connected. Inspect the connections and disconnect and reconnect any cables that are not properly seated.
Following the motherboard’s manual is crucial for correctly connecting the front panel cables, as the layout and pin configurations can vary between motherboard models. Take your time to ensure accuracy and avoid forcing or bending any pins during the connection process.
By connecting the front panel cables correctly, you’re now ready to access and control various functions from the front of your computer. The motherboard is now fully connected and operational, and in the next step, we will connect any other necessary components to complete the installation process.
Step 10: Connecting Other Components:
With the motherboard and power supply connected, it’s time to connect the other components to complete the installation process. These components might include storage devices, graphics cards, additional PCIe cards, and any other peripherals you have. Follow these steps to connect the other components:
- Storage devices: If you have HDDs or SSDs, connect the SATA data cables from the storage devices to the corresponding SATA ports on the motherboard. Ensure a secure connection and use cable ties to manage the cables neatly.
- Graphics card: If you’re using a dedicated graphics card, align it with the PCIe slot on the motherboard and firmly press it down until it clicks into place. Connect the necessary PCIe power connectors from the power supply to the graphics card, if required.
- Other PCIe cards: If you have any additional PCIe expansion cards, such as a sound card or network card, install them in the appropriate PCIe slots on the motherboard. Secure them with screws if necessary and connect any power cables they may require.
- Peripherals and connectors: Connect any necessary peripherals, such as a monitor, keyboard, mouse, and speakers, to their respective ports on the motherboard or other connected devices. This includes USB, HDMI, DisplayPort, audio, and any other necessary cables.
- Check all connections: Double-check all the connections you’ve made, ensuring that they are securely connected and aligned properly. Verify that all the components and connectors are in their correct positions and fastened securely.
Take the time to ensure that all connections are secure and not loose. Secure any cables using cable ties or Velcro straps to improve cable management and airflow within the computer case. This will help to keep your system organized and prevent any potential cable interference.
By connecting the other components, your system is now fully assembled and ready for the final step – testing the motherboard and powering on your computer. In the next step, we will cover how to power on and test the motherboard to ensure that everything is functioning correctly.
Step 11: Double Checking Connections:
Before powering on your computer, it’s important to double check all the connections you’ve made during the motherboard installation process. This step ensures that everything is properly connected and minimizes the risk of any issues or errors. Follow these steps to double check the connections:
- Visually inspect all connections: Take a close look at each connection, including cables, connectors, and components. Ensure that all cables are properly seated and securely connected. Look for any loose connections or cables that may have become disconnected during the installation process.
- Verify connection alignment: Check that each connector is aligned correctly, whether it be the CPU power connector, RAM modules, front panel cables, or any other connectors. Make sure they are inserted fully and securely into their respective ports or slots.
- Check cable routing: Examine the routing of all cables within the computer case. Ensure that cables are not obstructing airflow or interfering with any components. Use cable ties or Velcro straps to tidy up the cables and keep them organized.
- Inspect power connections: Pay close attention to the power connections, including those from the power supply to the motherboard and other components. Confirm that they are securely connected and that all necessary power cables have been properly plugged in.
- Verify front panel connections: Double check the connections of the front panel cables, including the power button, reset button, LEDs, USB ports, and audio jacks. Confirm that they are properly connected to the corresponding pins or headers on the motherboard.
- Review additional component connections: If you have installed additional components, such as storage devices or a graphics card, ensure that their connections are secure and properly aligned. Check for any additional power cables that may need to be plugged in.
By double checking all the connections, you can have peace of mind that everything is securely connected and ready for the next step. Taking the time to review and confirm the connections minimizes the risk of any potential issues and ensures that your computer is set up correctly.
Now that you have double checked the connections, you’re ready for the final step – powering on and testing the motherboard. This step will help ensure that all your components are functioning properly and that your system is ready to be used. Proceed to the next step for guidance on powering on and testing your motherboard.
Step 12: Powering On and Testing the Motherboard:
After double checking all the connections, it’s time to power on and test the motherboard. This step is crucial to ensure that all the components are functioning correctly and that your system is ready for use. Follow these steps to power on and test the motherboard:
- Connect the power cord: Plug the power cord into the power supply and then into an electrical outlet. Ensure that the power switch on the back of the power supply is in the “off” position.
- Power on the computer: Locate the power button on the case and press it to turn on the computer. You should see the fans starting to spin, indicating that the power supply is providing power to the motherboard and other components.
- Check the BIOS: When the computer starts up, a splash screen will appear, displaying the brand logo of your motherboard. Pay attention to any messages or prompts that appear on the screen, such as “Press [key] to enter BIOS.” Press the indicated key to enter the BIOS setup utility.
- Verify component recognition: Once in the BIOS, navigate to the system information or hardware monitoring section to check if all the connected components, including the CPU, RAM, and storage devices, are correctly recognized. This allows you to ensure that everything is properly connected and detected by the motherboard.
- Perform a test boot: Exit the BIOS and let the computer boot into the operating system. Pay attention to any error messages or unusual behavior during the boot process. Ensure that the operating system loads successfully and that you can access your desktop.
- Test peripherals and connectivity: Test the functionality of your peripherals, such as the keyboard, mouse, monitor, and speakers. Ensure that USB ports and audio jacks are working correctly by connecting devices and checking for proper operation.
- Run benchmark or stress tests (optional): If you want to further test the stability and performance of your system, consider running benchmark or stress tests. These tests can help identify any potential issues, such as overheating or instability, under heavy loads.
During the testing phase, monitor your system for any abnormal behavior, overheating issues, or error messages. If you encounter any issues, consult the motherboard’s manual, check for updated drivers or BIOS versions, or seek assistance from technical support if needed.
By powering on and testing the motherboard, you can ensure that all the components are functioning correctly, and your system is ready for use. Congratulations! You have successfully installed and tested your motherboard, bringing your computer one step closer to completion.
Conclusion:
Congratulations on successfully installing your motherboard! By following these step-by-step instructions, you have assembled the foundation of your computer system. Installing a motherboard may seem complex, but with the right tools, equipment, and careful attention to detail, anyone can accomplish this task.
We started by preparing the work area and gathering all the necessary tools and equipment. Properly aligning and inserting the CPU, installing the CPU cooler, and mounting the RAM modules were essential steps to ensure the smooth operation of your computer.
Connecting the power supply, front panel cables, and other components ensured that your system is powered and all connections are secure. Double checking all the connections was crucial to prevent any potential issues or errors during the installation process.
Finally, you powered on and tested the motherboard to ensure that all components are functioning correctly. By entering the BIOS, checking component recognition, and testing peripherals, you verified the successful installation of your motherboard and tested the stability of your system.
Remember, if you encounter any issues during the installation or testing process, refer to the motherboard’s manual, check for updated drivers or BIOS versions, and seek assistance from technical support if needed.
By successfully installing the motherboard, you have set the stage for building a powerful and efficient computer system. From here, you can continue with the installation of an operating system, software, and further customize your system to meet your needs.
Thank you for following this guide, and we hope you found it helpful and informative. Happy computing with your newly installed motherboard!