Introduction
Welcome to our guide on how to install the Cooler Master Liquid CPU Cooler. If you’re looking to improve cooling performance and boost the overall efficiency of your computer, then upgrading to a liquid cooling solution is a great choice. Liquid CPU coolers are designed to dissipate heat more effectively compared to traditional air coolers, resulting in lower temperatures and better system performance.
In this step-by-step guide, we will walk you through the installation process of the Cooler Master Liquid CPU Cooler. With the right tools and a little patience, you’ll be able to successfully install your new liquid cooler and enjoy the benefits it brings.
Before we begin, it’s essential to note that each CPU cooler model may have slight variations in the installation process. Therefore, it’s crucial to read and follow the specific instructions provided by Cooler Master for your particular model. This guide serves as a general overview, but always refer to the manufacturer’s guidelines for detailed instructions.
Now, let’s dive into the installation process and get your Cooler Master Liquid CPU Cooler up and running!
What You Will Need
Before you begin the installation process, it’s important to gather all the necessary tools and components. Here’s a list of what you’ll need:
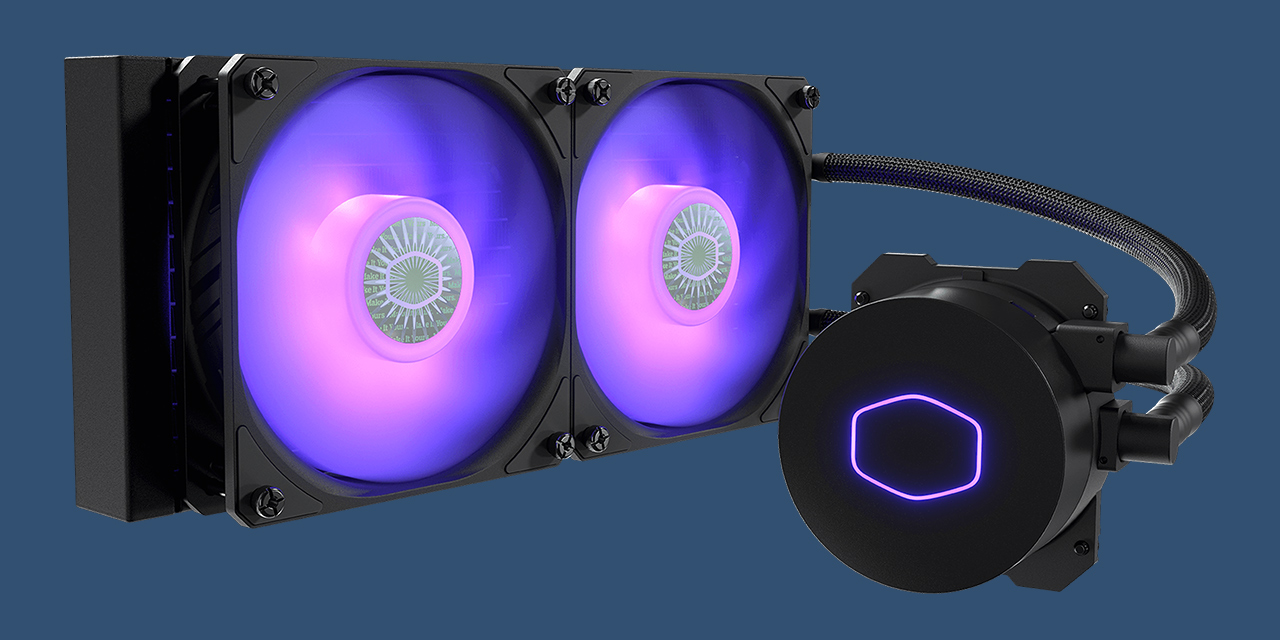
- A Cooler Master Liquid CPU Cooler kit – Make sure you have all the components included in the package, including the waterblock, radiator, fans, and mounting brackets.
- A compatible computer case – Ensure that your computer case has enough space to accommodate the radiator and fans. Refer to your case’s specifications for compatibility.
- A compatible CPU socket – Check the compatibility of your CPU socket with the Cooler Master Liquid CPU Cooler. Most modern sockets, such as Intel’s LGA1151 or AMD’s AM4, are supported.
- Thermal paste – It’s important to use high-quality thermal paste to facilitate optimal heat transfer between the CPU and the waterblock. Some cooler models may come with pre-applied thermal paste.
- A screwdriver – Depending on your computer case, you may need a Phillips or flathead screwdriver to secure the radiator and fans.
- Isopropyl alcohol – This is used to clean the CPU and heatspreader before applying thermal paste.
- Clean cloth or lint-free wipes – These are needed to apply the isopropyl alcohol and to clean any excess thermal paste.
It’s crucial to have all the necessary tools and components ready before starting the installation process. This will ensure a smooth and hassle-free experience.
Step 1: Preparing for Installation
Before diving into the installation process, it’s important to prepare your workstation and handle the components with care. Here are the steps to ensure a smooth installation:
- Turn off your computer – Make sure to shut down your computer completely and unplug the power cord from the wall outlet. This will prevent any electrical accidents and protect your computer during the installation process.
- Clear your workspace – Create a clean and well-lit workspace with ample room to maneuver. Remove any clutter or objects that may obstruct the installation process.
- Read the instruction manual – Carefully read the instruction manual provided by Cooler Master. Familiarize yourself with the various components and their functions. Understand the specific requirements and recommendations for your CPU cooler model.
- Prepare the CPU – If you’re upgrading from an existing cooler, remove the old cooler carefully by following the manufacturer’s instructions. Clean off any existing thermal paste from the CPU and heatspreader using isopropyl alcohol and a lint-free cloth.
- Inspect the components – Carefully inspect all the components of the Cooler Master Liquid CPU Cooler. Ensure there are no visible damages or missing parts. If you notice any issues, contact Cooler Master’s customer support for assistance.
- Plan the installation – Assess your computer case and determine the optimal location for mounting the radiator and fans. Consider factors such as clearance, airflow, and accessibility. It’s crucial to plan the installation to avoid any potential conflicts later in the process.
By following these preparation steps, you’ll be ready to proceed with the installation of your Cooler Master Liquid CPU Cooler. Taking the time to prepare and understand the requirements will help ensure a successful installation.
Step 2: Removing the Old Cooler
If you’re upgrading from an existing cooler, you’ll need to remove it before installing the Cooler Master Liquid CPU Cooler. Follow these steps to safely remove the old cooler:
- Ensure your computer is powered off and unplugged – Before removing any components, make sure your computer is shutdown and disconnected from the power source. This is crucial to prevent any electrical accidents during the process.
- Locate the CPU cooler – Identify the location of your current CPU cooler on the motherboard. Most CPU coolers are mounted near the CPU socket and consist of a heatsink and fan.
- Disconnect the fan cable – Locate the fan cable connected to the CPU fan header on the motherboard. Gently pull the connector to detach it from the header. Take note of how the cable is routed for easier reinstallation later.
- Remove the mounting mechanism – Depending on your current cooler, there may be screws or clips securing it in place. Use a screwdriver or your hands to loosen and remove these mounting mechanisms. Be careful not to damage the motherboard or other components.
- Detach the cooler from the CPU – With the mounting mechanism removed, gently lift the cooler off the CPU. You may need to twist it slightly to break the thermal paste seal. Be cautious not to apply excessive force as it may damage the CPU or motherboard.
- Clean the CPU and heatspreader – Once the old cooler is removed, use isopropyl alcohol and a lint-free cloth to clean the thermal paste residue from the CPU and heatspreader. Ensure they are both clean and free of any debris.
By following these steps, you’ll be able to safely remove your old cooler in preparation for installing the Cooler Master Liquid CPU Cooler. Take your time and handle the components with care to avoid any unnecessary damage.
Step 3: Mounting the Waterblock
Now that the old cooler has been removed, it’s time to mount the waterblock of your Cooler Master Liquid CPU Cooler. The waterblock is the component that directly contacts the CPU and removes heat through liquid circulation. Follow these steps to properly mount the waterblock:
- Review the installation manual – Before proceeding, refer to the installation manual specific to your Cooler Master Liquid CPU Cooler model. Familiarize yourself with the mounting mechanism and any specific instructions provided by the manufacturer.
- Apply thermal paste – Apply a small amount of thermal paste onto the center of the CPU. The paste helps create a smooth layer between the CPU and the waterblock, ensuring optimal heat transfer. Use a pea-sized amount for most CPUs, as excess paste can negatively impact cooling performance.
- Prepare the waterblock – Ensure that the waterblock is clean and free from any protective covers. Take note of the orientation of the waterblock and the location of the inlet and outlet ports.
- Align the waterblock – Carefully align the waterblock onto the CPU, ensuring that the mounting holes align with the corresponding holes around the CPU socket. Press the waterblock down gently to evenly spread the thermal paste.
- Secure the waterblock – Depending on your Cooler Master model, use the provided mounting brackets, screws, or other mechanisms to secure the waterblock onto the CPU. Tighten them evenly and in a diagonal pattern to ensure even pressure distribution.
- Double-check the mounting – After securing the waterblock, double-check that it is properly aligned and firmly attached to the CPU. Avoid excessive tightening, as it can damage the CPU or motherboard.
With the waterblock securely mounted, you have completed the crucial step of preparing the CPU for liquid cooling. Moving on to the next step, you will install the radiator to effectively dissipate the heat generated by your CPU.
Step 4: Installing the Radiator
Once the waterblock is securely mounted, it’s time to install the radiator of your Cooler Master Liquid CPU Cooler. The radiator is responsible for dissipating the heat collected by the waterblock. Follow these steps to properly install the radiator:
- Choose the radiator placement – Determine the optimal location for the radiator within your computer case. Consider factors such as available space, airflow, and convenience. Popular options include mounting the radiator at the front, top, or rear of the case.
- Prepare the case – Depending on your case, you may need to remove any existing fans or mounting brackets in the chosen radiator location. Clear out any obstructions and ensure a clean and stable mounting surface for the radiator.
- Attach the mounting brackets – Check the instruction manual to identify the appropriate mounting brackets for your radiator. Secure them onto the radiator according to the provided instructions. Ensure the brackets are positioned correctly for your chosen location.
- Position the radiator – Carefully position the radiator in the chosen location inside the case. Align the mounting holes on the radiator with the corresponding mounting holes on the case. Ensure the radiator is level and properly oriented for efficient airflow.
- Secure the radiator – Use the provided screws or other mounting mechanisms to secure the radiator onto the case. Tighten them evenly and snugly to avoid damage to the radiator or case. Follow the instructions provided by Cooler Master for your specific model.
- Connect the radiator fans – Attach the fans to the radiator, ensuring proper alignment with the mounting holes. Connect the fan cables to the appropriate fan headers on the motherboard. Refer to the motherboard manual for guidance if needed.
- Manage cables – Properly route and manage the cables from the radiator fans to ensure a clean and organized appearance. Use cable ties or adhesive clips to secure the cables along the case’s cable management routes.
By following these steps, you’ll successfully install the radiator of your Cooler Master Liquid CPU Cooler. With the radiator in place, you’re one step closer to enjoying the enhanced cooling performance and efficiency provided by liquid cooling.
Step 5: Connecting the Fans and Pump
With the radiator installed, it’s time to connect the fans and pump of your Cooler Master Liquid CPU Cooler. The fans help circulate air through the radiator, while the pump ensures proper liquid flow. Follow these steps to properly connect the fans and pump:
- Locate the fan headers – Identify the fan headers on your motherboard or fan controller. These headers provide power and control for the radiator fans. Consult your motherboard manual or refer to the fan controller instructions to find the appropriate headers.
- Connect the radiator fans – Connect the fan cables from the radiator to the fan headers on the motherboard or fan controller. Ensure a secure and proper connection, aligning the pins correctly. Use zip ties or cable management clips to secure the cables for a neat appearance.
- Connect the pump – Locate the pump header or SATA power connection on your Cooler Master Liquid CPU Cooler. Connect the pump’s power cable to the appropriate header or SATA power connector. Consult the cooler’s manual for specific instructions regarding the pump connection.
- Configure the fan speed – Access your motherboard’s BIOS or use software provided by the motherboard manufacturer to adjust the fan speed. Configure the settings to ensure proper cooling while minimizing noise. Consult your motherboard’s manual or online resources for information on fan speed control.
- Ensure proper cable management – Arrange the fan and pump cables inside the case to ensure they are neatly routed and organized. Use cable ties or adhesive clips to secure the cables along designated cable management routes to avoid any interference with other components.
- Double-check the connections – Before proceeding further, double-check that all the fan and pump connections are secure and properly seated. Take a moment to inspect the cable connections and ensure there are no loose or disconnected cables.
With the fans and pump properly connected, you’re almost ready to start enjoying the benefits of your Cooler Master Liquid CPU Cooler. In the next step, we will perform some tests and final checks to ensure everything is in working order.
Step 6: Testing and Final Checks
Now that you’ve completed the installation of your Cooler Master Liquid CPU Cooler, it’s time to perform some tests and final checks to ensure everything is in working order. Follow these steps to test and verify the installation:
- Reassemble your computer – Put all the components back into your computer case, ensuring they are properly seated and connected. Double-check that all cables and connections are secure and in their respective positions.
- Plug in the power – Reconnect the power cord to your computer and plug it into a wall outlet. Make sure all power connections are secure and properly seated.
- Power on your computer – Press the power button to start your computer. Listen for any unusual noises or vibrations during startup. Check that the fans on the radiator are spinning, indicating that they are receiving power.
- Monitor the temperatures – Once your computer is booted up, use monitoring software or the BIOS to check the CPU temperatures. Ensure that the temperatures are within expected ranges for your specific CPU model.
- Run stress tests – To further evaluate the cooling performance, run CPU-intensive applications or stress test software. Monitor the temperatures during these tests to ensure that the cooler is effectively dissipating heat and keeping the CPU temperatures under control.
- Inspect for leaks – Look for any signs of liquid leakage around the waterblock, radiator, and tubing. Check for any excessive moisture or unusual stains. If you notice any leaks, immediately shut down your computer and contact Cooler Master’s customer support for assistance.
- Ensure proper software recognition – Install and open software provided by Cooler Master, if available, to monitor and control the cooler’s settings. Ensure that the software recognizes the cooler and allows you to adjust fan speeds and monitor coolant temperatures.
By following these steps and performing the necessary tests and checks, you can ensure that your Cooler Master Liquid CPU Cooler is functioning properly. If everything looks good and the temperatures are within expectations, you can enjoy the benefits of improved cooling performance and efficiency for your CPU.
Conclusion
Congratulations! You have successfully installed the Cooler Master Liquid CPU Cooler and taken a big step towards improving the cooling performance of your computer. By following the step-by-step guide, you have ensured that the cooler is securely mounted, the radiator is properly installed, and the fans and pump are connected correctly.
A liquid CPU cooler like the Cooler Master provides a more efficient and effective cooling solution compared to traditional air coolers. It helps keep your CPU temperatures in check, resulting in improved system performance and longevity. With its sleek design and high cooling capabilities, the Cooler Master Liquid CPU Cooler is a great choice for both enthusiasts and gamers.
Remember to regularly monitor your CPU temperatures and perform routine maintenance to ensure the longevity and proper functioning of your liquid cooler. Keep an eye out for any signs of leakage or unusual noises and address them promptly to avoid any potential issues. Additionally, make sure to keep the cooling system clean from dust and debris to maintain optimal performance.
We hope this guide has been helpful in your installation process. However, always refer to the specific instructions provided by Cooler Master for your particular model, as each model may have slight variations in the installation process. If you have any further questions or encounter any difficulties during the installation, do not hesitate to reach out to Cooler Master’s customer support for assistance.
Enjoy the enhanced cooling performance and efficiency of your Cooler Master Liquid CPU Cooler, and happy computing!