Introduction
Welcome to our guide on how to install a Cooler Master case fan! Whether you’re a seasoned tech enthusiast or a DIY computer builder, keeping your system cool is crucial for optimal performance and longevity. A well-functioning case fan helps to prevent overheating and ensures that your components operate smoothly and efficiently.
Installing a Cooler Master case fan is a relatively straightforward process, and by following this step-by-step guide, you’ll have your new fan up and running in no time. Before we dive into the installation process, it’s important to note that the specific steps may vary slightly depending on your computer case and motherboard. However, the general principles outlined here will apply to most installations.
Throughout this guide, we’ll cover everything you need to know, from gathering the necessary tools and materials to troubleshooting common issues. By the end, you’ll have the knowledge and confidence to successfully install your Cooler Master case fan, ensuring better airflow and temperature regulation for your system.
Whether you’re looking to replace an old case fan or add additional cooling capacity to your computer, this guide will provide you with the essential information to get the job done. So, let’s get started with step one – gathering the necessary tools and materials!
Step 1: Gather the necessary tools and materials
Before you begin the installation process, it’s essential to gather all the tools and materials you’ll need. This ensures a smooth and efficient installation experience. Here’s a list of what you’ll need:
- A screwdriver (typically a Phillips or flathead screwdriver, depending on your computer case)
- The Cooler Master case fan (make sure it’s the correct size and compatible with your computer case)
- Screws or mounting brackets (included with the Cooler Master case fan or provided with your computer case)
- Rubber grommets (optional, but recommended for reducing vibrations)
- An anti-static wristband (recommended to prevent static electricity damage to your components)
Before handling any computer components, it’s important to ground yourself properly to discharge any static electricity. Consider using an anti-static wristband or regularly touching a grounded metal surface throughout the installation process.
Once you’ve gathered all the necessary tools and materials, you’re ready to move on to step two, where we’ll help you choose the right Cooler Master case fan for your system. Don’t worry if you’re unsure about which fan to choose – we’ll provide guidance to ensure you find a suitable option that meets your specific requirements.
Step 2: Choose the right Cooler Master case fan
When it comes to selecting the right Cooler Master case fan for your system, there are a few factors to consider. These include size, airflow, noise level, and any additional features you may need. Let’s dive into each consideration:
Size: Cooler Master offers case fans in various sizes, such as 80mm, 120mm, and 140mm. The size you choose will depend on the available space in your computer case and your specific cooling requirements. Larger fans generally provide better airflow at lower RPMs, resulting in quieter operation.
Airflow: Consider the airflow specifications of the Cooler Master case fan. Look for the CFM (cubic feet per minute) rating, which indicates the volume of air the fan can move per minute. Higher CFM values typically indicate better cooling performance.
Noise Level: Pay attention to the noise level of the fan, measured in decibels (dB). If you prefer a quieter system, choose a fan with a lower dB rating. Cooler Master offers fans with low-noise designs and advanced fan blade designs to minimize noise while maintaining efficient cooling.
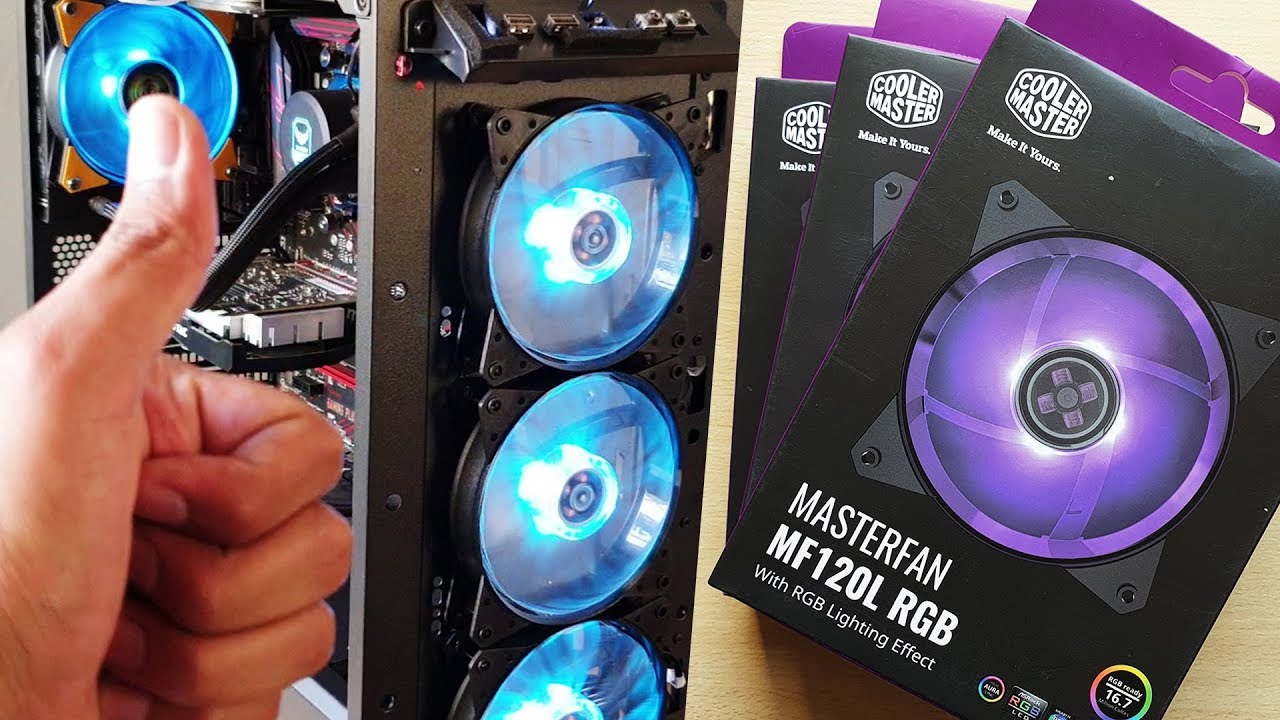
Additional Features: Cooler Master case fans may come with additional features, such as RGB lighting, fan speed control, and PWM (Pulse Width Modulation) for precise control over fan speeds. Consider whether you want these extra features or if a basic fan will suffice.
Take your time to research and consider these factors to ensure you find the right Cooler Master case fan that meets your specific needs. Once you’ve chosen the perfect fan, you’re ready to move on to step three, where we’ll discuss preparing the computer case for installation.
Step 3: Prepare the computer case for installation
Before installing the Cooler Master case fan, it’s important to prepare your computer case to ensure a smooth and successful installation. Follow these steps to get your case ready:
1. Power off and unplug your computer: It’s crucial to turn off your computer and disconnect it from the power source before beginning any installation process. This helps prevent any potential damage or electrical shocks.
2. Open the computer case: Depending on your computer case model, you may need to remove one or both side panels to gain access to the internal components. Check your case’s manual or look for screws or latches on the back panel that secure the side panels. Carefully remove them and set the side panels aside.
3. Identify the mounting points: Locate the mounting points where you’ll install the Cooler Master case fan. These are usually located on the front, back, or top of the case. Refer to your computer case’s manual or identify the existing fan location if you’re replacing an old fan.
4. Clean the mounting points: Use a soft, lint-free cloth or compressed air to remove any dust or debris from the mounting points. This ensures proper contact between the fan and the case, maximizing cooling efficiency.
5. Consider anti-vibration measures: If you have rubber grommets or anti-vibration pads included with your Cooler Master case fan or computer case, consider using them. These help reduce vibrations and noise caused by the fan operation.
Once your computer case is prepped and ready, you can move on to step four, where we’ll discuss removing the old fan (if applicable) before installing the new Cooler Master case fan.
Step 4: Remove the old fan (if applicable)
If you’re replacing an existing fan with your new Cooler Master case fan, you’ll need to remove the old fan before proceeding. Here’s how to do it:
1. Power off and unplug your computer: As a safety precaution, turn off your computer and disconnect it from the power source.
2. Identify the old fan: Locate the fan you want to replace. It’s usually mounted on the front, back, or top of the computer case. Make a note of any screws or clips securing the fan in place.
3. Disconnect the fan cables: Carefully detach the fan’s power cable from the motherboard or fan controller. If there are additional cables for RGB lighting or fan speed control, disconnect those as well.
4. Remove the mounting screws: Using a screwdriver, unscrew the screws securing the old fan to the mounting points in the case. Keep the screws aside as you’ll need them later for the new Cooler Master fan.
5. Gently remove the old fan: Once the screws are removed, gently pull the old fan away from the mounting points in the case. Be careful not to put too much pressure on the fan blades or any delicate components nearby.
6. Clean the mounting points: Take a moment to clean any dust or debris from the mounting points using a soft, lint-free cloth or compressed air. This ensures a clean surface for installing the new Cooler Master fan.
If you don’t have an old fan to remove, you can skip this step and proceed directly to step five, where we’ll cover the installation of the new Cooler Master case fan.
Step 5: Install the new Cooler Master case fan
Now that you’ve prepared the computer case and, if necessary, removed the old fan, it’s time to install your new Cooler Master case fan. Follow these steps to ensure a successful installation:
1. Orient the fan correctly: Before placing the fan inside the case, ensure you have it oriented correctly. The direction of the airflow arrows on the fan frame should align with the desired airflow direction for optimal cooling.
2. Align the mounting holes: Position the Cooler Master case fan in the desired mounting location inside the computer case. Align the screw holes on the fan with the corresponding mounting points or brackets in the case.
3. Secure the fan with screws: Take the screws you set aside earlier and use a screwdriver to secure the Cooler Master fan to the mounting points. Tighten the screws just enough to hold the fan in place, but be careful not to overtighten them, as it may damage the fan or the case.
4. Connect the fan cables: Locate the fan’s power cable and connect it to the appropriate fan header on the motherboard. If you have additional cables for RGB lighting or fan speed control, connect them as well, following the manufacturer’s instructions.
5. Attach any rubber grommets: If you have rubber grommets included with your Cooler Master case fan, now is the time to place them on the mounting screws. This helps reduce vibrations and noise caused by fan operation.
6. Close the computer case: Once the fan is securely installed, close the computer case by reattaching the side panels. Ensure that they are properly aligned and secure, using any screws or latches provided by the case manufacturer.
With the new Cooler Master case fan successfully installed, you’re now ready to move on to step six, where we’ll discuss connecting the fan to the motherboard to ensure proper functioning and control.
Step 6: Connect the fan to the motherboard
Connecting the Cooler Master case fan to the motherboard is an important step to ensure proper operation and control. Follow these steps to connect the fan correctly:
1. Identify the fan headers: Locate the fan headers on your motherboard. These are usually labeled “FAN” or “SYS_FAN” and are often located near the CPU socket or along the edges of the motherboard.
2. Match the fan connector: Take a look at the connector on the end of the fan’s power cable. It should have three or four pins, depending on the type of fan. Match the connector to the corresponding pins on the fan header.
3. Connect the fan cable: Gently plug the fan’s power cable into the fan header, ensuring a secure connection. Align the pins and connector, and push it firmly into place. You should feel a slight click when the connection is made.
4. Check the fan settings: Depending on your motherboard, you may have the option to adjust the fan settings in the BIOS or through software. Check your motherboard manual for instructions on accessing and modifying fan settings. Adjust the fan speed or enable temperature-based control if desired.
5. Repeat for additional fans (if applicable): If you have installed multiple Cooler Master case fans, repeat the previous steps for each fan. Connect them to available fan headers on the motherboard or use fan splitters or fan controllers, if necessary.
6. Secure the loose cables: To ensure a clean and organized setup, use zip ties or cable management solutions to secure any loose fan cables and prevent them from blocking airflow or interfering with other components.
With the fan properly connected to the motherboard, you’re one step closer to enjoying improved ventilation and temperature control in your computer. In the next step, step seven, we’ll discuss how to test the new Cooler Master case fan to ensure it’s functioning as expected.
Step 7: Test the new case fan
Now that you’ve installed the new Cooler Master case fan and connected it to the motherboard, it’s time to test its functionality. Following these steps will help ensure that the fan is working as expected:
1. Power on your computer: Plug in your computer and turn on the power. Allow the system to boot up to the operating system.
2. Monitor fan activity: Keep an eye on the new Cooler Master case fan to see if it starts spinning as soon as the computer powers on. The fan’s blades should be rotating steadily without any unusual noise or vibrations.
3. Verify airflow: Place your hand near the fan’s exhaust or vented areas to feel if there is a steady flow of air. Adequate airflow from the fan indicates that it is effectively cooling your system components.
4. Monitor temperature: Use monitoring software or check your BIOS to monitor the system’s temperature. With the new case fan installed, you should observe a decrease in temperature compared to before the installation. This indicates that the fan is effectively dissipating heat from your system.
5. Adjust fan settings (if required): If you’re not satisfied with the fan’s performance or noise level, you may want to adjust its speed or control settings. You can explore the BIOS or use manufacturer-provided software to modify fan settings to your preference.
If you observe any issues during the testing phase, such as the fan not spinning, excessive noise, or inadequate airflow, you should double-check the fan connections, ensure proper power supply, and verify that the fan is compatible with your motherboard and case. If problems persist, consult the Cooler Master product manual or contact their customer support for further assistance.
Congratulations! If everything is in order during the testing phase, you have successfully installed and tested your new Cooler Master case fan. In the next step, step eight, we’ll discuss common issues you might encounter during the installation process and provide troubleshooting tips.
Step 8: Troubleshooting common issues
While the installation process for a Cooler Master case fan is usually straightforward, you may encounter some common issues along the way. Here are a few troubleshooting tips to help you resolve them:
1. Fan not spinning: If the fan is not spinning, double-check the fan connections. Ensure that the power cable is securely plugged into the motherboard’s fan header. If the connections are correct and the fan still doesn’t spin, try connecting the fan to a different fan header to rule out a faulty header.
2. Excessive noise or vibrations: If the fan is making excessive noise or causing vibrations, ensure that it is securely mounted to the case using the appropriate screws or mounting brackets. Additionally, check that there are no loose connections or obstructions that may interfere with the fan’s operation.
3. Inadequate airflow: If you’re experiencing inadequate airflow, make sure that the fan is oriented correctly, with airflow arrows pointing in the desired direction. Also, check that there are no obstructions such as cables or dust blocking the airflow path. Cleaning the fan and the case’s vents can also help improve airflow.
4. Compatibility issues: Ensure that the Cooler Master case fan you’ve chosen is compatible with your computer case and motherboard. Check the fan size, mounting options, and power requirements to ensure they match with your system’s specifications.
5. Temperature concerns: If the fan installation doesn’t result in the desired temperature reduction, consider checking other cooling components such as CPU cooler, GPU cooler, or case ventilation. Sometimes, additional fans or replacing existing coolers may be required to achieve better cooling efficiency.
If you’re still unable to resolve the issue or encounter other problems, consult the Cooler Master product manual or reach out to their customer support for further guidance. They can provide specific troubleshooting steps tailored to your case fan model or offer suggestions based on your system configuration.
With the troubleshooting process complete, you should now have a fully functional Cooler Master case fan installed in your system, ensuring better airflow, temperature regulation, and improved performance!
Congratulations on successfully navigating the installation and troubleshooting process! You’re now ready to enjoy the enhanced cooling benefits that the Cooler Master case fan provides. Happy computing!
Conclusion
Installing a Cooler Master case fan is a practical and effective way to improve the cooling capacity of your computer system. By carefully following the steps outlined in this guide, you can successfully install a new fan and ensure proper airflow, temperature regulation, and overall system performance.
Throughout this guide, we discussed the importance of gathering the necessary tools and materials, choosing the right Cooler Master case fan, preparing the computer case, removing an old fan (if applicable), installing the new fan, connecting it to the motherboard, testing its functionality, and troubleshooting common issues.
Remember to consider factors such as fan size, airflow, noise level, and additional features when selecting a Cooler Master case fan. Take your time to properly prepare the computer case by cleaning the mounting points and installing any anti-vibration measures. When installing the new fan, ensure it is securely mounted and connected to the motherboard.
Testing the new case fan and monitoring its performance, temperature reduction, and airflow is crucial to ensure optimal functionality. If you encounter any issues, refer to the troubleshooting tips provided or consult the Cooler Master product manual and customer support for further assistance.
By following the steps outlined in this guide, you can enjoy a well-cooled and reliable computer system, ensuring better performance and longevity for your components. Remember to maintain regular cleaning and maintenance of your case fan to keep it operating at its best. With your new Cooler Master case fan installed, you can experience improved cooling efficiency and peace of mind knowing your system is well-protected.
We hope this guide has been informative and helpful in your journey to install a Cooler Master case fan. Enjoy your newly optimized computer cooling setup!


