Introduction
Welcome to this step-by-step guide on how to install a solid state drive (SSD) in an IBM ThinkPad T420. Upgrading to an SSD can greatly improve the performance and responsiveness of your laptop, allowing you to enjoy faster boot times, quicker file transfers, and smoother multitasking. Whether you’re a tech enthusiast or simply looking to breathe new life into your aging ThinkPad T420, this guide will walk you through the process, ensuring a successful installation.
Before we dive into the details, it’s important to note that installing an SSD involves working with delicate hardware components. If you don’t feel comfortable doing it yourself, we highly recommend seeking the assistance of a professional or a knowledgeable friend. Additionally, take the time to back up your data to avoid any potential loss during the upgrade process.
In this guide, we’ll cover each step of the installation process, from gathering the necessary tools to securely installing the SSD in your ThinkPad T420. Following these steps will ensure a smooth and successful upgrade experience. So, let’s get started!
Step 1: Gather the necessary tools and equipment
Before you begin installing the solid state drive in your IBM ThinkPad T420, it’s important to gather all the necessary tools and equipment. Having everything on hand will make the installation process smoother and more efficient. Here are the essential items you will need:
- Philips head screwdriver: You will need a small Philips head screwdriver to remove and reattach screws throughout the installation process. Make sure it is the right size to avoid damaging the screws.
- Static wrist strap: To prevent electrostatic discharge (ESD) from damaging sensitive components, it is highly recommended to wear a static wrist strap. This will help ground your body and minimize the risk of static electricity causing damage to your laptop.
- SSD: Of course, you will need the solid state drive itself. Ensure that the SSD is compatible with your ThinkPad T420. It’s a good idea to check the specifications and requirements before making a purchase.
- External storage device: Before starting the installation, it’s crucial to back up your data. A portable external storage device, such as a USB flash drive or an external hard drive, will come in handy for this purpose.
- Soft cloth or anti-static mat: As you disassemble your laptop, it’s important to work on a clean and static-free surface. A soft cloth or an anti-static mat will help protect the internal components from debris and static electricity.
Make sure you have all these tools and equipment readily available before proceeding to the next step. This will help streamline the installation process and ensure a successful and stress-free upgrade for your ThinkPad T420.
Step 2: Back up your data
Before embarking on the installation of a solid state drive (SSD) in your IBM ThinkPad T420, it is crucial to back up your data. This step is essential to prevent any potentially irretrievable loss of files or information during the upgrade process. Here’s how you can ensure a secure backup:
- Select a backup method: Decide on the most suitable backup method for your needs. You can opt for cloud-based storage services like Google Drive or Dropbox, or physically transfer your files to an external storage device such as a USB drive or an external hard disk.
- Identify and prioritize important files: Take the time to identify and prioritize the files and data that you need to back up. This includes documents, photos, videos, music, and any other files that are important to you.
- Organize your files: Before initiating the backup process, organize your files into logical folders and sub-folders. This will make it easier to locate and retrieve specific files later on.
- Start the backup process: Once you have decided on your backup method and organized your files, begin transferring them to the chosen storage destination. Depending on the size of your data, this process may take some time, so be patient and ensure that the transfer is complete.
- Verify the backup: After the backup is complete, take a moment to verify that all the important files have been successfully transferred. Double-check that everything you need has been included in the backup, and cross-reference with your original files to ensure accuracy.
Remember, backing up your data is not limited to the installation of a new SSD. It is always a good practice to regularly back up your files to safeguard against unexpected data loss due to hardware failures, accidents, or software issues.
By following this step and creating a secure backup of your data, you can proceed with peace of mind to the next stage of the installation process.
Step 3: Power off and unplug your ThinkPad T420
Before you begin disassembling your IBM ThinkPad T420 to install a solid state drive (SSD), it is essential to power off your laptop and disconnect it from any external power sources. Following this step will help ensure your safety and protect your laptop from potential damage. Here’s how to do it:
- Save your work and close all programs: Before powering off your ThinkPad T420, make sure to save any files or documents you are working on and close all open programs. This will prevent any potential data loss or corruption during the shutdown process.
- Shut down your laptop: To power off your ThinkPad T420, click on the “Start” menu in the bottom-left corner of your screen, then select “Shut down” from the options. Wait for your laptop to completely shut down before proceeding to the next step.
- Disconnect the charger: Unplug the charger from the power outlet and disconnect it from your ThinkPad T420. This will ensure that your laptop is running solely on battery power and reduce the risk of electrical shock during the disassembly process.
- Remove any peripheral devices: Take a moment to disconnect and remove any peripheral devices or cables that are connected to your ThinkPad T420, such as USB drives, external monitors, or headphones. This will give you easier access and prevent any accidental damage to these devices during the installation.
Once the above steps are completed, your ThinkPad T420 will be powered off and disconnected from all external power sources. This ensures the safety of both you and your laptop as you proceed with the installation process. Make sure to keep your laptop in a secure and stable position during the next steps to avoid any accidental damage.
Now that your laptop is powered off and unplugged, we’re ready to move on to the next step: removing the bottom cover of your ThinkPad T420.
Step 4: Remove the bottom cover of your ThinkPad T420
Now that your IBM ThinkPad T420 is powered off and unplugged, it’s time to remove the bottom cover of your laptop. This will provide access to the internal components and allow you to proceed with the installation of the solid state drive (SSD). Follow these steps carefully:
- Turn your laptop over: Gently flip your ThinkPad T420 over so that the bottom side is facing up. Place it on a clean and static-free surface to avoid any potential damage or static electricity buildup.
- Locate the screws: The bottom cover of your ThinkPad T420 is held in place by several small screws. Look for the screw holes or indications on the cover to locate them. Typically, there will be screws around the perimeter of the cover and some in the center.
- Remove the screws: Using a small Philips head screwdriver, unscrew each of the screws securing the bottom cover. Keep the screws in a safe place as you will need them later when reassembling your laptop.
- Unlock any latches or clips: Some laptop models have additional latches or clips that hold the bottom cover in place. Check for any latches or clips near the edges of the cover and gently unlock them using a plastic spudger or a flat tool. Be careful not to exert too much force to prevent damaging the cover or the internal components.
- Remove the bottom cover: Once all the screws and latches are undone, carefully lift the bottom cover of your ThinkPad T420 and set it aside. Take note of any cables that may still be connected to the cover and gently detach them to free the cover completely.
With the bottom cover successfully removed, you now have access to the internal components of your ThinkPad T420. Take a moment to familiarize yourself with the layout and location of the hard drive bay, which is where we will be installing the solid state drive (SSD) in the next steps.
Proceed with caution and precision when handling the internal components of your laptop to avoid any unnecessary damage. Let’s move on to the next step: locating the hard drive bay.
Step 5: Locate the hard drive bay
Now that you have removed the bottom cover of your IBM ThinkPad T420, it’s time to locate the hard drive bay. This is where the current hard drive is housed and where you will be installing the solid state drive (SSD). Follow these steps to find the hard drive bay:
- Inspect the internal components: Take a moment to examine the internal components of your ThinkPad T420. Look for the area that houses the current hard drive and observe its position relative to other components like the battery, memory modules, or wireless cards.
- Refer to the user manual: If you’re unsure about the location of the hard drive bay, refer to the user manual of your ThinkPad T420. The manual will provide detailed information and diagrams to help you identify the specific location of the hard drive bay.
- Look for demarcations or labels: Manufacturers often label or designate areas for specific components. Look for any demarcations or labels that indicate the hard drive bay. These may be in the form of icons or text, such as “HDD” or “Hard Drive”.
- Observe the mounting bracket: The hard drive is typically held in place by a mounting bracket or enclosure. Look for a metal or plastic frame that secures the hard drive, as this will often be located within the hard drive bay.
Take your time and ensure you have correctly located the hard drive bay before proceeding to the next step. The exact location may vary depending on the make and model of your ThinkPad T420, so it’s important to be thorough in your search.
Once you have successfully identified the hard drive bay, you’re one step closer to installing the solid state drive (SSD) and reaping the benefits of improved performance for your ThinkPad T420.
Now, let’s move on to the next step: removing the old hard drive from the bay.
Step 6: Remove the old hard drive
Now that you have located the hard drive bay of your IBM ThinkPad T420, it’s time to remove the old hard drive. Removing the old hard drive is a necessary step before installing the solid state drive (SSD). Follow these steps to safely remove the old hard drive:
- Identify the old hard drive: Take a moment to visually identify the existing hard drive within the hard drive bay. Observe its size, shape, and any connectors or cables attached to it. This will help distinguish it from other components and ensure you are removing the correct device.
- Disconnect any cables: Carefully disconnect any cables or connectors that are attached to the old hard drive. These may include data cables, power cables, or any other cables securing the drive in place. Gently pull the connectors away from the hard drive, taking care not to damage them in the process.
- Remove any mounting screws: Look for any screws securing the old hard drive to the mounting bracket or the hard drive bay itself. Use a small Philips head screwdriver to loosen and remove these screws, setting them aside in a safe place.
- Remove the old hard drive: Once all cables and screws are disconnected, carefully remove the old hard drive from the hard drive bay. Take note of its orientation and position within the bay, as you will need to install the new SSD in the same manner.
It’s important to handle the old hard drive with care, as it may contain sensitive data or moving parts. Place it in an anti-static bag or a safe location for later disposal or storage.
With the old hard drive successfully removed, you have made room for the new solid state drive (SSD) in your ThinkPad T420. Now, let’s move on to the next step: installing the SSD in the hard drive bay.
Step 7: Install the solid state drive in the hard drive bay
Now that you have removed the old hard drive, it’s time to install the new solid state drive (SSD) in the hard drive bay of your IBM ThinkPad T420. Follow these steps to ensure a successful installation:
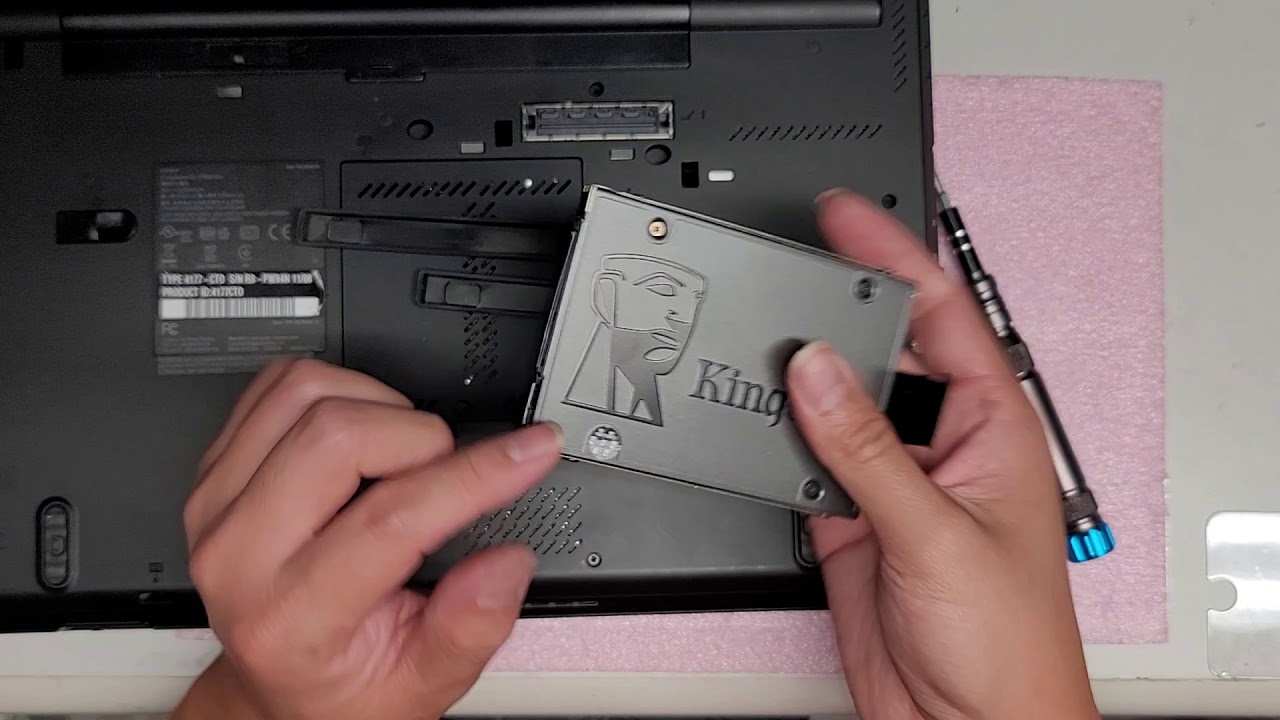
- Prepare the SSD for installation: Carefully remove the new SSD from its packaging. Take note of its orientation and the connectors or pins on the drive. Make sure to handle the SSD by its edges to avoid any damage to the circuitry.
- Align the SSD with the hard drive bay: Position the SSD in the same orientation as the previous hard drive. Align the connectors or pins on the SSD with the corresponding ports within the hard drive bay. Ensure a secure fit by gently sliding the SSD into place.
- Connect any necessary cables: If there are any data cables or power cables that need to be connected to the SSD, carefully attach them to the respective ports. Take care not to force the connectors or bend any pins during this step.
- Ensure a secure fit: Once the SSD is properly aligned and the cables are connected, gently push down on the SSD to ensure it is securely in place. Check for any movement or looseness to confirm a snug fit.
It’s important to note that not all SSDs may require cables for connectivity. Some SSDs, particularly M.2 SSDs, may rely on direct connections to the motherboard or other specialized ports. Consult the documentation or specifications of your specific SSD model for guidance on installation.
By following these steps, you have successfully installed the solid state drive (SSD) in the hard drive bay of your ThinkPad T420. The new SSD will provide improved performance and faster data retrieval compared to traditional hard drives. Now, it’s time to secure the SSD in place to prevent any movement or accidental disconnection.
Next, let’s move on to the next step: securing the solid state drive in place.
Step 8: Secure the solid state drive in place
Now that you have successfully installed the solid state drive (SSD) in the hard drive bay of your IBM ThinkPad T420, it’s important to secure it in place to prevent any movement or accidental disconnection. Follow these steps to ensure the SSD is properly secured:
- Locate the mounting brackets or screws: Look for any mounting brackets or screws that were originally holding the old hard drive in place. These brackets or screws may need to be reused to secure the SSD in the same manner.
- Align the mounting brackets: If there are mounting brackets, position and align them with the screw holes on the sides or bottom of the SSD. Ensure a proper fit by adjusting the brackets accordingly.
- Secure the SSD with screws: Using a small Philips head screwdriver, insert and tighten the screws through the mounting brackets and into the screw holes on the SSD. Be careful not to over-tighten the screws to avoid damaging the SSD or the mounting brackets.
- Double-check the stability: Confirm that the SSD is securely fastened by gently pressing on it. There should be minimal to no movement or rattling. If it feels loose, double-check the screws and mounting brackets to ensure everything is properly tightened.
Keeping the solid state drive (SSD) securely in place is essential to prevent any potential damage or disconnection during normal usage or transportation of your ThinkPad T420.
Take a moment to double-check the connections and overall stability of the SSD before proceeding to the next step. This will help ensure the longevity and optimal performance of the SSD in your laptop.
With the SSD now securely in place, it’s time to reattach the bottom cover of your ThinkPad T420. Let’s move on to the next step: reattaching the bottom cover.
Step 9: Reattach the bottom cover of your ThinkPad T420
Now that you have successfully installed and secured the solid state drive (SSD) in your IBM ThinkPad T420, it’s time to reattach the bottom cover. Reattaching the cover will not only give your laptop a finished appearance but will also protect the internal components. Follow these steps to securely reattach the bottom cover:
- Position the bottom cover: Carefully align the bottom cover with the bottom of your ThinkPad T420. Ensure that all the edges of the cover align with the corresponding edges of the laptop’s chassis.
- Reconnect any cables: If there were any cables or connectors that were detached from the cover during the initial removal, reconnect them to their respective ports. Take extra care to ensure that the connectors are properly aligned and inserted without forcing them.
- Secure the bottom cover: Begin securing the bottom cover by first tightening any screws or latches that hold it in place. Start with the screws near the perimeter and work your way towards the center. Use a small Philips head screwdriver to tighten the screws, but be cautious not to overtighten.
- Test the cover: Once the screws are tightened, press down on various parts of the bottom cover to ensure it is securely in place. Check for any areas that may feel loose or not properly aligned. If needed, readjust and retighten the screws as necessary.
It’s important to take your time and ensure that the bottom cover is correctly and securely reattached. This will help protect the internal components and prevent any potential issues in the future.
Congratulations! With the bottom cover now reattached, your IBM ThinkPad T420 is almost ready for use. In the next step, we will power on your laptop and ensure that everything is functioning properly.
Let’s proceed to the final step: powering on your ThinkPad T420.
Step 10: Power on your ThinkPad T420
Now that you have successfully reattached the bottom cover of your IBM ThinkPad T420, it’s time to power on your laptop and ensure that everything is functioning properly after the installation of the solid state drive (SSD). Follow these steps to power on your ThinkPad T420:
- Double-check all connections: Before turning on your laptop, take a moment to double-check all the connections you made during the installation process. Ensure that the SSD is securely seated in the hard drive bay and that all cables are properly connected.
- Plug in the power adapter: Connect your ThinkPad T420 to a power source using the provided power adapter. Make sure the adapter is securely plugged into both the laptop and the power outlet.
- Power on your laptop: Press the power button located on your ThinkPad T420 to turn it on. You should see the startup screen and hear the familiar sounds of your laptop booting up.
- Check for SSD detection: Once your laptop has powered on, go to the BIOS or UEFI settings to check if the solid state drive (SSD) is detected. The specific key combination to access these settings varies by manufacturer, so consult your laptop’s user manual or search online for the correct key combination.
- Confirm successful installation: In the BIOS or UEFI settings, ensure that the SSD is listed as a recognized storage device. If it is present, you have successfully installed the SSD in your ThinkPad T420.
- Boot into the operating system: Exit the BIOS or UEFI settings and allow your laptop to proceed with booting into the operating system. If everything has been successfully installed, your ThinkPad T420 should now boot faster and perform more efficiently with the new SSD.
If, for any reason, your ThinkPad T420 does not start up or the SSD is not recognized, double-check your installation steps and connections. It’s also a good idea to consult the manufacturer’s documentation or seek assistance from a professional if needed.
Now that your IBM ThinkPad T420 is powered on and running with the new solid state drive (SSD), you can enjoy improved performance, faster boot times, and smoother multitasking. Congratulations on successfully installing the SSD in your ThinkPad T420!
If you’ve encountered any issues during the installation process, don’t hesitate to seek assistance or consult the manufacturer’s support resources. Enjoy your upgraded laptop and the enhanced performance it brings!
Conclusion
Congratulations on successfully installing a solid state drive (SSD) in your IBM ThinkPad T420! By following this step-by-step guide, you have upgraded your laptop’s storage and improved its overall performance. Let’s recap the installation process:
Step 1: Gathering the necessary tools and equipment – By having the right tools on hand, you set yourself up for a smooth installation process.
Step 2: Backing up your data – Prioritizing data backup ensures that no important files are lost during the upgrade.
Step 3: Powering off and unplugging your ThinkPad T420 – Safely shutting down and disconnecting your laptop is essential to protect yourself and the device from any potential harm.
Step 4: Removing the bottom cover of your ThinkPad T420 – Accessing the internal components prepares you for the SSD installation.
Step 5: Locating the hard drive bay – Identifying the hard drive bay helps you position the SSD correctly.
Step 6: Removing the old hard drive – Safely removing the old hard drive clears the way for the new SSD.
Step 7: Installing the SSD in the hard drive bay – Properly aligning and connecting the SSD ensures a secure fit.
Step 8: Securing the solid state drive in place – Securing the SSD prevents any movement or accidental disconnection.
Step 9: Reattaching the bottom cover of your ThinkPad T420 – Reattaching the bottom cover protects the internal components and gives your laptop a finished appearance.
Step 10: Powering on your ThinkPad T420 – Powering on and checking for SSD detection confirms a successful installation.
With the SSD installation complete, your ThinkPad T420 is now ready to deliver faster boot times, quicker file transfers, and smoother multitasking. You can enjoy an improved user experience with increased responsiveness and overall system performance.
Remember to regularly back up your data and keep your system updated to maintain the optimal performance of your ThinkPad T420. If you encounter any issues or have any questions, consult the manufacturer’s documentation or seek assistance from a professional.
Thank you for following this guide, and we hope your upgraded ThinkPad T420 serves you well for years to come!