Introduction
Welcome to our guide on how to install a Crucial SSD! If you’re looking to upgrade your computer’s storage capabilities or replace an old hard drive with a faster and more efficient SSD, you’ve come to the right place. Installing an SSD can significantly improve your computer’s performance, speed up boot times, and provide ample space for your valuable data.
Crucial is a renowned brand in the SSD market, known for producing high-quality and reliable solid-state drives. Whether you’re a seasoned computer enthusiast or a tech novice, this step-by-step guide will walk you through the installation process, ensuring a smooth and successful upgrade.
Before we dive into the installation process, it’s important to note that opening and working inside your computer case carries some risks. Make sure to follow proper safety precautions, such as grounding yourself to prevent static discharge, working on a clean and well-lit surface, and disconnecting all power sources.
In this guide, we’ll cover the necessary tools and materials you’ll need, how to open the computer case, locating the SATA connectors, connecting the Crucial SSD, securing it in place, closing the case, powering on and initializing the SSD, and optional steps for transferring data from your old drive.
By the end of this guide, you’ll be well-equipped with the knowledge and confidence to install a Crucial SSD in your computer, unlocking its true potential and transforming your computing experience. So, let’s get started with Step 1: Gathering the necessary tools and materials!
Step 1: Gather necessary tools and materials
Before you begin the installation process, it’s essential to gather all the necessary tools and materials. Having everything at hand will ensure a smooth and efficient installation. Here’s a list of items you’ll need:
- A Crucial SSD: Make sure you have the right Crucial SSD model that is compatible with your computer. Consider the storage capacity you require for your needs.
- Screwdriver: Depending on your computer case, you may require a Phillips or a Torx screwdriver. Check the case specifications or consult your computer’s manual to determine the appropriate screwdriver type.
- Antistatic wrist strap: This optional accessory helps dissipate any static electricity from your body, preventing potential damage to sensitive electronic components. Consider using it to ensure a safe installation.
- Cable ties or velcro straps: These handy accessories will help you manage and organize the cables inside your computer case, reducing clutter and improving airflow.
- Cleaning cloth: Before you install the Crucial SSD, it’s a good idea to clean any dust or debris from the computer case and surrounding components. A soft microfiber cleaning cloth will do the job effectively.
- Optional: SATA cable: Depending on the number of available SATA connectors in your computer, you may need an additional SATA cable to connect the Crucial SSD. Check your computer’s specifications or consult the manual to determine if you require an extra cable.
Once you have gathered all the necessary tools and materials, you’re ready to proceed to the next step, which involves opening your computer case. Remember to handle all components with care, avoid static discharge, and power off your computer before starting the installation process.
Step 2: Open the computer case
Now that you have gathered all the necessary tools and materials, it’s time to open your computer case. Follow these steps:
- Power off your computer: Make sure to shut down your computer properly and disconnect the power cord from the wall outlet.
- Ground yourself: To prevent any static electricity from damaging sensitive components, it’s important to ground yourself. You can do this by touching a metal surface or by wearing an antistatic wrist strap.
- Locate the screws: Look for the screws securing the computer case. Commonly, they are located along the edges at the back of the case. Use the appropriate screwdriver to remove them.
- Remove the side panel: Gently slide or lift the side panel away from the computer case. Depending on your case design, you may need to remove additional screws or use a latch mechanism to open the panel.
- Set aside the side panel: Place the side panel in a safe and stable location, ensuring it does not interfere with your workspace or risk being damaged.
With the computer case open, you now have access to the internal components of your computer. Take a moment to familiarize yourself with the layout and organization of the components, as this will help you locate the SATA connectors for the next step.
Remember, when working inside the computer case, be mindful of static discharge and handle the components with care. Refrain from touching any exposed circuitry or delicate parts. Let’s move on to the next step: locating the SATA connectors.
Step 3: Locate the SATA connectors
With the computer case open, it’s time to locate the SATA connectors where you will connect your Crucial SSD. SATA (Serial ATA) connectors are small rectangular ports typically found on the motherboard or a separate SATA controller card. Follow these steps to find the SATA connectors:
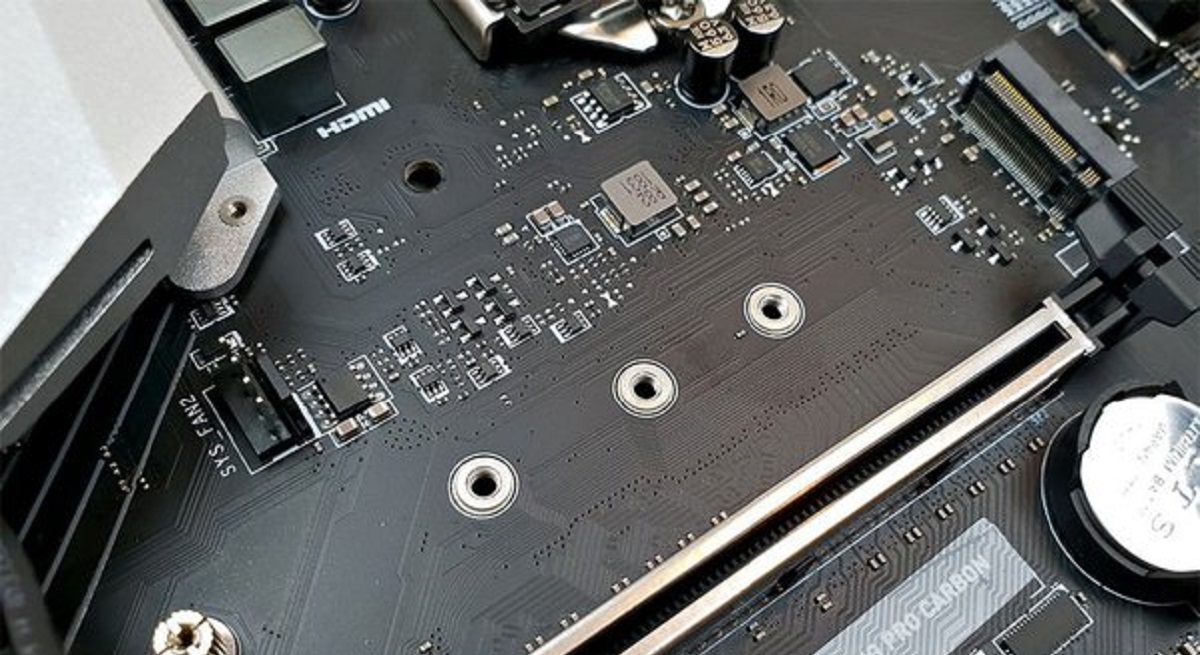
- Identify the motherboard or SATA controller card: Look for the main circuit board inside your computer case. This is the motherboard. If you have a separate SATA controller card, it will be an additional card plugged into the motherboard.
- Look for the SATA ports: On the motherboard or SATA controller card, you’ll find multiple ports labeled as SATA. These ports are usually color-coded and have the word “SATA” printed next to them.
- Inspect the SATA cable orientation: Take note of the direction the existing SATA cables are connected to the ports. Most SATA connectors have a small L-shape groove on one side. Ensure you align the groove on the Crucial SSD’s SATA connector with the same side on the SATA ports.
- Count the available SATA connectors: Depending on your computer’s specifications, you may have multiple SATA connectors. Count the number of available ports to determine the best one for connecting your Crucial SSD.
It’s important to note that the SATA ports may be oriented horizontally or vertically on the motherboard or SATA controller card. Take note of the orientation to ensure you connect the Crucial SSD correctly.
Now that you have located the SATA connectors, you’re ready to proceed to the next step: connecting the Crucial SSD.
Step 4: Connect the Crucial SSD
Now that you’ve located the SATA connectors on your motherboard or SATA controller card, it’s time to connect your Crucial SSD. Follow these steps to ensure a secure and proper connection:
- Locate the SATA data cable: Check if you have an available SATA data cable. If not, you may need to purchase an additional one. Connect one end of the SATA data cable to the SATA port on the Crucial SSD.
- Connect the other end of the SATA data cable: Plug the other end of the SATA data cable into the SATA port you identified in Step 3 on the motherboard or SATA controller card. Ensure a snug fit, but avoid applying excessive force.
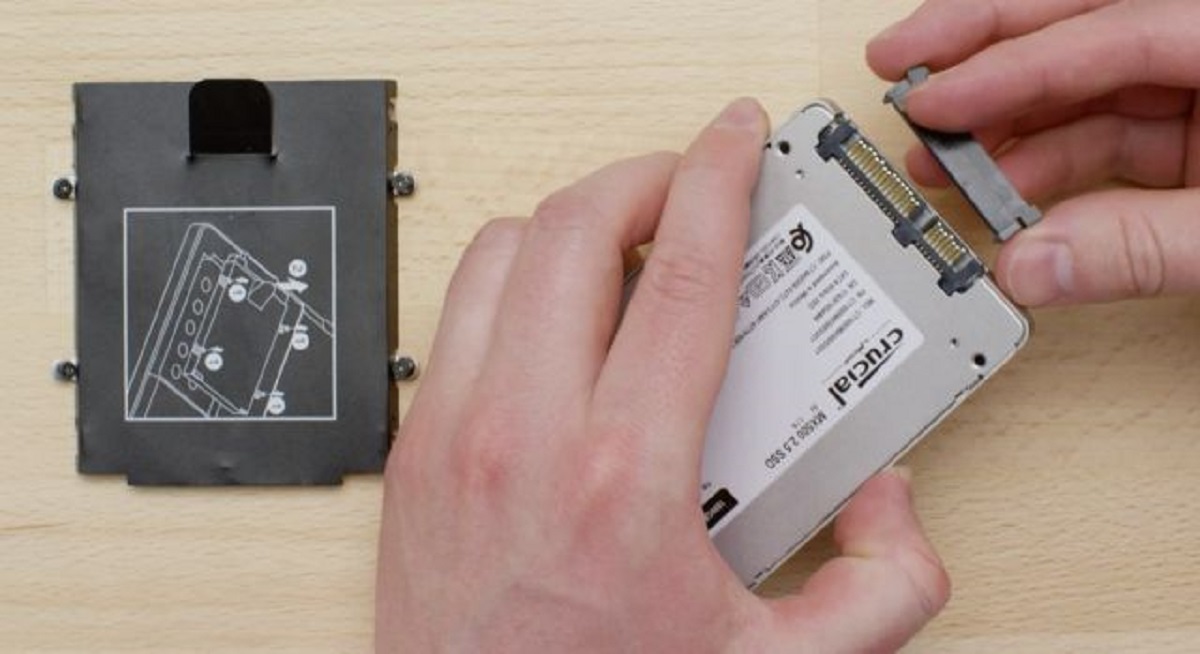
- Find the SATA power connector: Locate the SATA power connector from your power supply unit (PSU). It is a wide, flat connector with a L-shaped groove on one side.
- Connect the SATA power cable: Plug the SATA power cable into the corresponding SATA power connector on the Crucial SSD. Again, ensure a secure connection without exerting excessive force.
By connecting both the SATA data cable and the SATA power cable, you have completed the physical connection of the Crucial SSD to your computer. Take a moment to double-check that all connections are secure and properly aligned.
Remember, if you’re unsure about any of the connections or need further assistance, consult your motherboard or computer manual. Following the correct instructions for your specific hardware is crucial to avoid any errors or damage.
Now that the Crucial SSD is connected, it’s time to move on to the next step, securing the SSD in place.
Step 5: Secure the SSD in place
Securing the Crucial SSD in place is essential to prevent any movement or damage during the operation of your computer. Follow these steps to properly secure the SSD:
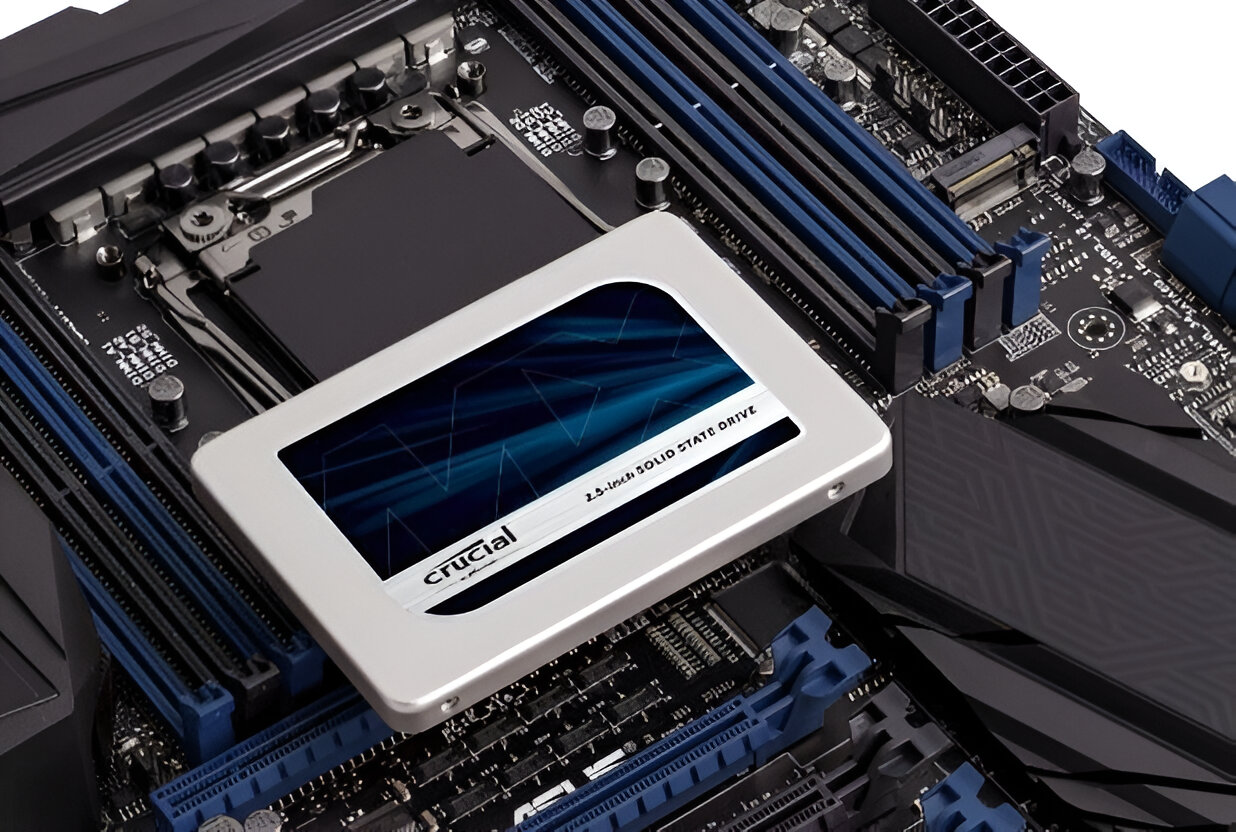
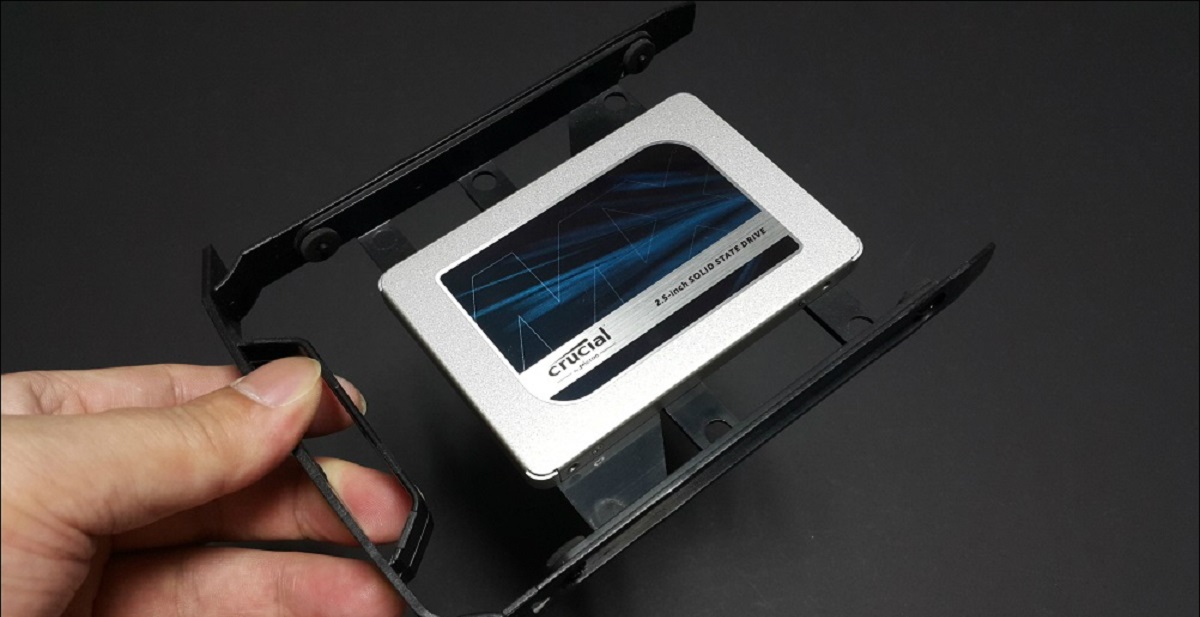
- Check for mounting points: Look for mounting points on the inside of your computer case specifically designed for SSD installation. These are typically small brackets or trays with screw holes.
- Align the Crucial SSD: Place the Crucial SSD in the designated mounting area, ensuring it aligns properly with the screw holes or brackets.
- Secure the SSD: Use the appropriate screws (often included with your computer case) to secure the Crucial SSD in place. Align the screw holes on the SSD with the mounting points and carefully screw them in, taking care not to overtighten.
Depending on your computer case, you may have alternative methods of securing the SSD, such as using rubber grommets or mounting brackets. Consult your computer’s manual or the case manufacturer’s instructions for specific guidance.
Properly securing the Crucial SSD not only prevents physical movement but also aids in maintaining proper airflow within your computer case, which can contribute to cooler and more efficient overall system performance.
Once you’ve securely mounted the Crucial SSD in place, take a moment to double-check that it’s firmly attached and does not wiggle or shift when lightly pushed. This completes the securing step, and you can now move on to the next step: closing the computer case.
Step 6: Close the computer case
After securing the Crucial SSD in place, it’s time to close the computer case to ensure the components are protected and the system operates optimally. Follow these steps to properly close the case:
- Align the side panel: Carefully align the side panel of the computer case with the corresponding slots or hinges on the main frame.
- Slide or secure the side panel: Depending on your computer case design, either slide the side panel back into position or secure it using the latch or screws that were previously removed.
- Ensure a proper fit: Gently press the side panel to ensure it is properly seated and fully secure. Double-check that all edges are aligned and there are no gaps.
- Insert and tighten screws: If your case requires screws to secure the side panel, insert them into the screw holes and tighten them just enough to hold the panel in place, without overtightening.
Keep in mind that overtightening the screws can cause damage to the case or strip the screw threads, making future maintenance or upgrades more challenging. Use a reasonable amount of force to secure the side panel firmly, but not excessively.
Once the side panel is securely in place, take a moment to visually inspect the computer case and ensure that everything is properly closed, aligned, and free from any obstructions or loose cables.
With the computer case closed, you’re now ready to move on to the next and final step: powering on the computer and initializing the Crucial SSD.
Step 7: Power on and initialize the SSD
With the Crucial SSD installed and the computer case closed, it’s time to power on your computer and initialize the SSD. Follow these steps to ensure a successful initialization:
- Reconnect the power cord: Plug the power cord back into the wall outlet, ensuring a secure connection.
- Power on the computer: Press the power button on your computer to turn it on. Wait for the startup process to complete.
- Access the BIOS/UEFI: During the computer’s initial boot-up process, there is usually a prompt to access the BIOS/UEFI settings. This is typically achieved by pressing a specific key, such as F2 or Delete. Consult your computer’s manual if you’re unsure about the key combination.
- Locate the SSD in the BIOS/UEFI: Inside the BIOS/UEFI settings, navigate to the “Storage” or “Boot” section and locate the Crucial SSD. It should be listed as a connected drive.
- Set the SSD as the boot device (optional): If you intend to use the SSD as your primary boot drive, change the boot order in the BIOS/UEFI settings to prioritize the Crucial SSD. This ensures that the computer will boot from the SSD instead of the old drive.
- Save changes and exit: Once you have made any necessary adjustments in the BIOS/UEFI settings, save the changes and exit the settings interface.
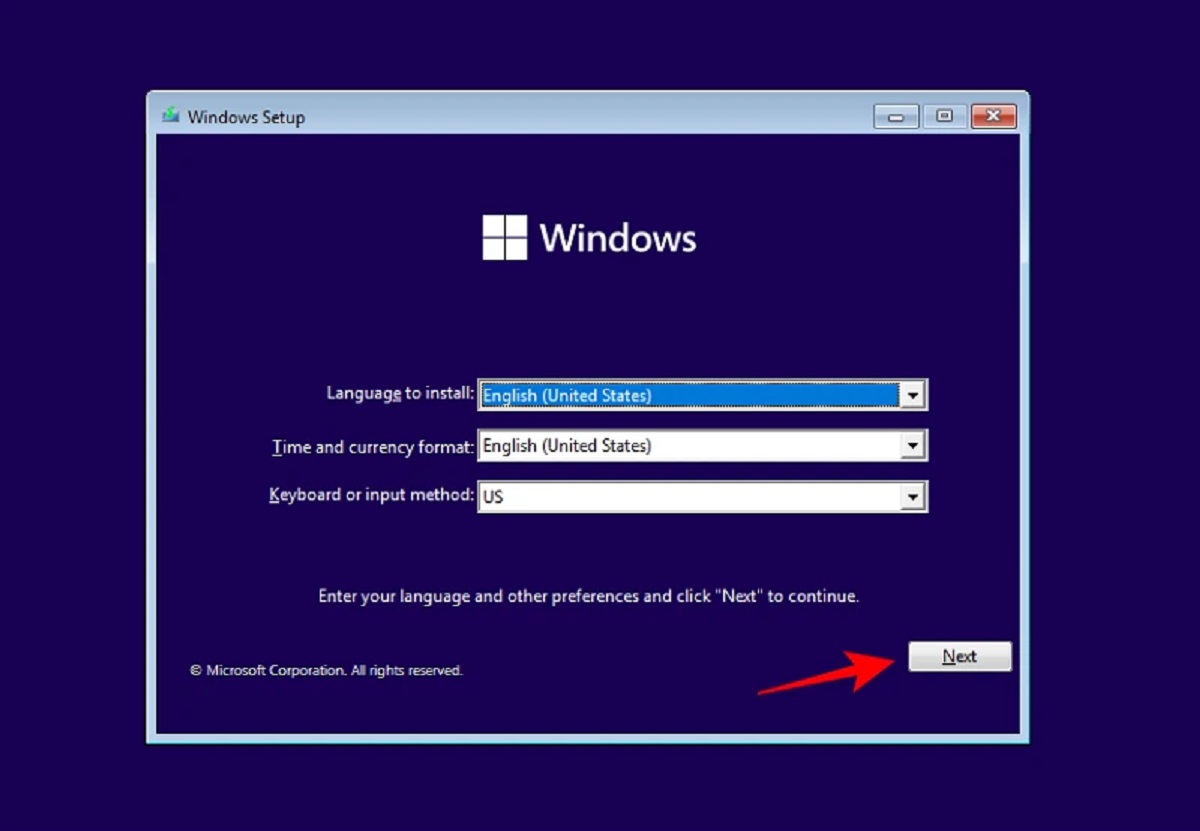
- Operating System installation: If you are installing a fresh operating system on the Crucial SSD, follow the prompts on the installation media to complete the process. If you are transferring the existing operating system from the old drive, skip to the optional step below.
Once you have completed these steps, your computer should recognize and initialize the Crucial SSD. Depending on your operating system and its configuration, additional steps may be required to fully utilize the SSD’s storage capacity and optimize its performance. Consult the operating system’s documentation or Crucial’s support resources for further guidance.
Congratulations! You have successfully powered on and initialized the Crucial SSD. If you have data on your old drive that you would like to transfer to the SSD, proceed to the optional step below. Otherwise, you can now enjoy the improved performance and storage capability provided by the Crucial SSD.
Step 8: Transfer data from old drive (optional)
If you have data on your old drive that you would like to transfer to the newly installed Crucial SSD, follow these steps to ensure a smooth and successful data migration:
- Clone the old drive: To transfer all the data from the old drive to the Crucial SSD, you can use a disk cloning software. There are several reliable options available, such as Acronis True Image, EaseUS Todo Backup, and Clonezilla. Install and open the cloning software.
- Select the source and destination drives: In the cloning software, select the old drive as the source drive and the Crucial SSD as the destination drive. Ensure that the target SSD has enough capacity to accommodate the data from the old drive.
- Configure the cloning process: Depending on the software you are using, you may have options to resize partitions, select specific files or folders, or choose a sector-by-sector clone. Review the settings based on your preferences and requirements.
- Start the cloning process: Once you have configured the settings, start the cloning process. The software will begin copying data from the old drive to the Crucial SSD. This process may take some time, depending on the size of the data being transferred.
- Verify the clone: Once the cloning process is complete, verify that the data has been successfully transferred to the Crucial SSD. You can do this by comparing the files and folders on both drives or by checking the disk usage in the file explorer.
- Change the boot order (optional): If you want to use the Crucial SSD as your primary boot drive, you may need to change the boot order in the BIOS/UEFI settings. Refer to Step 7 for instructions on accessing the BIOS/UEFI settings and configuring the boot order.
- Disconnect the old drive (optional): If you have successfully transferred all your data to the Crucial SSD and no longer need the old drive, you can disconnect it from the computer. This step is optional but recommended to free up space and avoid confusion.
Remember to back up your important data before attempting any disk cloning or data transfer process. In rare cases, data loss or corruption can occur during the migration process, and having a backup ensures that your data is safe.
Once you have completed the data transfer process, you can now enjoy the improved performance and storage capacity of the Crucial SSD with all your existing files and settings intact.
Conclusion
Congratulations! You have successfully completed the installation of a Crucial SSD in your computer. By following the step-by-step guide outlined in this article, you have transformed your computer’s storage capabilities, enhancing its speed, performance, and overall user experience.
Throughout the installation process, you learned how to gather the necessary tools and materials, open the computer case, locate and connect the Crucial SSD using the SATA connectors, secure the SSD in place, close the computer case, power on the system, and initialize the SSD. You also had the option to transfer data from your old drive to the new Crucial SSD.
Remember, when working on your computer, always prioritize safety by following proper precautions and referencing your computer’s manual when needed. Take your time during the installation process, ensuring all connections are secure and accurate.
With the Crucial SSD installed, you can expect faster boot times, quicker application launches, and improved overall system responsiveness. The increased storage capacity will allow you to store more files, documents, photos, videos, and other valuable data without worrying about running out of space.
Don’t forget to regularly update your Crucial SSD firmware and maintain a backup of your important data to ensure the longevity and integrity of your storage solution. Refer to Crucial’s support resources for firmware updates and other helpful information.
Thank you for choosing Crucial and following our guide to install your Crucial SSD. Enjoy the enhanced performance and storage capabilities that come with this upgrade! Happy computing!