Introduction
Welcome to our guide on how to clear your SSD! If you’re looking to improve the performance and lifespan of your solid-state drive, this article is for you. SSDs (Solid-State Drives) have become increasingly popular due to their faster read and write speeds compared to traditional hard drives. However, over time, the performance of an SSD can degrade due to various factors like fragmented data, unnecessary files, and outdated firmware.
Clearing your SSD is a maintenance task that can help restore its performance to optimal levels and ensure longevity. By following the steps outlined in this guide, you’ll be able to safely and effectively clear your SSD and keep it running smoothly.
In this article, we’ll explore the importance of clearing your SSD, the things you should consider before initiating the process, and provide you with a step-by-step guide on how to clear your SSD properly. We’ll also discuss some tips for maintaining your SSD’s performance in the long run. Whether you’re a tech enthusiast or a casual user, this guide will equip you with the knowledge you need to maintain and optimize your SSD.
Before we dive into the details, it’s important to note that clearing your SSD is a process that involves deleting all data stored on it. Therefore, it’s crucial to back up any important files and documents before proceeding with the clearing process. Now, let’s explore why it is important to clear your SSD in the first place.
Why is it important to clear your SSD?
Clearing your SSD is essential for maintaining its performance and ensuring its longevity. Here are a few reasons why clearing your SSD is important:
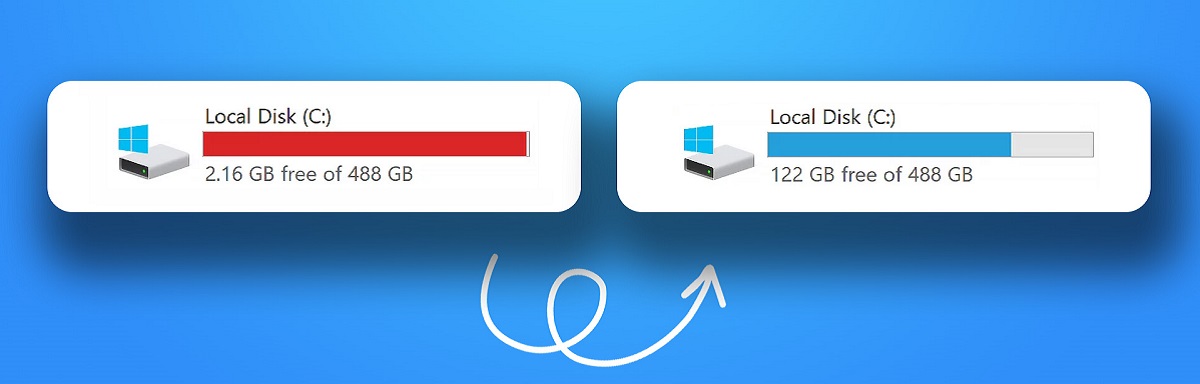
- Reclaim Storage Space: As you use your SSD, temporary files, duplicate files, and unnecessary system files can accumulate, taking up valuable storage space. By clearing your SSD, you can reclaim this space and ensure you have enough room for important files and applications.
- Improve Performance: Over time, fragmented data can slow down your SSD’s read and write speeds. Clearing your SSD helps consolidate the data, reducing fragmentation and improving overall performance. It allows your SSD to access files more efficiently, resulting in faster boot times, application launches, and file transfers.
- Enhance Lifespan: SSDs have a finite number of write cycles. Every time data is written or rewritten on the drive, it reduces its lifespan. By clearing your SSD, you can minimize unnecessary writes and prolong its overall lifespan. Additionally, clearing your SSD can help prevent potential errors and issues that may arise from outdated or corrupted files.
- Ensure Data Security: If you’re planning to sell, donate, or dispose of your SSD, it’s crucial to clear all the data stored on it to protect your personal information. Clearing your SSD using secure methods ensures that your sensitive data cannot be recovered by unauthorized individuals.
By routinely clearing your SSD, you can maintain its performance, extend its lifespan, and ensure the security of your personal data. Now, let’s move on to the things you should consider before clearing your SSD.
Things to consider before clearing your SSD
Before you proceed with clearing your SSD, there are a few important factors to consider. These factors will help ensure that you take the necessary precautions and make informed decisions throughout the process. Here are some things to keep in mind:
- Backup your data: Before you begin clearing your SSD, it is crucial to back up all your important files and data. This will prevent any data loss in case of accidental deletion or unforeseen issues during the clearing process.
- Consider alternative options: Clearing your SSD is not always the solution to performance issues. Take some time to evaluate other possible causes of slowdowns, such as outdated drivers or a lack of RAM. It’s always advisable to explore other troubleshooting options before proceeding with clearing your SSD.
- Check manufacturer guidelines: Different SSD manufacturers may have specific recommendations or guidelines when it comes to clearing their SSDs. Check the manufacturer’s website or user manual to ensure you are following the recommended procedures for your specific model.
- Understand the clearing methods: There are different methods to clear an SSD, and it’s vital to understand the implications of each method. Some methods might completely erase all data, while others may be less thorough. Choose a method that aligns with your goals, whether it’s securely erasing data or simply freeing up storage space.
- Consider professional help: If you’re unsure about the process or lack the technical expertise, it’s recommended to seek professional help. A qualified technician or IT specialist can guide you through the steps, ensuring that your SSD is cleared properly without any potential risks.
By considering these factors before clearing your SSD, you can avoid potential pitfalls and make informed decisions throughout the process. Now that we have discussed the important considerations, let’s move on to the step-by-step guide for clearing your SSD.
Step-by-step guide to clearing your SSD
Clearing your SSD can be done effectively by following a systematic approach. Here is a step-by-step guide to help you clear your SSD:
- Back up your data: Before you begin the clearing process, it’s crucial to back up all your important files and data to an external storage device or cloud storage. This ensures that you have a copy of your data in case of any unexpected issues or data loss during the clearing process.
- Securely erase your SSD: There are several methods to securely erase the data on your SSD. One common method is to use software tools specifically designed for this purpose. These tools typically overwrite the entire SSD with random data multiple times, making it nearly impossible to recover any of the original data. Follow the instructions provided by the software tool you choose to securely erase your SSD.
- Reinstall your operating system: After securely erasing your SSD, you will need to reinstall your operating system. This ensures a fresh start and eliminates any remnants of the previous data. Make sure you have a copy of your operating system installation files and a valid license key before proceeding.
- Check for firmware updates: Once your operating system is installed, it’s a good practice to check for any firmware updates for your SSD. SSD manufacturers often release firmware updates to improve performance, fix bugs, and enhance compatibility. Visit the manufacturer’s website and follow their instructions to install any recommended firmware updates for your SSD.
Following these steps will help you effectively clear your SSD and ensure that it is ready to deliver optimal performance. However, keep in mind that the specifics of the process may vary depending on the manufacturer and the software tools you choose to use. It’s always advisable to consult the manufacturer’s guidelines and documentation for accurate instructions tailored to your specific SSD model.
Now that you have successfully cleared your SSD, it’s important to keep it running smoothly and maintain its performance. In the next section, we will provide you with some valuable tips for maintaining your SSD’s performance in the long run.
Back up your data
Before you initiate the process of clearing your SSD, it is crucial to back up all your important data. This step ensures that you have a copy of your files in case of any accidental data loss or unforeseen issues during the clearing process. Here’s how you can effectively back up your data:
- Identify important files: Take some time to identify the files and data that are crucial to you. These may include documents, photos, videos, music, and any other files that you cannot afford to lose. Creating a list of important files will help you ensure that you do not miss anything during the backup process.
- Choose a backup method: There are several backup methods available, depending on your preferences and requirements. You can choose to back up your data to an external hard drive, a USB flash drive, network-attached storage (NAS), or utilize cloud storage services. Evaluate the pros and cons of each method and select the one that suits your needs best.
- Organize and clean up your data: Before backing up your data, it’s a good idea to clean up your files and folders. Delete any unnecessary files, duplicates, or temporary files to free up space and ensure that you are only carrying forward the essential data. This will streamline the backup process and make it more efficient.
- Use backup software: Backup software can simplify the process by automating the backup process and providing additional features like scheduled backups and incremental backups. Research different backup software options and choose one that aligns with your requirements. Popular options include Acronis True Image, EaseUS Todo Backup, and Macrium Reflect.
- Perform the backup: Once you’ve selected your backup method and organized your data, it’s time to perform the actual backup. Follow the instructions provided by the chosen backup method or software to initiate the backup process. Ensure that the backup is successful and verify that all your important files have been safely copied.
By backing up your data before clearing your SSD, you can have peace of mind knowing that your important files are secured. Remember to keep your backup up to date, especially if you regularly create or modify files. With your data safely backed up, you can proceed with confidence to clear your SSD and improve its performance. Next, we’ll explore the second step in the process, which is securely erasing your SSD.
Securely erase your SSD
Once you have backed up your data, the next step in clearing your SSD is to securely erase all the existing data on it. This process ensures that the data cannot be recovered by unauthorized individuals, protecting your privacy and sensitive information. Here is a step-by-step guide on securely erasing your SSD:
- Choose a secure erasure method: There are several methods available to securely erase an SSD, each with varying levels of security and complexity. One commonly used method is to utilize specialized software designed for SSD erasure, such as Parted Magic, Blancco, or Secure Erase. Research the available options and choose the method that best suits your needs and technical abilities.
- Follow instructions from the software provider: Once you have selected the software for secure erasure, carefully read and follow the instructions provided by the software provider. This ensures that you perform the erasure correctly and maximize its effectiveness.
- Perform a full erase: When using SSD erasure software, select the option for a full erase or secure erase. This method will overwrite all sectors of the SSD with random data, making it extremely difficult to recover any of the original information.
- Be patient: The secure erasure process can take some time, depending on the size of your SSD and the chosen method. Avoid interrupting the process to ensure that the data is completely overwritten, leaving no trace of the original information.
- Perform verification: After the erasure process is complete, it’s advisable to verify that the SSD has been securely wiped. Some SSD erasure software includes a verification step to ensure that all data has been successfully overwritten. Use this verification feature to confirm the successful erasure.
By following these steps, you can securely erase your SSD and ensure that the previously stored data is irrecoverable. This step is crucial, especially if you plan to sell, donate, or dispose of the SSD. With the data securely wiped, you can proceed to reinstall your operating system to start fresh. The next section will walk you through the process of reinstalling your operating system on the cleared SSD.
Reinstall your operating system
After securely erasing your SSD, the next step is to reinstall your operating system. This step ensures a clean and fresh start, eliminating any remnants of the previous data and settings. Here is a step-by-step guide to reinstalling your operating system:
- Gather installation media: Depending on your operating system, you will need to gather the installation media such as a CD, DVD, USB flash drive, or an ISO file. Ensure that you have a valid license key for your operating system.
- Boot from the installation media: Insert the installation media into your computer and restart it. Enter the boot menu or BIOS settings during startup to select the media as the primary boot device. This will initiate the installation process.
- Follow the installation prompts: The installation process may vary slightly depending on your operating system. Generally, you will be guided through a series of prompts where you can choose the installation location, partition the SSD, and select any customization options.
- Format and install: During the installation process, you will reach a point where you can choose the drive on which to install your operating system. Select the previously cleared SSD and choose the option to format it. This ensures that all previous data is erased, preparing the SSD for a fresh installation.
- Complete the installation: Once you have selected the installation location and customized any desired settings, proceed with the installation process. Follow the prompts provided by the installer to complete the installation.
- Update drivers and software: After the operating system is installed, it’s important to update drivers and software to ensure optimal performance and security. Visit the manufacturer’s website for your hardware drivers and utilize reputable sources to download and install necessary software updates.
By following these steps, you can reinstall your operating system on the cleared SSD effectively. This ensures a fresh start, eliminates any potential issues from previous installations, and helps your SSD operate at its peak performance. Once the operating system is installed, the next step is to check for any firmware updates for your SSD, which we will discuss in the next section.
Check for firmware updates
After reinstalling your operating system on the cleared SSD, it’s important to check for any firmware updates for your SSD. Firmware updates are released by the SSD manufacturer to improve performance, fix bugs, enhance compatibility, and address security vulnerabilities. Here’s how you can check for and install firmware updates for your SSD:
- Identify your SSD model: Determine the exact model of your SSD. You can usually find this information on the SSD itself or in your computer’s device manager. Note down the model and the manufacturer.
- Visit the manufacturer’s website: Go to the website of the SSD manufacturer and navigate to the support or downloads section. Look for the section related to firmware or software updates for SSDs.
- Verify compatibility: Check if there are any firmware updates available for your specific SSD model. Pay attention to the compatibility requirements and make sure that the update is intended for your SSD.
- Follow the instructions: Download the firmware update file and carefully read the instructions provided by the manufacturer. The instructions will guide you through the process of updating the firmware on your SSD.
- Backup your data: Before proceeding with the firmware update, it’s essential to back up your data. Although rare, there is a small risk that the update process could cause data loss. Taking precautions by backing up your data will help you protect your valuable information.
- Install the firmware update: Follow the specific instructions provided by the manufacturer to install the firmware update. This may involve running a software utility or using a bootable USB drive to update the firmware. Make sure to follow the instructions carefully to avoid any issues during the update process.
- Verify the update: After the firmware update is installed, it’s a good practice to verify its successful completion. Check the SSD manufacturer’s documentation for any recommended verification steps to ensure that the firmware update was applied correctly.
By regularly checking and installing firmware updates, you can ensure that your SSD is operating with the latest improvements and fixes provided by the manufacturer. These updates not only enhance performance but also address known issues, ensuring a smooth user experience. Keep in mind that firmware updates are specific to each SSD model, so it’s important to check for updates regularly and follow the instructions provided by the manufacturer.
Now that you’ve completed the process of clearing your SSD, reinstalling the operating system, and checking for firmware updates, it’s time to explore some tips for maintaining your SSD’s performance for the long term.
Tips for maintaining your SSD’s performance
To ensure that your SSD continues to perform optimally and remains in good health, here are some essential tips for maintaining its performance:
- Enable TRIM: TRIM is a feature supported by modern operating systems that helps optimize SSD performance. Enable TRIM to ensure that the SSD is efficiently managing data and maintaining its performance over time. Check the operating system settings or consult the manufacturer’s documentation for instructions on enabling TRIM.
- Avoid filling it to capacity: SSDs operate best when they have some free space available. Avoid completely filling your SSD to ensure that it can perform tasks like wear leveling and garbage collection effectively. Aim to keep at least 10-20% of the SSD’s total capacity free for optimal performance.
- Avoid defragmentation: Unlike traditional hard drives, SSDs do not benefit from defragmentation. In fact, defragmenting an SSD can cause unnecessary wear and tear on the drive. Modern operating systems are typically aware of this and do not defragment SSDs. However, it’s important to verify that automatic defragmentation is disabled for your SSD.
- Minimize unnecessary writes: SSDs have a limited number of write cycles. Minimize unnecessary writes to the SSD by avoiding excessive temporary file usage, reducing unnecessary software installations and updates, and being mindful of your file management practices.
- Regularly update firmware: Stay up to date with the latest firmware updates provided by the manufacturer. These updates often include performance improvements and bug fixes, ensuring that your SSD operates optimally and remains compatible with the latest technologies and standards.
- Avoid extreme temperatures: High temperatures can negatively impact the performance and lifespan of your SSD. Keep your SSD in an environment with adequate cooling and avoid exposing it to direct sunlight or extreme temperature variations.
- Perform regular health checks: Periodically check the health and performance of your SSD using software utilities provided by the manufacturer or reputable third-party tools. These utilities can provide insights into the overall health of your SSD, helping you identify potential issues or anomalies.
By following these tips, you can ensure that your SSD maintains optimal performance, longevity, and reliability. Regular maintenance and mindful usage practices will help you get the most out of your SSD investment and enjoy fast and reliable storage performance.
With these valuable tips in mind, you are equipped to maintain the performance of your SSD and maximize its lifespan. Regularly applying these practices will help you get the most out of your SSD and ensure a seamless computing experience.
Conclusion
Congratulations! You have successfully learned how to clear and maintain your SSD for optimal performance. By following the step-by-step guide provided in this article, you have taken important steps to reclaim storage space, improve performance, enhance lifespan, and ensure data security for your SSD.
Remember to always back up your data before clearing your SSD and select a secure method to erase the data effectively. Reinstalling your operating system on the cleared SSD provides a fresh start, eliminating any remnants of previous data and settings. Keeping your SSD firmware up to date and following the manufacturer’s recommendations can further enhance performance and address potential issues.
In addition, we discussed essential tips for maintaining your SSD’s performance, such as enabling TRIM, avoiding full capacity usage, minimizing unnecessary writes, and regular firmware updates. These practices will help keep your SSD operating at its peak and prolong its lifespan.
By maintaining your SSD’s performance, you’ll enjoy faster boot times, quicker application launches, and smoother overall system responsiveness. Your SSD will continue to deliver reliable and efficient storage for your data and applications.
Remember to regularly monitor the health of your SSD and stay informed about any firmware updates or best practices provided by the manufacturer. With proper maintenance, your SSD can serve you well for years to come.
Thank you for reading our guide on how to clear your SSD and maintain its performance. We hope that this article has provided valuable insights and guidance to help you optimize the performance and longevity of your SSD.