Introduction
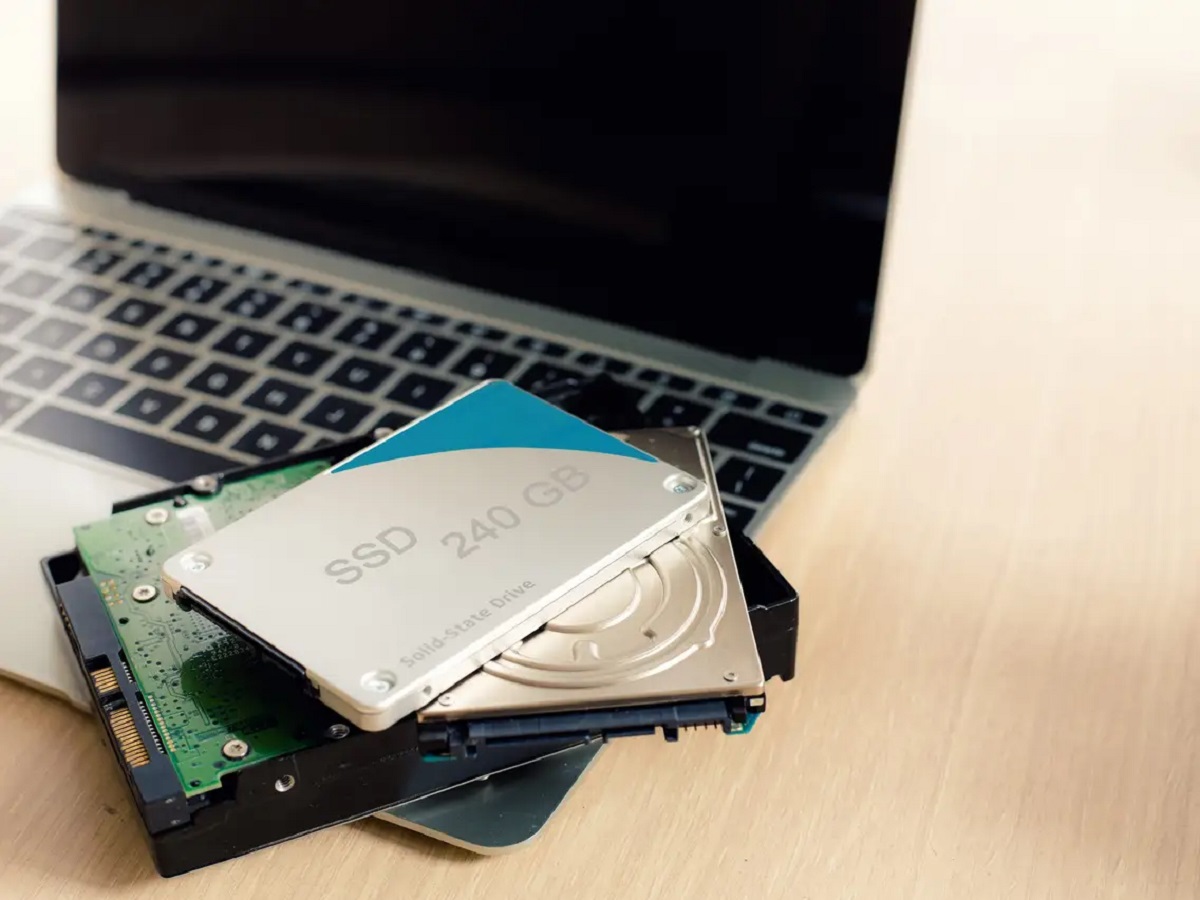
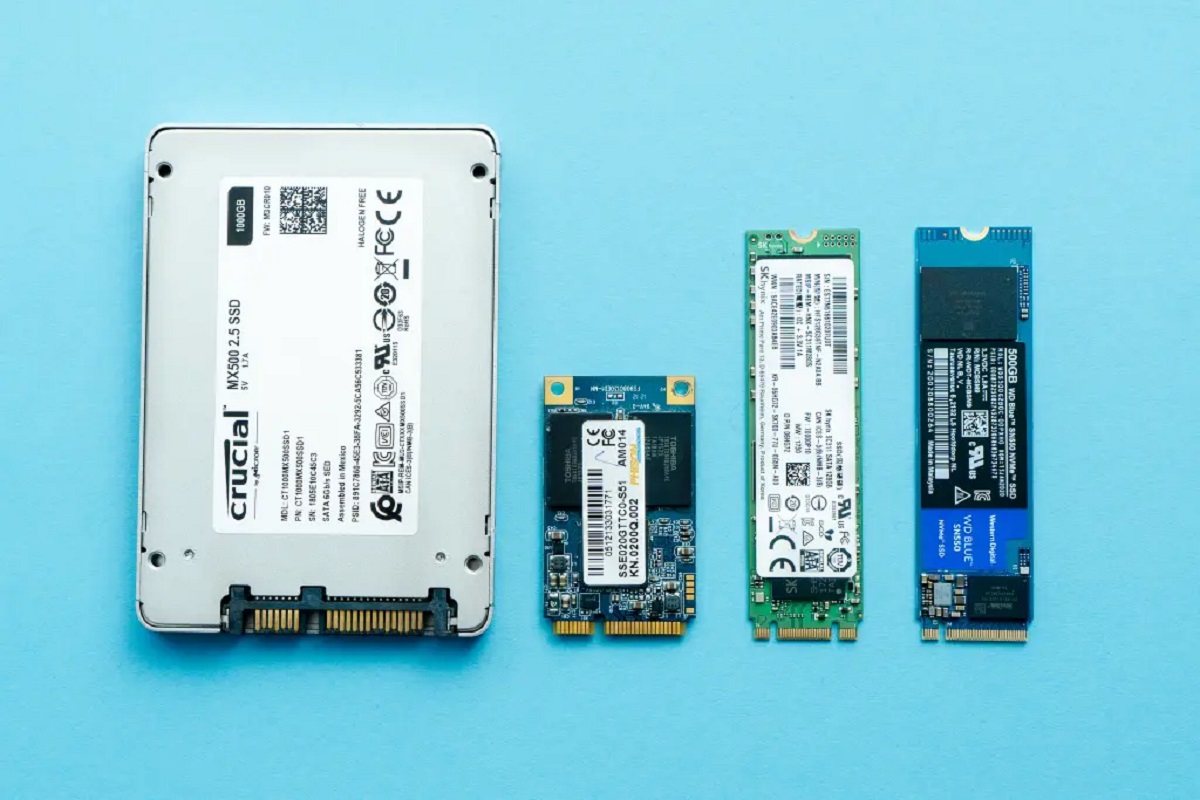
When it comes to optimizing the performance of your computer, freeing up space on your solid-state drive (SSD) is essential. An SSD is a high-speed storage device that can significantly enhance the speed and responsiveness of your system. However, its capacity is often limited compared to traditional hard disk drives (HDDs). If you notice your SSD is running out of space, it’s important to take action to ensure its longevity and maintain its efficiency.
In this article, we will explore various effective methods to free up space on your SSD. By implementing these strategies, you can remove unnecessary files, programs, and other items that may be consuming valuable disk space. Not only will this help optimize the performance of your SSD, but it will also provide you with more room to store important files and applications.
It’s important to note that while the primary focus is on freeing up space on SSDs, many of these methods can also be applied to traditional hard drives. However, be aware that some specific SSD-related features, such as disabling hibernation or limiting page file size, are only applicable to SSDs.
Without further ado, let’s dive into the various methods you can use to free up space on your solid-state drive.
Uninstall Unused Programs
One of the most effective ways to free up space on your SSD is by uninstalling unused programs. Over time, we tend to accumulate a range of applications that we no longer use or need. These programs can take up a significant amount of valuable disk space.
To uninstall programs on a Windows computer, you can follow these steps:
- Open the Control Panel by searching for it in the Start menu or right-clicking on the Start button and selecting “Control Panel”.
- In the Control Panel, navigate to the “Programs” or “Programs and Features” section.
- Here, you will find a list of installed programs. Scroll through the list and identify the programs that you no longer use.
- Click on the program you want to uninstall and select the “Uninstall” or “Remove” option.
- Follow the on-screen prompts to complete the uninstallation process.
For macOS users, uninstalling programs is as simple as dragging the program from the “Applications” folder to the Trash. However, some applications may require additional steps for complete removal, so be sure to check the developer’s instructions or use an uninstaller tool if necessary.
By regularly uninstalling unused programs, you can free up significant space on your SSD and ensure that only the applications you truly need are taking up valuable storage.
Delete Unnecessary Files and Folders
In addition to uninstalling unused programs, deleting unnecessary files and folders is another effective way to free up space on your SSD. Over time, we accumulate various files that are no longer needed, such as old documents, temporary files, and duplicate files.
To identify and delete unnecessary files and folders, you can manually go through your directories and delete items that are no longer needed. Here are a few areas where you might find files that can be safely deleted:
- Downloads Folder: Often, the Downloads folder can become a repository for files that we no longer need. Sort through this folder and delete files that are no longer necessary, such as old installers or downloaded documents.
- Documents and Personal Files: Review your documents, images, and other personal files. Delete any files that are outdated, irrelevant, or duplicated.
- Temporary Files: Temporary files are generated by various applications and can take up a significant amount of space if left unchecked. Use the built-in Disk Cleanup tool on Windows or the Optimize Storage feature on macOS to remove temporary files.
- Trash or Recycle Bin: Empty your Trash or Recycle Bin regularly to permanently delete files and reclaim storage space.
For those who prefer a more automated approach, there are several third-party software programs available that can help identify and remove unnecessary files and folders. These tools can scan your SSD for duplicate files, junk files, and other clutter that can be safely deleted.
Remember to exercise caution when deleting files and folders, as some items may be essential for the functioning of your system or certain applications. If you are unsure about deleting a particular file or folder, it is always a good idea to do some research first or seek assistance from a technical expert.
By regularly deleting unnecessary files and folders, you can free up vital space on your SSD and ensure that your storage is optimized for maximum performance and efficiency.
Clear Temporary Files
Temporary files are created by your operating system and various applications to store data temporarily. Over time, these files can accumulate and take up a significant amount of space on your SSD. Clearing temporary files regularly can help free up valuable storage and improve the performance of your system.
Here are a few methods to clear temporary files on both Windows and macOS:
- Windows:
- Use the built-in Disk Cleanup tool: Open the Start menu, search for “Disk Cleanup,” and select the tool. It will scan your system for temporary files and other unnecessary files that can be safely deleted.
- Manually delete temporary files: Press the Windows key + R to open the Run box, type “%temp%”, and press Enter. This will open the Temporary folder. Select all the files and folders and delete them.
- macOS:
- Use the Optimize Storage feature: Go to Apple menu > About This Mac > Storage > Manage. The Optimize Storage feature will scan your SSD and suggest files that can be safely removed, including temporary files.
- Manually delete temporary files: Open Finder, click on “Go” in the menu bar, select “Go to Folder,” and type “/private/var/folders”. This will open the temporary files folder. Sort the files by date and delete the older ones.
Clearing temporary files not only frees up space on your SSD but can also help improve system performance. It’s recommended to perform this maintenance task regularly to ensure optimal storage usage.
Use Storage Management Tools
Managing storage efficiently is crucial when it comes to maintaining the health and performance of your SSD. To make the process easier, many operating systems provide built-in storage management tools that can help you optimize your SSD space. These tools offer various features and functionalities to help you analyze and manage your storage effectively.
Here are a few storage management tools you can utilize:
- Windows:
- Storage Sense: This feature, available in Windows 10 and later versions, automatically identifies files and applications that can be safely deleted to free up space. You can enable Storage Sense in the Settings app by going to System > Storage.
- Storage Spaces: If you have multiple drives, Windows provides Storage Spaces, a tool that lets you group drives together. By combining drives, you can create a single virtual space and better manage storage allocation.
- Third-party Tools: There are also third-party storage management tools available, such as CCleaner, TreeSize, and WinDirStat, that offer more advanced features for analyzing and optimizing your SSD storage.
- macOS:
- Storage Optimization: macOS includes built-in features like Optimize Storage and Store in iCloud that help manage storage efficiently. Optimize Storage suggests files that can be safely removed, while Store in iCloud moves your files to iCloud Drive to free up space on your SSD.
- Third-party Tools: There are various third-party storage management tools for macOS, such as DaisyDisk, GrandPerspective, and Disk Inventory X, that provide visual representations of your storage usage and help you identify large files or folders that can be deleted.
These storage management tools enable you to keep track of your storage utilization, identify space-consuming files or applications, and take appropriate actions to optimize your SSD space. By utilizing these tools, you can efficiently manage your storage and ensure that your SSD is performing at its best.
Move Files to External Storage
If you find that your SSD is running out of space, one solution is to move files to external storage devices. External hard drives, USB flash drives, and network-attached storage (NAS) devices provide additional storage capacity that can accommodate files you don’t require immediate access to.
Here are a few steps to help you move files to external storage:
- Identify files to be moved: Start by identifying files that you can move to external storage. This can include large media files, old/archived documents, or any files that are not frequently accessed.
- Connect the external storage device: Connect your external hard drive or USB flash drive to your computer. If using a NAS device, ensure it is connected to your network and accessible.
- Copy or move files: Open the file explorer on your computer and navigate to the files or folders you want to move. Right-click on the selected files/folders and choose “Copy” or “Cut”. Then, navigate to the external storage device, right-click inside the destination folder, and choose “Paste” to initiate the transfer.
- Verify the file transfer: Once the files are copied or moved, double-check that they have been successfully transferred to the external storage device. You can do this by opening the files or folders on the external storage and confirming their presence.
- Safely eject the external storage: When you have finished transferring files to the external storage device, ensure you safely eject or disconnect it from your computer. This helps prevent any data loss or corruption.
Moving files to external storage not only frees up space on your SSD but also provides a convenient way to organize and backup your files. However, keep in mind that external storage devices may have limitations, so make sure to choose reliable and appropriate devices based on your storage needs.
Remember to label and organize your external storage devices properly to easily locate files when needed. Additionally, consider periodically reviewing the files on your external storage and removing any that are no longer required to keep your storage optimized and clutter-free.
Compress Files
If you’re dealing with large files that you frequently access but don’t want to permanently delete, compressing them can be a viable solution to free up space on your SSD. File compression reduces the size of files, allowing you to store more data in a smaller amount of space.
To compress files on both Windows and macOS, you can use built-in tools or third-party software:
- Windows:
- Windows built-in compression: Windows has a built-in feature called NTFS compression that allows you to compress individual folders or files. Right-click on the file or folder, select “Properties,” and check the “Compress contents to save disk space” option. Note that this method works for files stored on NTFS-formatted drives only.
- Third-party compression tools: Alternatively, you can use third-party compression software such as WinRAR, 7-Zip, or WinZip to compress files into various formats like ZIP or RAR.
- macOS:
- Built-in compression: macOS provides the option to compress files and folders using the built-in Archive Utility. Simply select the file or folder you want to compress, right-click, and select “Compress [filename].” The compressed file will be created in the same location.
- Third-party compression tools: There are also third-party compression tools available for macOS, such as Keka, BetterZip, or The Unarchiver, which offer additional features and support for various compression formats.
Compressing files is especially useful for documents, images, and media files that are not frequently modified but still need to be accessible. Keep in mind that while compression reduces file size, it may slightly impact file access time as the files need to be decompressed before use.
Remember to create a backup of any compressed files, especially if they are important or irreplaceable, to avoid the risk of data loss. Additionally, regularly review your compressed files and decompress those that you need to access frequently or have become obsolete to free up additional space.
Clean up Desktop and Downloads Folder
The Desktop and Downloads folders are two common locations where files tend to accumulate, often resulting in a cluttered and disorganized storage space. Cleaning up these folders can help you free up space on your SSD and improve overall system performance.
Here are some steps to clean up your Desktop and Downloads folders:
- Organize files: Begin by sorting through the files on your Desktop and Downloads folders. Delete any files that are no longer needed or that you haven’t accessed in a while.
- Create subfolders: To keep your files better organized, consider creating subfolders within the Desktop and Downloads folders. Categorize your files into these subfolders based on their type or relevance.
- Move files to appropriate folders: Once you have created subfolders, move the files from your Desktop and Downloads folders into their respective subfolders. This will help keep your Desktop and Downloads folders clutter-free and easier to navigate.
- Delete unnecessary files: Review the files that remain in your Desktop and Downloads folders. Delete any files that are no longer needed or that exist in other folders.
- Empty Recycle Bin or Trash: After deleting files, be sure to empty your Recycle Bin on Windows or Trash on macOS to permanently remove them from your storage.
Cleaning up your Desktop and Downloads folders not only frees up space on your SSD but also improves your workflow and makes it easier to find files when you need them. By organizing and removing unnecessary files, you can optimize your storage usage and improve performance.
Remember to adopt good file management habits moving forward by regularly organizing and cleaning up your Desktop and Downloads folders to prevent them from becoming cluttered again. Consider setting up a system to automatically organize downloads into appropriate folders or periodically review and delete files that are no longer needed.
Disable Hibernation
Hibernation is a useful feature that allows your computer to save its current state to the hard drive before shutting down, allowing you to resume exactly where you left off when you power it back on. However, the hibernation file (hiberfil.sys) can consume a significant amount of space on your SSD.
If you rarely use the hibernation feature or prefer to save SSD space, you can consider disabling hibernation on your Windows computer by following these steps:
- Open Command Prompt as an administrator: Type “Command Prompt” in the Start menu search bar, right-click on “Command Prompt,” and choose “Run as administrator.”
- Disable hibernation: In the Command Prompt window, type the following command and press Enter:
powercfg.exe /hibernate offThis command will disable the hibernation feature on your computer.
- Free up hibernation file space: To free up the space occupied by the hibernation file, you need to delete it. In the Command Prompt window, type the following command and press Enter:
powercfg.exe /hibernate /size 0This command will remove the hibernation file from your SSD and free up the occupied space.
It’s important to note that disabling hibernation will prevent you from using this feature in the future. If you decide to re-enable hibernation, you can follow the same steps outlined above but replace “off” with “on” in the first command.
Disabling hibernation can help reclaim valuable space on your SSD. However, if you frequently use the hibernation feature, it’s recommended to consider alternative options, such as reducing the size of the hibernation file rather than disabling it completely.
By disabling hibernation and reclaiming the space previously occupied by the hibernation file, you can effectively optimize your SSD storage and allocate it for more essential data and files.
Clear the Recycle Bin
When you delete files from your computer, they are often moved to the Recycle Bin (Windows) or Trash (macOS) as a safety net in case you need to recover them. However, files in the Recycle Bin or Trash still occupy space on your SSD. To free up this space, it’s important to regularly clear the Recycle Bin or Trash.
Here’s how you can clear the Recycle Bin or Trash on both Windows and macOS:
- Windows:
- Double-click on the Recycle Bin icon on your desktop to open it.
- Click on “Empty Recycle Bin” in the toolbar at the top of the window.
- Confirm the action when prompted to permanently delete all the files in the Recycle Bin.
- macOS:
- Click the Trash icon in the Dock, or open a Finder window and click on “Trash” in the sidebar.
- Click on “Empty” in the toolbar at the top of the window.
- Confirm the action when prompted to permanently delete all the files in the Trash.
Clearing the Recycle Bin or Trash will permanently delete the files contained within, freeing up the space they were occupying on your SSD. However, be cautious when emptying the Recycle Bin or Trash, as files deleted in this manner cannot be recovered.
To avoid accidentally deleting important files, it’s a best practice to review the contents of the Recycle Bin or Trash before emptying them. This allows you to double-check that you have not mistakenly included any files that you may need to keep. If you find any such files, you can restore them to their original location before emptying the Recycle Bin or Trash.
Regularly clearing the Recycle Bin or Trash is a simple yet effective way to free up space on your SSD and ensure that your storage is optimized for better performance and efficiency.
Disable System Restore
System Restore is a feature in Windows that allows you to revert your computer’s settings and system files to a previous state. While it can be useful for resolving system issues, it can also occupy a significant amount of space on your SSD. If you have other backup solutions in place or prefer to save space, you can consider disabling System Restore.
Here’s how you can disable System Restore on Windows:
- Open the System Properties window: Right-click on the Start button and select “System” or press Windows key + Pause/Break to open the System Properties window.
- Go to the System Protection tab: In the System Properties window, click on the “System Protection” tab.
- Select the drive and disable System Restore: Select the SSD drive or the specific drive where System Restore is enabled. Click on the “Configure” button below.
- Choose “Disable system protection”: In the System Protection window, select the “Disable system protection” option, then click “Apply” and “OK” to save the changes.
Once System Restore is disabled, Windows will remove all existing restore points and free up the disk space associated with them on your SSD. It’s worth noting that disabling System Restore means you won’t be able to use this feature to restore your system to a previous state if needed.
If you decide to re-enable System Restore, you can follow the same steps and select the “Enable system protection” option instead.
Disabling System Restore can help you reclaim valuable space on your SSD, especially if you have other backup solutions in place. However, if you rely on System Restore as a safety net for system recovery, it is advisable to keep the feature enabled, but consider reducing the allocated disk space for restore points.
Remember to regularly back up your important files and consider alternative backup solutions, such as creating system images or using cloud-based services, to ensure the safety of your data.
Disable or Limit Page File Size
The page file, also known as the swap file, is a system file on your SSD that acts as a supplement to physical RAM. It is used by the operating system to store data when the RAM becomes overwhelmed. By default, Windows automatically manages the size of the page file, but you have the option to disable or limit its size to save space on your SSD.
Here’s how you can disable or limit the page file size on Windows:
- Open the System Properties window: Right-click on the Start button and select “System” or press Windows key + Pause/Break. In the System Properties window, click on the “Advanced system settings” link on the left-hand side.
- Go to the Performance Options: In the System Properties window, click on the “Settings” button under the “Performance” section.
- Access the Virtual Memory settings: In the Performance Options window, go to the “Advanced” tab and click on the “Change” button under the “Virtual memory” section.
- Disable or limit the page file size: In the Virtual Memory window, you have several options:
- To disable the page file completely, select the SSD drive where the page file is located and choose the “No paging file” option.
- To limit the page file size, select the SSD drive and choose the “Custom size” option. Set the initial size and maximum size according to your preferences. A smaller size will save space on your SSD, but make sure it is large enough to accommodate essential system processes.
- Apply the changes: Click “OK” to apply the changes and then restart your computer for the modifications to take effect.
Disabling or limiting the page file size can potentially save space on your SSD. However, it is important to note that disabling or setting the page file size too small may lead to system instability or lack of memory for certain tasks. It is recommended to carefully consider your RAM usage and the specific needs of your system before making changes to the page file configuration.
If you encounter any issues after disabling or limiting the page file, you can revisit the Virtual Memory settings and re-enable the automatic management of the page file or adjust its size accordingly.
Remember to regularly monitor your system’s performance and adjust the page file settings as needed to maintain optimal performance and avoid any potential issues related to low memory conditions.
Disable or Limit Virtual Memory
Virtual memory, also known as the paging file, is a portion of your SSD’s storage space that the operating system uses as an extension of physical RAM. It helps manage memory demands, allowing your computer to run smoothly even when you have numerous applications open. While virtual memory is important for system performance, you have the option to disable or limit its size to save space on your SSD.
Here’s how you can disable or limit virtual memory on Windows:
- Open the System Properties window: Right-click on the Start button and select “System” or press Windows key + Pause/Break. In the System Properties window, click on the “Advanced system settings” link on the left-hand side.
- Go to the Performance Options: In the System Properties window, click on the “Settings” button under the “Performance” section.
- Access the Virtual Memory settings: In the Performance Options window, go to the “Advanced” tab and click on the “Change” button under the “Virtual memory” section.
- Disable or limit the virtual memory: In the Virtual Memory window, you have several options:
- To disable virtual memory completely, select the SSD drive where the page file is located and choose the “No paging file” option. Click “Set” and then “OK” to apply the changes.
- To limit the virtual memory size, select the SSD drive and choose the “Custom size” option. Set the initial size and maximum size according to your preferences. Keep in mind that virtual memory is often beneficial for system performance, so it’s recommended to have a minimum size to handle potential memory demands.
- Apply the changes: Click “OK” to apply the changes, and then restart your computer for the modifications to take effect.
Disabling or limiting virtual memory can help save space on your SSD. However, it’s important to consider the RAM capacity of your system and the memory requirements of the applications you run. Disabling virtual memory or setting excessively small limits may result in system instability or insufficient memory for certain tasks.
If you encounter any issues after disabling or limiting virtual memory, you can revisit the Virtual Memory settings and re-enable automatic management or adjust the size according to your needs.
Remember to regularly monitor your system’s performance and adjust the virtual memory settings as required to maintain optimal performance while effectively managing your SSD’s storage space.
Disable or Limit Hibernate File Size
When your computer enters hibernation mode, a file named “hiberfil.sys” is created on your SSD to store the current state of your system. This allows you to resume your work when you power on your computer again. However, the hibernate file can take up a significant amount of space on your SSD. If you rarely use the hibernation feature or prefer to save space, you can consider disabling or limiting the hibernate file size.
Here’s how you can disable or limit the hibernate file size on Windows:
- Open Command Prompt as an administrator: Type “Command Prompt” in the Start menu search bar, right-click on “Command Prompt,” and choose “Run as administrator.”
- Disable hibernation: In the Command Prompt window, type the following command and press Enter:
powercfg.exe /hibernate offThis command will disable the hibernation feature on your computer.
- Free up hibernate file space: To free up the space occupied by the hibernate file, you need to delete it. In the Command Prompt window, type the following command and press Enter:
powercfg.exe /hibernate /size 0This command will remove the hibernate file from your SSD and free up the occupied space.
It’s important to note that disabling hibernation will prevent you from using this feature in the future. If you decide to re-enable hibernation, you can follow the same steps outlined above but replace “off” with “on” in the first command.
If you prefer to limit the hibernate file size instead of disabling it entirely, you can adjust the “/size” parameter in the second command. For example, if you want to limit the hibernate file size to 4 GB, you would use the command:
powercfg.exe /hibernate /size 4This will set the hibernate file size to 4 GB on your SSD.
Disabling or limiting the hibernate file size can help you reclaim valuable space on your SSD. However, if you frequently use the hibernation feature, it’s recommended to consider alternative options, such as reducing the size of the hibernate file rather than disabling it completely.
Remember to regularly monitor your SSD’s space usage and adjust the hibernate file settings as needed to maintain optimal performance and storage utilization.
Remove Unnecessary Language Packs
Language packs in an operating system provide support for different languages, enabling users to switch between different language preferences. However, having multiple language packs installed on your system can occupy a significant amount of space on your SSD. If you only require one or a few specific languages, removing unnecessary language packs can help free up valuable storage space.
Here’s how you can remove unnecessary language packs on Windows:
- Open the Settings app: Click on the Start button, then click on the gear-shaped Settings icon to open the Settings app.
- Select “Time & Language”: In the Settings app, click on the “Time & Language” option.
- Go to “Language”: In the left sidebar of the Time & Language settings, click on “Language.”
- Manage languages: Under the “Preferred languages” section, you will see a list of installed languages. Select the language pack you want to remove and click on the “Remove” button.
- Confirm removal: Windows will ask you to confirm the removal of the selected language pack. Click “Yes” to proceed. Repeat this process for any other unnecessary language packs you want to remove.
- Restart your computer: After removing the language packs, it’s recommended to restart your computer for the changes to take effect.
Removing unnecessary language packs can save a considerable amount of space on your SSD. However, be cautious when removing language packs, as it may affect the language display options available to you. Make sure to keep at least one language pack installed that you need for your daily use.
Regularly reviewing and removing unnecessary language packs can help ensure optimal disk space utilization. It’s also recommended to periodically reevaluate your language needs and remove any additional packs that are no longer necessary to further optimize your SSD storage.
Disable or Limit Windows Search Indexing
Windows Search Indexing is a feature that helps you quickly find files, folders, and applications on your computer. It works by creating and maintaining an index of your files and their contents. While this feature enhances search functionality, it can consume significant resources on your SSD. If you find that search indexing is using excessive storage space or impacting system performance, you have the option to disable or limit Windows Search Indexing.
Here’s how you can disable or limit Windows Search Indexing on Windows:
- Open the Control Panel: Click on the Start button, then search for “Control Panel” and open it.
- Select “Indexing Options”: In the Control Panel, click on “Indexing Options.” This will open the Indexing Options window.
- Modify indexing settings: In the Indexing Options window, you have a few options:
- Disable indexing: To completely disable indexing, click on the “Modify” button and uncheck all the options listed. This will prevent Windows from indexing any files or folders on your SSD.
- Limit indexing: If you want to limit the indexing to specific locations or file types, click on the “Modify” button and select the locations or file types you want to be indexed. This will reduce the size of the index and focus on the areas that are most important to you.
- Apply the changes: After making your desired changes, click “OK” to save the modifications.
Disabling or limiting Windows Search Indexing can help save space on your SSD and reduce system resource usage. However, it’s important to note that searching for files and folders may take longer or become less accurate, especially when accessing locations or file types outside of the indexed areas.
If you decide to re-enable Windows Search Indexing in the future, you can revisit the Indexing Options settings and make the necessary adjustments to meet your needs.
Regularly evaluating your indexing settings and adjusting them based on your usage patterns and storage requirements will help ensure optimal performance and utilization of your SSD’s resources.
Clear Browser Cache and Temporary Files
Web browsers store temporary files, such as images, scripts, and web pages, in a cache to improve website loading times. Over time, this cache can grow significantly, occupying valuable space on your SSD. Clearing your browser cache and temporary files regularly can help free up storage space and improve browser performance.
Here’s how you can clear the cache and temporary files for popular web browsers:
- Google Chrome:
- Click on the three-dot menu in the top-right corner of the browser window.
- Go to “More tools” and select “Clear browsing data.”
- In the Clear browsing data window, select the desired time range and check the box next to “Cached images and files.”
- Click on the “Clear data” button to clear the cache and temporary files.
- Mozilla Firefox:
- Click on the three-line menu in the top-right corner of the browser window.
- Go to “Options” and select “Privacy & Security.”
- In the Cookies and Site Data section, click on the “Clear Data” button.
- Check the box next to “Cached Web Content” and click on the “Clear” button.
- Microsoft Edge:
- Click on the three-dot menu in the top-right corner of the browser window.
- Go to “Settings” and click on “Privacy, search, and services.”
- Under the “Clear browsing data” section, click on the “Choose what to clear” button.
- Check the box next to “Cached images and files” and click on the “Clear” button.
These are general guidelines for clearing the cache and temporary files in web browsers. The steps might vary slightly depending on the specific browser version you are using. It’s recommended to consult your browser’s support documentation for more accurate instructions.
By periodically clearing your browser cache and temporary files, you can free up SSD space and ensure that your browser performs optimally. Additionally, clearing the cache can also help resolve certain issues, such as displaying outdated or incorrect data from cached sources.
Keep in mind that clearing the cache will remove saved passwords and other browsing data. However, it will not delete your bookmarks or browsing history. It’s a good practice to review and adjust the cache and temporary file clearing settings based on your browsing habits and available storage space.
Disable or Limit Windows Update Storage Size
Windows updates are essential for keeping your operating system secure and up to date. However, these updates can occupy a significant amount of space on your SSD, particularly if you have limited storage capacity. If you want to save space or have control over the storage used by Windows updates, you can disable or limit the storage size dedicated to these updates.
Here’s how you can disable or limit Windows update storage size:
- Open the Settings app: Click on the Start button, then click on the gear-shaped Settings icon to open the Settings app.
- Select “Update & Security”: In the Settings app, click on “Update & Security.”
- Go to “Windows Update”: In the left sidebar of the Update & Security settings, click on “Windows Update.”
- Access advanced options: Under the Windows Update section, click on the “Advanced options” link.
- Disable or limit update storage size: In the advanced options, you have several options:
- Disable update storage: To disable Windows update storage completely, toggle off the switch for “Automatically download updates, even over metered data connections.” This will prevent Windows from automatically downloading updates, saving storage space on your SSD.
- Limit update storage: If you want to limit the storage size used by updates, click on the “Delivery Optimization” link. Then, under “Download settings,” choose the “Limit how much bandwidth is used for downloading updates in the background” option. Here, you can set the absolute bandwidth limit or specify a percentage of your total bandwidth to be used for downloads.
Disabling or limiting Windows update storage helps conserve SSD space, especially if you have limited storage capacity or want more control over the storage allocation for updates. However, it’s worth noting that staying up to date with Windows updates ensures you have the latest security fixes and improvements. It’s recommended to regularly check for updates manually if you choose to disable or limit automatic updates.
Remember to periodically evaluate your storage needs and adjust the Windows update settings accordingly to ensure your SSD space is effectively utilized while maintaining a secure and up-to-date system.
Clean Up Thumbnails Cache
Thumbnails are small previews of images and videos that are generated and stored in a cache on your SSD. While these thumbnails enhance the browsing experience by providing quick visual previews, the cache can grow in size and occupy valuable storage space over time. Cleaning up the thumbnails cache can help free up space on your SSD and improve overall system performance.
Here’s how you can clean up the thumbnails cache on Windows:
- Open File Explorer: Click on the folder icon in the taskbar, or press Windows key + E to open File Explorer.
- Access Folder Options: In the File Explorer window, click on the “View” tab at the top, then click on the “Options” button on the far right.
- Change folder settings: In the Folder Options window, click on the “View” tab, then scroll down and locate the “Files and Folders” section.
- Clear the thumbnail cache: Under the “Files and Folders” section, check the box next to “Show hidden files, folders, and drives” and uncheck the box next to “Hide protected operating system files.”
- Apply the changes: Click on “Apply” and then “OK” to save the changes.
- Locate the thumbnail cache: Open a File Explorer window and navigate to the following directory:
%LocalAppData%\Microsoft\Windows\ExplorerHere, you will find a file named “thumbcache_*.db” (the asterisk represents a random alphanumeric string).
- Delete the thumbnail cache: Select all the “thumbcache_*.db” files and press the Shift + Delete keys to permanently delete them from your SSD. Alternatively, right-click on the selected files and choose “Delete.”
Deleting the thumbnails cache files may temporarily inconvenience the display of icons and previews in File Explorer, as new thumbnails will be generated when you open folders or view files. However, this will not affect your actual files and can be quickly regenerated over time.
Regularly cleaning up the thumbnails cache helps reclaim valuable space on your SSD. Consider performing this maintenance task periodically to ensure the efficient use of your storage and maintain optimal system performance.
Optimize and Defragment the Solid State Drive
Optimizing and defragmenting a solid-state drive (SSD) is a process that helps organize and improve the performance of files stored on the drive. While traditional hard disk drives (HDDs) benefit from defragmentation, SSDs operate differently and do not require the same defragmentation process. However, SSDs can still benefit from optimization to ensure efficient storage usage.
Here’s how you can optimize and defragment your SSD in Windows:
- Open the Optimize Drives tool: Click on the Start button, then search for “Defragment and Optimize Drives” and open the tool.
- Select the SSD drive: In the Optimize Drives window, select the SSD drive you want to optimize from the list.
- Click on “Optimize”: Click on the “Optimize” button to start the optimization process.
The optimization process for an SSD differs from the traditional defragmentation process for HDDs. Instead of rearranging files, the optimization process consolidates free space and reorganizes files to enhance the SSD’s performance and improve wear leveling, which increases the lifespan of the drive.
Windows automatically schedules periodic optimization for SSDs. However, you can manually initiate the optimization process using the steps mentioned above if needed.
It’s worth noting that excessive optimization can lead to unnecessary wear on an SSD. Therefore, it’s generally recommended to optimize your SSD on a regular basis rather than too frequently. Windows will determine the optimal frequency for optimization based on the drive’s usage patterns and needs.
Remember that defragmenting an SSD is not necessary and can actually cause unnecessary wear on the drive. SSDs manage data differently from HDDs, utilizing flash memory cells that can be accessed in parallel. This allows for faster read and write operations, eliminating the need for defragmentation.
Optimizing your SSD ensures efficient storage usage and helps maintain optimal performance over time. By following these guidelines, you can effectively manage your SSD and prolong its lifespan while maximizing its speed and responsiveness.
Conclusion
Keeping your solid-state drive (SSD) optimized and free of unnecessary clutter is essential for maintaining its performance and longevity. By following the strategies outlined in this article, you can effectively free up space on your SSD and improve overall system efficiency.
We discussed several approaches to achieve this goal. Uninstalling unused programs, deleting unnecessary files and folders, and clearing temporary files are great starting points to reclaim valuable SSD space. Additionally, utilizing storage management tools can offer further control and analysis of your SSD usage.
Moving files to external storage, compressing large files, and cleaning up the Desktop and Downloads folders help ensure that essential files are properly organized and the SSD is prioritized for frequently accessed data.
Disabling or limiting hibernation, System Restore, page files, virtual memory, and Windows update storage are options to save space on your SSD. However, it’s important to consider the impact these changes may have on system functionality and stability. Exercise caution and consider your specific usage requirements before making modifications to these settings.
Regularly clearing the Recycle Bin, browser cache, and thumbnails cache are recommended to optimize SSD space usage and maintain system performance. Additionally, optimizing and defragmenting an SSD requires a different approach than with traditional hard disk drives (HDDs) – consolidating free space and organizing files rather than defragmenting – which helps improve overall performance.
Remember to strike a balance between optimizing your SSD and maintaining necessary functionality. Regularly reassess your storage needs and periodically perform the mentioned optimization tasks to keep your SSD running smoothly.
By implementing these strategies, you can effectively free up space, improve performance, and prolong the lifespan of your SSD. Enjoy the benefits of a well-optimized storage solution, ensuring a streamlined and efficient computing experience.


