Introduction
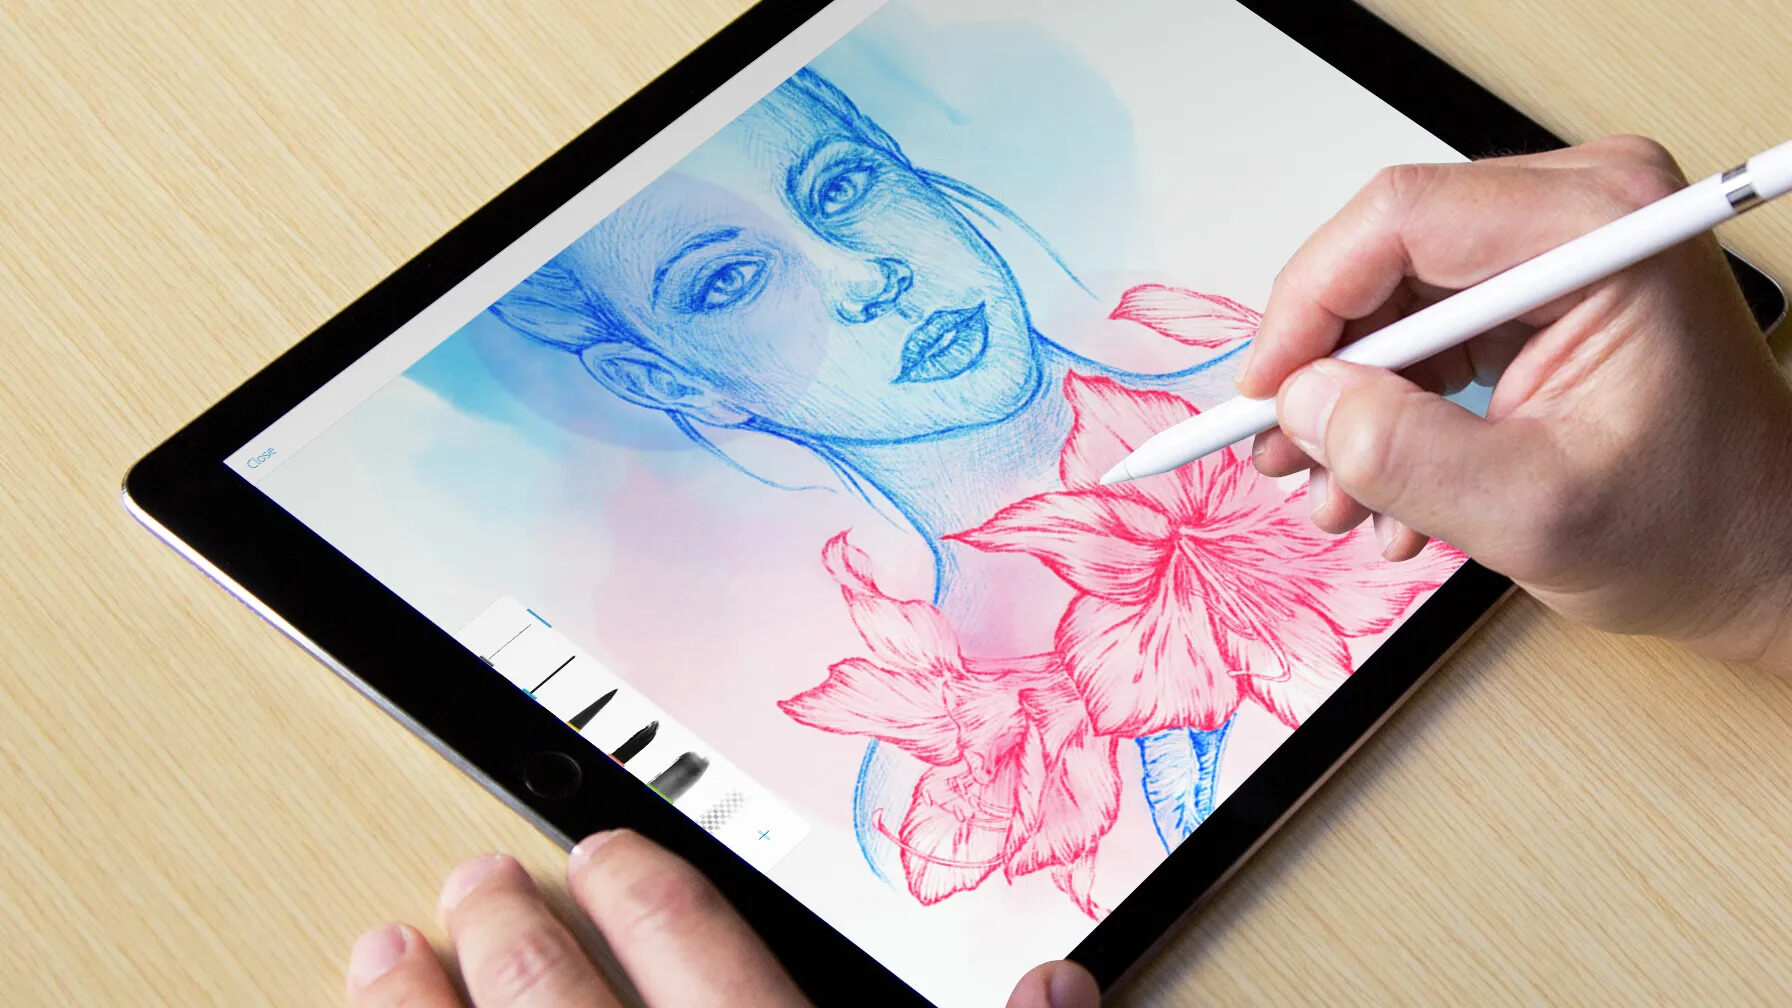
Drawing using a tablet has revolutionized the art industry, allowing artists to showcase their creativity in a digital format. With the advancements in technology, tablets have become powerful tools for artists of all levels, providing a seamless and intuitive drawing experience. However, using a tablet for drawing comes with its own set of challenges, including the proper placement of your hand.
Hand placement plays a crucial role in achieving precise control and accuracy while drawing on a tablet. It not only influences your ability to create detailed and intricate artwork but also impacts your overall drawing experience. Finding the optimal hand position helps in reducing strain, enhancing accuracy, and creating a more comfortable and enjoyable drawing process.
In this article, we will explore the benefits of using a tablet for drawing and emphasize the importance of proper hand placement. We will also discuss different grip styles, techniques for keeping your hand relaxed, and adjustments you can make for different tasks. Additionally, we will cover the significance of practicing hand-eye coordination, taking breaks, and stretching to maintain optimal hand health. By incorporating these practices, you can elevate your drawing skills and achieve remarkable results using a tablet.
Benefits of Using a Tablet for Drawing
Using a tablet for drawing offers a myriad of benefits that traditional art mediums cannot replicate. Whether you’re a professional artist or a hobbyist, embracing digital art can take your creative endeavors to new heights. Let’s explore some of the advantages of using a tablet for drawing.
- Portability: Unlike traditional art supplies, which can be bulky and require a dedicated workspace, tablets are lightweight and easily portable. You can carry your digital canvas wherever you go, allowing you to draw whenever inspiration strikes.
- Versatility: Digital art grants you access to an extensive range of tools and features. With a tablet, you’re not limited to a single brush or color palette; you have a vast array of customizable options at your fingertips. This versatility enables you to experiment, explore various art styles, and push the boundaries of your creativity.
- Undo and Redo Functionality: One of the most significant advantages of drawing on a tablet is the ability to undo and redo your actions. Made a mistake? Simply tap a button, and it’s gone. This feature allows for more experimentation and reduces the fear of making irreversible errors.
- Efficiency: Drawing with a tablet can significantly expedite your workflow. Digital tools enable easy layering, resizing, and transforming elements, making it effortless to make adjustments and modifications to your artwork. This streamlined process saves time, allowing you to focus more on the creative aspects of your work.
- Access to a Global Community: Digital art platforms and social media have connected artists from all around the world. Sharing your artwork and connecting with fellow artists has never been easier. The ability to showcase your talent and receive feedback and inspiration from the global art community is a valuable asset that tablets bring to the table.
These benefits, coupled with the ever-evolving technology of tablets, make them an indispensable tool for any artist. Whether you’re a traditional artist exploring the digital realm or a digital native honing your skills, using a tablet for drawing opens up a world of possibilities and enhances your artistic journey.
Importance of Proper Hand Placement
When it comes to drawing on a tablet, proper hand placement is essential for achieving optimal control and precision. Your hand serves as the bridge between your creativity and the digital canvas, so ensuring that it is positioned correctly can make a significant difference in the quality of your artwork. Let’s explore the importance of proper hand placement while drawing on a tablet.
1. Control and Accuracy: Placing your hand correctly on the tablet surface allows you to have better control over your stylus or finger. This control translates into more precise lines, strokes, and details in your artwork. By maintaining a stable and comfortable hand position, you can execute your desired movements effortlessly, resulting in enhanced accuracy and improved drawing outcomes.
2. Reduced Strain and Fatigue: Improper hand placement can lead to various physical issues such as hand strain, wrist pain, and even Carpal Tunnel Syndrome. By understanding and implementing correct hand positioning techniques, you can minimize the strain on your hand and wrist, allowing for longer and more comfortable drawing sessions. It is important to maintain a relaxed and natural hand posture to prevent unnecessary tension and fatigue.
3. Smooth Workflow: Proper hand placement facilitates a smooth and uninterrupted workflow. By positioning your hand in a way that avoids accidental touches or gestures on the tablet surface, you can prevent unintended marks or disruptions to your drawing process. This enables you to focus on your creative vision without constantly worrying about unintentional gestures or unwanted outcomes.
4. Mitigating Smudging and Accidental Touches: Tablets often have touch-sensitive screens, and unintended touches can lead to smudges or unwanted marks on your artwork. By placing your hand strategically, you can reduce the chances of accidentally touching the screen and causing disruptions or unwanted effects. This allows you to work more efficiently and maintain the integrity of your artwork.
By paying attention to proper hand placement, you can enhance your drawing abilities and create artwork with greater control and precision. The proper positioning ensures a more comfortable and efficient workflow, reducing strain and fatigue. Now that we understand the importance of hand placement let’s explore some guidelines to find a comfortable and optimal position for drawing on a tablet.
Finding a Comfortable Position
Finding a comfortable position while drawing on a tablet is crucial for maintaining a relaxed and enjoyable drawing experience. The right posture not only enhances your creativity but also prevents discomfort, strain, and long-term health issues. Here are some guidelines to help you find a comfortable position for drawing on a tablet.
1. Sit in a Well-Ergonomic Chair: Start by sitting in a chair that provides proper support for your back. Ensure that your feet are flat on the ground and your knees are at a comfortable 90-degree angle. Sitting in a well-ergonomic chair will promote good posture and reduce strain on your neck, shoulders, and back, resulting in a more comfortable drawing session.
2. Position the Tablet at Eye Level: Adjust the tablet screen position to ensure it is at eye level. This helps in maintaining a neutral position for your neck and reduces the strain on your eyes. You can use a tablet stand or prop it up with books to achieve the desired height. Keeping the tablet screen at eye level allows for a more natural and comfortable drawing experience.
3. Rest Your Forearm on a Support: Resting your forearm on a support, such as a cushion or a rolled-up towel, can help reduce strain on your wrist and forearm muscles. This support will provide stability and prevent excessive movement of your hand while drawing. It also helps in finding a comfortable angle for your hand and wrist, enhancing control and precision.
4. Maintain a Relaxed Posture: Make a conscious effort to maintain a relaxed posture while drawing. Avoid slouching or hunching over the tablet, as this can lead to neck and shoulder strain. Keep your shoulders relaxed and your arms and hands in a comfortable position. Taking periodic breaks and stretching can also help alleviate any tension or stiffness in your body.
5. Experiment and Adjust: Everyone’s body is unique, so it’s important to experiment with different positions and adjustments to find what works best for you. Try various chair heights, tablet angles, and support options to customize your drawing setup. Listen to your body and make adjustments accordingly to ensure a comfortable and sustainable drawing posture.
By finding a comfortable position, you’ll be able to focus more on your creativity and produce better artwork. Remember that maintaining a relaxed posture and taking care of your body is just as important as honing your drawing skills. With a comfortable setup, you’ll enjoy your drawing sessions to the fullest and avoid any unnecessary strain or discomfort.
Grip Styles for Optimal Control
Choosing the right grip style when drawing on a tablet can greatly impact your control and precision. Finding a grip that is comfortable for you helps to maintain a stable grip on the stylus and allows for better control over your digital strokes. Let’s explore some common grip styles that can optimize your drawing experience on a tablet.
1. Tripod Grip: The tripod grip is one of the most common and widely used grip styles. It involves holding the stylus between the thumb, index finger, and middle finger, forming a tripod shape. This grip allows for a good balance of control and flexibility, enabling precise movements. The index finger is placed on the tip button of the stylus, allowing easy access to additional features like erasing or selecting tools without having to reposition your hand.
2. Extended Grip: The extended grip involves holding the stylus further back, away from the tip. It is often used when drawing longer strokes or when you need a looser and more fluid motion. This grip provides greater control over broader strokes and can be beneficial for creating sweeping lines or shading.
3. Overhand Grip: The overhand grip involves holding the stylus between your fingers while extending your hand over the tablet surface. This grip style provides a larger range of motion and is useful for creating broad strokes or when you need to cover a large area. It can also give you a more natural feel and mimic the experience of drawing with traditional tools like a paintbrush or charcoal.
4. Underhand Grip: The underhand grip is the opposite of the overhand grip and involves holding the stylus below the tablet surface. This grip style allows for more control and precision, especially when working on intricate details or when you require better stability. It can provide a comfortable and secure grip while enabling intricate movements without excessive strain.
5. Hybrid Grip: The hybrid grip is a combination of different grip styles. It involves adjusting your grip according to the specific task or stroke you are making. For example, you may switch to an underhand grip for precise details and then transition to a tripod grip for broader strokes or shading. Adapting your grip style to different drawing situations can enhance your overall control and versatility.
It’s important to remember that the grip style you choose should be comfortable for you and allow for a natural and relaxed hand position. Experiment with different grip styles to see which one feels the most comfortable and provides the best control and precision for your drawing style. By finding a grip that suits you, you can optimize your control over the stylus and enhance your overall drawing experience on a tablet.
Keeping Your Hand Relaxed and Loose
Keeping your hand relaxed and loose while drawing on a tablet is essential for maintaining fluidity in your strokes and minimizing strain on your muscles. Tension in your hand can hinder your ability to create smooth lines and can lead to discomfort or even injury over time. Here are some tips to help you keep your hand relaxed and loose while drawing on a tablet.
1. Check Your Grip: Start by checking your grip on the stylus or pen. Make sure you are not gripping it too tightly. A gentle and light grip allows for more flexibility and fluidity in your movements. Avoid placing unnecessary pressure on the stylus, and let it glide effortlessly across the tablet surface.
2. Take Breaks and Stretch: It’s important to take regular breaks when working on a tablet. During these breaks, stretch your fingers, hands, and wrists to release any tension that may have built up. Simple stretching exercises, such as wrist circles and finger flexion and extension, can help improve blood circulation and prevent muscle fatigue.
3. Avoid Hovering: Hovering your hand above the tablet surface while drawing can lead to increased muscle tension. Instead, rest your hand lightly on the tablet. This allows for better control and stability while reducing strain on your hand and wrist. Remember to keep your hand relaxed and avoid unnecessary stiffness or hovering.
4. Maintain a Good Posture: Maintaining a proper posture while drawing is crucial for keeping your hand relaxed. Sit up straight with your shoulders relaxed and your back supported. Avoid hunching over the tablet, as this can lead to tension in your hand, arm, and shoulder muscles. A good posture promotes better blood flow and reduces the risk of discomfort or injuries.
5. Breathe and Relax: Pay attention to your breathing while drawing. Deep, slow breaths help relax your body and release tension. When you find yourself getting tense, take a moment to pause, take a deep breath, and consciously relax your hand. Focusing on relaxation can help you maintain a loose and fluid drawing motion.
By adopting these practices, you can cultivate a relaxed and loose hand while drawing on a tablet. Remember to listen to your body and be mindful of any signs of tension. Paying attention to your grip, taking breaks, and maintaining a good posture will not only improve your drawing technique but also contribute to a more enjoyable and comfortable drawing experience.
Adjusting Your Hand Placement for Different Tasks
When working on a tablet, adjusting your hand placement according to the specific task at hand can greatly improve your drawing efficiency and help you achieve better results. Different drawing techniques and tasks require varying levels of control and precision, and adapting your hand placement can optimize your performance. Here are some tips for adjusting your hand placement for different tasks on a tablet.
1. Fine Details: When working on intricate details that require precision, it’s helpful to bring your hand closer to the tablet surface. This allows for better control as your hand is more stable, and your movements are more precise. Positioning your hand closer to the area you’re working on allows for small, delicate movements, ensuring accuracy and attention to detail.
2. Broad Strokes and Shading: For tasks that involve broad strokes or shading, it’s beneficial to increase the distance between your hand and the tablet surface. This provides a wider range of motion and allows for smoother, sweeping movements. By holding the stylus further away from the tip, you can achieve a looser grip and create more fluid and expressive strokes.
3. Erasing or Navigating: When switching to erasing or navigating through menus and options, adjusting your hand placement can enhance your workflow. Instead of gripping the stylus tightly, hold it more lightly or switch to holding it further back, allowing for quick and effortless movements on the tablet surface.
4. Rotating and Zooming: Many digital art applications offer the ability to rotate or zoom in on the artwork. When accessing these features, consider adjusting your hand placement to accommodate the gestures required. For example, using an overhand grip may provide better control and comfort while rotating the canvas or zooming in and out.
5. Experiment and Adapt: Every artist has their own unique preferences and techniques. Don’t be afraid to experiment and adapt your hand placement to find what works best for you. Explore different grip styles and hand positions for various tasks, and pay attention to how it affects your control, comfort, and overall drawing experience. Customizing your hand placement allows you to optimize your performance and bring out your creative best.
By being mindful of the specific requirements of different drawing tasks, you can adjust your hand placement on your tablet to maximize control, precision, and overall drawing performance. Adopting this practice enhances your workflow and enables you to tackle various artistic challenges with ease and confidence. Remember that finding the most comfortable and effective hand placement requires experimentation and personalization to suit your unique artistic style.
Practicing Hand-Eye Coordination
Hand-eye coordination is a crucial skill for any artist, and practicing it is equally important when drawing digitally on a tablet. The ability to synchronize your hand movements with what you see on the screen helps you accurately translate your artistic vision onto the digital canvas. Here are some tips for practicing and improving hand-eye coordination while drawing on a tablet.
1. Follow Guided Exercises: There are numerous guided exercises and drawing tutorials available online specifically designed to improve hand-eye coordination. These exercises typically involve tracing, copying, or replicating shapes, lines, and objects. By repetitively performing these exercises, you strengthen the connection between your hand movements and visual perception.
2. Draw from Life: Drawing from observation is an excellent way to develop hand-eye coordination. Set up still life arrangements and practice capturing the details and proportions of objects. Pay close attention to the relationships between different elements, such as light and shadow, and try to replicate them accurately on your tablet. This exercise helps train your hand to translate what you see onto the digital canvas.
3. Incorporate Gestures and Expressive Lines: Experiment with incorporating gestures and expressive lines into your artwork on the tablet. These exercises involve more fluid and dynamic drawing movements. By intentionally challenging yourself to create bold and energetic lines, you improve your hand-eye coordination as you learn to control and direct your stylus with greater accuracy.
4. Increase the Complexity Gradually: Gradually increase the complexity of your drawing exercises over time. Start with simple shapes and lines, and as your hand-eye coordination improves, move on to more intricate subjects. This progressive approach allows you to build confidence and refine your coordination skills at a manageable pace.
5. Experiment with Different Tools and Brushes: Explore various digital tools and brush settings on your tablet. This experimentation introduces new challenges that require adjustments in your hand movements. By switching between different brushes and tools, you train your hand-eye coordination to adapt and respond to varying textures, opacities, and brush effects.
6. Be Mindful of Your Movements: Develop greater awareness of your hand movements while drawing on the tablet. Pay attention to the pressure you apply, the speed at which you move the stylus, and the angles you use. By being mindful of these factors, you can fine-tune your hand-eye coordination and make deliberate choices that lead to more precise and controlled strokes.
Practicing hand-eye coordination is an ongoing process that requires patience and dedication. Regularly incorporating these exercises into your drawing routine on a tablet will gradually enhance your skills and help you achieve more precise and accurate results. Remember that consistent practice is key to improving your hand-eye coordination and translating your artistic vision seamlessly onto the digital canvas.
Taking Breaks and Stretching
Taking breaks and incorporating stretching exercises into your drawing sessions on a tablet is vital for maintaining the health and well-being of your hand, arm, and overall body. Prolonged periods of drawing without breaks can lead to muscle fatigue, strain, and the risk of repetitive strain injuries. Here are some important reasons why taking regular breaks and implementing stretching exercises is essential for digital artists.
1. Relieving Muscle Fatigue: Drawing on a tablet can be physically demanding, as it requires repetitive movements and fine motor skills. Taking breaks at regular intervals gives your muscles an opportunity to rest and recover from the continuous exertion. This helps prevent muscle fatigue and reduces the risk of developing overuse injuries such as tendonitis or carpal tunnel syndrome.
2. Improving Blood Circulation: Continuous drawing can lead to restricted blood flow to the muscles and joints in your hand, arm, and upper body. Regular breaks allow for increased blood circulation, delivering essential oxygen and nutrients to the affected areas. Improved circulation promotes muscle relaxation and can help alleviate any discomfort or tension that may have built up during your drawing session.
3. Preventing Repetitive Strain Injuries: Repetitive strain injuries (RSIs) are common among digital artists who engage in prolonged and intensive drawing sessions. Taking frequent breaks and implementing stretching exercises can help prevent RSIs by reducing the repetitive stress placed on your muscles and joints. Stretching helps maintain flexibility and range of motion while alleviating any muscle imbalances that may lead to injury.
4. Easing Eye Strain: Drawing on a tablet requires focusing on a bright screen for extended periods, which can cause eye strain and fatigue. Breaks allow your eyes to rest and refocus on other objects in the distance, reducing the strain on your eye muscles. Additionally, giving your eyes periodic breaks from the screen helps maintain better eye health and reduces the risk of long-term vision problems.
5. Refreshing Your Creativity: Taking breaks not only benefits your physical well-being but also revitalizes your creativity. Stepping away from your work for a short time gives your mind a chance to relax and recharge. When you return to your artwork with a fresh perspective, you may find new ideas or solutions that can enhance your creative process.
During your breaks, incorporate stretching exercises that target the muscles and joints in your hand, wrist, arm, and shoulder. These exercises help release any tension or stiffness, improve flexibility, and prevent muscle imbalances. Include exercises like wrist rotations, finger stretches, and shoulder rolls to keep your muscles limber and reduce the risk of strain or injury.
Remember to listen to your body and take breaks whenever you feel the need. Even short breaks of a few minutes can make a significant difference in how you feel and perform during your drawing sessions. By prioritizing breaks and incorporating stretching exercises, you can maintain the health and longevity of your musculoskeletal system, allowing you to continue expressing your creativity on the tablet without unnecessary discomfort or the risk of injuries.
Conclusion
Drawing on a tablet offers a range of benefits and opportunities for artists to explore their creativity in the digital realm. However, to make the most of this innovative technology, it’s essential to pay attention to proper hand placement and implement techniques that enhance your drawing experience. By finding a comfortable position, using the right grip styles, and practicing hand-eye coordination, you can optimize your control, precision, and overall artistic growth on a tablet.
Remember to keep your hand relaxed and loose, adjusting your hand placement based on the specific task at hand. Taking breaks and incorporating stretching exercises into your drawing routine helps in maintaining physical well-being and preventing strain or injuries. By being mindful of these practices, you can ensure a comfortable and enjoyable drawing process while safeguarding your long-term health.
Digital art has opened up new avenues of creativity and connectivity for artists worldwide. Embrace the possibilities offered by tablets, and continually explore new techniques and tools that expand your artistic horizons. By developing your skill set, experimenting with different styles, and using the tablet as a platform for your imagination, you can unlock endless possibilities for creative expression.
Incorporate these tips and practices into your drawing routine, and watch as your artistic abilities continue to grow and evolve. From engaging in proper hand placement to taking regular breaks, each step contributes to a more comfortable, efficient, and rewarding drawing experience on a tablet. So let your creativity soar, and enjoy the endless possibilities of digital art on your tablet.