Reasons why you need More RAM on your Mac
Random Access Memory (RAM) is an essential component of your Mac’s performance. It plays a crucial role in multitasking, running demanding applications, and ensuring a smooth user experience. While macOS is known for its efficient memory management, there are several reasons why you might need to upgrade your RAM. Let’s explore some of these reasons:
1. Enhanced Performance: More RAM allows your Mac to handle multiple tasks simultaneously without slowing down. If you frequently work with resource-intensive applications such as video editing software, graphic design tools, or virtual machines, increasing your RAM can significantly improve performance and prevent lagging or freezing.
2. Smooth Multitasking: Do you often find yourself juggling multiple applications and browser tabs at the same time? Insufficient RAM can result in slower response times and delays when switching between tasks. With more RAM, you can seamlessly switch between applications, streamlining your workflow and increasing productivity.
3. Future-proofing: As technology advances, software and applications tend to become more resource-intensive. By upgrading your RAM, you ensure that your Mac is prepared to handle the demands of future updates and software upgrades. This helps prolong the lifespan of your device and prevents it from becoming outdated.
4. Gaming and multimedia: Gamers and multimedia enthusiasts require ample memory to run high-resolution games, edit videos, or work with large media files. With additional RAM, you can enjoy smoother gaming experiences, quicker rendering times, and faster video editing capabilities.
5. Virtualization: Virtual machines allow you to run multiple operating systems simultaneously on your Mac. However, virtualization requires a significant amount of RAM to allocate memory to each virtual machine. Upgrading your RAM will enable you to allocate more memory to virtual machines, enhancing their performance and eliminating potential slowdowns.
Remember, the amount of RAM you need depends on your specific requirements and usage patterns. If you frequently encounter slowdowns or notice your Mac struggling to handle intensive tasks, it may be time to consider upgrading your RAM. Before making a decision, we recommend checking your current RAM usage and determining if additional memory would benefit your workflow.
Understanding the Basics of RAM
Random Access Memory (RAM) is a fundamental component of your Mac’s performance and plays a crucial role in how your computer handles tasks and processes data. To better understand the importance of RAM, let’s delve into some key concepts:
1. What is RAM? RAM is a type of computer memory that stores data that is actively being used by your computer’s operating system and applications. It provides temporary storage for data that is quickly accessible by the processor, allowing for faster execution of tasks. Unlike long-term storage like your hard drive or SSD, RAM is volatile, meaning it is cleared when the computer is shut down.
2. How does RAM work? When you open an application or perform a task, the relevant data is loaded into RAM from your storage devices. This data is organized into small chunks called memory addresses, which the processor can access rapidly. The more RAM you have, the more data can remain in memory, reducing the need for the processor to read from slower storage devices.
3. Determining RAM capacity: The capacity of your RAM is measured in gigabytes (GB) and determines the amount of data that can be stored. In general, the more RAM you have, the better your computer’s performance will be, particularly when running multiple applications or handling demanding tasks.
4. RAM speed: RAM speed refers to how quickly data can be read from or written to the memory modules. It is measured in megahertz (MHz) or gigahertz (GHz). Higher RAM speeds can lead to improved performance, especially in tasks that involve frequent data transfers.
5. Dual-channel and DDR: Dual-channel RAM refers to the practice of using two identical RAM modules that work together to increase performance. DDR (Double Data Rate) is a type of RAM that transfers data on both the rising and falling edges of the clock signal, effectively doubling the data transfer rate compared to standard RAM.
Understanding the basics of RAM is essential for making informed decisions about upgrading your Mac’s memory. By increasing your RAM capacity and opting for faster modules, you can improve your computer’s performance and ensure smoother multitasking experiences.
How to Check the Current RAM on your Mac
Before considering a RAM upgrade for your Mac, it’s essential to determine how much RAM is currently installed. Here’s a step-by-step guide to checking your Mac’s current RAM:
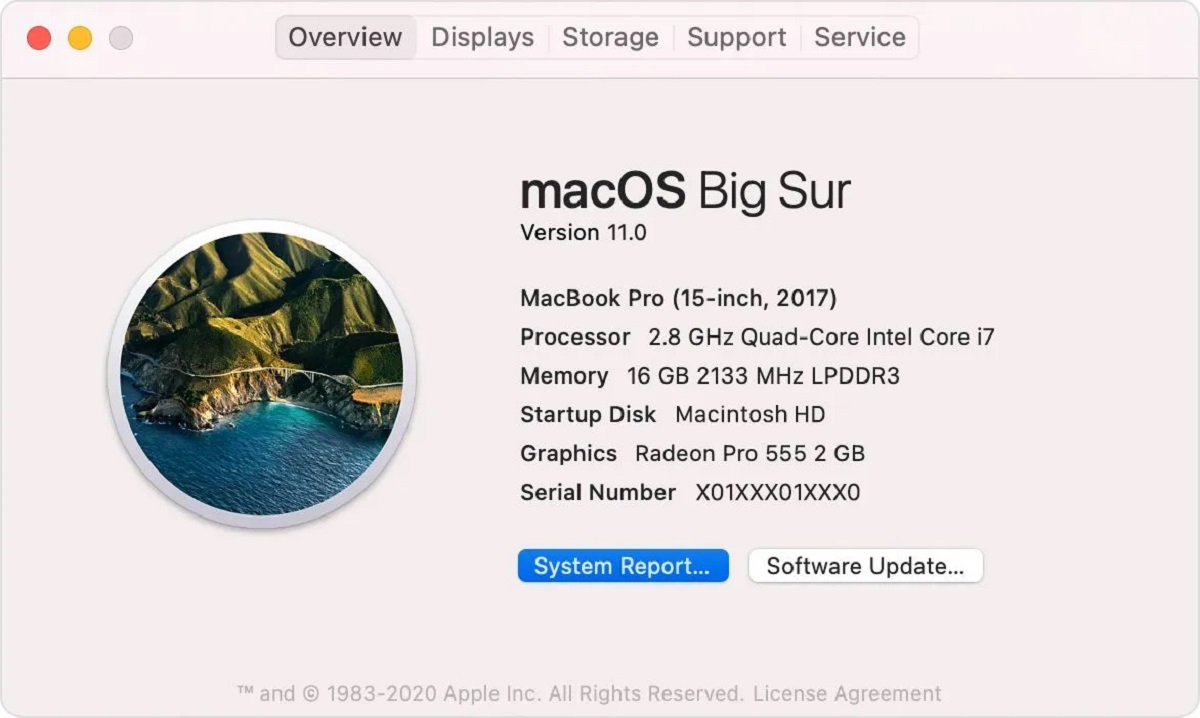
1. Click on the Apple menu in the top left corner of your screen and select “About This Mac.”
2. In the window that appears, click on the “Overview” tab.
3. The “Overview” tab provides information about your Mac, including the currently installed RAM. Look for the “Memory” or “Memory Upgrade” section, which will display the amount of RAM installed on your computer.
4. The RAM information will include the total amount of installed memory, such as “8 GB” or “16 GB,” and the RAM type, such as “DDR4” or “LPDDR3.”
5. If you want more detailed information about your RAM, click on the “System Report” button at the bottom of the window. This will open a new window with comprehensive hardware information about your Mac.
6. In the left sidebar of the System Report window, click on “Memory.” Here, you’ll find detailed information about your RAM, including its specifications, speed, and configuration.
By following these steps, you can easily check the current RAM on your Mac. It’s important to note that the maximum amount of RAM your Mac can support may vary depending on the model and year of your computer. Refer to Apple’s official documentation or consult with an Apple representative to determine the maximum RAM capacity your Mac can handle.
Once you have identified the currently installed RAM, you can make an informed decision about whether upgrading your Mac’s memory is necessary to improve its performance.
Determining if you need More RAM
As your computer ages or your usage requirements change, you may start to notice signs that indicate the need for more RAM. Here are some factors to consider when determining if it’s time to upgrade your Mac’s memory:
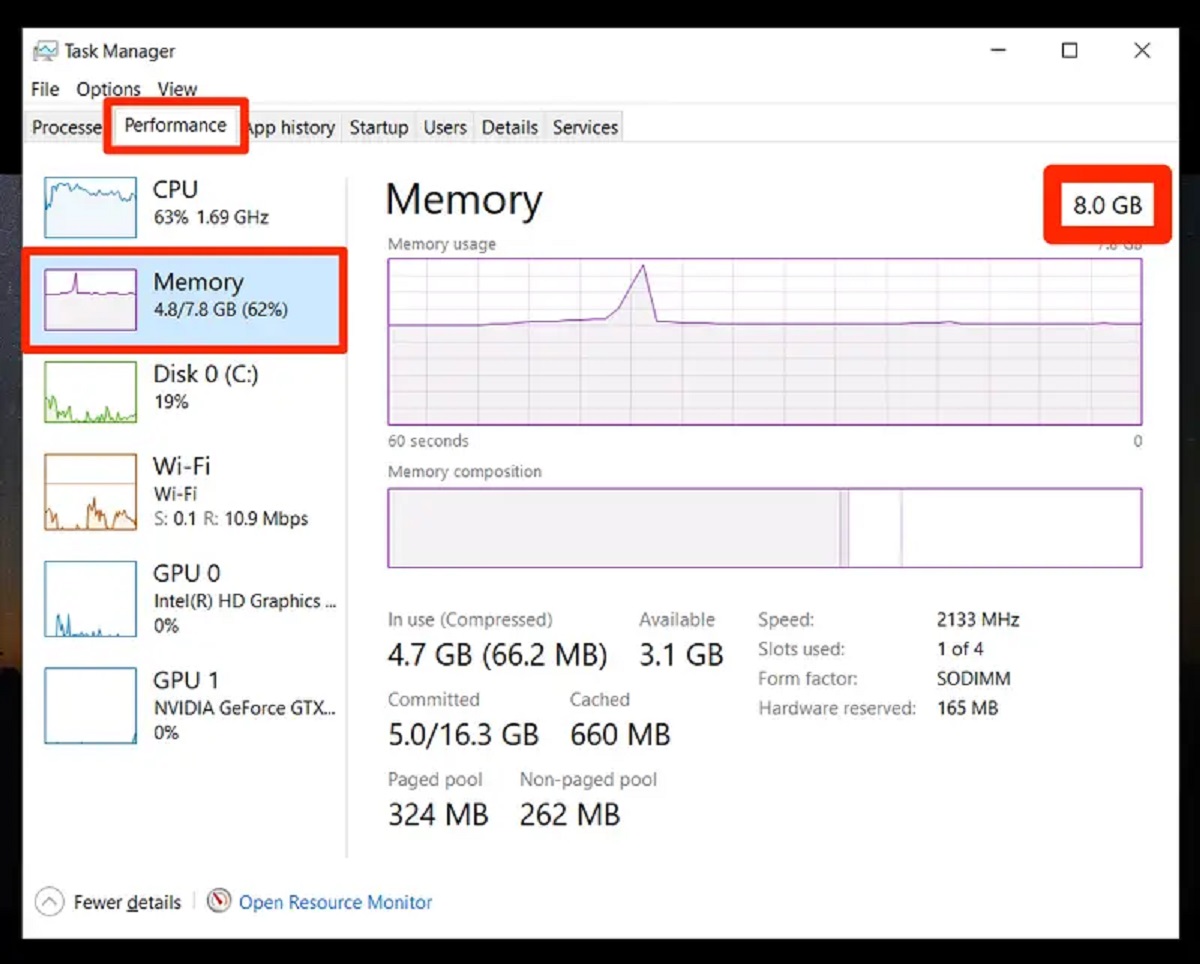
1. Slow performance: If your Mac is experiencing sluggishness, frequent freezes, or significant delays when launching apps or switching between tasks, it could be a sign of insufficient RAM. Keep an eye on your Mac’s activity monitor or task manager to see if your RAM usage is consistently high or if you frequently max out the available memory.
2. Intensive tasks: If you regularly work with memory-intensive applications such as video editing software, virtual machines, or 3D modeling tools, you may benefit from additional RAM. These applications require significant system resources, and increasing your RAM can ensure smoother performance and prevent crashes or slowdowns.
3. Multitasking: Do you find it challenging to work with multiple applications and browser tabs open simultaneously? Insufficient RAM can result in reduced productivity as your Mac struggles to handle the memory demands of multiple tasks. If you frequently multitask and notice a slowdown in performance, upgrading your RAM can help alleviate this issue.
4. RAM usage check: Monitor your Mac’s RAM usage regularly to assess if your current memory capacity is meeting your needs. You can access this information through the Activity Monitor (found under Applications > Utilities) or by using third-party system monitoring apps. If you consistently find your available RAM is running low or if you frequently encounter memory-related errors, it may be an indication that you need more RAM.
5. Future-proofing: Consider your future computing needs when deciding if upgrading your RAM is necessary. If you anticipate using more demanding applications, working with larger files, or running resource-intensive tasks, it’s wise to invest in additional RAM now to accommodate future requirements and ensure a smooth user experience down the line.
By evaluating these factors and assessing your specific usage patterns, you can determine if upgrading your Mac’s RAM is necessary. Remember to consider the recommended minimum requirements for the applications you use and consult your Mac’s documentation or an Apple representative to find out the maximum RAM capacity your Mac can support.
Upgrading the RAM on your Mac
Upgrading the RAM on your Mac can be a cost-effective way to boost its performance and improve multitasking capabilities. Here are the steps to follow when upgrading the RAM:
1. Check compatibility: Before purchasing new RAM modules, ensure they are compatible with your Mac. Check your Mac’s model and year to determine the specific RAM type and maximum supported capacity. Consulting Apple’s official documentation or using the Crucial Memory Advisor tool can help you find compatible RAM options.
2. Gather the necessary tools: To install the new RAM, you will typically need a screwdriver (usually a Phillips) and an antistatic wrist strap. A soft cloth or a static-free work surface is also handy to prevent any damage to the RAM modules.
3. Power off and disconnect: Shut down your Mac and unplug any connected cables. This will protect your Mac and yourself from any electrical mishaps during the upgrade process.
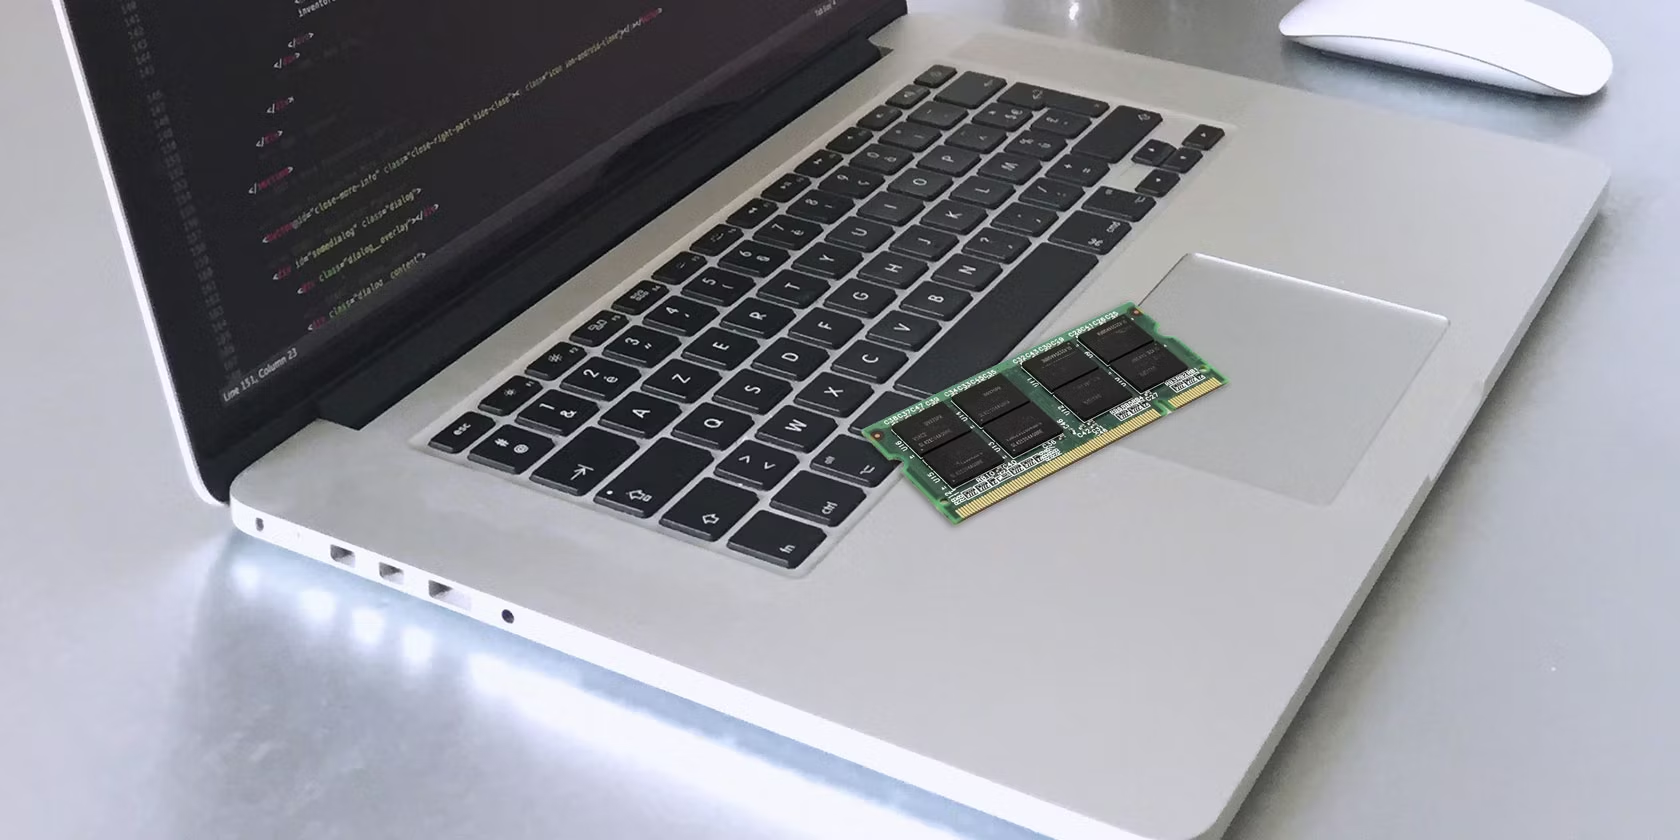
4. Access the RAM slots: The location of the RAM slots varies depending on your Mac model. Check your Mac’s documentation or online tutorials specific to your device to locate and access the RAM slots. In most Macs, the RAM slots are located under a panel on the back or underside of the machine.
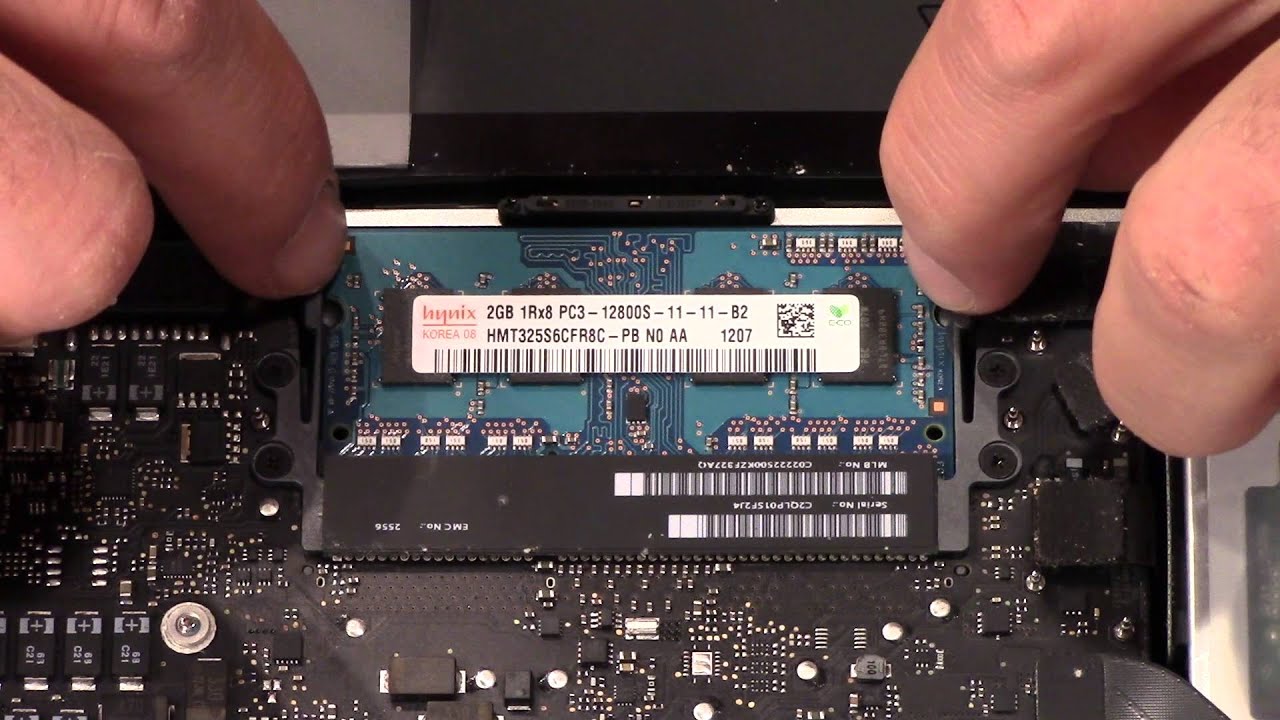
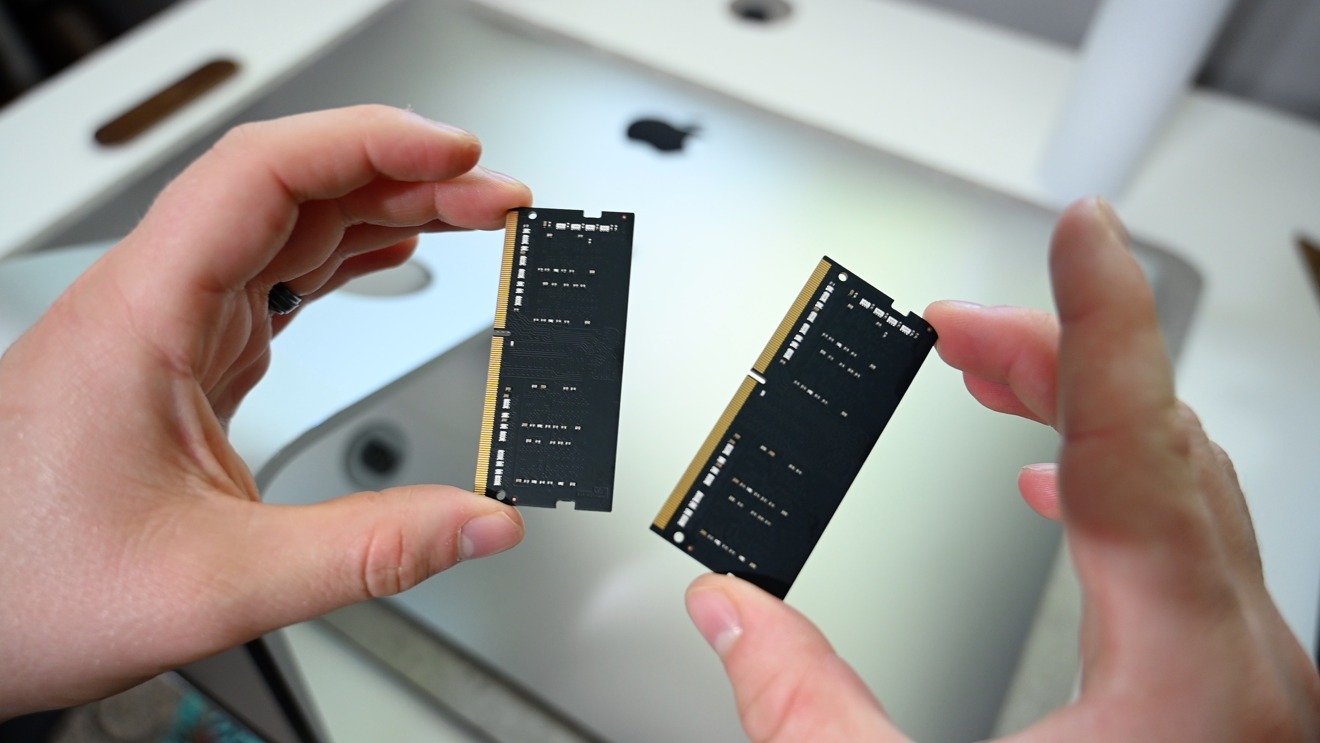
5. Remove existing RAM modules: Gently remove the existing RAM modules by pushing the ejector levers on the sides or by carefully pulling them out. Place the removed RAM modules on a static-free surface or in an antistatic bag to prevent any damage.
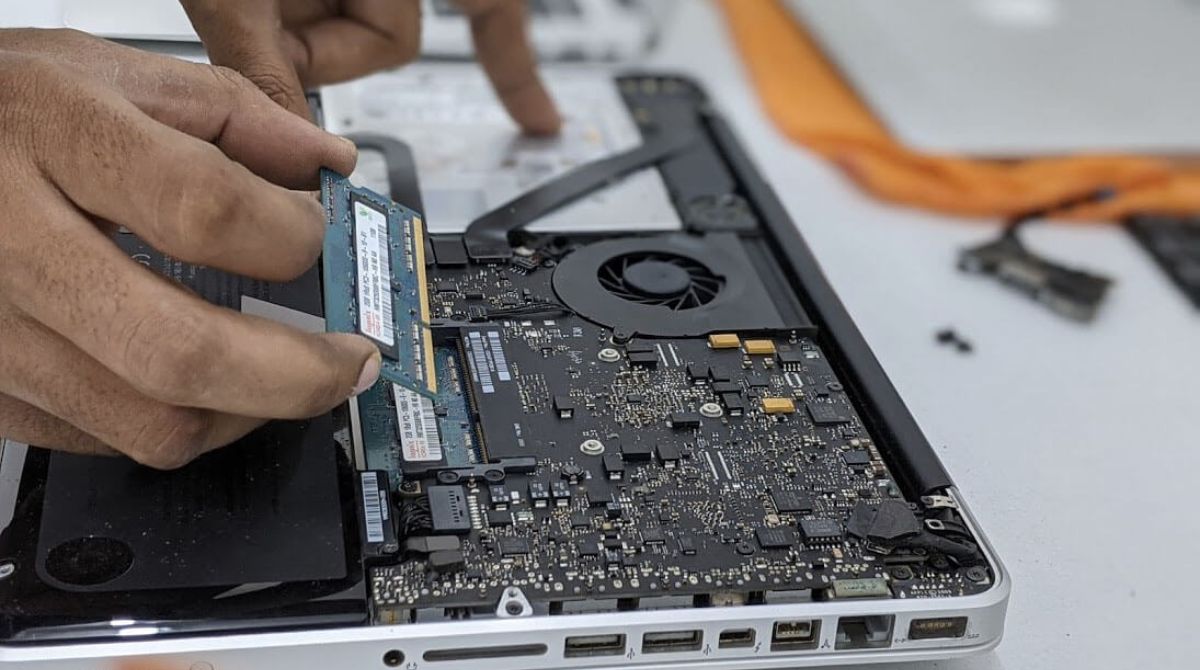
6. Install the new RAM modules: Align the notch on the new RAM module with the notch in the RAM slot and firmly press it into place. Ensure that the module is inserted evenly and completely seated in the slot. Repeat this process for each RAM module you are installing.
7. Secure the RAM modules: Once the new RAM modules are installed, gently push down on each module to secure them in place. They should be snug and fully inserted into the slots.
8. Close up and reconnect: Put the panel back in place or reassemble your Mac, depending on the model. Ensure that all screws are tight, but be careful not to overtighten. Reconnect any cables or peripherals you had disconnected earlier.
9. Power on and verify: Power on your Mac and wait for it to start up. Once your Mac has booted up, go to “About This Mac” to verify that the new RAM is recognized and registered with the correct capacity.
By following these steps, you can successfully upgrade the RAM on your Mac and enjoy improved performance for various tasks and applications.
Researching the Compatible RAM for your Mac Model
Before upgrading the RAM on your Mac, it’s crucial to ensure that you choose compatible memory modules that are suitable for your specific Mac model. Here are the steps to research the compatible RAM for your Mac:
1. Identify your Mac model: Determine the exact model and year of your Mac. You can find this information by clicking the Apple menu in the top left corner of your screen, selecting “About This Mac,” and looking for the model information, such as “MacBook Pro (Retina, 13-inch, Early 2015).”
2. Visit the Apple support website: Access the official Apple support website and search for your Mac model using the provided search bar or navigation options. This will take you to the dedicated support page for your specific Mac model.
3. Check the technical specifications: On the support page, look for the technical specifications section. Here you will find detailed information about your Mac, including the type of RAM it supports, the maximum RAM capacity, and the number of RAM slots available.
4. Verify RAM type and speed: Note the specific RAM type (e.g., DDR3, DDR4) and the maximum supported RAM speed listed in the technical specifications. This information is essential when selecting compatible RAM modules.
5. Use the Crucial Memory Advisor: Visit the Crucial website and use their Memory Advisor tool. Enter your Mac model details or use the system scanner to automatically detect your Mac’s specifications. The tool will provide you with a list of compatible RAM options based on your Mac model.
6. Cross-reference with other sources: To ensure accuracy, cross-reference the information obtained from the Apple support website and the Crucial Memory Advisor with other reputable sources that provide compatibility information for Mac RAM upgrades. Websites like OWC (Other World Computing) and reputable computer hardware forums can provide additional insights and recommendations.
7. Read user reviews and check ratings: Before making a final decision, read user reviews and ratings of the RAM modules you are considering. This will provide insights into the compatibility, reliability, and performance of the RAM in real-world usage scenarios.
Remember that purchasing RAM from reputable manufacturers is crucial to ensure compatibility and reliability. When selecting compatible RAM modules, consider factors such as capacity, speed, and latency that meet your specific requirements and budget.
By thoroughly researching the compatible RAM options for your Mac model, you can confidently choose the right memory modules and maximize the performance of your Mac.
Installing the new RAM on your Mac
Once you have obtained the compatible RAM modules for your Mac, it’s time to install them. Follow these steps to ensure a successful installation:
1. Prepare your workspace: Before starting the installation, make sure to work on a clean, static-free surface. Consider using an antistatic mat or grounding yourself by wearing an antistatic wrist strap.
2. Power off and disconnect: Shut down your Mac and unplug any connected cables or peripherals. This will prevent any accidental damage from static electricity or other electrical hazards during the installation process.
3. Locate the RAM slots: Refer to your Mac’s documentation or online resources to find the location of the RAM slots. Typically, MacBooks have their RAM slots located on the underside of the device, while iMacs may require removing the back panel or accessing the RAM slots through a dedicated access door.
4. Remove existing RAM: If there are existing RAM modules installed, gently press the ejector levers on the sides of each module to release them. Carefully remove the modules from their slots, holding them by the edges to avoid touching any sensitive components.
5. Insert the new RAM modules: Align the notch on the new RAM module with the notch in the RAM slot. Insert the module at a slight angle and firmly press it down until you hear a click. Repeat this process for each RAM module, if applicable. Ensure that the modules are fully seated in the slots and securely in place.
6. Close up and reconnect: If you removed any panels or access doors, reattach them securely. Tighten any screws, but avoid over-tightening. Reconnect any cables or peripherals that were disconnected earlier.
7. Power on your Mac: Once everything is reassembled, plug in your Mac and power it on. If everything is properly installed, your Mac should detect the new RAM modules automatically during the startup process.
8. Verify the new RAM: To confirm that the new RAM is recognized by your Mac, go to “About This Mac” by clicking the Apple menu and selecting the option. The new RAM capacity and other details should be displayed under the memory section. If the new RAM is not recognized or there are any issues, double-check the installation and make sure the modules are properly seated.
By following these steps, you can successfully install the new RAM on your Mac. Enjoy the increased performance and improved multitasking capabilities that the additional memory provides!
Testing and Verifying the New RAM
After installing new RAM modules in your Mac, it is essential to test and verify that they are functioning correctly. Here are some steps to ensure the new RAM is working as expected:
1. Power on your Mac: Start by turning on your Mac and allowing it to boot up fully. Watch for any error messages or unusual behavior during the startup process, as these could indicate potential issues with the new RAM.
2. Check system information: Click on the Apple menu in the top left corner of your screen and select “About This Mac.” In the window that appears, click on the “Overview” tab. Verify that the total RAM capacity displayed matches the expected capacity of the new RAM modules installed.
3. Check system performance: Use your Mac as you normally would and observe its performance. If the new RAM is functioning properly, you should experience improved performance, smoother multitasking, and faster application loading times. Pay attention to any signs of slowdowns, freezes, or errors, as they may indicate compatibility or installation issues.
4. Run memory tests: There are several third-party memory testing tools available that can help assess the stability and reliability of your new RAM. Memtest86 and Rember are popular options that can thoroughly test the RAM for any errors or compatibility issues. Run these tests to ensure the new RAM passes all checks without any warning or error messages.
5. Optimize RAM usage: To fully benefit from the new RAM, optimize your Mac’s memory management settings. Go to “System Preferences” > “Memory” (or “Activity Monitor” > “Memory” tab for older macOS versions) to view the memory usage and adjust settings if necessary. Ensure that your Mac is effectively utilizing the newly installed RAM.
If there are any issues or inconsistencies during testing or if you are experiencing performance problems after the RAM upgrade, consider the following troubleshooting steps:
– Check if the RAM modules are securely seated and properly installed in their respective slots.
– Verify that the RAM modules are compatible with your Mac model and meet the required specifications.
– Try reseating the RAM modules or swapping their positions to rule out any slot-related issues.
– Consult the manufacturer’s support documentation or contact their customer support for further assistance.
By testing and verifying the new RAM, you can ensure that it is functioning correctly and enjoy the increased performance and responsiveness that additional memory provides for your Mac.
Optimizing your Mac’s Performance with More RAM
With the installation of more RAM in your Mac, you have unlocked the potential for improved performance and smoother multitasking. To optimize your Mac’s performance and take full advantage of the additional memory, follow these tips:
1. Close unnecessary applications: Close any unnecessary applications running in the background to free up memory resources. This ensures that more RAM is available for the applications and tasks you are actively using, reducing the chance of slowdowns or bottlenecks.
2. Increase virtual memory: Virtual memory, also known as swap space, is a portion of your hard drive or SSD that is used as an extension of physical RAM. By default, macOS automatically manages virtual memory. However, you can manually adjust the virtual memory settings if needed. Go to “System Preferences” > “Memory” (or “Activity Monitor” > “Memory” tab for older macOS versions) to review and adjust the virtual memory settings.
3. Manage startup items: Prevent unnecessary applications from launching at startup as they can consume valuable memory resources. Go to “System Preferences” > “Users & Groups” > “Login Items” to manage startup items and disable any that are not essential.
4. Optimize storage: Ensure that your Mac has sufficient free space on its storage drive. A full disk can slow down your Mac, including the performance of your RAM. Regularly remove unneeded files, clear temporary caches, and consider moving large files or applications to external storage devices.
5. Update your software: Keep your macOS and applications up to date with the latest updates and patches. This ensures that your software is optimized for performance and compatibility with the latest hardware, including the new RAM modules.
6. Use activity monitor: Monitor your Mac’s memory usage using the Activity Monitor tool (located in Applications > Utilities). It provides valuable insights into how your RAM is being utilized and can help identify any memory-hogging applications or processes. Take action to address any issues or optimize resource allocation if necessary.
7. Consider advanced optimizations: For more advanced users, optimizing performance with additional techniques such as configuring RAM disk or optimizing memory allocation may be beneficial. However, exercise caution when attempting these techniques and ensure you thoroughly research and understand their potential implications.
By implementing these optimization strategies, you can make the most of your Mac’s increased RAM capacity. Your computer will be better equipped to handle resource-intensive applications, multitasking, and overall system performance, resulting in a smoother and more efficient user experience.
FAQs about Upgrading RAM on Mac
Upgrading the RAM on your Mac can be a significant step in boosting its performance. Here are some frequently asked questions about upgrading RAM on Mac:
Q: Is it possible to upgrade the RAM on all Mac models?
A: No, not all Mac models allow for RAM upgrades. Certain Mac models, such as the MacBook Air or some Mac Mini models, have soldered RAM that cannot be upgraded. It’s important to check your specific Mac model’s specifications to determine if RAM upgrades are possible.
Q: How much RAM can my Mac support?
A: The maximum amount of RAM your Mac can support depends on its model and year. Apple’s official documentation or technical support can provide you with the specific RAM upgrade options and maximum supported capacity for your Mac.
Q: Can I mix different RAM module capacities or speeds?
A: While it is generally recommended to use identical RAM modules for optimal performance and compatibility, some Mac models do support mixing different module capacities or speeds. However, it’s best to consult your Mac’s documentation or the manufacturer’s guidelines to determine if mixing RAM is possible for your specific Mac model.
Q: Can I install RAM modules with higher capacity than the maximum recommended by Apple?
A: It is not recommended to install RAM modules with a capacity higher than what is officially supported by Apple. Doing so can potentially cause compatibility issues, instability, and may void your warranty. Stick to the recommended maximum RAM capacity specified by Apple or consult with an authorized service provider for guidance.
Q: Do I need to reinstall macOS after upgrading the RAM?
A: No, upgrading the RAM does not require a reinstallation of macOS or any other software. Your Mac should recognize the new RAM modules automatically when you power it on.
Q: Can I use RAM from third-party manufacturers instead of Apple’s official RAM?
A: Yes, third-party RAM modules from reputable manufacturers are commonly used to upgrade Macs. However, it is crucial to ensure that the RAM is compatible with your Mac model and meets the required specifications for optimal performance and reliability.
Q: Can I upgrade my Mac’s RAM myself or do I need to take it to a professional?
A: Upgrading the RAM on a Mac can often be done by users themselves, especially for models with accessible RAM slots. However, if you are unsure or uncomfortable with the process, it is always recommended to seek assistance from a professional or authorized Apple service provider to ensure a proper and safe installation.
Remember to consult your specific Mac model’s documentation, official Apple resources, or contact Apple support for accurate and up-to-date information regarding RAM upgrades for your Mac.