Introduction
Welcome to the world of Warzone, a popular online multiplayer battle royale game, where survival of the fittest is the ultimate goal. Whether you are a seasoned gamer or new to the realm of Warzone, you may have encountered various obstacles that can hinder your gaming experience. One such obstacle is geo-restrictions, which prevent players from accessing the game in certain regions. This is where a VPN (Virtual Private Network) comes to the rescue.
A VPN is a powerful tool that can not only bypass geo-restrictions but also provide added security and privacy while gaming. With a VPN, you can connect to a server in a different location and mask your IP address, making it appear as if you are in a different country. This allows you to access Warzone and other restricted content, regardless of your physical location.
But choosing the right VPN for Warzone requires careful consideration. There are numerous VPN providers available, each offering different features, server locations, and pricing plans. In this article, we will guide you on how to get a VPN for Warzone and ensure a seamless gaming experience.
What is Warzone and why do you need a VPN?
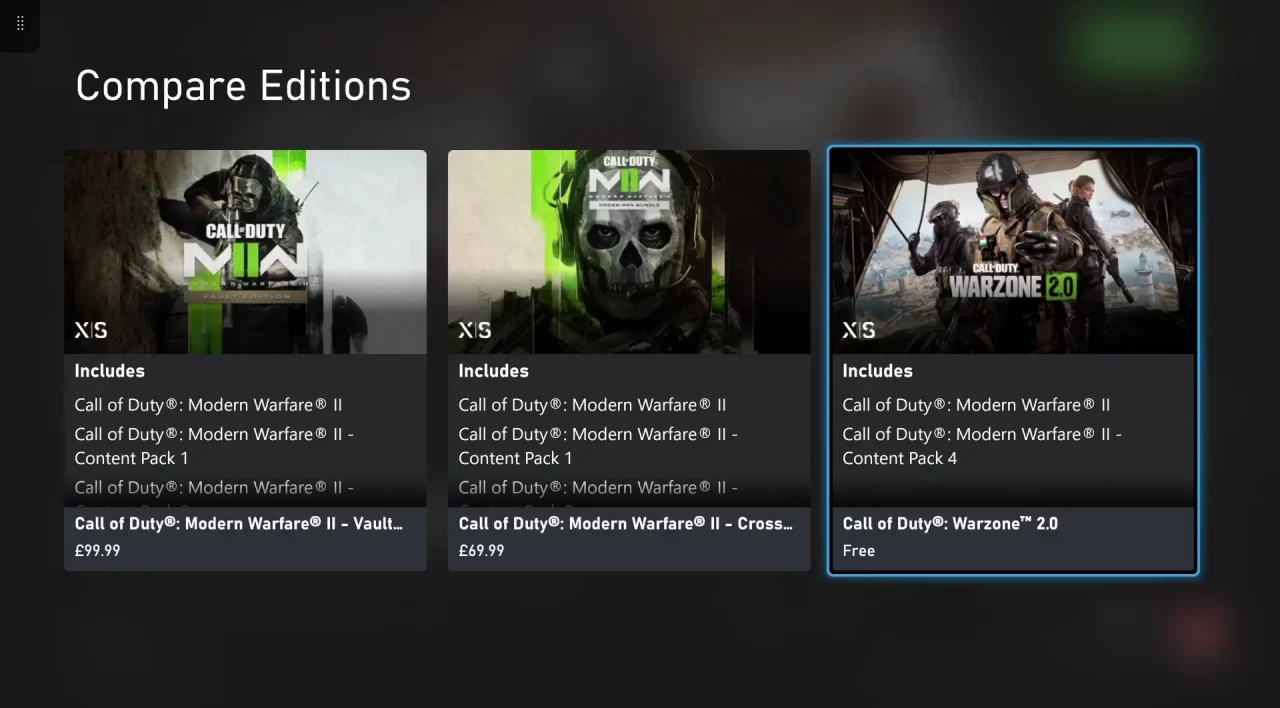
Warzone is a popular free-to-play online battle royale game developed and published by Activision. In this fast-paced game, players are dropped into a massive map and must fight to be the last one standing. With a combination of intense gunfights, tactical gameplay, and the thrill of survival, Warzone has captured the attention of millions of gamers worldwide.
However, despite its immense popularity, Warzone is not universally accessible. Certain countries or regions may have restrictions or blockages that prevent players from accessing the game. This can be frustrating if you’re traveling or living in such a location, as it completely hampers your ability to enjoy the game.
This is where a VPN comes in handy. By using a VPN, you can bypass geo-restrictions and connect to a server in a location where Warzone is available. This allows you to enjoy the game without any limitations, regardless of your physical location.
But the benefits of a VPN for Warzone go beyond just bypassing geo-restrictions. A VPN also encrypts your internet connection, providing an additional layer of security while gaming. This is especially important when engaging in online multiplayer games, as it helps protect your personal information and gaming data from potential hackers or threats.
Furthermore, a VPN helps to reduce lag and improve your gaming experience by providing a more stable and fast connection. With dedicated gaming servers and optimized routes, a VPN can help minimize latency and packet loss, ensuring smoother gameplay and quicker reactions.
Additionally, a VPN enables you to access region-specific in-game content or special events that may not be available in your region. By connecting to a server in the desired location, you can unlock exclusive content and participate in limited-time events, enhancing your overall gaming experience.
In summary, a VPN is a vital tool for Warzone players who want to overcome geo-restrictions, enhance their security, improve their gaming performance, and access region-specific content. In the next section, we will discuss how to choose the right VPN for Warzone.
Choosing the right VPN for Warzone
When it comes to choosing a VPN for Warzone, there are several factors to consider to ensure you make the right choice. Here are some key aspects to keep in mind:
- Server Locations: Look for a VPN provider that has a wide range of server locations available. This will allow you to connect to a server in a region where Warzone is accessible, giving you the freedom to play from anywhere in the world.
- Connection Speed: Gaming requires a fast and stable internet connection to ensure smooth gameplay. Prioritize VPN providers that offer high-speed servers and have optimized routes for gaming traffic to minimize latency and maximize performance.
- Security and Privacy: It’s crucial to choose a VPN that prioritizes your security and privacy. Look for features such as strong encryption, a no-logs policy, and a kill switch to ensure your gaming sessions remain private and protected from potential cyber threats.
- User-Friendly Interface: A VPN should be easy to set up and use, even for those who are not tech-savvy. Choose a provider with a simple and intuitive interface that makes it hassle-free to connect to servers and adjust settings.
- Compatibility: Make sure the VPN works on all the devices you use for gaming, such as PC, Mac, PlayStation, or Xbox. Check if the VPN provider has dedicated apps or setup guides for your preferred gaming platforms.
- Customer Support: In case you encounter any issues or have questions, reliable customer support is essential. Look for VPN providers that offer 24/7 customer support via live chat or email to ensure prompt assistance whenever you need it.
It’s also worth considering factors such as cost, additional features like split tunneling or ad-blockers, and the reputation of the VPN provider.
To make an informed decision, it’s advisable to read reviews and compare different VPN providers before making a final choice. Look for reputable VPN review websites and consider the experiences and opinions of other gamers to find the VPN that best suits your specific needs.
Now that you have an understanding of what to look for in a VPN for Warzone, let’s proceed to the next section where we will discuss the step-by-step process of getting a VPN for Warzone.
Steps to get a VPN for Warzone
Now that you’re aware of the importance of a VPN for Warzone and the factors to consider when choosing one, let’s dive into the step-by-step process of getting a VPN for Warzone:
Step 1: Research and compare VPN providers
Start by conducting thorough research on the top VPN providers in the market. Compare their features, server locations, pricing plans, and user reviews. This will help you narrow down your options and select the VPN provider that best suits your needs.
Step 2: Sign up for a chosen VPN service
Once you’ve selected a VPN provider, proceed to sign up for their service. Visit their website and choose a subscription plan that fits your budget and gaming requirements. Fill in the necessary information and make the payment to create your VPN account.
Step 3: Download and install the VPN software
After signing up, the next step is to download and install the VPN software on your gaming device. Most VPN providers offer dedicated apps for various platforms, including Windows, Mac, iOS, and Android. Download the appropriate app for your device from the VPN provider’s website or the app store.
Step 4: Connect to a VPN server
Once you’ve installed the VPN software, launch the app and log in using your VPN account credentials. Browse through the available server locations and choose a server in a region where Warzone is accessible. Click on the connect button to establish a VPN connection.
Step 5: Launch Warzone and enjoy secure gaming
With the VPN connection established, launch Warzone on your gaming device. You should now be able to access the game without any geo-restrictions. Enjoy a secure and uninterrupted gaming experience while benefiting from the added privacy and protection provided by the VPN.
Remember to keep the VPN software running in the background while gaming to ensure a continuous VPN connection. If you experience any connection issues or need to switch servers, simply disconnect from the current server and connect to a different one within the VPN app.
Additionally, it’s advisable to periodically update the VPN software to benefit from the latest security features and improvements.
With these steps, you are now ready to get a VPN for Warzone and unlock a world of unrestricted gaming possibilities. In the next section, we will provide you with some additional tips for using a VPN with Warzone.
Step 1: Research and compare VPN providers
The first step in getting a VPN for Warzone is conducting thorough research and comparing different VPN providers. Here’s what you need to do:
1. Start by making a list of reputable VPN providers. Look for providers that have a solid reputation, positive user reviews, and a track record of providing reliable and secure services.
2. Visit the websites of each VPN provider on your list and explore their features, server locations, and pricing plans. Pay attention to details such as the number of servers available, the countries they have servers in, connection speed, and security protocols offered.
3. Take note of any additional features that the VPN provider offers. Some VPNs may offer features like split tunneling, which allows you to route specific applications or websites outside of the VPN tunnel. Others may have built-in ad-blockers or malware protection.
4. Consider the pricing plans of each VPN provider. Compare the costs, subscription duration, and any discounts or special offers that may be available. Keep in mind that while price is important, it should not be the sole deciding factor. Consider the value provided by the VPN in terms of features, security, and performance.
5. Read user reviews and ratings to gain insights into the experiences of other gamers with each VPN provider. Look for feedback specifically related to gaming performance, connection stability, customer support, and ease of use.
6. Take advantage of free trials or money-back guarantees offered by VPN providers. This will allow you to test their service and performance before committing to a long-term subscription.
By conducting proper research and comparing VPN providers, you can make an informed decision and choose a VPN that meets your gaming needs and preferences. Remember, the right VPN will not only help you bypass geo-restrictions but also provide a secure and optimized gaming experience.
Now that you have narrowed down your options, it’s time to move on to the next step: signing up for a chosen VPN service. Keep reading to learn about the next steps in getting a VPN for Warzone.
Step 2: Sign up for a chosen VPN service
Once you have researched and compared different VPN providers, it’s time to sign up for the VPN service of your choice. Follow these steps to complete the sign-up process:
1. Visit the website of the VPN provider you have selected. Look for a “Sign Up” or “Get Started” button, which will usually be prominently displayed on their homepage.
2. Choose a subscription plan that suits your needs. VPN providers often offer different pricing tiers with varying benefits and features. Consider factors such as the duration of the subscription and whether they offer different plans for individuals or multiple devices.
3. Fill out the necessary information to create your VPN account. This will typically include providing your email address, creating a username and password, and entering your payment details. Ensure that you provide accurate information and read the terms and conditions before proceeding.
4. Review the payment details and make the required payment. VPN providers usually accept a variety of payment methods, including credit cards, PayPal, or cryptocurrencies. Choose the payment method that you prefer and follow the prompts to complete the transaction.
5. Once the payment is confirmed, you will receive a confirmation email with your account details. Keep this email for future reference, as it will contain important information about your VPN account, such as your username and instructions for downloading the VPN software.
6. Some VPN providers may require you to verify your email address or go through additional steps to activate your account. Follow the instructions provided in the confirmation email to activate your VPN account.
7. After completing the sign-up process, you are now ready to move on to the next step: downloading and installing the VPN software on your gaming device.
By signing up for a chosen VPN service, you gain access to all the features and benefits offered by the VPN provider. You are one step closer to enjoying a secure and unrestricted gaming experience with Warzone.
Next, we will cover the details of Step 3: Downloading and installing the VPN software on your gaming device.
Step 3: Download and install the VPN software
Once you have signed up for a chosen VPN service, the next step is to download and install the VPN software on your gaming device. Follow these steps to complete the process:
1. Access the VPN provider’s website and look for the “Download” or “Get Started” page. This is where you will find the necessary software and apps for your specific device.
2. Choose the correct software version for your operating system. VPN providers typically offer software for various platforms, including Windows, Mac, iOS, Android, and sometimes even gaming consoles like PlayStation or Xbox.
3. Click on the appropriate download button to start the download process. The file will typically be a small executable or installer package (.exe or .dmg) for desktop operating systems or an app from the respective app store for mobile devices.
4. Once the download is complete, locate the downloaded file on your device and run it to start the installation process. Follow the on-screen instructions provided by the VPN software installer.
5. During the installation process, you may be prompted to accept the terms and conditions of the VPN software. Read through the information provided and proceed if you agree with the terms.
6. After the installation is complete, the VPN software will usually prompt you to log in using the account credentials you created during the sign-up process. Enter your username and password to log in and gain access to the VPN application.
7. Once you are logged in, you will typically see a user-friendly interface with various options and settings. Explore the interface to familiarize yourself with the features and customization options that the VPN software offers.
8. If needed, you can usually customize settings such as connection protocols, server locations, or auto-connect options within the VPN software. Make any necessary adjustments according to your preferences.
9. Congratulations! The VPN software is now installed and ready to use on your gaming device. Remember to keep the software running in the background while gaming to ensure a continuous VPN connection.
Next, we will move on to Step 4: Connecting to a VPN server and preparing to launch Warzone securely.
Step 4: Connect to a VPN server
With the VPN software installed on your gaming device, you’re ready to connect to a VPN server and prepare to launch Warzone securely. Follow these steps:
1. Launch the VPN software on your device. Depending on the VPN provider and software, you may find it as an icon in your system tray, taskbar, or among your installed applications. Open the software to access its interface.
2. Log in to the VPN software using your VPN account credentials. Enter your username and password in the designated fields and click on the “Log In” or “Connect” button to proceed.
3. Once logged in, you are usually presented with a list of available server locations or a map showing server locations around the world. Choose a server location where Warzone is accessible. This can be a server located in a country or region where the game is available for play.
4. Click on the server location of your choice to initiate the VPN connection. The VPN software will establish a secure connection to the selected server location, encrypting your internet traffic and masking your IP address.
5. Wait for the VPN software to establish a connection to the server. The software generally displays the status of the connection, indicating when it is established and ready to use. This may take a few seconds or longer, depending on your internet connection and the server load.
6. Once the VPN connection is active, your device is now virtually located in the server location you selected. This means that your IP address is masked, and you can access Warzone as if you were physically present in that location.
7. Keep the VPN software running in the background while you launch Warzone. This ensures that your gaming session remains securely connected through the VPN server.
8. Launch Warzone on your gaming device and start enjoying the game without any geographical restrictions. You can now access the game and play from anywhere, even if Warzone is not officially available in your region.
Remember to keep the VPN software and the Warzone game running simultaneously to maintain a secure and uninterrupted gaming experience.
By connecting to a VPN server, you can bypass geo-restrictions, protect your privacy, and enjoy a secure gaming session with Warzone. In the next section, we will provide some additional tips for using a VPN with Warzone.
Step 5: Launch Warzone and enjoy secure gaming
With the VPN connection established, it’s time to launch Warzone and enjoy a secure gaming experience. Follow these steps:
1. Keep the VPN software running in the background on your gaming device. Ensure that the VPN connection to the selected server is still active and stable.
2. Locate the Warzone game launcher on your device. This can be in the form of a desktop shortcut, a start menu entry, or an icon on your gaming console’s home screen.
3. Click or select the Warzone game launcher to start the game. The launcher will prompt you to log in to your game account using your credentials. Enter your username and password to proceed.
4. Once logged in, you will be presented with the Warzone game interface. You can now start playing the game as you normally would, but with the added security and benefits provided by the VPN.
5. Enjoy a secure and private gaming experience while connected to the VPN. Your internet traffic is encrypted, keeping your data safe from potential threats and ensuring your privacy while gaming.
6. Take advantage of the benefits of using a VPN with Warzone. By connecting to a server in a different region, you can access region-specific content, participate in special events, or enjoy different in-game experiences.
7. While playing Warzone, monitor your VPN connection to ensure its stability. If you experience any issues with your VPN connection, such as slow speeds or disconnects, try switching to a different server within the VPN software.
8. If you have a multiplayer gaming session or want to communicate with other players, the VPN should not interfere with these activities. However, if you encounter any difficulties, check the VPN software settings to ensure that it does not restrict or block any necessary communication protocols.
By launching Warzone while connected to the VPN, you can enjoy the game without any regional restrictions and with the added security and privacy provided by the VPN. Immerse yourself in the battle royale experience, knowing that your connection is encrypted and your personal information is protected.
In the next section, we will provide some additional tips for using a VPN with Warzone to further enhance your gaming experience.
Additional tips for using a VPN with Warzone
Using a VPN with Warzone can greatly enhance your gaming experience. Here are some additional tips to help you make the most out of your VPN usage:
1. Choose the nearest server: When connecting to a VPN server, opt for a server that is geographically close to your actual location. This can help reduce latency and improve your gaming performance by minimizing the distance your data has to travel.
2. Experiment with different servers: If you experience latency or connection issues while gaming, consider trying different VPN servers. Some servers may be more optimized for gaming traffic, providing a smoother and more stable connection.
3. Configure your VPN software: Take the time to explore the settings of your VPN software. You may find options to enable features like split tunneling, which allows you to route specific traffic through the VPN while letting other applications use your regular internet connection.
4. Monitor your bandwidth: Streaming gameplay and using a VPN can consume a significant amount of bandwidth. Keep an eye on your bandwidth usage to ensure your internet connection can handle both activities without experiencing lag or interruptions.
5. Update your VPN software: Regularly check for updates to your VPN software and install them when available. Updates often include bug fixes, security patches, and performance improvements, ensuring a smooth and secure gaming experience.
6. Consider using a wired connection: If possible, connect your gaming device to your router using an Ethernet cable. A wired connection can provide a more stable and reliable internet connection compared to a wireless connection, minimizing potential connection issues while gaming with a VPN.
7. Test your VPN connection: Before diving into intense gaming sessions, take the time to test your VPN connection to ensure it’s working as expected. Verify that your IP address is properly masked, and check for any potential IP or DNS leaks that could compromise your privacy.
Remember, while a VPN can enhance your gaming experience, it’s important to prioritize your security. Only download and install VPN software from trusted sources, and be cautious of free VPN services that may compromise your privacy or limit your bandwidth.
By following these additional tips, you can optimize your VPN usage with Warzone and enjoy a secure and unrestricted gaming experience. Now that you’re equipped with these tips, start exploring the world of Warzone without limitations and game on with peace of mind!
Conclusion
Getting a VPN for Warzone can open up a world of gaming possibilities, allowing you to bypass geo-restrictions, enhance security, and improve your overall gaming experience. By following the step-by-step process provided in this guide, you can easily set up and connect to a VPN server, ensuring that you can access Warzone from anywhere in the world.
Remember to research and compare different VPN providers to find the one that best fits your gaming needs. Consider factors such as server locations, connection speed, security features, and user-friendly interfaces. Take advantage of free trials or money-back guarantees to test the VPN service before committing to a long-term subscription.
Once you have chosen a VPN provider, sign up for their service, download and install the VPN software, and connect to a server in a region where Warzone is accessible. Launch the game and enjoy a secure and unrestricted gaming experience while benefiting from the added privacy and protection provided by the VPN.
Additionally, using a VPN with Warzone opens up possibilities for accessing region-specific content, participating in special events, and enjoying different in-game experiences. Keep in mind the additional tips provided in this guide, such as choosing the nearest server, configuring your VPN software, and monitoring your bandwidth usage, to optimize your VPN usage.
By using a VPN with Warzone, you can overcome geographical restrictions, protect your personal information, and enhance your gaming performance. Stay connected, secure, and enjoy the immersive world of Warzone without limitations.
Get ready to embark on thrilling battles, connect with players from around the world, and experience the true potential of Warzone with the power of a VPN by your side.


