Introduction
Welcome to this guide on how to forward a text message on the Samsung Galaxy! Whether you want to share an important piece of information, a funny conversation, or any other text message, forwarding it is a quick and convenient way to do so. The Samsung Galaxy offers a user-friendly interface and intuitive messaging features that make forwarding text messages a breeze.
Forwarding a text message allows you to easily send it to another contact without the need to type it out manually. This can save you time and effort, especially when you need to share a lengthy or complex message. Whether you’re using a Samsung Galaxy S21, Note 20, or any other model, the process of forwarding text messages remains relatively similar.
In this step-by-step guide, we will walk you through the process of forwarding a text message on your Samsung Galaxy device. We will cover everything from opening the Messages app to sending the message. So, let’s dive in and learn how to forward text messages on your Samsung Galaxy device!
Step 1: Open the Messages app
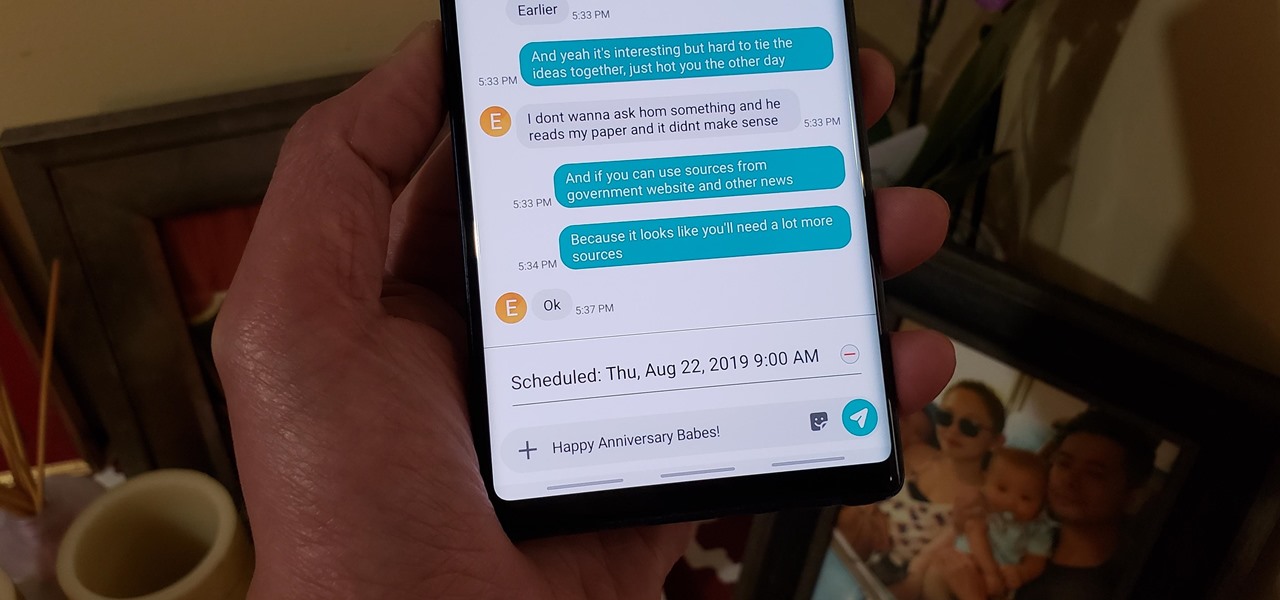
The first step to forwarding a text message on your Samsung Galaxy is to open the Messages app. The Messages app is where all your text conversations are stored, and it is the platform from which you can access and manage your messages.
To open the Messages app, locate the Messages icon on your device’s home screen or app drawer. The icon is usually represented by a speech bubble or a messaging symbol. Tap on the icon to launch the app.
Once you’ve opened the Messages app, you will see a list of your recent conversations. This list displays the names or phone numbers of the contacts with whom you’ve had conversations. Scroll through the list or use the search bar at the top of the screen to find the conversation containing the text message you want to forward.
If you’re unable to find the Messages app on your home screen or app drawer, you can use the device’s search feature. Swipe down on the home screen to reveal the search bar and type in “Messages” to locate and open the app.
Once you’ve successfully opened the Messages app, you’re ready to move on to the next step: selecting the conversation containing the text message you want to forward.
Step 2: Select the conversation containing the text message you want to forward
After opening the Messages app on your Samsung Galaxy, the next step is to select the conversation that contains the text message you want to forward. The Messages app organizes your conversations in a list, making it easy to find and access specific conversations.
To select the conversation, scroll through the list of conversations displayed on the screen. Each conversation is identified by the contact’s name or phone number. If you have a long list of conversations, you can use the search bar at the top of the screen to quickly find the desired conversation.
Once you have located the conversation you want to forward a text message from, tap on it to open the conversation thread. This will display all the messages exchanged between you and the contact. Scroll through the conversation until you find the specific text message you wish to forward.
In some cases, the specific text message you want to forward may be part of a longer conversation thread. You can scroll up or down within the conversation to locate the desired message. If necessary, you can use the app’s search function to find the message by entering relevant keywords or contact names.
By selecting the conversation and accessing the conversation thread, you are now ready to proceed to the next step, which involves tapping and holding on the text message you want to forward.
Step 3: Tap and hold on the text message you want to forward
Once you have selected the conversation containing the text message you want to forward in the Messages app on your Samsung Galaxy, it’s time to tap and hold on the specific text message that you wish to forward. This action will bring up a menu of options related to that message.
To tap and hold on the text message, simply press your finger on the desired message and hold it for a moment. You will notice that the message is highlighted or selected, and a menu will appear above or below the message.
In the menu that appears, you will see various options related to the selected text message. These options typically include “Copy,” “Delete,” “Reply,” and “Forward.” Since our goal is to forward the text message, tap on the “Forward” option.
By tapping the “Forward” option, you are instructing the Messages app to prepare the selected text message to be forwarded to another contact or recipient. This action will take you to the next step, where you can enter the recipient’s information.
It’s worth noting that if you want to forward multiple text messages from the same conversation, you can tap and hold on each message individually and then select the “Forward” option for each message. This allows you to forward multiple messages in a single forwarding action.
Now that you have successfully tapped and held on the text message you want to forward, let’s move on to the next step: entering the recipient’s information.
Step 4: Tap the “Forward” option
After selecting the desired text message in the Messages app on your Samsung Galaxy and bringing up the menu with options, it’s time to tap the “Forward” option. Tapping this option will open a new forward message screen, where you can input the recipient’s information and prepare the text message for forwarding.
Once you have tapped the “Forward” option, you will be directed to a new screen that resembles a blank message composition window. At the top of the screen, you will notice a label indicating that you are forwarding a message. Below this label, you will find an area to enter the recipient’s information.
To input the recipient’s information, you have several options:
- You can start typing the recipient’s name or phone number in the “To” field. As you enter the information, the Messages app will suggest contacts from your phonebook that match the entered text. You can select the correct recipient from the suggestions.
- If the recipient is in your contacts list, you can tap on the “+” button or the “Contacts” icon next to the “To” field. This will open your phonebook, allowing you to select the recipient from your saved contacts.
- Alternatively, if you prefer to manually enter the recipient’s phone number, you can simply type the full number in the “To” field.
After entering the recipient’s information, double-check to ensure that it is accurate and correctly formatted. This will ensure that the text message is forwarded to the intended recipient. Once you have verified the recipient’s information, you can proceed to the next step, which involves adding any additional text or comments if desired.
Now that you have tapped the “Forward” option and entered the recipient’s information, let’s move on to the next step: adding any additional text or comments to the forwarded message.
Step 5: Enter the recipient’s information
After tapping the “Forward” option in the Messages app on your Samsung Galaxy, the next step is to enter the recipient’s information. This step is crucial as it determines who will receive the forwarded text message.
On the forward message screen, you will see a field labeled “To” where you can enter the recipient’s information. There are several ways to input the recipient’s information:
- Type the recipient’s name or number: Begin typing the recipient’s name or phone number in the “To” field. As you type, the Messages app will automatically suggest contacts from your address book that match the entered text. You can choose the correct recipient from the suggestions that appear.
- Select from your contacts: If the recipient is saved in your contacts list, you can tap the “+” button or the “Contacts” icon next to the “To” field. This will open your phonebook, allowing you to select the recipient from your list of contacts.
- Manually enter the number: If you prefer to enter the recipient’s phone number directly, you can simply type the complete number in the “To” field. Make sure to include the correct country and area code if applicable.
Double-check the recipient’s information to ensure accuracy. This step is essential to ensure that the forwarded text message reaches the intended recipient. If you have multiple recipients, you can separate their names or numbers with commas or semicolons.
Once you have entered the recipient’s information, you’re ready to proceed to the next step, which involves adding any additional text or comments to the forwarded message.
Now that you’ve entered the recipient’s information, let’s move on to the next step and add any necessary supplementary text or comments to the forwarded message.
Step 6: Add any additional text or comments if desired
After entering the recipient’s information in the Messages app on your Samsung Galaxy, you have the option to add any additional text or comments to the forwarded message. This step allows you to provide context, clarification, or personal notes along with the text message you are forwarding.
On the forward message screen, you will notice a blank text field below the recipient’s information field. This is where you can type any additional text or comments you want to include. You can use this space to explain why you are forwarding the message, provide additional information related to the content of the message, or simply add a personal touch.
To add text or comments, tap on the empty text field and enter your desired message using the device’s keyboard. You can type as much as you want within the character limitation of the message app. Additionally, you can format the text by utilizing options like bold, italic, or underline if available in the messaging app.
If you don’t have any additional text or comments to add, you can proceed to the next step without entering anything in the text field.
It’s important to note that any additional text or comments you include are optional. You can choose to send only the forwarded text message without any additional content if you prefer. However, adding context or providing comments can be helpful for the recipient to understand the purpose or significance of the forwarded message.
Once you have added any desired additional text or comments, you’re almost ready to send the forwarded message. The final step involves tapping the send button, which we will cover in the next section.
Step 7: Tap the send button to forward the text message
After entering the recipient’s information and optionally adding any additional text or comments, the final step to forward a text message on your Samsung Galaxy is to tap the send button. This action will initiate the process of sending the forwarded message to the intended recipient.
On the forward message screen, locate the send button. It is typically represented by an icon resembling a paper plane or an envelope with an arrow. Tap on this button to send the forwarded message.
Before you tap the send button, it’s a good practice to review the recipient’s information, the text message being forwarded, and any additional comments you have included. Take a moment to ensure everything is correct and aligned with your intentions.
Once you’re satisfied with the content and recipient information, tap the send button. The forwarded message will be sent to the specified contact or contacts, and you will receive a confirmation or success message indicating that the message has been sent.
It’s important to note that tapping the send button will immediately forward the message, so be sure you have reviewed the content thoroughly to avoid any unintended or incorrect forwarding.
After tapping the send button, the message app may display a progress indicator or animation while the message is being sent. The timing of delivery may vary depending on the network connection and the recipient’s availability.
Congratulations! You have successfully forwarded a text message on your Samsung Galaxy device. The message has been sent to the recipient with any additional text or comments you included. Repeat these steps as needed to forward more messages in the future.
Conclusion
Forwarding a text message on your Samsung Galaxy is a simple and convenient way to share important information, funny conversations, or any other text content with your contacts. By following the step-by-step guide outlined in this article, you can easily forward text messages in just a few taps.
We started by opening the Messages app and selecting the conversation containing the desired text message. Then, we tapped and held on the text message and selected the “Forward” option. Next, we entered the recipient’s information and optionally added any additional text or comments to provide context. Finally, we tapped the send button to complete the forwarding process.
Remember to double-check the recipient’s information and any additional text you include to ensure accuracy and clarity. Taking a moment to review the content before sending will help you avoid any potential mistakes or misunderstandings.
Now that you know how to forward text messages on your Samsung Galaxy, you can easily share important information, funny conversations, or any other text content with your contacts whenever needed. This feature can save you time and effort, particularly when sharing lengthy or complex messages.
So go ahead and utilize the forwarding functionality on your Samsung Galaxy device to conveniently share text messages with your contacts. Explore the various features and options available in the Messages app to further enhance your messaging experience.
Happy forwarding!