Introduction
When it comes to storing large amounts of data, external hard drives are a convenient and reliable choice for many users. However, sometimes you may encounter an issue where your external hard drive becomes not visible or unrecognized by your computer. This can be a frustrating situation, especially if the drive contains important files or backups.
There are several factors that can cause an external hard drive to become not visible. It could be due to a connection problem, driver issues, file system errors, or even physical damage to the drive. Regardless of the cause, one potential solution to regain access to your drive is to format it.
Formatting an external hard drive involves erasing all the data on the drive and setting up a new file system. It can help resolve issues related to corrupted file systems or partition tables, allowing your computer to recognize and use the drive again. However, it’s important to note that formatting will delete all data on the drive, so it’s crucial to back up any important files before proceeding.
In this guide, we will walk you through different methods to format a not visible external hard drive on both Windows and Mac operating systems. Depending on your specific situation and preferences, you can choose the method that best suits your needs. We will also provide troubleshooting tips to help you resolve any potential issues you may encounter during the formatting process.
Common Causes of a Not Visible External Hard Drive
There are several common causes that can result in an external hard drive not being visible or recognized by your computer. Understanding these causes can help you identify the root of the problem and find an appropriate solution. Here are some of the most common causes:
- Physical Connection Issues: One of the most common causes of a not visible external hard drive is a loose or faulty connection. Ensure that the USB or Thunderbolt cable is securely plugged into both the drive and the computer. Try using a different cable or port to rule out any issues with the connection.
- Driver Issues: Outdated, corrupted, or missing device drivers can also prevent your computer from recognizing the external hard drive. Update the drivers for your USB or Thunderbolt ports by navigating to the manufacturer’s website or using third-party driver update software.
- File System Corruption: Over time, file system errors or corruption can occur on the external hard drive, making it inaccessible to your computer. This can happen due to improper ejection, power outages, or software conflicts. Running a disk repair tool or performing a file system check can help resolve these issues.
- Partition Table Issues: The partition table is responsible for storing information about the partitions on the external hard drive. If the partition table becomes corrupt or damaged, your computer may not be able to detect the drive. Using disk management tools or specialized partition recovery software can help fix the partition table and make the drive visible again.
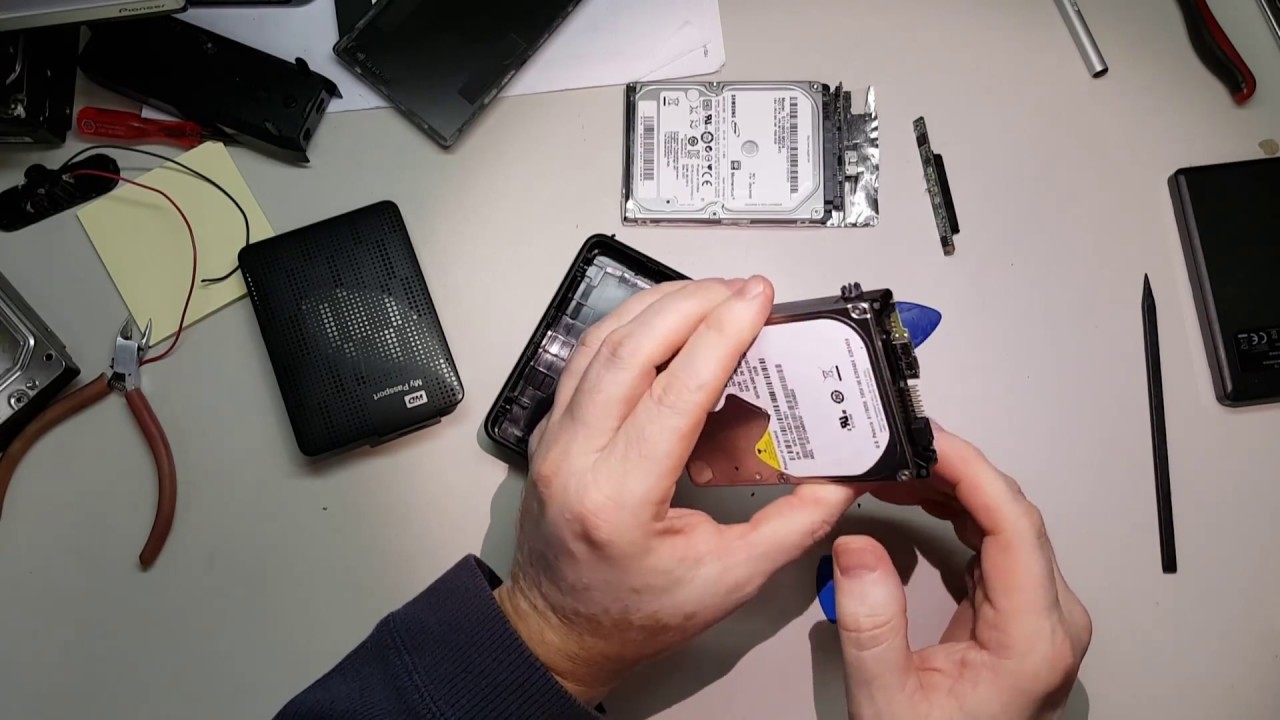
- Physical Damage: In some cases, physical damage to the external hard drive or its components can render it not visible. Damaged cables, connectors, or internal hardware can prevent the drive from functioning correctly. If you suspect physical damage, consider taking the drive to a professional data recovery service.
Keep in mind that these are just some of the common causes of a not visible external hard drive. The actual cause may vary depending on your specific situation. It’s important to thoroughly troubleshoot the issue and follow the appropriate steps to resolve it.
Precautions Before Formatting
Before you proceed with formatting your not visible external hard drive, it is important to take certain precautions to ensure that you don’t lose any important data. Formatting will erase all the data on the drive, so it is crucial to back up any files or information you want to keep. Here are some precautions to consider:
- Backup Your Data: Before formatting the external hard drive, make sure to create a backup of all your important files, documents, photos, videos, and other data stored on the drive. You can copy the files to another external hard drive, cloud storage, or your computer’s internal storage.
- Check for Hidden Partitions: Sometimes, an external hard drive may have hidden partitions that contain system or recovery files. Ensure that you have backed up any necessary files from these hidden partitions as well before proceeding with the formatting process.
- Remove External Connections: Disconnect any other external devices, such as USB flash drives or SD cards, from your computer before formatting the not visible external hard drive. This will prevent any accidental data loss on these devices.
- Scan for Viruses: Run a thorough antivirus scan on your external hard drive to ensure that there are no malicious files or viruses present. If any are detected, quarantine or remove them before proceeding with the formatting process.
- Take Note of Drive Specifications: Make a note of the make, model, and capacity of the external hard drive. This information will be useful if you need to download specific drivers or firmware updates for the drive after formatting.
By taking these precautions, you can minimize the risk of data loss and ensure a smooth formatting process. It’s better to be safe than sorry when it comes to your valuable data, so take the time to complete these steps before proceeding.
Method 1: Disk Management (Windows)
If you’re using a Windows operating system, one of the easiest ways to format a not visible external hard drive is through the Disk Management utility. Here’s how you can do it:
- Connect the Drive: Ensure that the not visible external hard drive is properly connected to your computer via a USB or Thunderbolt cable.
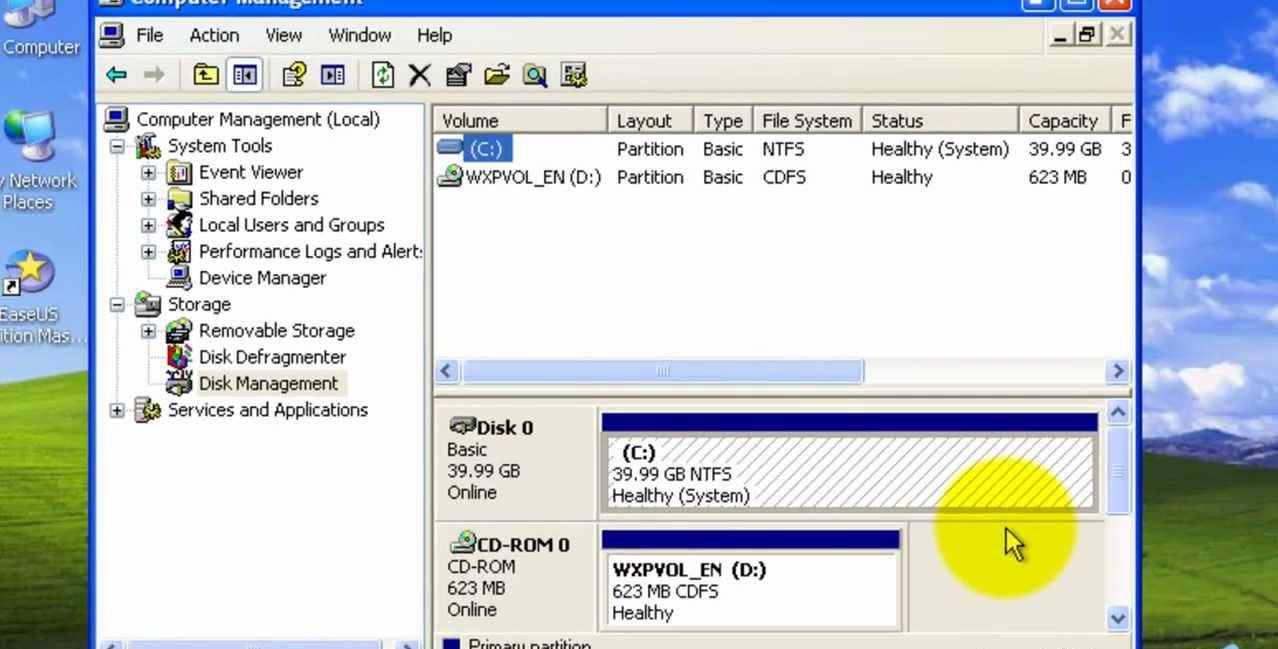
- Open Disk Management: Right-click on the “Start” button and select “Disk Management” from the context menu. Alternatively, you can press the Windows key + X and choose “Disk Management” from the menu.
- Locate the External Hard Drive: In the Disk Management window, you should see a list of all the connected drives. Look for the external hard drive that is not visible. It will likely be labeled as “Unallocated,” “Unknown,” or have no drive letter assigned.
- Format the Drive: Right-click on the not visible external hard drive and select “Format” from the context menu. Choose the desired file system, such as NTFS or exFAT, and provide a name for the drive.
- Complete the Formatting Process: Follow the on-screen prompts to complete the formatting process. Once the process is finished, the drive should become visible and ready for use.
It’s important to note that formatting the drive using Disk Management will permanently erase all data on the drive. Therefore, ensure that you have backed up any important files before proceeding with the formatting.
If you encounter any issues or errors during the formatting process, you can try restarting your computer and repeating the steps. You can also check for driver updates or seek assistance from the manufacturer’s support website.
Disk Management is a built-in utility in Windows that provides basic disk management functions. It offers a simple and straightforward way to format a not visible external hard drive without the need for third-party software.
Method 2: Disk Utility (Mac)
If you’re using a Mac, Disk Utility is the go-to tool for managing and formatting storage devices, including not visible external hard drives. Here’s how you can format the drive using Disk Utility:
- Connect the Drive: Ensure that the not visible external hard drive is properly connected to your Mac using a USB or Thunderbolt cable.
- Open Disk Utility: Launch Disk Utility by going to the “Applications” folder, then “Utilities,” and selecting “Disk Utility.”
- Locate the External Hard Drive: In the Disk Utility window, you will see a list of all the connected drives. Look for the external hard drive that is not visible. It may appear as “Uninitialized,” “Not Mounted,” or not appear at all.
- Choose the Drive: Select the not visible external hard drive from the list. Be careful to choose the correct one to avoid formatting the wrong drive and losing valuable data.
- Erase the Drive: Click on the “Erase” tab in the Disk Utility toolbar. Choose the desired file system, such as Mac OS Extended (Journaled) or exFAT, and provide a name for the drive.
- Format the Drive: Click on the “Erase” button to start the formatting process. Disk Utility will warn you that all data on the drive will be erased. Double-check that you have backed up any important files before proceeding.
- Complete the Formatting Process: Once the formatting process is complete, the not visible external hard drive should become visible in Finder and ready for use.
Keep in mind that formatting the drive using Disk Utility will delete all data stored on it. Therefore, it’s crucial to back up any important files before proceeding with the formatting process.
If you encounter any issues during the formatting process or the drive still doesn’t become visible, you can try restarting your Mac and repeating the steps. Additionally, you can check for any firmware updates for the drive or consult the manufacturer’s support website for further assistance.
Disk Utility is a powerful built-in tool in macOS that provides comprehensive disk management and formatting capabilities, making it easy to resolve issues with not visible external hard drives.
Method 3: Command Line (Mac and Windows)
If you prefer using the command line interface, both Mac and Windows operating systems offer command line tools that allow you to format a not visible external hard drive. Here’s how you can do it:
Mac:
- Connect the Drive: Ensure that the not visible external hard drive is connected to your Mac using a USB or Thunderbolt cable.
- Open Terminal: Launch Terminal by going to “Applications,” then “Utilities,” and selecting the “Terminal” app.
- List Available Drives: In the Terminal window, type the command
diskutil listand press Enter. This will display a list of all connected drives, including the not visible external hard drive. - Identify the Drive: Locate the not visible external hard drive in the list by matching its size and name. Take note of the identifier for the drive, such as disk2 or disk3s1.
- Format the Drive: In the Terminal window, type the command
diskutil eraseDisk [file system] [name] [identifier], replacing [file system] with the desired file system (e.g., JHFS+ or exFAT), [name] with the desired name for the drive, and [identifier] with the identifier of the drive. Press Enter to execute the command. - Complete the Formatting Process: Once the formatting process is complete, the not visible external hard drive should become visible and ready to use.
Windows:
- Connect the Drive: Ensure that the not visible external hard drive is properly connected to your Windows computer via a USB or Thunderbolt cable.
- Open Command Prompt: Press the Windows key + R to open the Run dialog box. Type “cmd” and press Enter to open the Command Prompt.
- List Available Drives: In the Command Prompt window, type the command
diskpartand press Enter. Then typelist diskand press Enter. This will display a list of all connected disks, including the not visible external hard drive. - Select the Drive: Type the command
select disk [number], replacing [number] with the number of the not visible external hard drive. Press Enter to select the drive. - Clean and Format the Drive: Type the command
cleanto remove any existing partitions on the drive. Then, type the commandcreate partition primaryand press Enter to create a new primary partition. Finally, typeformat fs=[file system] quick, replacing [file system] with the desired file system (e.g., NTFS or exFAT), and press Enter to format the drive. - Complete the Formatting Process: Once the formatting process is complete, the not visible external hard drive should become visible and ready for use.
Using the command line interface allows for more control and flexibility in the formatting process. However, it requires careful typing and knowledge of the appropriate commands for each operating system.
Method 4: Using Third-Party Formatting Tools
If the previous methods did not work or if you prefer a more user-friendly approach, you can consider using third-party formatting tools to format a not visible external hard drive. These tools offer additional features and a simpler interface for formatting and managing disk drives. Here’s how you can use them:
- Research and Choose a Tool: Explore different third-party formatting tools available for your operating system. Read reviews and check their compatibility with your not visible external hard drive.
- Download and Install the Tool: Visit the official website of the chosen tool and download the installation file. Follow the on-screen instructions to install the tool on your computer.
- Connect the Drive: Ensure that the not visible external hard drive is properly connected to your computer via a USB or Thunderbolt cable.
- Open the Formatting Tool: Launch the downloaded third-party formatting tool.
- Locate the External Hard Drive: In the formatting tool’s interface, you should see a list of connected drives. Look for the not visible external hard drive in the list.
- Select and Format the Drive: Select the not visible external hard drive from the list and choose the desired file system and other formatting options provided by the tool. Review the formatting settings and proceed with the formatting process.
- Complete the Formatting Process: Follow the on-screen prompts to complete the formatting process. Once finished, the not visible external hard drive should become visible and ready for use.
Third-party formatting tools often come with advanced options such as disk diagnostics, partition management, and data recovery features. Some popular tools for both Mac and Windows include EaseUS Partition Master, MiniTool Partition Wizard, and Paragon Hard Disk Manager. Make sure to research and choose a tool that best suits your needs.
Keep in mind that using third-party tools carries its own risks and it’s important to download them from trusted sources to avoid malware or other security issues. Additionally, be cautious with the settings and options you choose during the formatting process to prevent data loss or unintended consequences.
Using third-party formatting tools can provide a more straightforward and feature-rich experience when it comes to formatting a not visible external hard drive. However, always exercise caution and ensure that you have backed up any important data before proceeding.
Troubleshooting Tips
If you encounter issues while trying to format a not visible external hard drive, here are some troubleshooting tips you can try:
- Check the Connections: Ensure that the USB or Thunderbolt cable is securely connected to both the external hard drive and your computer. Try using a different cable or port to rule out any connection issues.
- Restart Your Computer: Sometimes, a simple restart can help resolve temporary glitches or conflicts that may be causing the not visible issue. Restart your computer and try formatting the drive again.
- Update Device Drivers: Outdated or corrupted drivers can prevent your computer from recognizing the external hard drive. Update the drivers for your USB or Thunderbolt ports from the manufacturer’s website or using third-party driver update software.
- Run Disk Repair or Check Disk Tool: Use built-in disk repair tools like CHKDSK on Windows or Disk Utility’s First Aid on Mac to scan and fix any file system errors or disk issues that may be preventing the drive from being recognized.
- Try a Different Computer: Connect the problem external hard drive to a different computer to determine if the issue lies with the drive or the computer. If the drive is recognized on a different computer, there may be an issue with your computer’s settings or drivers.
- Update Firmware: Check the manufacturer’s website for any firmware updates for the specific external hard drive model you are using. Updating the firmware may help resolve compatibility issues or bugs that are causing the drive to be not visible.
- Seek Professional Help: If all else fails, and the drive contains critical data that you cannot afford to lose, consider seeking assistance from a professional data recovery service. They have the expertise and tools to recover data from inaccessible or damaged drives.
Remember to take precautionary measures like backing up your data before attempting any troubleshooting steps to prevent data loss.
By following these troubleshooting tips, you can increase the chances of resolving the issue with your not visible external hard drive and successfully formatting it for use again.
Conclusion
Formatting a not visible external hard drive can be a practical solution to regain access and use your storage device again. Whether you’re using Windows or Mac, there are various methods available to format the drive and resolve any related issues.
In this guide, we explored different methods for formatting a not visible external hard drive. We discussed using Disk Management on Windows, Disk Utility on Mac, command line tools, and third-party formatting tools. Each method offers its own advantages and caters to different user preferences.
Before proceeding with any formatting method, it is crucial to take precautions such as backing up your data and ensuring you have selected the correct drive for formatting. This will help prevent data loss and ensure a smooth formatting process.
Furthermore, troubleshooting tips were provided to assist in resolving issues that may arise during the formatting process. Checking connections, updating drivers, running disk repair tools, and seeking professional help are some of the steps that can be taken to troubleshoot and overcome challenges.
Remember that formatting a not visible external hard drive will permanently erase all data on the drive. Therefore, it is essential to make backups of any important files before proceeding.
By following the methods and tips discussed in this guide, you should be able to format your not visible external hard drive successfully and restore its functionality. Take your time, be cautious, and consult the manufacturer’s support resources if needed.
With a properly formatted external hard drive, you can continue to store and access your files with confidence, knowing that your data is secure and easily accessible.