Introduction
Forgetting a network on Windows 10 is necessary in certain situations. Sometimes, you may encounter connectivity issues or decide to no longer use a particular Wi-Fi network. In such cases, it is important to remove the network from your list of known networks to prevent your device from automatically connecting to it. Fortunately, Windows 10 provides a simple and straightforward process to forget a network.
By forgetting a network, you effectively erase all saved passwords and connection information associated with that network. This ensures that your device does not attempt to connect to the network again without your permission, offering you more control over your Wi-Fi connections. Whether you want to remove an old, unreliable hotspot or simply clear up your list of known networks, the steps to forget a network on Windows 10 are easy to follow.
In this tutorial, we will guide you through the process of forgetting a network on Windows 10. We will walk you through the necessary steps, from accessing the Network & Internet settings to confirming that the network has been forgotten. By the end of this tutorial, you will be fully equipped to manage your known networks and remove any unwanted or unnecessary connections from your Windows 10 device.
If you’re ready to regain control over your network connections, let’s get started with the first step: accessing the Network & Internet settings on your Windows 10 device.
Step 1: Open the Network & Internet settings
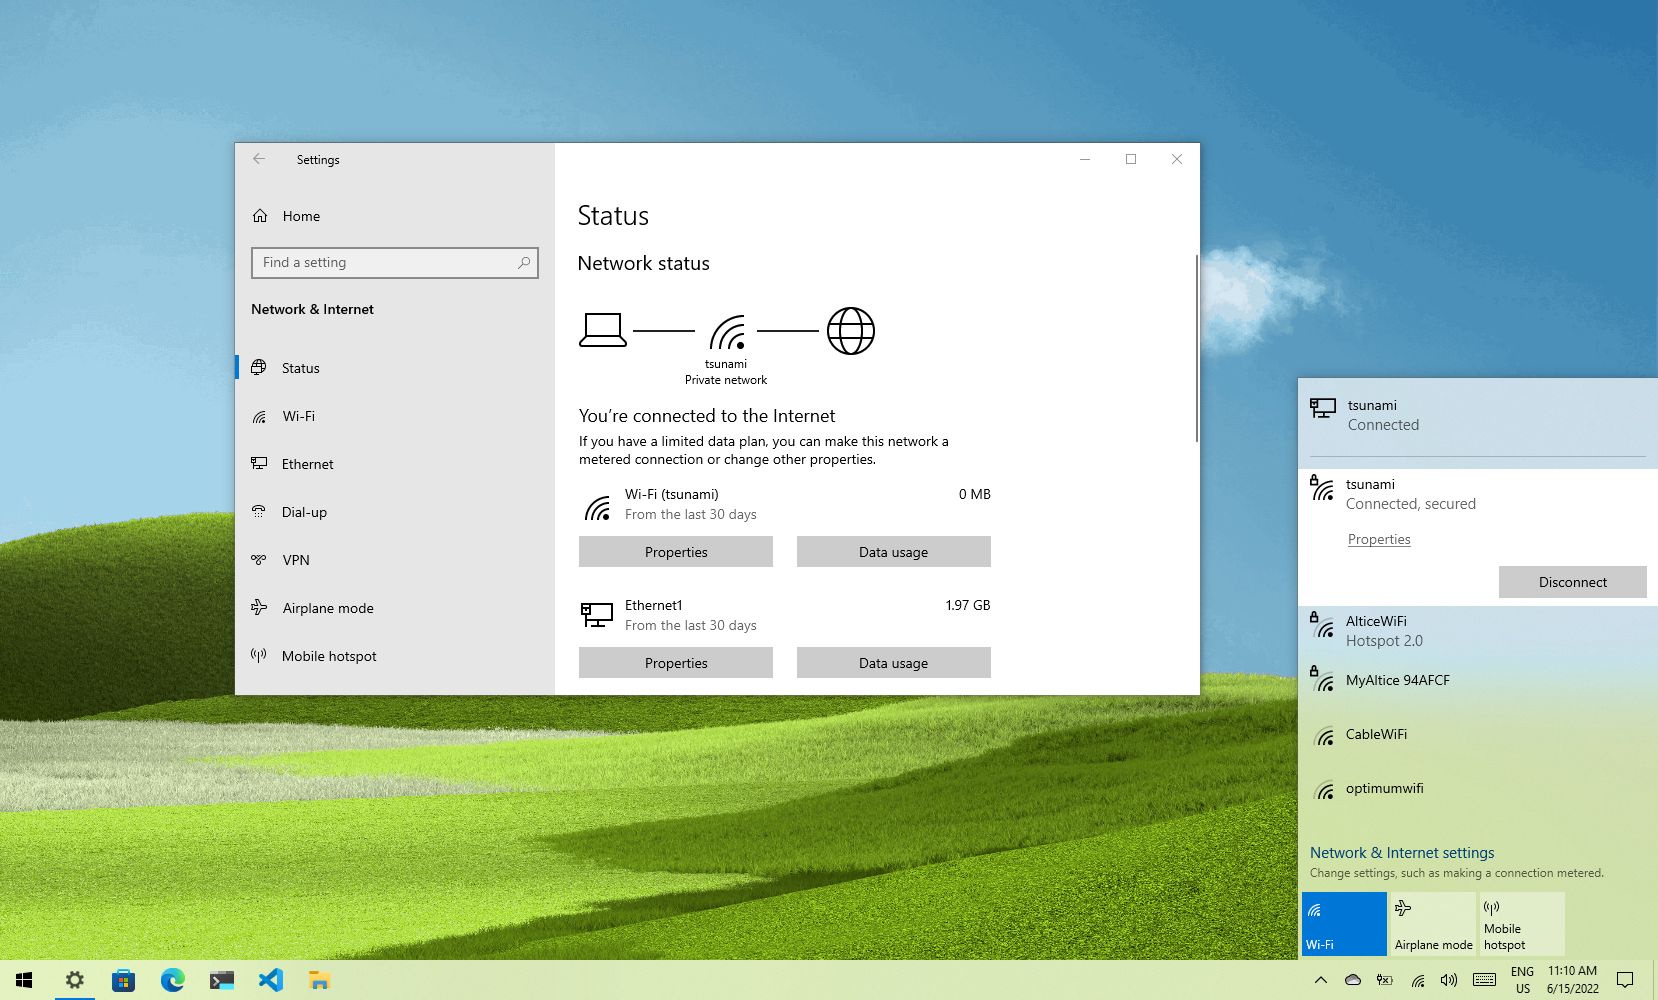
To forget a network on Windows 10, you need to access the Network & Internet settings. This is where you can manage all your Wi-Fi connections and make changes to your network settings. Follow these steps to open the Network & Internet settings:
- Click on the “Start” button, usually located at the bottom left corner of your screen. You can also press the Windows key on your keyboard to open the Start menu.
- From the Start menu, click on the “Settings” icon, which resembles a gear. Alternatively, you can use the shortcut “Windows key + I” to directly open the Settings menu.
- In the Settings menu, locate and click on the “Network & Internet” option. The Network & Internet settings window will open.
Once you have successfully opened the Network & Internet settings, you are ready to proceed to the next step and access the Wi-Fi settings.
Remember, the steps may vary slightly depending on the version of Windows 10 you are using. However, the general process remains the same, allowing you to easily navigate to the Network & Internet settings regardless of the specific version you have installed.
Now that you have successfully accessed the Network & Internet settings, you can move on to the next step and learn how to manage known networks in Windows 10.
Step 2: Access the Wi-Fi settings
After opening the Network & Internet settings, the next step is to access the Wi-Fi settings. This is where you can find all your saved Wi-Fi networks and perform various actions, including forgetting a network. Follow these steps to access the Wi-Fi settings:
- In the Network & Internet settings window, you will see a sidebar on the left. Look for the “Wi-Fi” option and click on it. This will take you to the Wi-Fi settings page.
- On the Wi-Fi settings page, you will find a list of available Wi-Fi networks. Scroll down until you see the heading “Manage known networks”. Click on it to expand the list of known networks.
- Now, you should see a list of all the Wi-Fi networks that your Windows 10 device has previously connected to. Each network will be displayed with its name and connection status.
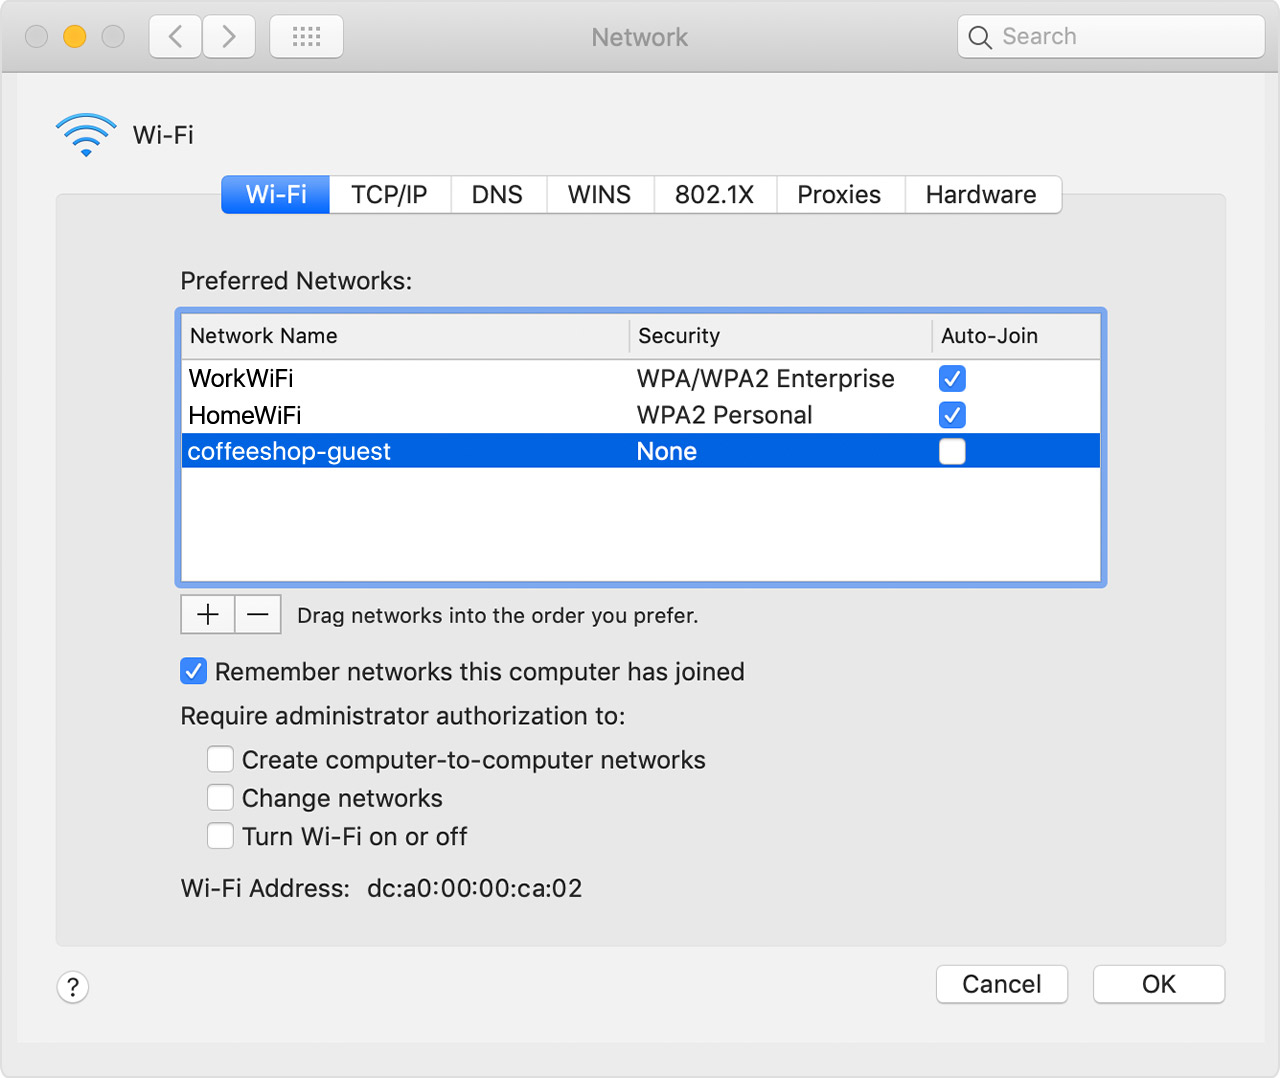
The Wi-Fi settings page not only allows you to forget a network but also provides additional options to manage your known networks. You can rename a network, change its properties, or even prioritize the order in which your device connects to available networks.
At this point, you have successfully accessed the Wi-Fi settings and can proceed to the next step, where we will learn how to manage known networks and forget a specific network from the list.
Step 3: Manage known networks
Once you have accessed the Wi-Fi settings and see the list of known networks, it’s time to manage and make changes to these networks. This step is crucial for forgetting a specific network. Follow these instructions to manage known networks on your Windows 10 device:
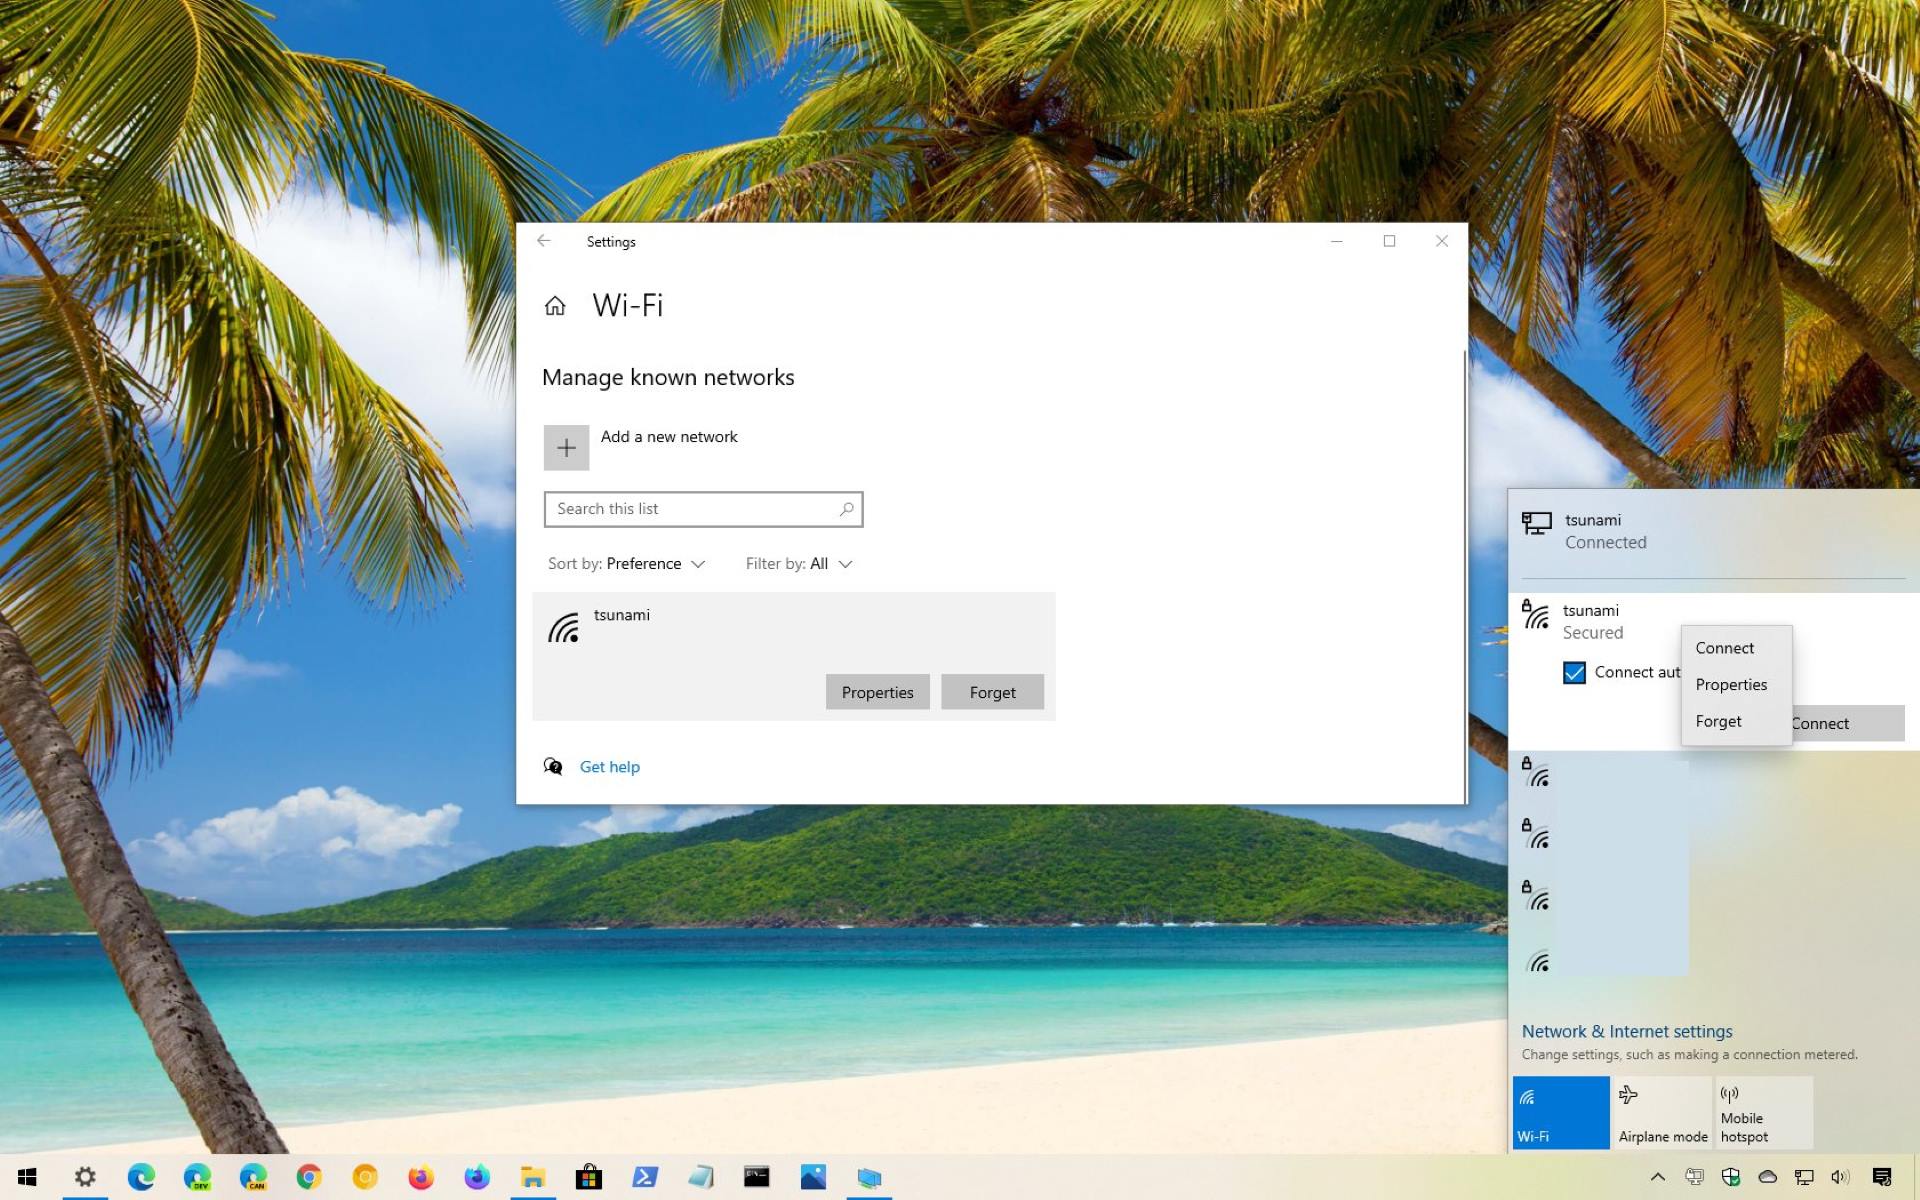
- From the list of known networks, locate the network that you want to forget. You can identify it by its network name (SSID).
- Click on the network you want to manage. This will bring up a set of options for that particular network.
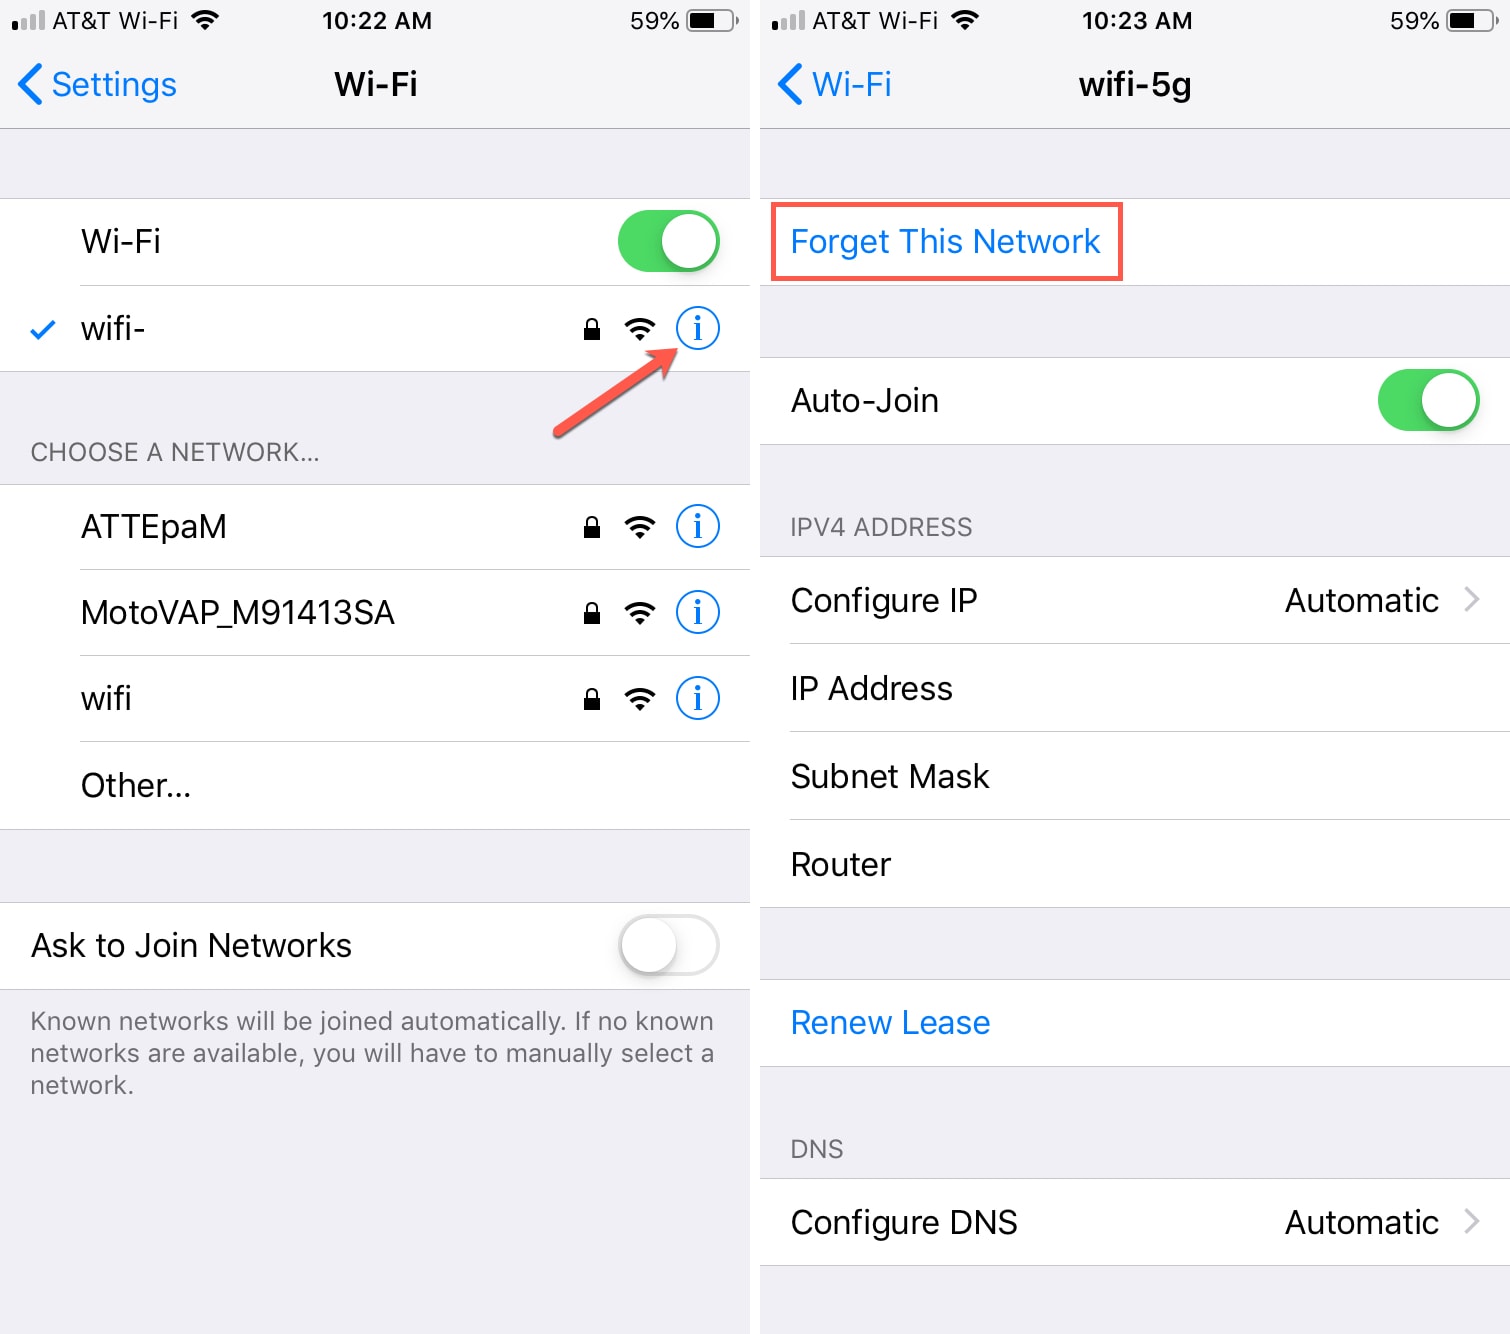
- Among the options, you will see a button that says “Forget”. Click on this button to initiate the process of forgetting the network.
It’s important to note that when you forget a network, all saved passwords and connection information for that network will be permanently removed from your Windows 10 device. This means that if you want to reconnect to the network in the future, you will need to enter the password again.
Furthermore, forgetting a network ensures that your device does not automatically connect to it, providing you with better control over your Wi-Fi connections. This is especially useful if you no longer want your device to connect to a particular network that may have connectivity issues or is no longer in use.
Now that you have managed the known networks by forgetting the desired network, you can proceed to the next step to confirm that the network has been successfully forgotten.
Step 4: Forget a network
Now that you have accessed the Wi-Fi settings and managed known networks, it’s time to actually forget the network you no longer want to be connected to. Follow these steps to forget a network on your Windows 10 device:
- From the options that appear after clicking on the network you want to manage, locate the “Forget” button. Click on it to initiate the process of forgetting the network.
- A confirmation prompt will appear, asking you to confirm the action of forgetting the network. Click on “Forget” again to proceed.
- Windows 10 will now remove the chosen network from its list of known networks. Any saved password or connection information associated with the network will be erased.
By following these steps, you have successfully forgotten the network on your Windows 10 device. This means that your device will no longer automatically connect to that network, giving you better control over your Wi-Fi connections and ensuring you are only connected to the networks you desire.
Remember, forgetting a network is typically done when you encounter connectivity issues, no longer use a specific network, or want to clear up the list of known networks on your device. You can always reconnect to a forgotten network by manually entering the password again when needed.
Congratulations! You have successfully completed the process of forgetting a network on your Windows 10 device. Now, let’s move on to the final step to confirm that the network has been successfully forgotten.
Step 5: Confirm the network has been forgotten
After following the previous steps to forget a network on your Windows 10 device, it’s important to confirm that the network has been successfully forgotten. Here’s how you can do it:
- Open the list of available Wi-Fi networks again by clicking on the Wi-Fi icon in the system tray, usually located in the bottom-right corner of your screen.
- Scroll through the list of networks and locate the network you just forgot. If you can no longer see it in the list, congratulations! The network has been successfully forgotten.
- If you still see the network in the list, it means that the forgetting process might not have been completed successfully. In this case, you can repeat the steps to forget the network, ensuring that you click on the “Forget” button and confirm the action.
Confirming that the network has been forgotten is essential to ensure that your Windows 10 device no longer automatically connects to it. This step gives you the peace of mind knowing that you have successfully removed the network from your known networks list.
With this final step completed, you have successfully forgotten a network on your Windows 10 device. Remember to repeat this process for any other networks you wish to remove, allowing you to maintain better control and organization over your Wi-Fi connections.
Now that you are familiar with the process of forgetting a network on Windows 10, you can easily manage and remove unwanted or unnecessary connections from your device. Whether you are experiencing connectivity issues or simply want to clear up your known networks list, these steps will help you regain control over your network connections.
Conclusion
Forgetting a network on Windows 10 is a simple yet essential task that allows you to have better control over your Wi-Fi connections. By following the steps outlined in this tutorial, you can easily manage your known networks and remove any unwanted or unnecessary connections from your Windows 10 device.
Throughout this tutorial, we have covered the necessary steps to forget a network. Beginning with opening the Network & Internet settings and accessing the Wi-Fi settings, we then moved on to managing known networks and finally, confirming that the network has been successfully forgotten.
By forgetting a network, you remove all saved passwords and connection information associated with that network, preventing your device from automatically connecting to it in the future. This is particularly useful when you encounter connectivity issues or no longer wish to connect to a specific network.
Remember, after forgetting a network, you can still reconnect to it by manually entering the password when needed. Forgetting a network simply provides you with more control over your Wi-Fi connections and ensures that your device only connects to the networks you desire.
Now that you are equipped with the knowledge of how to forget a network on Windows 10, you can easily manage your known networks and maintain a clean and organized list of connections. This will help optimize your Wi-Fi experience and provide you with a more seamless and controlled browsing experience.
So, the next time you encounter connectivity issues or decide to remove a network from your known networks list, don’t worry. Just follow the steps outlined in this tutorial and forget the network with ease.
Thank you for reading! We hope this guide has been helpful in assisting you with forgetting a network on your Windows 10 device. Enjoy your enhanced control over your Wi-Fi connections and a more personalized network experience!