Introduction
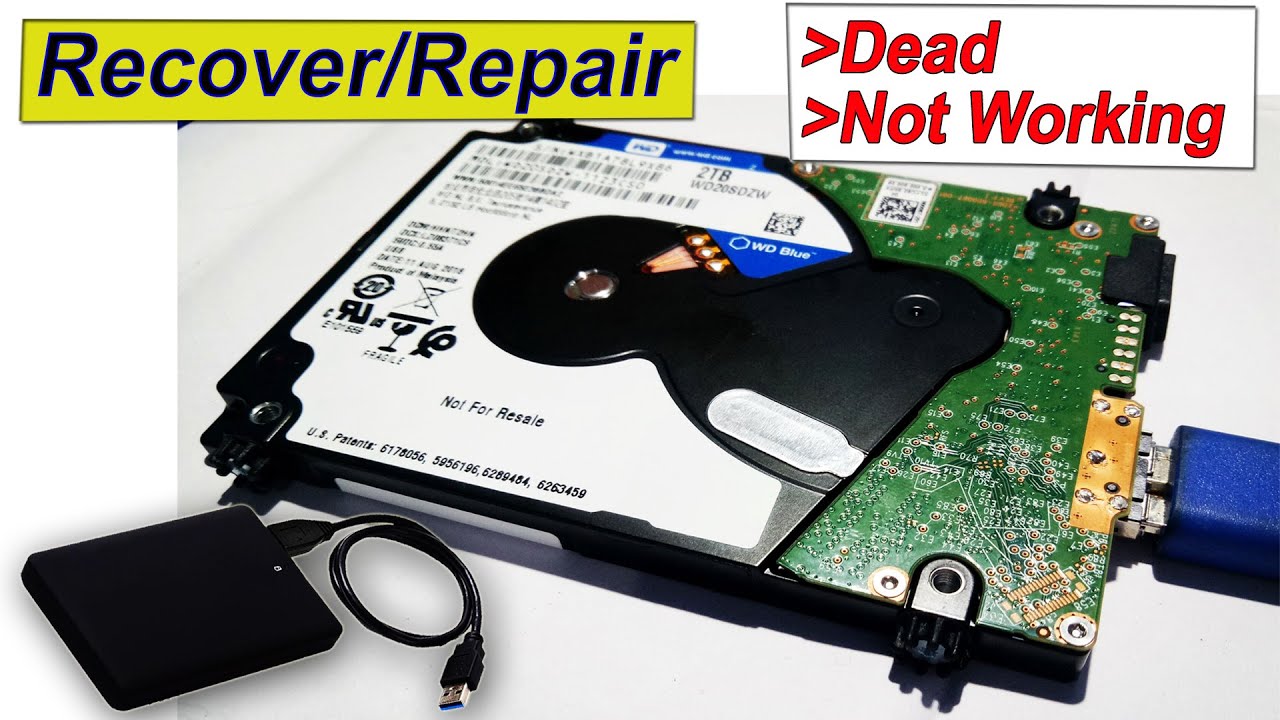
A WD hard disk drive (HDD) is a popular choice for storing and accessing data on both personal and professional computers. However, like any storage device, WD HDDs can experience issues and failures over time. In this guide, we will explore common signs of a failing WD HDD and provide troubleshooting steps to help you fix the problem.
Recognizing the signs of a failing HDD is crucial for preventing data loss and ensuring the continued functionality of your computer. These signs can include slow performance, unusual noises, frequent crashes, and device not being recognized by the computer.
Before attempting any troubleshooting steps, it is important to back up your important data. In some cases, the troubleshooting process may involve reformatting the HDD or using data recovery software, which can result in data loss. Therefore, it is always wise to have a backup of your files to avoid any potential loss.
This guide will cover basic troubleshooting steps that you can take to fix a failing WD HDD. However, it is essential to note that not all issues can be fixed through these steps, and in some cases, professional assistance may be required. It is always recommended to consult the WD customer support or a professional technician if you are unsure or uncomfortable performing the troubleshooting steps on your own.
Now that we understand the importance of detecting and addressing issues with a WD HDD, let’s dive into the common signs of a failing WD HDD and the steps you can take to fix them. By following these troubleshooting steps, you can potentially save your data and restore the functionality of your WD HDD.
Signs of a Failing WD Hard Disk Drive
A failing WD hard disk drive (HDD) can exhibit various signs that indicate potential issues with its functionality. Recognizing these signs early on can help you take the necessary steps to prevent data loss and address the problem before it worsens. Here are some common signs to look out for:
- Sudden and frequent crashes: If your computer frequently crashes or freezes, it could be a sign of a failing HDD. The crashes may occur while accessing specific files or during general use.
- Slow performance: If your computer is significantly slower than usual, especially when accessing files stored on the WD HDD, it could be an indication of a failing drive. Programs may take longer to load, and file transfers may become painstakingly slow.
- Unusual noises: Pay attention to any strange clicking, grinding, or whirring noises coming from the WD HDD. Unusual sounds can indicate mechanical issues within the drive, such as failing read/write heads or damaged disks.
- Files and folders disappearing: If you notice files or entire folders missing from your WD HDD, it could be a sign of data corruption or other underlying issues. Sometimes, it may seem like certain files are inaccessible or have vanished inexplicably.
- Device not recognized: If your computer fails to recognize the WD HDD altogether or displays error messages indicating a problem with the device, it could be an indication of a failing drive. Ensure you have checked the connections properly before concluding it as a sign of failure.
Keep in mind that while these signs may indicate a failing WD HDD, they can also be symptoms of other hardware or software issues. Therefore, it is essential to troubleshoot the HDD specifically to confirm whether it is indeed the cause of the problems.
Now that you are aware of the signs that may indicate a failing WD HDD, let’s move on to the troubleshooting steps that can help you fix the issues and restore the functionality of your hard disk drive.
Basic Troubleshooting Steps
When you encounter issues with your WD hard disk drive (HDD), there are several basic troubleshooting steps you can follow to try and resolve the problem. These steps can help identify and address common issues that may be causing the HDD to malfunction. Here are the basic troubleshooting steps:
- Check cables and connections: Ensure that all cables connecting the WD HDD to your computer are securely plugged in. Sometimes, loose or faulty cables can cause connectivity issues. Try using a different cable or connecting the HDD to another port to rule out any cable-related problems.
- Restart your computer: A simple restart can often resolve minor glitches or software conflicts that may be affecting the functionality of the WD HDD. Restart your computer and check if the issue persists.
- Run CHKDSK utility: The CHKDSK utility is a built-in Windows tool that can help detect and repair errors on the HDD. Open the Command Prompt as an administrator and type “chkdsk D: /f” (replace “D” with the drive letter assigned to your WD HDD). This utility will scan the drive for errors and attempt to fix them.
- Use WD Data Lifeguard Diagnostic tool: WD provides a diagnostic tool called the Data Lifeguard Diagnostic tool, which is specifically designed to diagnose and fix issues with WD HDDs. Download and install the tool from the official WD website, and then follow the on-screen instructions to scan and repair your HDD.
- Reformat the hard disk drive: If all else fails and you have a backup of your important data, reformatting the HDD can sometimes resolve persistent issues. However, note that reformatting will erase all data on the drive, so ensure you have a backup before proceeding. You can reformat the drive using the Disk Management tool in Windows or the WD Drive Utilities software.
- Perform a system restore: If the issues with your WD HDD started occurring after recent software installations or updates, performing a system restore to a previous stable state can help. Open the System Restore utility in Windows, choose a restore point before the issues started, and follow the prompts to restore your computer to that state.
- Use data recovery software: If you are unable to fix the issues and have important data on the failing WD HDD, you can try using data recovery software to retrieve your files. There are various third-party data recovery software options available that can assist in recovering data from a malfunctioning HDD.
- Contact WD customer support: If none of the above troubleshooting steps work or if you are uncomfortable performing them on your own, it is advisable to contact WD customer support. They can provide specialized assistance and guidance for resolving issues with your HDD.
Remember that these troubleshooting steps may not always fix the issues, and in some cases, professional help may be required. Additionally, it is crucial to have a backup of your important data to minimize the risk of data loss during the troubleshooting process.
Checking Cables and Connections
One of the first basic troubleshooting steps to take when encountering issues with your WD hard disk drive (HDD) is to check the cables and connections. Oftentimes, a loose or faulty cable can lead to connectivity problems and cause the HDD to malfunction. Here’s how you can check the cables and connections:
1. Inspect the power cable: Start by checking the power cable that connects the WD HDD to the power source. Ensure that it is securely plugged into both the HDD and the power outlet. If the cable appears damaged or worn out, consider replacing it with a new one.
2. Examine the data cables: Next, check the data cables that connect the WD HDD to your computer. If you are using a SATA connection, ensure that the SATA cable is properly connected to both the HDD and the motherboard. For older IDE connections, double-check the IDE ribbon cable and make sure it is securely attached at both ends.
3. Try a different cable: If you suspect that a faulty cable is causing the issue, try using a different cable to connect the WD HDD to your computer. This will help determine if the problem is with the cable itself. For example, if you were using a SATA cable, switch it with a new one and see if the issue persists.
4. Check the power supply: In some cases, a faulty power supply could be causing the HDD to malfunction. If you have access to another power supply unit, try connecting it to the WD HDD and see if the issue is resolved. If the HDD now functions properly, it may indicate a problem with the original power supply.
5. Secure the connections: Ensure that all connections are securely plugged in. Sometimes, a loose connection can lead to connectivity issues. Press the cables firmly into their respective ports to ensure a secure fit. Double-check that the connectors are aligned correctly and not damaged.
By checking the cables and connections, you can eliminate any potential issues arising from loose or faulty connections. If the HDD still does not function properly after performing these steps, it may be necessary to proceed with further troubleshooting methods or seek professional assistance.
Remember to power off your computer before attempting to check or adjust any cables or connections to avoid potential damage to your hardware.
Running CHKDSK Utility
If you are experiencing issues with your WD hard disk drive (HDD), running the CHKDSK utility can help detect and repair errors that may be causing the problem. CHKDSK (Check Disk) is a built-in Windows tool that scans the HDD for file system errors and attempts to fix them. Here’s how you can run the CHKDSK utility:
1. Open Command Prompt as an administrator: To access the CHKDSK utility, you’ll need to open the Command Prompt as an administrator. Right-click on the Start menu and select “Command Prompt (Admin)” from the context menu. If prompted for permission, click “Yes” to continue.
2. Type the command: In the Command Prompt window, type the following command and press Enter: chkdsk D: /f (replace “D” with the drive letter assigned to your WD HDD). The “/f” parameter instructs CHKDSK to fix any errors it finds.
3. Allow the scan to complete: Once you’ve entered the command, CHKDSK will start scanning the WD HDD for errors. The scan may take some time, depending on the size and state of the drive. During the scan, CHKDSK will display a progress indicator showing the current phase.
4. Review the scan results: Once the scan is complete, CHKDSK will display a summary of the scan results. If it found errors on the HDD, it will provide information on what errors were detected and whether they were repaired. Take note of any repaired errors for reference.
5. Restart the computer: After the scan is complete, it is recommended to restart your computer to ensure that any changes made by CHKDSK are applied. Restarting the computer will also allow you to assess whether the issues with your WD HDD have been resolved.
The CHKDSK utility can help fix common file system errors that may be impacting the functionality of your WD HDD. However, it’s important to note that CHKDSK cannot fix physical issues with the drive. If CHKDSK does not resolve the problem, or if it reports hardware-related errors, it may be necessary to consider other troubleshooting steps or seek professional assistance.
Remember to close any programs or files accessing the WD HDD before running CHKDSK to prevent potential data corruption. Additionally, it’s always a good idea to have a backup of your important data before performing any disk-related operations.
Using WD Data Lifeguard Diagnostic Tool
The WD Data Lifeguard Diagnostic tool is a specialized utility provided by WD for diagnosing and resolving issues with their hard disk drives (HDDs). This tool can help identify and repair problems specific to WD HDDs, ensuring optimal performance and reliability. Here’s how you can use the WD Data Lifeguard Diagnostic tool:
1. Download and install the tool: Visit the official WD website and navigate to the Support section. Look for the Data Lifeguard Diagnostic tool for your specific WD HDD model and download it. Once downloaded, install the tool following the on-screen instructions.
2. Connect the WD HDD: Ensure that your WD HDD is properly connected to your computer. Double-check the cables and connections to guarantee a secure and stable connection.
3. Launch the WD Data Lifeguard Diagnostic tool: Open the WD Data Lifeguard Diagnostic tool from the Start menu or desktop shortcut. If necessary, grant administrative privileges to the tool when prompted.
4. Select the WD HDD: The tool will detect the connected WD HDDs and display them in a list. Choose the HDD you want to diagnose and repair by clicking on it.
5. Run the Quick Test: The WD Data Lifeguard Diagnostic tool offers two types of tests: Quick Test and Extended Test. Start with the Quick Test, as it provides a faster assessment of the drive’s condition. This test scans the drive for basic errors and provides an initial overview of any detected issues.
6. Evaluate the Quick Test results: Once the Quick Test completes, the tool will display the test results. If no errors are detected, the drive is most likely functioning properly. If errors are found, the tool will provide information about the issue and recommend appropriate actions for repair.
7. Run the Extended Test (optional): If the Quick Test indicates potential issues, or if you want a more thorough analysis, you can proceed to the Extended Test. Keep in mind that the Extended Test takes longer to complete but provides a more comprehensive evaluation of the drive’s health and functionality.
8. Review and act on the Extended Test results: Once the Extended Test finishes, carefully review the test results. If errors are detected, the tool will offer specific recommendations for repair or further action, such as contacting WD customer support or seeking professional help.
Using the WD Data Lifeguard Diagnostic tool allows you to diagnose and address potential issues with your WD HDD in a targeted manner. However, it is important to note that some problems may be beyond the tool’s scope, such as physical damage to the drive. If the tool cannot resolve the issues or if it indicates hardware-related problems, contacting WD support or a professional technician is advisable.
Remember to close any programs or files accessing the WD HDD before running the WD Data Lifeguard Diagnostic tool to ensure accurate and reliable results. Additionally, maintain a backup of your important data to prevent potential data loss during the diagnostic process.
Reformatting the Hard Disk Drive
If you have tried basic troubleshooting steps and other methods to fix issues with your WD hard disk drive (HDD) without success, reformatting the HDD may be a viable option. Reformatting involves erasing all data on the drive and resetting it to its original state. Here’s how you can reformat your WD HDD:
1. Backup your important data: Before proceeding with the reformatting process, make sure to back up any important data on the WD HDD. Reformatting will erase all data on the drive, and there will be no way to recover it if you have not made a backup.
2. Open the Disk Management tool: In Windows, right-click on the Start menu, select “Disk Management” from the menu, and wait for the Disk Management window to open.
3. Locate and select the WD HDD: In the Disk Management window, locate the WD HDD from the list of available drives. It will be labeled with the drive letter and the size of the HDD.
4. Delete existing partitions: Right-click on each partition on the WD HDD and select “Delete Volume” from the context menu. Confirm the deletion when prompted. Repeat this step for each partition until the entire disk becomes unallocated space.
5. Create a new partition: Right-click on the unallocated space and select “New Simple Volume”. Follow the prompts in the New Simple Volume Wizard to create a new partition. You can choose the partition size, assign a drive letter, and format it using the desired file system (such as NTFS).
6. Complete the formatting process: Once the new partition is created, the formatting process will begin. Wait for the process to complete, which may take a few minutes depending on the size of the WD HDD.
7. Assign a drive letter: After the formatting process completes, right-click on the newly formatted partition and select “Change Drive Letter and Paths”. Choose an available drive letter and click “OK” to assign it to the partition.
8. Test the formatted WD HDD: Once the formatting is complete and a drive letter is assigned, you can test the functionality of the WD HDD. Copy some files to the drive and verify that they can be accessed without any issues.
Reformatting the WD HDD can help resolve stubborn issues and restore the drive to its original state. However, keep in mind that reformatting will erase all data, so ensure you have a backup before proceeding. Additionally, reformatting cannot fix physical hardware problems, so if the issues persist, it may be necessary to consult WD customer support or seek professional assistance.
Remember to exercise caution when selecting the drive to format in the Disk Management tool to avoid formatting the wrong drive and potentially losing important data. Take note of the drive letter assigned to the WD HDD before proceeding with the formatting process.
Performing a System Restore
If you are facing issues with your WD hard disk drive (HDD) that started occurring after recent software installations or updates, performing a system restore can help resolve the problem. System restore allows you to revert your computer’s settings and configuration to a previous stable state. Here’s how you can perform a system restore:
1. Open the System Restore utility: In Windows, right-click on the Start menu and select “System” from the menu. From the System window, click on “System Protection” in the left sidebar.
2. Access the System Restore: In the System Protection tab, click on the “System Restore” button. If prompted for an administrator password or confirmation, provide the necessary credentials.
3. Choose a restore point: In the System Restore window, you will see a list of available restore points. These points are essentially snapshots of your computer’s previous states. Select a restore point that was created before the issues with your WD HDD started occurring. You can click on “Scan for affected programs” to see a list of software that will be affected by the system restore.
4. Confirm the restore point: After choosing a restore point, review the details and click “Next”. It is recommended to read the description and ensure that you have selected the correct restore point.
5. Start the system restore: Click “Finish” to begin the system restore process. Your computer will restart and start restoring the selected restore point. This process may take some time, so be patient and avoid interrupting it.
6. Assess the results: After the system restore is completed, your computer will restart again. Once it reboots, check if the issues with your WD HDD have been resolved. Test accessing files on the HDD and ensure that the functionality has been restored.
Performing a system restore allows you to undo changes made to your computer’s settings and configuration, potentially resolving issues that arose after software installations or updates. However, keep in mind that system restore will not fix physical hardware problems with the WD HDD. If the issues persist after the system restore, it may be necessary to explore other troubleshooting methods or seek professional assistance.
Remember that performing a system restore will undo any changes made after the selected restore point, including installed software or driver updates. Make sure to back up any important data and take note of any software installations or updates that you might need to reinstall or reconfigure after the system restore process.
Using Data Recovery Software
If you have tried various troubleshooting steps and your WD hard disk drive (HDD) still fails to function properly, using data recovery software may help retrieve important files and information from the drive. Data recovery software is designed to recover data from damaged, corrupted, or inaccessible storage devices. Here’s how you can use data recovery software to recover your data:
1. Choose a reliable data recovery software: Before proceeding, select a reputable data recovery software that is specifically designed for HDD recovery. There are several options available, such as EaseUS Data Recovery, Recuva, or Stellar Data Recovery. Research and choose one that suits your needs.
2. Install the data recovery software: Download and install the selected data recovery software onto a computer that is not experiencing issues. Avoid installing the software directly onto the WD HDD you want to recover from, as it may overwrite the data you are trying to retrieve.
3. Connect the WD HDD as a secondary drive: Disconnect the WD HDD from your current computer and connect it as a secondary drive to the computer with the data recovery software installed. You can do this by using an external hard drive enclosure or connecting the HDD to a spare SATA port internally.
4. Open the data recovery software: Launch the data recovery software and follow the on-screen instructions to begin the recovery process. Most software will have a “Scan” or “Recover” option to initiate the scanning of the connected WD HDD.
5. Perform a thorough scan: Select the WD HDD you want to recover data from and start a thorough scan. This scan may take some time, depending on the size and condition of the HDD. The software will search for lost or deleted files on the drive.
6. Preview and recover the files: After the scan completes, the recovery software will display a list of recoverable files. Take advantage of any preview options available to ensure the integrity and relevance of the files. Select the files you want to recover and choose a safe location to restore them to on a different storage device.
7. Save the recovered files: Follow the prompts to save the recovered files to the specified location. Be cautious not to save them back onto the same WD HDD to avoid overwriting any remaining data or further damaging the drive.
Using data recovery software can be an effective solution for retrieving precious data from a malfunctioning WD HDD. However, keep in mind that not all data may be recoverable, especially if the drive has physical damage. If the software fails to recover your data or the WD HDD continues to be problematic, it may be necessary to consult professional data recovery services.
Remember to handle the WD HDD with care during this process and avoid any actions that could potentially worsen its condition. Once you have successfully recovered your data, consider replacing the faulty WD HDD to prevent future data loss.
Contacting WD Customer Support
If you have exhausted all troubleshooting options and are still unable to resolve the issues with your WD hard disk drive (HDD), contacting WD customer support can provide valuable assistance and guidance. WD’s customer support team consists of experts who specialize in addressing HDD-related problems. Here’s how you can reach out to WD customer support:
1. Visit the WD website: Go to the official WD website and navigate to the support section. Look for the “Contact” or “Support” page, where you can find the contact information for WD customer support.
2. Email or online support: Many companies, including WD, provide email or online support options. Look for a support email address or an online support form on the WD website. This method allows you to describe your issues in detail and receive assistance via email or online chat.
3. Phone support: Check if WD provides a phone support option. Look for a contact number specifically dedicated to technical support or HDD-related issues. Calling WD customer support can enable real-time communication and provide immediate guidance for troubleshooting your WD HDD.
4. Provide relevant information: When you contact WD customer support, be prepared to provide relevant information about your WD HDD, such as the model number, serial number, and a detailed description of the issues you are experiencing. These details will assist the support team in understanding your situation and providing targeted assistance.
5. Follow their instructions: The WD customer support team may request specific actions or steps to diagnose and resolve the issues with your WD HDD. It is important to carefully follow their instructions and provide any additional information or feedback they may need during the process.
6. Keep records of your interaction: Maintain written records of your communication with WD customer support. This includes the date and time of contact, the names of the customer support representatives you interacted with, and any case or reference numbers provided. Having these details can help track the progress of your support request and refer back to previous discussions if needed.
WD customer support is trained to handle various HDD-related issues and can provide helpful guidance throughout the troubleshooting process. If the issues with your WD HDD cannot be resolved through other means, customer support can help determine if warranty coverage applies or recommend further actions, such as sending the HDD for repair or replacement.
Remember to remain patient and polite when contacting WD customer support. Describe your issues clearly and provide any necessary information promptly to facilitate the resolution of your WD HDD problems.
Conclusion
Dealing with issues related to a failing WD hard disk drive (HDD) can be frustrating, but by following the right troubleshooting steps, you can potentially resolve the problems and restore the functionality of your drive. It is essential to recognize the signs of a failing HDD early on, such as slow performance, unusual noises, frequent crashes, and files disappearing. These signs indicate the need for further investigation and potential action.
Before attempting any troubleshooting steps, ensure you have a backup of your important data to minimize the risk of data loss during the process. Basic troubleshooting steps, such as checking cables and connections, running the CHKDSK utility, and using the WD Data Lifeguard Diagnostic tool, can help identify and resolve common issues with the WD HDD.
If these steps do not resolve the problems, reformatting the HDD or performing a system restore can be additional options to consider. Reformatting erases all data on the drive, while a system restore allows you to revert your computer to a previous stable state. However, both options require caution and the availability of backups to avoid data loss.
If data recovery becomes necessary, utilizing specialized data recovery software can help retrieve important files from the failing HDD. Additionally, contacting WD customer support provides expert assistance and guidance for addressing HDD-related issues.
Remember, while these troubleshooting steps can be effective in resolving many issues, there are instances where professional help or replacement of the WD HDD may be required. It’s important to assess the severity of the problems and weigh the cost versus benefit of repair options.
By staying proactive and taking the necessary steps to address any problems with your WD HDD, you can prolong its lifespan, minimize data loss risks, and ensure the continued functionality of your computer. Prioritize regular backups, maintain a clean and well-ventilated computer environment, and stay updated with any firmware or driver updates provided by WD to maximize the performance and reliability of your WD HDD.