Introduction
Welcome to our guide on how to fix a brand new LED TV with a dark blue screen. There’s nothing more frustrating than buying a new TV only to encounter issues right out of the box. A dark blue screen can be especially perplexing, as it prevents you from enjoying your favorite shows and movies.
Before you start panicking and contemplating returning the TV, take a deep breath. In many cases, this issue can be resolved with some basic troubleshooting steps. The good news is that most of the time, a dark blue screen is not a sign of a major hardware problem. It might be caused by a simple misconfiguration or a minor software issue.
In this guide, we will walk you through the common causes of a dark blue screen on a new LED TV and provide step-by-step instructions on how to troubleshoot and resolve the issue. We will cover both software and hardware aspects to ensure a comprehensive approach to fixing the problem.
It’s important to note that while we are focusing on LED TVs in this guide, many of the troubleshooting steps can be applied to other types of TVs as well. So, even if you don’t have an LED TV, you may still find this guide helpful.
So, without further ado, let’s dive into the world of LED TV troubleshooting and get your brand new TV back to its dazzling and vibrant display!
Common Causes of a Dark Blue Screen
A dark blue screen on your brand new LED TV can be frustrating, but understanding the common causes can help you identify and fix the issue. Here are some possible reasons for the dark blue screen:
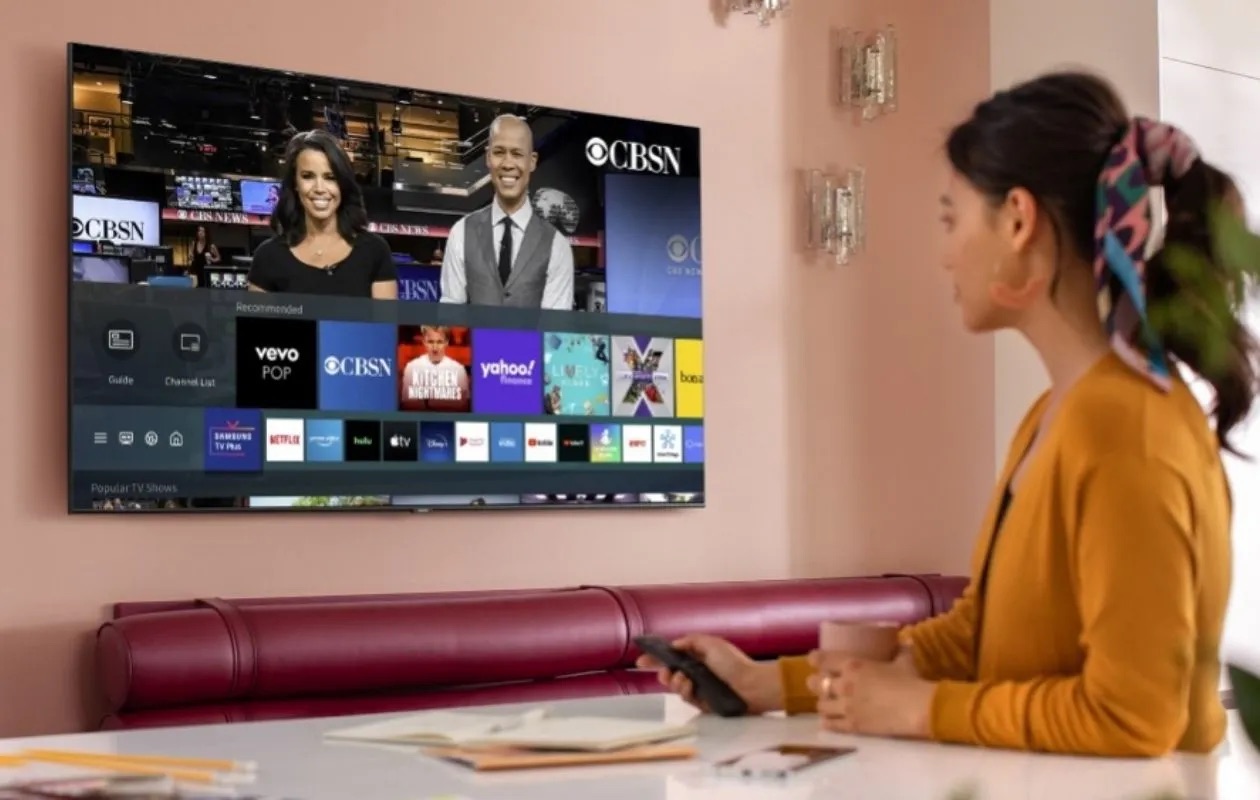
- Incorrect HDMI input: One of the most common causes of a dark blue screen is using the wrong HDMI input. Make sure you have selected the correct input source on your TV to display the content properly.
- Picture settings: Factory default picture settings may not be optimized to your liking. Adjusting the brightness, contrast, and other picture settings can help resolve the blue screen issue.
- Firmware issues: Outdated or corrupted firmware can sometimes cause display problems. It’s essential to keep your TV’s firmware up-to-date by installing the latest software updates.
- Hardware problems: While less common, hardware issues can also lead to a dark blue screen. Faulty cables, loose connections, or a defective backlight can all contribute to this problem.
- Environmental factors: Sometimes, external factors such as electromagnetic interference or improper grounding can affect the display quality of your TV, leading to a dark blue screen.
- Software glitches: Like any electronic device, TVs can experience software glitches, which may result in abnormal display behavior. Resetting the TV to its factory settings can often resolve these glitches.
By understanding these common causes, you can begin the troubleshooting process with a clear understanding of what might be causing the dark blue screen on your LED TV. In the next section, we will guide you through some basic troubleshooting steps to help you resolve the issue and enjoy your TV’s stunning visuals once again.
Basic Troubleshooting Steps
When faced with a dark blue screen on your brand new LED TV, it’s important to start with some basic troubleshooting steps to identify and resolve the issue. Here are the steps you can follow:
- Check the HDMI input: Ensure that you have selected the correct HDMI input on your TV that matches the device you are trying to connect. Use the TV remote to navigate through the input options and select the appropriate one.
- Inspect the cables: Check all the cables connected to your TV, including the HDMI cable and power cord. Make sure they are securely plugged in and not damaged. A loose or faulty cable connection can cause display issues, including a dark blue screen.
- Restart the TV: Sometimes, a simple restart can resolve temporary software glitches. Turn off your TV, unplug it from the power source, and wait for a few minutes. Then, plug it back in and turn it on again to see if the dark blue screen issue persists.
- Adjust the picture settings: Access the TV’s menu and navigate to the picture settings. Experiment with adjusting the brightness, contrast, color temperature, and other relevant settings to find an optimal balance. These adjustments can often correct display issues, including a dark blue screen.
- Reset the TV to factory settings: If none of the previous steps resolve the issue, you can try performing a factory reset. This will restore the TV’s settings to their original defaults. Consult the user manual or manufacturer’s website to learn how to initiate a factory reset for your specific TV model.
By following these basic troubleshooting steps, you have taken the first necessary actions to troubleshoot and fix the dark blue screen on your brand new LED TV. If the issue persists, don’t worry. In the upcoming sections, we will explore more advanced solutions to help you resolve the problem. Keep reading!
Check the HDMI Input
One of the most common causes of a dark blue screen on your brand new LED TV is using the incorrect HDMI input. It’s important to check that you have selected the right input source on your TV to display the content properly. Follow these steps to ensure the HDMI input is correctly set:
- Inspect the HDMI connections: Start by making sure that the HDMI cable is securely plugged into both the TV and the device you are trying to connect, such as a cable box, gaming console, or Blu-ray player. Check for any visible damage or bent pins on the connectors. If you notice any issues, try using a different HDMI cable to see if that resolves the problem.
- Locate the input/source button: On your TV remote, look for a button labeled “Input,” “Source,” or a similar term. This button allows you to change the input source on your TV.
- Press the input/source button: Press the input/source button repeatedly until you find the HDMI input that corresponds to the device you want to watch or use. The options may be labeled as HDMI 1, HDMI 2, etc., or may have specific names such as “Cable Box” or “Game Console.”
- Confirm the selected input: Once you’ve selected the correct HDMI input, confirm that it is displayed on the screen. You should see the content from your device appear if the input is set correctly.
- Repeat for other devices: If you have multiple devices connected to your TV via HDMI cables, repeat the steps above for each device to ensure that the correct input is selected for each of them.
By checking and selecting the appropriate HDMI input, you can ensure that your brand new LED TV displays the content correctly without a dark blue screen. If the issue persists, don’t worry. In the following sections, we will explore further troubleshooting steps to help you resolve the problem. Keep reading!
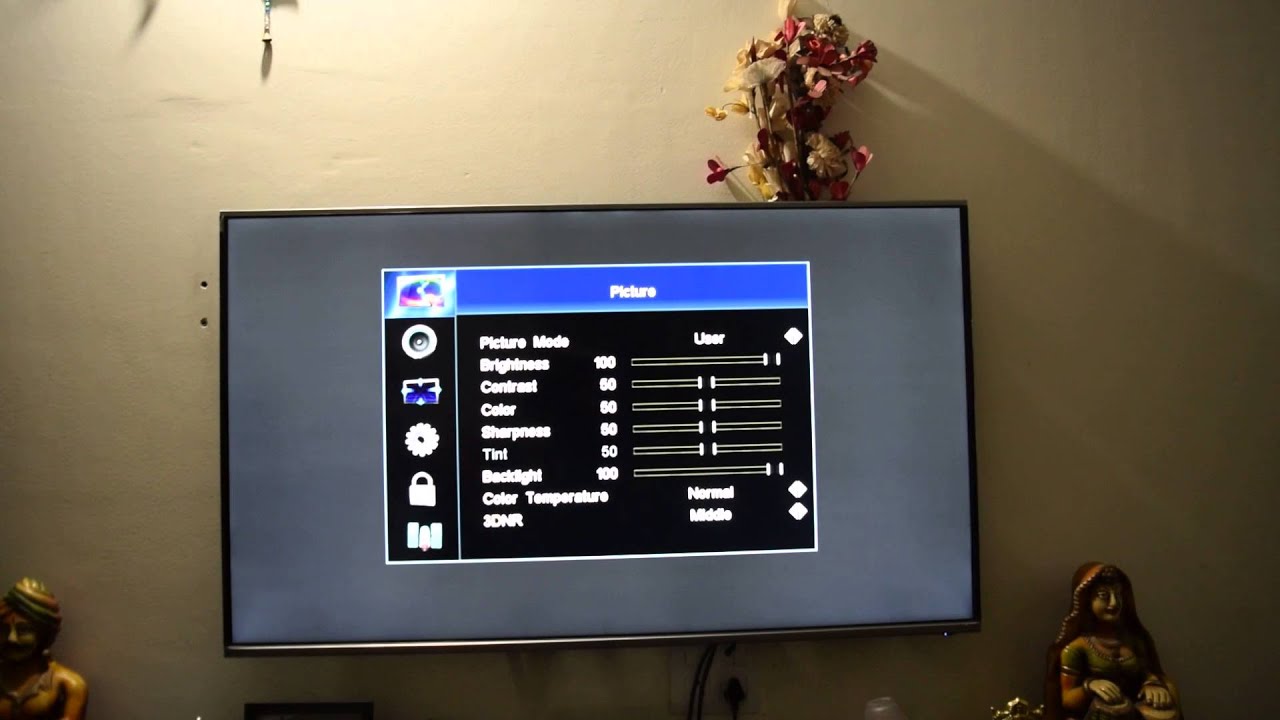
Adjust the Picture Settings
If you are experiencing a dark blue screen on your brand new LED TV, the issue may be related to the picture settings. Factory default settings might not be optimized to your liking, leading to display problems. Adjusting the picture settings can often help resolve the issue. Here’s how you can do it:
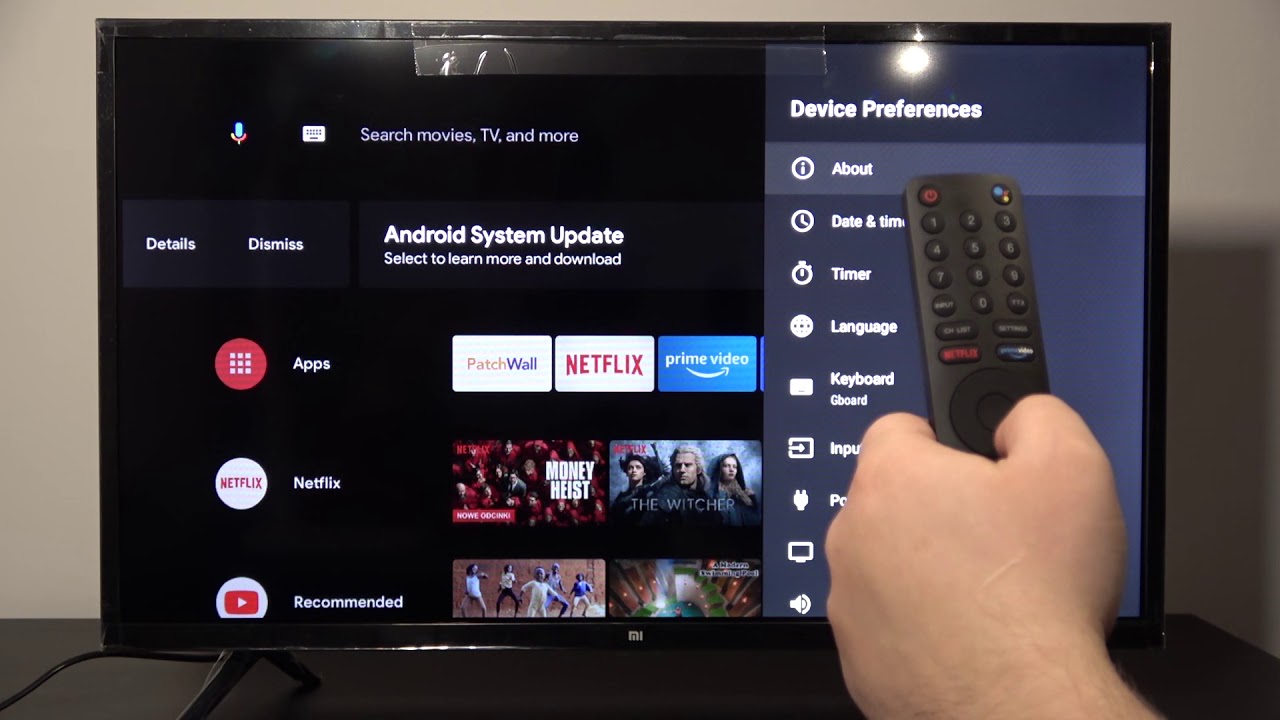
- Access the picture settings: On your TV remote, look for a button that is labeled “Menu” or “Settings.” Press it to access the TV’s menu.
- Navigate to picture settings: Inside the menu, use the arrow buttons on your remote to navigate to the “Picture” or “Display” settings. Press the select button to enter the picture settings submenu.
- Adjust the brightness: In the picture settings submenu, locate the “Brightness” option. Use the arrow buttons to increase or decrease the brightness level until you find the desired balance. Keep in mind that setting the brightness too low can result in a dim picture, while setting it too high can cause washed-out colors.
- Modify the contrast: Find the “Contrast” option in the picture settings submenu. Adjust the contrast to a level that enhances the distinction between light and dark shades without losing detail in bright areas.
- Explore other settings: Depending on your TV model, you may have additional picture settings like color temperature, sharpness, color saturation, and backlight. Experiment with these settings to find the optimal configuration for your viewing preferences.
- Save the changes: Once you have made the necessary adjustments, navigate to the option labeled “Save” or “Apply” in the picture settings menu. Press the select button to save the changes and exit the menu.
By adjusting the picture settings on your LED TV, you can fine-tune the display and potentially resolve the dark blue screen issue. If the problem persists, don’t worry. In the upcoming sections, we will explore more troubleshooting steps to help you fix the issue. Keep reading!
Reset the TV to Factory Settings
If adjusting the picture settings did not resolve the dark blue screen issue on your brand new LED TV, performing a reset to factory settings can be a helpful troubleshooting step. Resetting the TV will revert all settings back to their original defaults, potentially resolving any software glitches causing the problem. Here’s how you can reset your TV to factory settings:
- Access the TV menu: Using your TV remote, press the “Menu” or “Settings” button to access the TV’s menu.
- Locate the reset option: Inside the menu, navigate to the “System” or “Setup” settings. Look for an option labeled “Reset” or “Factory Reset.” This option is usually located under the “System” or “Setup” category.
- Confirm the reset: Once you’ve found the reset option, select it and read any on-screen prompts or warnings. These prompts will inform you about the consequences of resetting the TV to factory settings. Make sure you understand the implications before proceeding.
- Enter the PIN (if required): Some TVs may have a security feature that requires you to enter a PIN code to perform a factory reset. Enter the correct PIN code if prompted.
- Initiate the reset: After confirming the reset, select the “Reset” or “OK” option to begin the process. The TV will restart, and all settings will be reset to their original defaults.
- Set up the TV again: Once the reset is complete, you will need to go through the initial setup process, such as selecting your language, connecting to Wi-Fi, and tuning channels. Follow the on-screen instructions to set up your TV again.
Performing a factory reset on your LED TV can often fix software glitches that may be causing the dark blue screen issue. If the problem persists even after resetting to factory settings, don’t worry. In the following sections, we will explore additional troubleshooting steps to help you resolve the issue. Keep reading!
Update the TV’s Firmware
If you are still facing a dark blue screen on your brand new LED TV after trying the previous troubleshooting steps, it might be worth checking if there are any firmware updates available. Updating the TV’s firmware can often address software issues and improve overall performance. Here’s how you can update the firmware:
- Determine the current firmware version: Access the TV’s menu using the remote and navigate to the “System” or “Setup” settings. Look for an option labeled “Software” or “Firmware” to see the current firmware version installed on your TV.
- Check for updates: Visit the manufacturer’s website or check the support section to see if there are any available firmware updates for your specific TV model. Look for the latest firmware version that is compatible with your TV.
- Download the firmware: If there is a new firmware version available, download it to your computer or a USB flash drive as instructed by the manufacturer. Ensure that you choose the correct firmware version for your TV model to avoid compatibility issues.
- Prepare the TV for the update: Follow the instructions provided by the manufacturer to prepare your TV for the firmware update. This may involve connecting the USB flash drive to the TV, turning off the TV, or following specific button sequences to initiate the update process.
- Start the firmware update: Once your TV is prepared, initiate the firmware update as instructed. This process may take a few minutes, during which the TV will restart and install the new firmware. Do not turn off the TV or disconnect any cables during the update process.
- Verify the firmware update: After the update is complete, verify that the firmware version has been successfully updated on your TV. You can check the firmware version again in the “Software” or “Firmware” settings to ensure that the update was applied successfully.
Updating the firmware can often address software-related issues, including the dark blue screen problem on your LED TV. If the issue persists after updating the firmware, don’t worry. In the upcoming sections, we will explore further troubleshooting steps to help you resolve the problem. Keep reading!
Check for Hardware Issues
If you have tried the previous troubleshooting steps and are still experiencing a dark blue screen on your brand new LED TV, it’s possible that the issue is related to hardware. While less common, hardware problems can contribute to display issues. Here are some steps you can take to check for hardware issues:
- Inspect the cables: Take a close look at all the cables connected to your TV, including the HDMI cable, power cord, and any other peripherals. Check for any visible damage or loose connections. Replace any faulty cables, ensuring they are securely plugged in.
- Try a different HDMI port: If your TV has multiple HDMI ports, try connecting your device to a different port. This helps determine if the issue is specific to a particular HDMI port or the input source itself.
- Test with different devices: Connect different devices to your TV via HDMI, such as a DVD player or game console, to see if the dark blue screen issue occurs with all devices or just a specific one. This can help isolate whether the problem lies with the TV or the device.
- Check for firmware updates: Even if you have already performed a firmware update, check the manufacturer’s website or support page again to ensure you have the latest firmware version available for your TV model. Sometimes, new firmware updates address hardware-related issues.
- Consult the manufacturer or a technician: If the dark blue screen problem persists despite these steps, it is recommended to reach out to the manufacturer’s customer support or consult a professional technician. They can provide specialized knowledge and assistance, as well as determine if there is an underlying hardware problem that needs to be addressed.
By checking for hardware issues and following these steps, you can identify any potential hardware-related causes of the dark blue screen. If the problem still persists, don’t worry. In the next section, we will discuss how to contact the manufacturer for further assistance. Keep reading!
Contacting the Manufacturer
If you have exhausted all the troubleshooting steps and are still grappling with the dark blue screen issue on your brand new LED TV, it’s time to reach out to the manufacturer for further assistance. The manufacturer’s customer support team can provide you with specialized guidance tailored to your specific TV model. Here’s how you can contact the manufacturer:
- Locate the manufacturer’s contact information: Search for the manufacturer’s official website or check the documentation that came with your TV to find their contact details. Look for a customer support helpline or an email address that you can reach out to.
- Prepare the necessary information: Before contacting the manufacturer, gather all the relevant information about your TV, including the model number, serial number, and a detailed description of the issue you are facing. This information will help the customer support team provide you with accurate assistance.
- Reach out to customer support: Call the customer support helpline or send an email explaining the problem. Be sure to provide all the necessary details and describe the steps you have already taken to troubleshoot the issue. This will help the manufacturer’s support team assess your situation and provide appropriate next steps.
- Follow the manufacturer’s instructions: The manufacturer’s customer support team may provide you with further troubleshooting steps, warranty information, or advise you on how to proceed. Follow their instructions carefully to ensure the best course of action.
- Consider warranty coverage: If your TV is still under warranty, the manufacturer may offer repair or replacement services to resolve the issue. Be prepared to provide proof of purchase and any other required documentation to avail the warranty benefits.
- Document all interactions: Keep a record of all communication with the manufacturer, including dates, names of customer support representatives, and any reference numbers or case IDs provided. This documentation can be helpful for future reference if needed.
Contacting the manufacturer allows you to leverage their expertise and resources to resolve the dark blue screen issue on your LED TV. They can guide you through further troubleshooting steps, warranty services, or provide recommendations for professional repairs. Remember to remain patient and cooperative throughout the process, as it may take time to find a resolution.
Conclusion
Dealing with a dark blue screen on your brand new LED TV can be frustrating, but by following the troubleshooting steps outlined in this guide, you can work towards resolving the issue and enjoying your TV’s stunning display.
We began by discussing the common causes of a dark blue screen, such as incorrect HDMI input, picture settings, firmware issues, hardware problems, and software glitches. From there, we explored basic troubleshooting steps, including checking the HDMI input, inspecting cables, restarting the TV, adjusting picture settings, and performing a factory reset.
If those steps did not solve the problem, we provided guidance on updating the TV’s firmware and checking for hardware issues. Finally, we emphasized the importance of contacting the manufacturer’s customer support if the issue persists or seems to be related to a hardware malfunction.
Remember, each LED TV model can have its own unique troubleshooting steps, so it’s essential to consult your TV’s user manual or the manufacturer’s support resources for specific instructions.
We hope that this guide has provided you with helpful information and guidance to fix the dark blue screen on your LED TV. By following the steps outlined here, you can be on your way to enjoying your favorite shows and movies with a vibrant and properly functioning display.