Introduction
Whether you’re troubleshooting network connectivity issues or setting up a new device on your home network, finding the MAC address of your Chromebook can be a useful piece of information. The MAC address, also known as the Media Access Control address, is a unique identifier assigned to a network interface card or wireless adapter. This address allows devices to communicate with each other on a local network.
Knowing how to find the MAC address on your Chromebook can come in handy in various situations. For instance, it may be required when registering a device with your network administrator, configuring MAC address filtering, or troubleshooting network connectivity problems. Fortunately, finding the MAC address on a Chromebook is a straightforward process that can be done through different methods.
In this article, we will explore four methods that you can use to find the MAC address on your Chromebook. Whether you prefer using the Chromebook settings, command prompt, Chrome OS app, or network connection settings, we’ve got you covered. So, let’s dive in and find out how to discover the MAC address on your Chromebook!
Method 1: Finding the MAC address through Chromebook settings
The easiest way to find the MAC address on your Chromebook is by using the Chromebook settings. Here’s how you can do it:
- First, click on the time in the bottom-right corner of the screen to open the system tray.
- Next, click on the gear icon to open the Settings menu.
- In the Settings menu, click on the “Wi-Fi” option in the left-hand sidebar.
- Under the Wi-Fi settings, you’ll see the name of your connected Wi-Fi network. Click on the network name.
- A pop-up window will appear with detailed information about your Wi-Fi network. Scroll down until you see the “MAC address” field.
- The MAC address will be displayed next to the “MAC address” field. It typically consists of six pairs of alphanumeric characters separated by colons or hyphens.
Once you have located the MAC address, you can note it down or use it for any network-related configurations or troubleshooting that may require it. Remember to write it down accurately as even a single character difference can cause problems when configuring MAC address filtering or connecting your device to certain networks that require MAC address authentication.
Now that you know how to find the MAC address through the Chromebook settings, let’s explore another method that you can use.
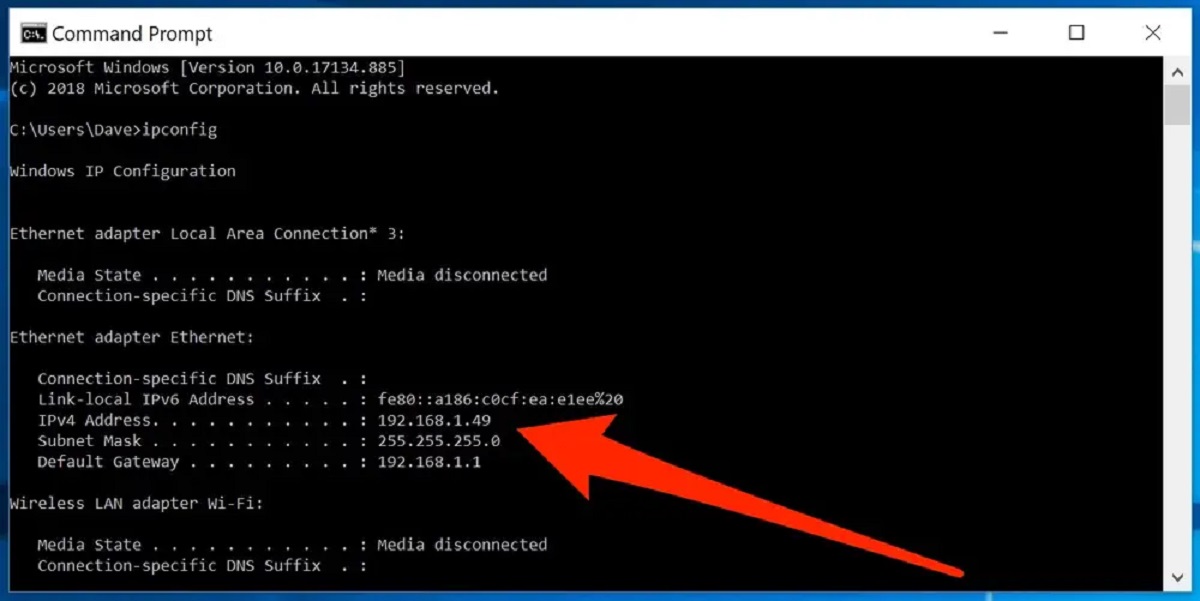
Method 2: Using the command prompt to locate the MAC address
If you’re comfortable with using the command prompt, you can also find the MAC address on your Chromebook through this method. Follow the steps below:
- Press the “Ctrl + Alt + T” keys simultaneously to open the Chrome OS command prompt, also known as the Crosh.
- In the Crosh window, type “network_diag” and hit Enter. This will display detailed network connection information.
- Scroll through the information until you find the section labeled “MAC.” The MAC address will be listed next to it.
- Note down the MAC address for future reference or use it as needed.
The command prompt method provides a quick way to access the MAC address on your Chromebook. It’s especially useful if you’re familiar with using command line interfaces or prefer a more technical approach to finding information.
With the MAC address in hand, you can proceed with any network-related configurations or troubleshooting that requires it. Keep in mind that the MAC address is a unique identifier and should be handled with care to ensure accuracy while entering it into any device or network settings.
Now that you know how to find the MAC address using the command prompt, let’s move on to another method that you can use.
Method 3: Finding the MAC address through the Chrome OS app
If you prefer using a dedicated app to find the MAC address on your Chromebook, the Chrome OS app provides an easy and convenient way to access this information. Follow the steps below:
- Click on the time in the bottom-right corner of the screen to open the system tray.
- Find and click on the gear icon to open the Settings menu.
- In the Settings menu, click on the “About Chrome OS” option in the left-hand sidebar.
- Scroll down until you find the “Detailed build information” section. Under this section, click on the “App info” link.
- A new window will appear with a list of installed apps. Scroll through the list and find the “Network” app.
- Click on the “Network” app to open it.
- In the Network app, you will find a tab labeled “Connections.” Click on it.
- Under the “Connections” tab, you will see information about your network connections, including the MAC address.
- Note down the MAC address for future reference or use it as needed.
The Chrome OS app provides a user-friendly interface to access various network-related information, including the MAC address. This method eliminates the need to dive deep into system settings and offers an intuitive way to find the MAC address on your Chromebook.
With the MAC address in hand, you can proceed with any network-related configurations or troubleshooting that requires it. Remember to double-check the accuracy of the MAC address when entering it into any network settings or authentication fields.
Now that you know how to find the MAC address through the Chrome OS app, let’s move on to the final method.
Method 4: Locating the MAC address through the Chromebook network connection settings
An alternative method to find the MAC address on your Chromebook is by accessing the network connection settings. Here’s how you can do it:
- Click on the time in the bottom-right corner of the screen to open the system tray.
- Find and click on the Wi-Fi icon to open the network connection settings.
- In the Wi-Fi settings, locate your connected network and click on the network name.
- A window will appear with detailed information about the network. Scroll down until you see the “MAC address” field.
- The MAC address will be displayed next to the “MAC address” field. It typically consists of six pairs of alphanumeric characters separated by colons or hyphens.
- Note down the MAC address for future reference or use it as needed.
Using the network connection settings method provides another straightforward way to find the MAC address on your Chromebook. It allows you to access the information directly related to your connected network without navigating through additional settings menus.
Once again, ensure the accuracy of the MAC address when using it for network configurations or troubleshooting purposes. Even a slight mistake in entering the MAC address can cause connectivity issues or hinder proper authentication with certain networks.
Now that you are familiar with all four methods of finding the MAC address on your Chromebook, you can choose the one that best suits your preference and needs.
Conclusion
Knowing how to find the MAC address on your Chromebook is essential for various network-related tasks, from troubleshooting connectivity issues to configuring network settings. In this article, we explored four different methods to help you locate the MAC address on your Chromebook.
The first method involved using the Chromebook settings, where you can easily access the MAC address through the Wi-Fi settings menu. Method two involved using the command prompt, providing a more technical approach for those comfortable with command line interfaces. Method three showcased using the Chrome OS app, which offers a dedicated interface for accessing network-related information, including the MAC address. Lastly, method four involved utilizing the network connection settings to find the MAC address directly related to your connected network.
By following any of these methods, you can quickly discover the MAC address on your Chromebook. Remember to accurately note down the MAC address, as any mistakes may cause issues when configuring network settings or connecting to specific networks that require MAC address authentication.
With the MAC address at hand, you’re well-equipped to handle any network-related tasks that require this unique identifier. Whether you’re setting up a new device, troubleshooting connectivity problems, or configuring network security features, having the MAC address readily available will streamline the process.
Now that you have learned how to find the MAC address on your Chromebook, you can confidently navigate through network configurations and troubleshooting scenarios, ensuring a smooth and seamless network experience.