Introduction
Welcome to our guide on how to enable a graphics card in the BIOS. In today’s fast-paced digital world, graphics cards play a crucial role in delivering smooth and visually stunning graphics for various applications, such as gaming, graphic design, and video editing. Sometimes, you may encounter situations where your computer’s graphics card is not automatically detected or enabled by the system. In such cases, accessing the BIOS settings can allow you to manually enable the graphics card, ensuring optimal performance and functionality.
Before we dive into the details, let’s first understand what the BIOS is and why you might need to enable a graphics card through it. The BIOS, short for Basic Input/Output System, is a firmware embedded in your computer’s motherboard that initializes hardware components and launches the operating system. It holds vital settings and configurations required for the proper functioning of your system.
Enabling a graphics card in the BIOS might be necessary in situations where your computer’s default settings do not recognize or utilize the graphics card correctly. This can happen when you have recently installed a new graphics card, upgraded your existing one, or when the system fails to detect the graphics card for some reason. By accessing the BIOS and enabling the graphics card, you can ensure that it is recognized by your system and can perform at its best.
However, it’s important to note that not all computers and motherboards have the same BIOS interface or options. The steps provided in this guide are general guidelines and may vary slightly depending on your specific hardware and BIOS version. Therefore, it’s always recommended to refer to your motherboard’s user manual or manufacturer’s website for detailed instructions tailored to your system.
Now that we have a basic understanding of the BIOS and why enabling a graphics card in the BIOS might be necessary, let’s move on to the next section, where we will discuss how to check compatibility between your graphics card and motherboard.
What is a BIOS?
The BIOS, or Basic Input/Output System, is a fundamental component of any computer system. It is a small firmware embedded in the computer’s motherboard that provides the necessary instructions for the system to start up and operate. Think of it as the intermediary between the hardware and the operating system.
During the boot process, the BIOS is responsible for initializing various hardware components, such as the processor, memory, hard drives, and graphics card. It ensures that all these components are functioning correctly before handing control over to the operating system.
The BIOS also contains important settings and configurations that dictate how the hardware interacts with the software. These settings are accessed and modified through the BIOS interface, which is typically accessed by pressing a specific key during the system’s startup process.
One of the primary functions of the BIOS is to provide the necessary instructions for the operating system to load. It identifies which storage device contains the operating system and instructs the system to load it into memory. Without the BIOS, the computer would not be able to start up and run any software.
Additionally, the BIOS is responsible for managing the power settings of the system. It controls aspects such as CPU power management, system sleep modes, and other power-related functions.
Over the years, the BIOS has undergone several advancements and improvements. The traditional BIOS interface has evolved into the more modern UEFI (Unified Extensible Firmware Interface), which offers a graphical user interface and additional features.
Overall, the BIOS is a critical component of the computer system, ensuring that the hardware is recognized and functioning correctly. It provides essential instructions for the system to boot up, manages power settings, and allows users to customize hardware configurations.
Now that we have a clear understanding of what a BIOS is, let’s proceed to the next section, where we will discuss why you might need to enable a graphics card in the BIOS.
Why would you need to enable a graphics card in the BIOS?
Enabling a graphics card in the BIOS can be necessary for a variety of reasons. Here are some common scenarios where you might need to enable a graphics card:
- Upgrading the graphics card: If you have recently upgraded your graphics card, the BIOS may not automatically recognize it. Enabling the graphics card in the BIOS ensures that the system acknowledges the new hardware and allows it to function properly.
- Installing a new graphics card: When installing a new graphics card for the first time, it may not be detected by the system by default. Enabling the graphics card in the BIOS ensures that it is recognized and can be utilized for improved performance.
- Troubleshooting graphics card issues: In some cases, you may encounter issues with your graphics card, such as poor performance or visual artifacts. Enabling the graphics card in the BIOS can be a troubleshooting step to ensure that the hardware is correctly recognized and utilized by the system.
- Bypassing integrated graphics: Many computers have integrated graphics, which are basic graphics capabilities built into the motherboard. If you have a dedicated graphics card and want to utilize its full power, enabling it in the BIOS allows you to bypass the integrated graphics and ensure that your system uses the dedicated card for graphics-intensive tasks.
- Restoring default settings: In certain cases, your graphics card may have been disabled in the BIOS accidentally or due to a software issue. Enabling it in the BIOS restores it to its default enabled state, resolving any related issues.
By enabling a graphics card in the BIOS, you ensure that it is recognized and utilized by your system to its maximum potential. This can lead to improved performance, smoother graphics, and a better overall user experience.
Now that we understand the reasons why you might need to enable a graphics card in the BIOS, let’s move on to the next section, where we will discuss how to check the compatibility between your graphics card and motherboard.
Checking compatibility with your motherboard
Before you proceed with enabling a graphics card in the BIOS, it’s important to check the compatibility between your graphics card and motherboard. Not all graphics cards are compatible with every motherboard, and ensuring compatibility is crucial to avoid any potential issues or incompatibilities.
Here are the steps to check compatibility between your graphics card and motherboard:
- Identify the motherboard model: To determine the compatibility, you need to know the model of your motherboard. You can usually find it printed on the motherboard itself or check your computer’s documentation or manufacturer’s website for this information.
- Check available expansion slots: Once you have identified the motherboard model, check the available expansion slots. Graphics cards are typically installed in PCIe (Peripheral Component Interconnect Express) slots. Ensure that your motherboard has at least one compatible PCIe slot available to install the graphics card.
- Check power requirements: Graphics cards require a certain amount of power to operate. Check the power supply unit (PSU) in your computer and ensure that it provides enough power to support the graphics card. Review the power requirements specified by the graphics card manufacturer and compare them with the PSU’s wattage and available connectors.
- Consider physical space: Graphics cards come in various sizes, and it’s crucial to ensure that your computer’s case has enough space to accommodate the graphics card. Check the dimensions of the graphics card and compare them with the available space in your computer’s case.
- Research compatibility: Finally, do some research and check for any specific compatibility issues or limitations between your chosen graphics card and motherboard. Look for any user reviews, forums, or official documentation that may provide insights into compatibility concerns or workarounds.
By following these steps, you can ensure that your graphics card is compatible with your motherboard, both in terms of physical and electrical requirements. This compatibility check is essential to avoid any potential issues such as the card not being recognized or functioning properly.
Now that we have covered checking compatibility, let’s move on to the preparations you need to make before entering the BIOS to enable the graphics card.
Preparations before entering the BIOS
Before you proceed to enter the BIOS and enable the graphics card, it is important to make a few preparations to ensure a smooth and successful process. Taking these steps beforehand can help minimize potential issues and ensure that you can navigate the BIOS settings efficiently.
Here are the preparations you should make:
- Read the motherboard manual: Familiarize yourself with the motherboard’s manual or documentation. Different motherboards have varying BIOS interfaces and options. Reading the manual will help you understand the specific key or combination of keys to press during startup to access the BIOS. It will also provide detailed instructions on navigating and modifying BIOS settings.
- Update your BIOS (optional): Consider updating your motherboard’s BIOS to the latest version. BIOS updates often include bug fixes, performance optimizations, and improved hardware compatibility. Check the manufacturer’s website for the latest BIOS version and carefully follow their instructions to update it, if necessary. However, be cautious during the update process, as improper BIOS updates can lead to system instability.
- Create a system restore point (optional): Before making any changes in the BIOS, consider creating a system restore point. This will allow you to revert back to a previous working state in case any issues arise. System restore points can provide an extra layer of protection and give you peace of mind during the process.
- Prepare a backup graphics option (if available): In case anything goes wrong during the BIOS configuration, it’s always helpful to have a backup plan. If your computer has integrated graphics, you can connect your monitor to the motherboard’s video output instead of the graphics card. This will allow you to access the system even if the graphics card is not enabled in the BIOS.
- Organize important information: Take note of any specific settings or configurations you want to make in the BIOS. For example, if you need to enable any other peripherals or modify system preferences, gather this information beforehand. It will save time and prevent you from forgetting any essential changes you intended to make.
By making these preparations, you set yourself up for a smoother experience when entering the BIOS and enabling the graphics card. It’s always better to be well-prepared and informed before making any changes in the BIOS to avoid any potential issues or unforeseen complications.
Now that we have made the necessary preparations, let’s move on to the next section, where we will discuss how to enter the BIOS.
Entering the BIOS
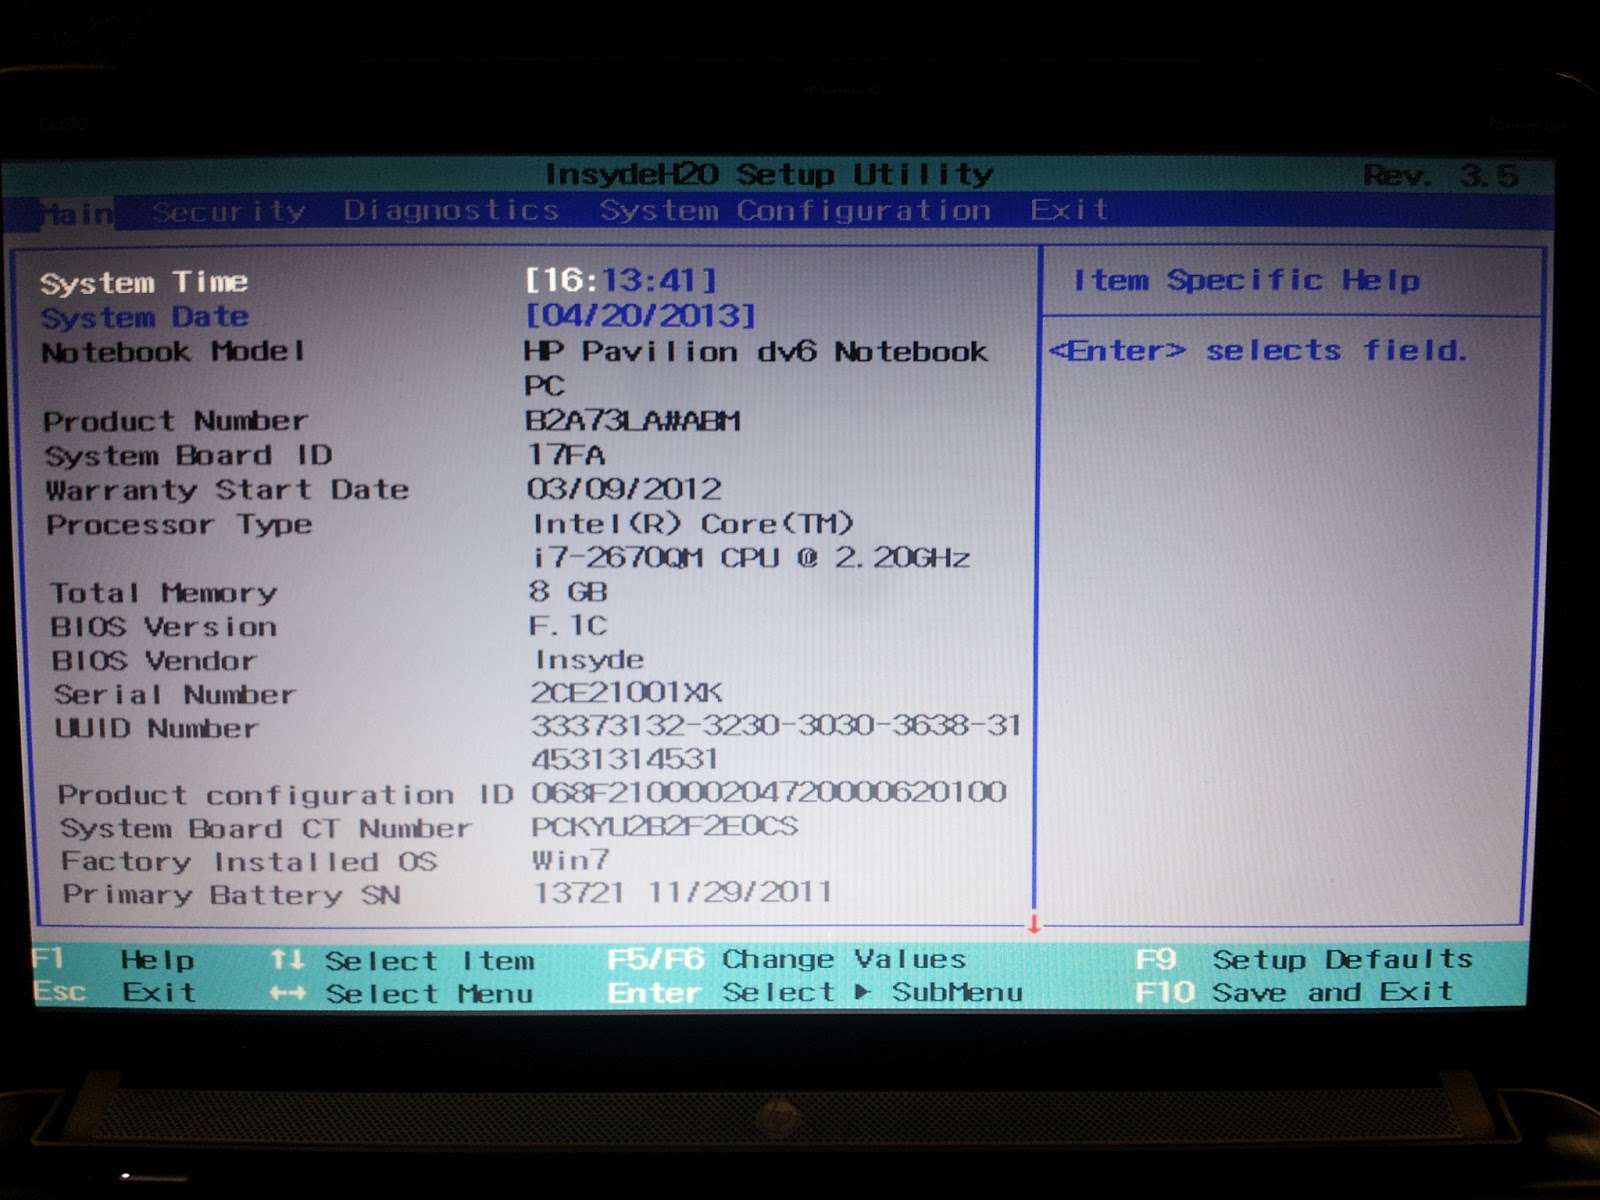
To enable the graphics card in the BIOS, you first need to access the BIOS interface. The method of entering the BIOS can vary depending on the motherboard manufacturer and model. Here are the general steps to enter the BIOS:
- Restart your computer: Start by restarting your computer. You can do this by clicking on the Start menu and selecting Restart or by pressing the power button and choosing the restart option. Make sure to save any ongoing work before proceeding.
- Watch for the BIOS key prompt: As the computer restarts, pay close attention to the screen. Look for a message that displays which key or combination of keys to press to enter the BIOS. Commonly used keys include F2, Del (Delete), F10, or Esc. The message is typically displayed briefly at the bottom or top of the screen.
- Press the BIOS key: Once you have identified the key to access the BIOS, start pressing it repeatedly as soon as you see the prompt. The timing is crucial, as you want to press the key before the operating system starts to load. If you miss the opportunity, you may need to restart the computer and try again.
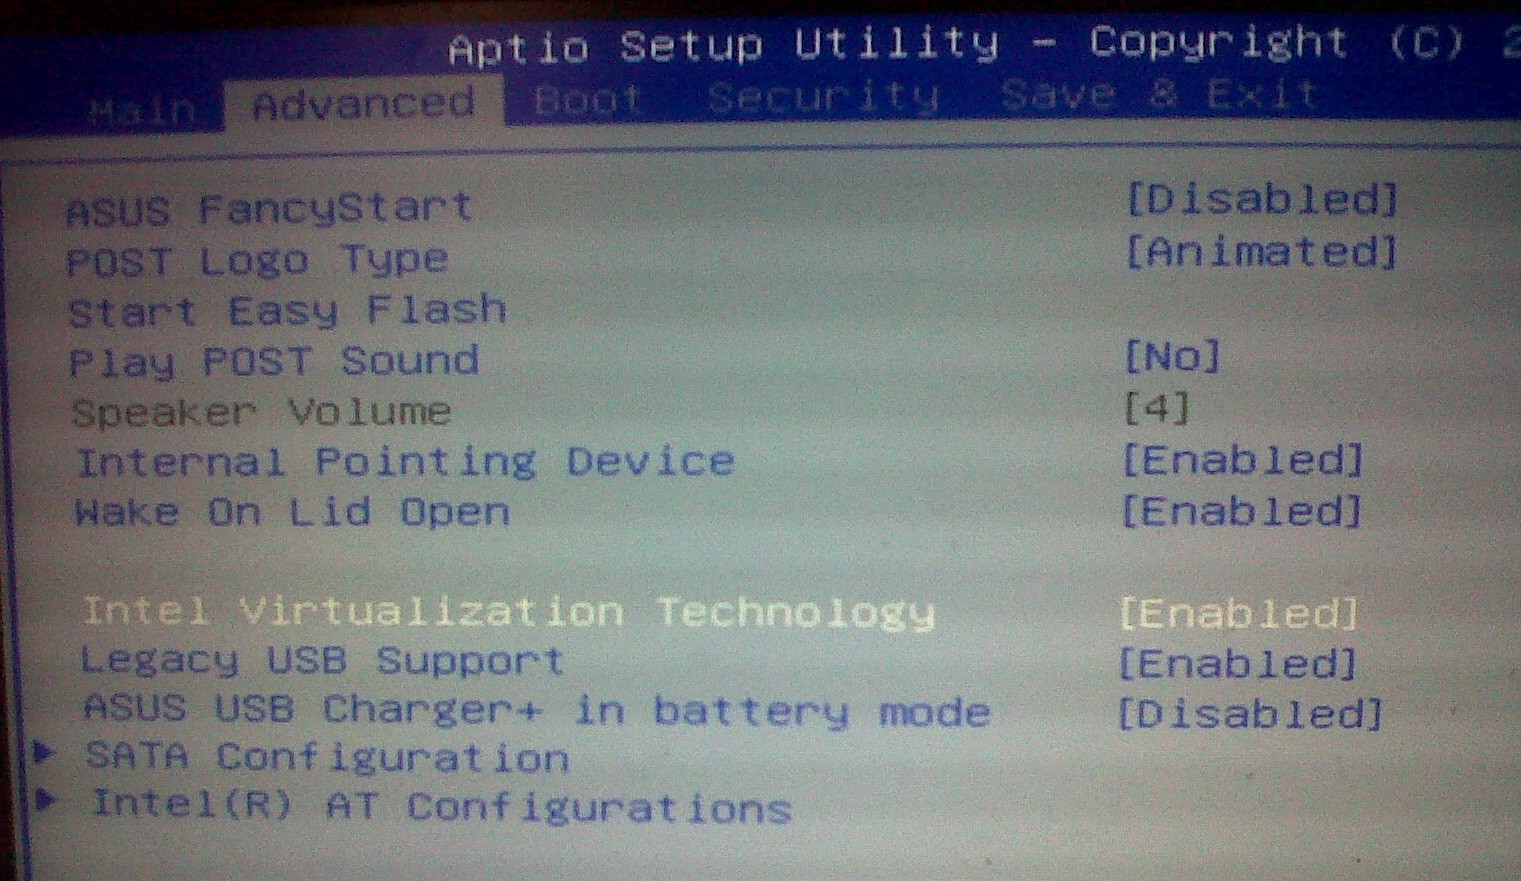
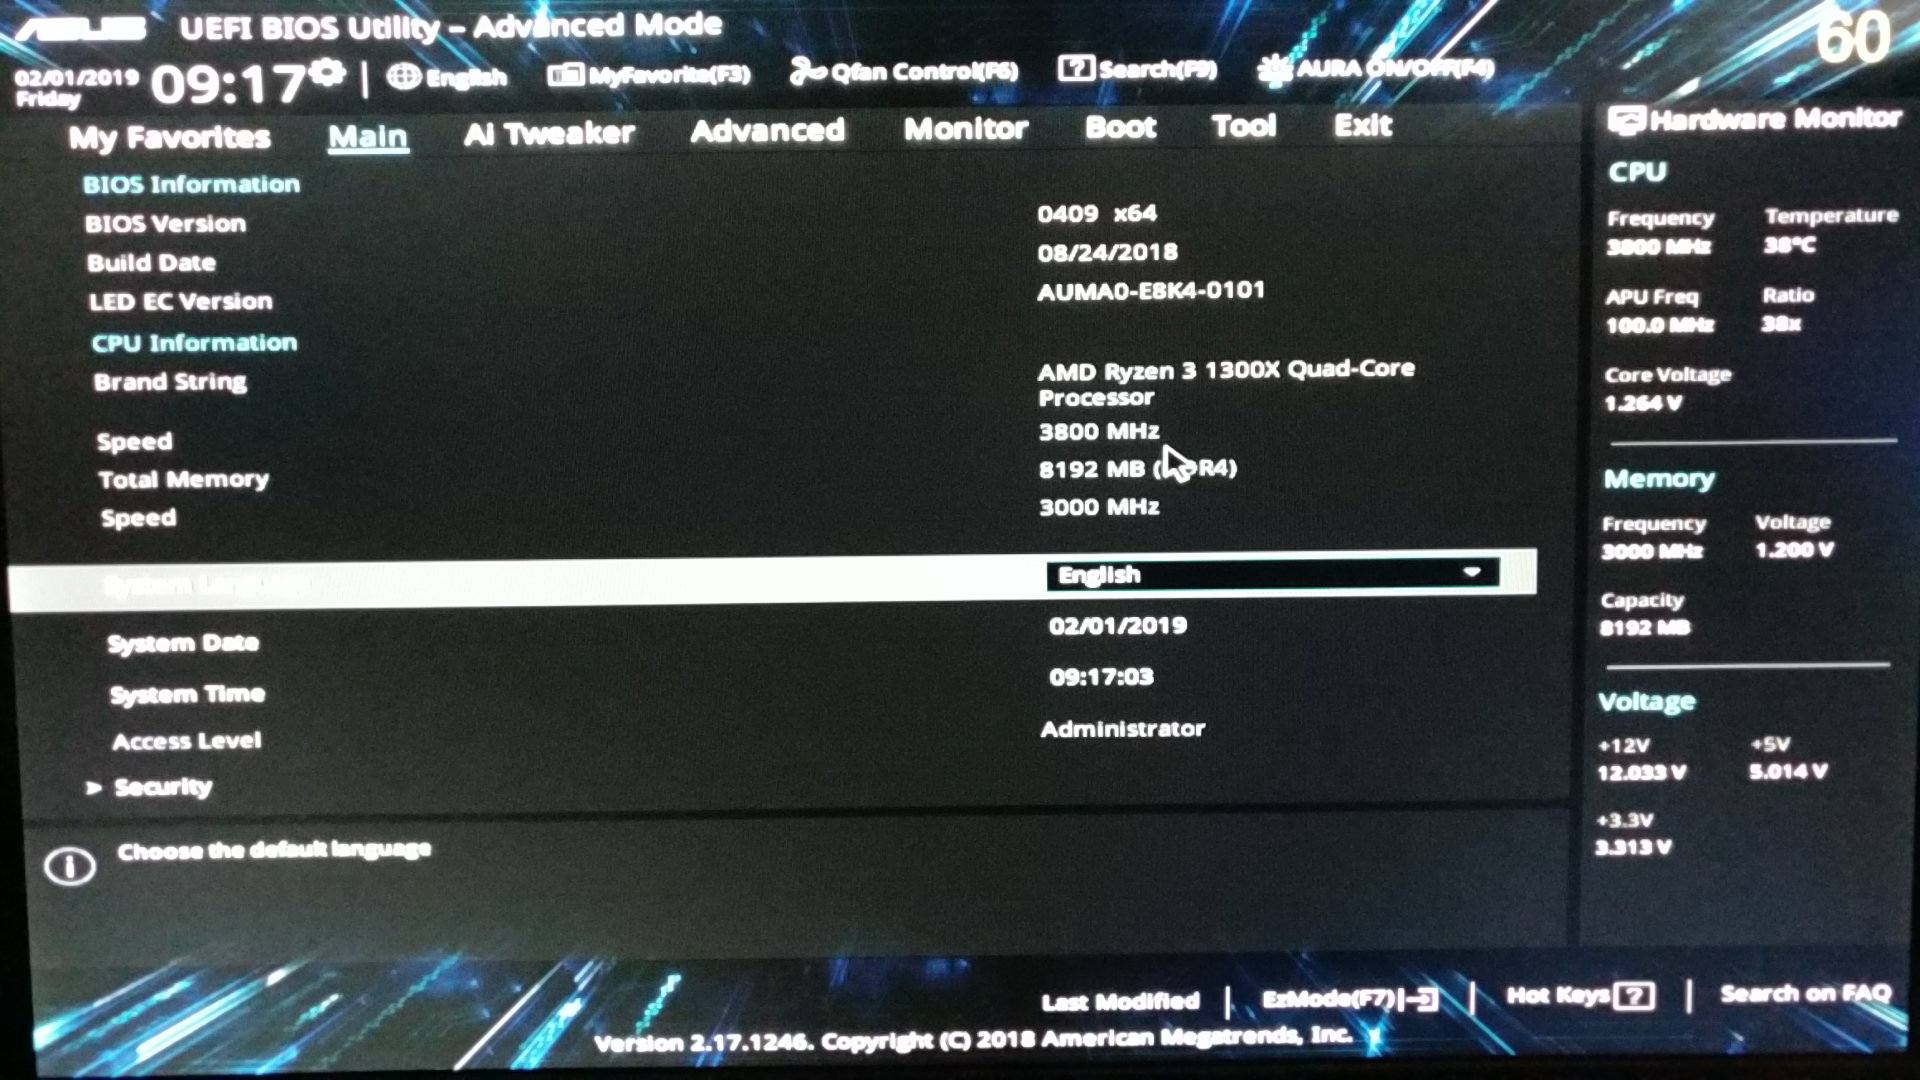
- Navigate the BIOS interface: After successfully entering the BIOS, you will be greeted with a graphical or text-based interface. Use the arrow keys on your keyboard to navigate through the menus and options. The specific layout and options can vary depending on your motherboard, but typically, the graphics card settings can be found under the “Advanced” or “Peripherals” section.
- Note down original settings: Before making any changes in the BIOS, it’s a good practice to take note of the original settings for future reference. This will allow you to revert back to the defaults if needed.
Remember, these steps are general guidelines, and your motherboard may have a slightly different process for entering the BIOS. Consult your motherboard’s manual or the manufacturer’s website for specific instructions tailored to your system.
Now that we have successfully entered the BIOS, let’s proceed to the next section, where we will discuss how to locate the graphics card settings within the BIOS interface.
Locating the graphics card settings
Once you have entered the BIOS, the next step is to locate the graphics card settings within the interface. The exact location of these settings can vary depending on your motherboard’s manufacturer and BIOS version. Here are some general steps to help you find the graphics card settings:
- Explore the BIOS menus: Navigate through the BIOS menus using the arrow keys on your keyboard. Look for menu options labeled “Advanced,” “Peripherals,” or “Graphics.” These options often contain settings related to graphics devices, including the primary display adapter or graphics card configuration.
- Look for the “Graphics” or “Video” submenu: Once you have accessed the appropriate menu, search for a submenu specifically dedicated to graphics or video settings. In this submenu, you should find options related to the graphics card, such as “Primary Display,” “Graphics Configuration,” or “Dual Graphics.”
- Inspect the available options: Within the graphics settings submenu, you may find options to enable or disable specific features, select the primary display adapter, or configure the behavior of the graphics card. These options can differ between motherboards and BIOS versions, so take your time to review them and understand their implications.
- Check for specific graphics card configurations: Some motherboards offer additional settings or options for specific graphics card brands or models. If your motherboard supports such configurations, you may find dedicated options or third-party software integration to further customize and optimize the performance of your graphics card.
- Make necessary changes: Once you have located the graphics card settings and familiarized yourself with the available options, make any desired changes. For example, if the graphics card is currently disabled, enable it by selecting the appropriate option. If there are multiple graphics card options available, ensure that the desired graphics card is set as the primary display adapter.
Remember to refer to your motherboard’s manual or the manufacturer’s website for specific instructions related to your system. The names and positions of the graphics card settings in the BIOS can differ, so it’s always recommended to consult the official documentation.
Now that we know how to locate the graphics card settings, let’s move on to the next section, where we will discuss how to enable the graphics card in the BIOS.
Enabling the graphics card
Once you have located the graphics card settings in the BIOS, the next step is to actually enable the graphics card. Enabling the graphics card ensures that it is recognized and utilized by the system for optimal performance. Here’s how you can enable the graphics card:
- Select the graphics card option: Within the graphics card settings submenu of the BIOS, locate the option that enables or activates the graphics card. This option may be labeled as “Enable Graphics Card,” “Primary Display Adapter,” or have a similar name depending on your motherboard’s BIOS interface.
- Enable the graphics card: To enable the graphics card, select the option and change the setting to “Enabled” or “Auto.” This will activate the graphics card and allow it to function as the primary display adapter.
- Save the changes: Once you have enabled the graphics card, navigate to the BIOS menu’s exit option. Select the option to save the changes you made in the BIOS. This is typically done by selecting “Save and Exit” or a similar option.
- Exit the BIOS: After saving the changes, exit the BIOS and let your computer reboot. The changes you made to enable the graphics card will take effect upon restarting.
- Update graphics card drivers (if necessary): After enabling the graphics card in the BIOS, it’s a good practice to update the graphics card drivers to ensure optimal performance. Visit the manufacturer’s website for your graphics card and download the latest drivers. Install the drivers on your computer following the provided instructions.
Remember, these steps are general guidelines, and the specific options and terminology may vary depending on your motherboard and BIOS version. It’s always recommended to consult your motherboard’s manual or the manufacturer’s website for precise instructions.
Now that we have successfully enabled the graphics card in the BIOS, let’s move on to the next section, where we will discuss how to save the BIOS changes and exit.
Saving and exiting the BIOS
After making changes to enable the graphics card in the BIOS, it’s important to save the modifications and exit the BIOS properly. Here’s how you can save the changes you made and safely exit the BIOS interface:
- Confirm the changes: Before saving the changes, take a moment to review the modifications you made in the BIOS. Ensure that you have enabled the graphics card and made any other desired adjustments. Double-checking will help avoid any unintentional errors or omissions.
- Save the changes: In the BIOS menu, look for the option to save the changes you made. This option is typically labeled as “Save and Exit,” “Save Changes and Reset,” or something similar. Select this option to save the modifications and apply them to your system.
- Confirm the exit: After saving the changes, the BIOS will prompt you to confirm the exit. Choose the option to exit the BIOS, typically labeled as “Exit” or “Exit BIOS.” This action will cause your computer to restart and implement the new BIOS settings.
- Let the computer restart: Allow your computer to restart after exiting the BIOS. The system will now recognize and utilize the enabled graphics card.
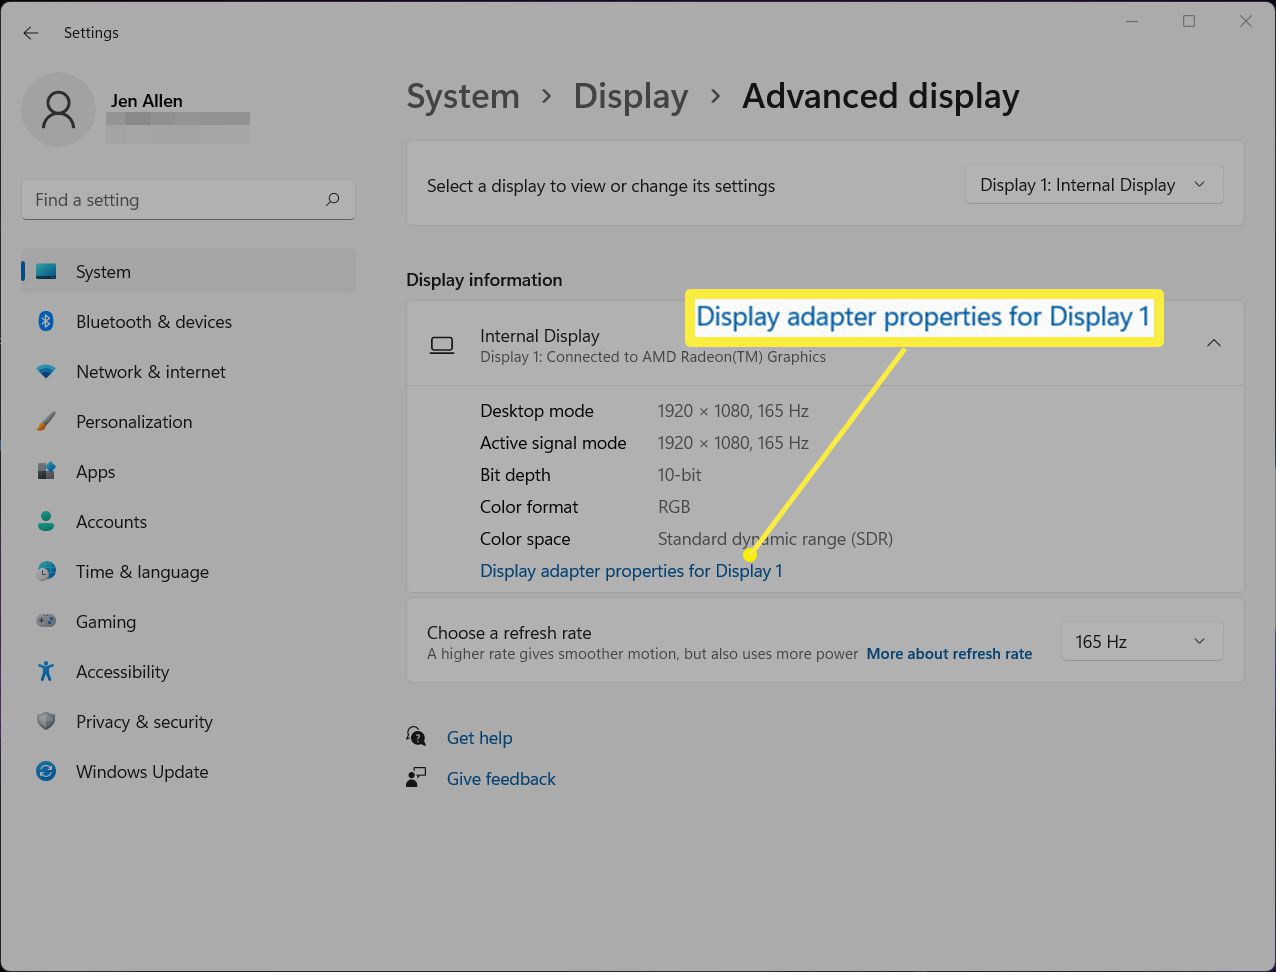
- Verify the graphics card: Once the computer has completed the restart process, verify that the graphics card is functioning correctly. Check the device manager or the graphics card control panel to ensure that the graphics card is recognized and no errors are present.
Always remember that the specific options and labels in the BIOS interface may vary depending on your motherboard and BIOS version. It’s essential to consult the manufacturer’s documentation for your specific motherboard or the motherboard’s manual to ensure the accurate and proper execution of these steps.
Now that you have successfully saved the BIOS changes and exited the BIOS, it’s time to test the graphics card and ensure it is functioning as expected. We will discuss this in the next section.
Testing the graphics card
After enabling and configuring the graphics card in the BIOS, it’s important to test its functionality to ensure everything is working correctly. Here are some steps to test the graphics card:
- Check device manager: Open the Device Manager on your computer and navigate to the Display Adapters section. Make sure that the graphics card is listed without any error symbols. If you see any errors, you might need to troubleshoot or reinstall the drivers.
- Monitor connections: Verify that your monitor is connected to the graphics card and not to the motherboard’s integrated graphics port. This ensures that the graphics card is the primary display adapter and will be used for graphics processing.
- Monitor performance: Open a graphics-intensive application or game and observe the performance. Check if the graphics card is handling the workload smoothly and delivering the expected performance. If there are any issues, you may need to troubleshoot further or update the graphics card drivers.
- Run benchmark tests: Consider running benchmark tests to evaluate the graphics card’s performance. Various benchmarking software, such as 3DMark or Heaven Benchmark, can provide detailed performance reports and help in comparing your graphics card’s performance with similar systems.
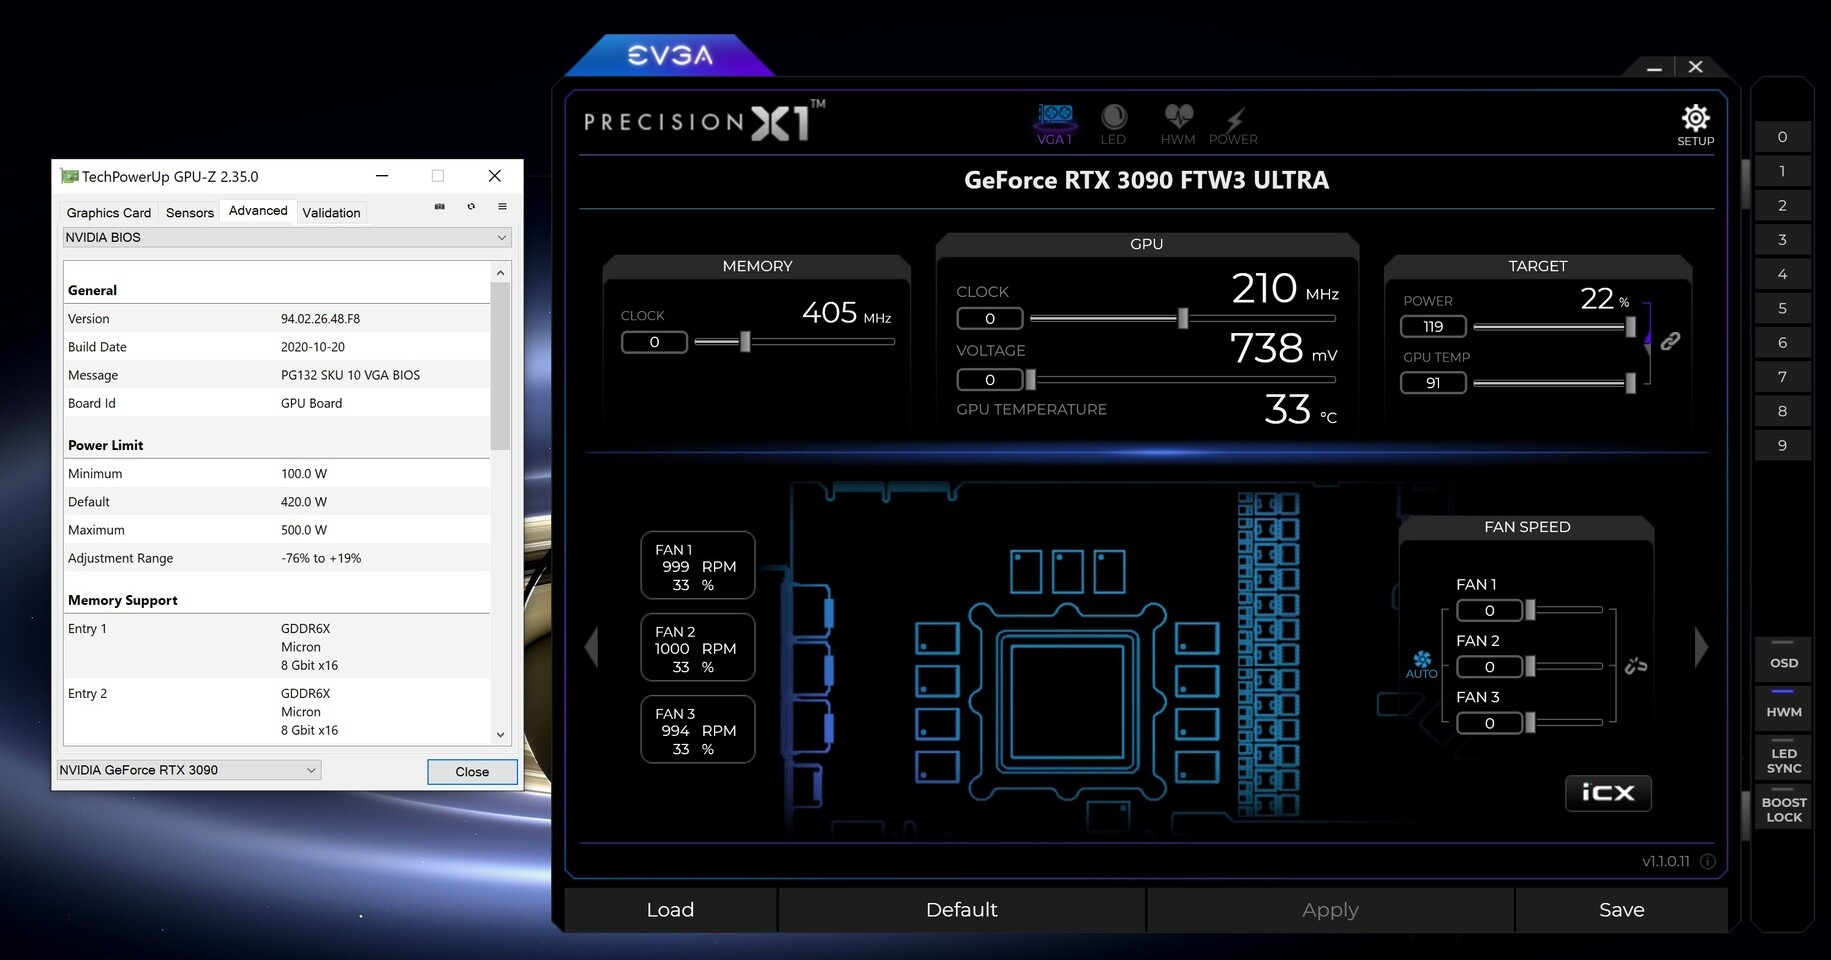
- Check temperature and cooling: Monitor the temperature of your graphics card during intensive tasks. Use software like MSI Afterburner or GPU-Z to monitor the temperature and ensure that it stays within acceptable ranges. Proper cooling is essential for long-term performance and stability.
- Test multiple applications: Test the graphics card with a variety of applications, including games, graphic design software, and video editing programs. This allows you to assess its performance in different scenarios and ensure compatibility with the software you regularly use.
By following these steps, you can ensure that the enabled graphics card is functioning properly and meeting your performance expectations. If you encounter any issues or concerns during the testing process, it may be necessary to further troubleshoot or seek assistance from the graphics card manufacturer or your system’s technical support.
Remember to keep your graphics card drivers updated regularly to ensure the best performance and compatibility with the latest software and games. Check the manufacturer’s website for driver updates specific to your graphics card model.
Now that you have successfully enabled and tested your graphics card, you are ready to enjoy its enhanced performance and capabilities for various applications and tasks.
Conclusion
Enabling a graphics card in the BIOS can be a necessary step to ensure that it is recognized and utilized by your system. Whether you have recently upgraded your graphics card or encountered issues with its detection, accessing the BIOS settings allows you to manually enable the graphics card for optimal performance.
In this guide, we started by understanding what the BIOS is and why enabling a graphics card in the BIOS might be necessary. We then explored the steps to check compatibility between your graphics card and motherboard, as well as the preparations to make before entering the BIOS.
We discussed how to enter the BIOS and locate the graphics card settings within the interface. Enabling the graphics card involved selecting the appropriate option and saving the changes before exiting the BIOS. It’s important to remember that the specific steps may vary depending on your motherboard and BIOS version.
After enabling the graphics card, we emphasized the importance of testing its functionality. Checking the device manager, observing performance in graphics-intensive applications, and monitoring temperature and cooling were highlighted as key aspects of testing the graphics card.
By following the steps provided in this guide, you can successfully enable and test your graphics card in the BIOS. However, it’s always recommended to consult your motherboard’s manual or the manufacturer’s website for specific instructions tailored to your system.
Now that you have enabled and tested your graphics card, you can enjoy improved performance and visuals in various applications such as gaming, graphic design, and video editing. Remember to keep your graphics card drivers updated regularly to ensure optimal compatibility and performance.
We hope this guide has been helpful in enabling your graphics card in the BIOS. If you have any further questions or encounter any difficulties, don’t hesitate to seek assistance from the graphics card manufacturer or your system’s technical support.