Introduction
Editing PDF files on your Android device can be a valuable skill, allowing you to make changes, add annotations, and customize your documents wherever you go. Whether you need to make last-minute edits to an important presentation or simply want to add notes to a PDF document, having a reliable PDF editing app on your Android device is essential.
In this article, we will guide you through the process of editing PDF files on Android, providing step-by-step instructions to help you get started. We will explore the necessary steps to download a PDF editing app, open the PDF file, make edits to the text and images, add annotations and highlights, and finally export and save the edited PDF file.
With the advancements in technology, there are now several PDF editing apps available for Android devices. These apps offer a range of features and tools that make editing PDFs on the go a breeze. Whether you are a student, professional, or casual user, being able to edit PDFs on your Android device can save you time and effort.
By having the ability to edit PDF files on your Android device, you can make quick changes to documents while on the move. This is particularly useful for business professionals who often find themselves working remotely or for students who need to make edits to their notes or assignments during their commute.
So, if you’re ready to learn how to edit PDF files on your Android device, let’s dive into the step-by-step guide. By the end of this article, you’ll be equipped with the knowledge and skills to confidently edit PDFs on your Android device and improve your productivity.
Step 1: Download a PDF Editing App
The first step in editing PDF files on your Android device is to download a reliable PDF editing app from the Google Play Store. There are several apps available, each with its own features and user interface. Some popular options include Adobe Acrobat Reader, Xodo PDF Reader & Editor, and Foxit PDF Reader.
To download a PDF editing app, follow these steps:
- Open the Google Play Store on your Android device.
- In the search bar at the top, type the name of the PDF editing app you want to download.
- Tap on the app from the search results to view the app’s page.
- Click on the “Install” button to download and install the app on your device.
Make sure to choose a PDF editing app that suits your needs. Consider factors such as user reviews, app ratings, and the features offered by the app. Reading through the app’s description and exploring its interface can help you determine if it meets your requirements.
Once the app is successfully downloaded and installed on your Android device, you can move on to the next step of opening the PDF file in the app.
It’s essential to note that some PDF editing apps have free versions with limited features, while others offer premium features through in-app purchases or subscription plans. Evaluate your editing needs and consider upgrading to a paid version if required.
Now that you have downloaded a PDF editing app on your Android device, you are ready to proceed with opening the PDF file and making edits. Let’s move on to the next step.
Step 2: Open the PDF File in the App
After you have downloaded a PDF editing app on your Android device, the next step is to open the PDF file you want to edit. Follow these simple steps to open the PDF file in the app:
- Launch the PDF editing app on your Android device by tapping on its icon.
- Once the app opens, you will typically see a home screen or a document library.
- Look for the option to “Open” or “Import” a file within the app.
- Tap on this option, and a file browser will appear, allowing you to navigate through your device’s storage and locate the PDF file.
- Select the desired PDF file by tapping on it.
- The app will then open the PDF file, displaying it on your screen.
Depending on the PDF editing app you have chosen, the user interface may vary slightly. Some apps may have additional features, such as the ability to connect to cloud storage services like Google Drive or Dropbox, making it easier to access your PDF files.
It’s worth exploring the app’s interface to familiarize yourself with the various tools and options available. This will help you navigate through the PDF document and make edits more efficiently.
Now that you have successfully opened the PDF file in the app, you can proceed to the next step of making edits to the PDF text and images. Let’s move on.
Step 3: Make Edits to the PDF Text and Images
Now that you have opened the PDF file in the editing app on your Android device, you can start making edits to the text and images within the document. The exact steps may vary depending on the PDF editing app you are using, but here are some general guidelines:
- Tap on the text or image you want to edit within the PDF document.
- Depending on the app you’re using, you may see options such as “Edit”, “Modify”, or “Format”. Tap on the appropriate option to make changes to the selected element.
- If you’re editing text, you can use the on-screen keyboard or an external Bluetooth keyboard (if supported by the app) to type in your edits. You can also change the font, size, color, or formatting of the text as needed.
- If you’re editing an image, you may have options to resize, crop, rotate, or even replace the image with a different one from your device’s gallery.
- Some PDF editing apps also provide advanced features like OCR (Optical Character Recognition) that can extract text from scanned documents, allowing you to edit the text even if it was originally in an image format.
- Make the desired edits to the text or images, ensuring that the changes accurately reflect what you need.
Remember to save your changes periodically to avoid losing any modifications. The app may have an auto-save feature, but it’s always a good practice to manually save your work.
It’s worth mentioning that while some basic edits can be made directly within the PDF editing app, more complex changes may require third-party tools or desktop applications. If you encounter any limitations while editing the PDF on your Android device, consider transferring the file to a computer for further modifications if necessary.
Now that you have made edits to the PDF text and images, it’s time to move on to the next step of adding annotations and highlights to the PDF. Let’s continue.
Step 4: Add Annotations and Highlights to the PDF
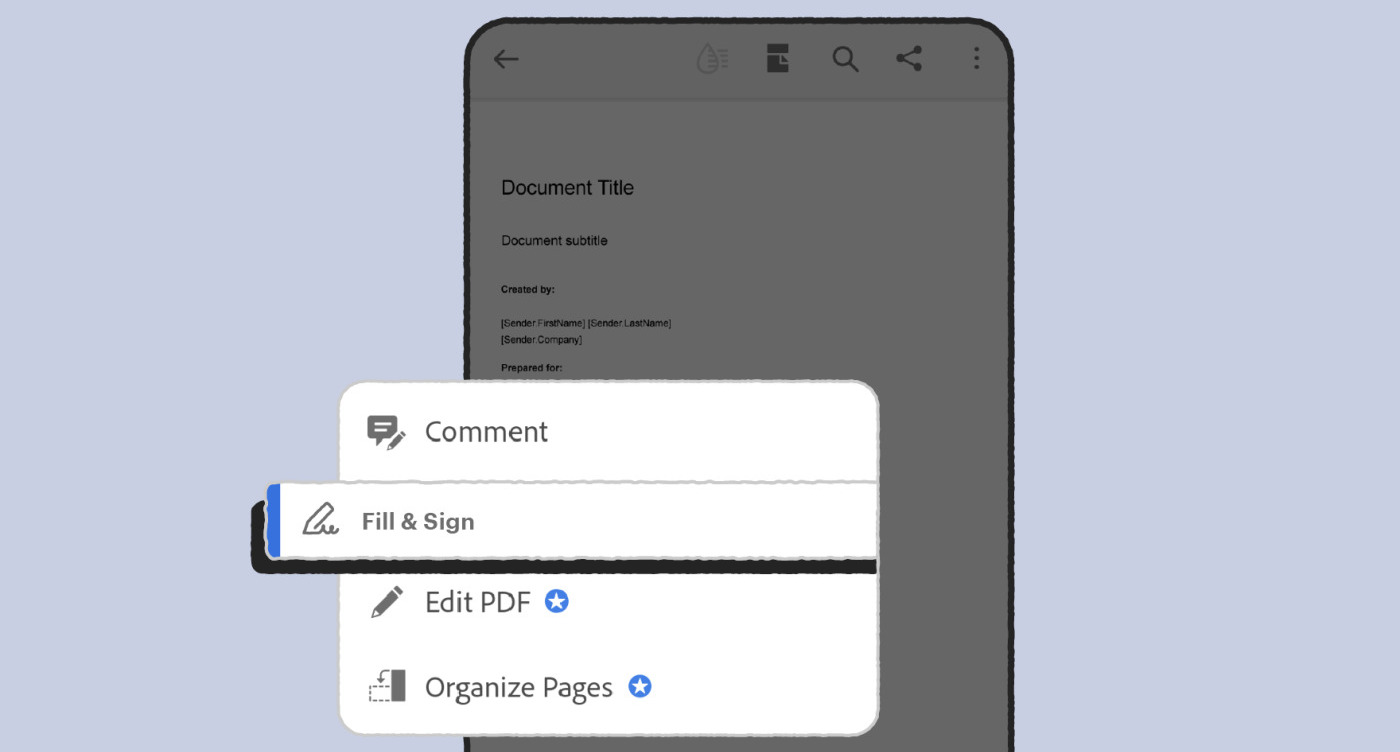
In addition to editing the text and images within a PDF file, you may also want to add annotations and highlights to further enhance the document. Annotations can include comments, sticky notes, drawings, or even signatures, depending on the features offered by the PDF editing app you are using.
Here are the steps to add annotations and highlights to a PDF on your Android device:
- Within the PDF editing app, locate the menu or toolbar that contains the annotation tools.
- Depending on the app, you may find options such as “Comments,” “Annotations,” or “Review.”
- Select the appropriate tool for the type of annotation you want to add. For example, if you want to add a comment, choose the comment tool.
- Tap on the area of the PDF where you want to place the annotation.
- Enter the text or draw the desired annotation using your finger or a stylus.
- Explore other annotation tools provided by the app, such as the ability to highlight text, underline, strikethrough, or add shapes.
- You may also have the option to change the color, size, or opacity of the annotations to suit your preferences.
- Save your annotations regularly to preserve your work.
Annotations are particularly useful for collaborative work, allowing you and your colleagues or clients to leave comments or suggestions directly within the PDF file. These annotations can easily be shared or exported to be viewed on other devices or applications.
Remember that not all PDF viewers or editing apps support annotations, so ensure that the app you choose has this feature if it is a necessary part of your editing process.
Now that you have added annotations and highlights to the PDF, it’s time to move on to the final step of exporting and saving the edited file. Let’s proceed.
Step 5: Export and Save the Edited PDF
Once you have made all the necessary edits, annotations, and highlights to your PDF file on your Android device, the final step is to export and save the edited document. This will ensure that your changes are preserved and can be accessed on other devices or shared with others.
Here’s how you can export and save the edited PDF:
- Locate the export or save option within the app’s menu or toolbar. This option is usually represented by an icon that resembles a floppy disk or a cloud with an arrow pointing upwards.
- Tap on the export or save icon to initiate the saving process.
- You may be prompted to choose a destination folder on your device or select a cloud storage service to save the edited PDF file.
- Specify the desired file name for the edited PDF document.
- Choose the file format in which you want to save the document. Common formats include PDF, PDF/A, or even Word or Excel formats.
- Depending on the app and your preferences, you may also have options to set the quality, size, or password protection for the exported PDF.
- Once you have selected the desired options, confirm the saving process, and wait for the app to complete the export.
- Once the export is complete, you will have the edited PDF file saved in the specified location, ready to be accessed or shared as needed.
Having the ability to export and save your edited PDF file ensures that you can easily access your work on other devices or share it with colleagues, clients, or friends. It’s always a good idea to save a backup copy of your edited PDF in case you need to refer back to the original version.
With your edited PDF file successfully saved, you have completed the process of editing a PDF on your Android device. You can now enjoy the convenience of making quick edits or adding annotations to your PDF documents while on the go.
Conclusion
Editing PDF files on your Android device has never been easier with the help of dedicated PDF editing apps. Whether you need to make quick textual changes, add annotations or highlights, or customize your PDF documents, these apps provide the necessary tools and features to accomplish these tasks efficiently.
In this article, we have explored the step-by-step process of editing PDF files on Android. Starting with downloading a PDF editing app from the Google Play Store, we moved on to opening the PDF file within the app, making edits to the text and images, adding annotations and highlights, and finally exporting and saving the edited PDF.
By following these steps, you can easily edit PDF files on the go, no matter where you are. The ability to make changes and add notes to your PDF documents directly on your Android device offers great convenience and flexibility.
Remember to choose a reliable and feature-rich PDF editing app that suits your needs. Take the time to explore the app’s interface and become familiar with its tools and options. This will help you make the most out of your PDF editing experience.
Whether you’re a professional who needs to edit business documents or a student who wants to annotate lecture notes, having a PDF editing app on your Android device empowers you with the ability to customize and enhance your PDF files to suit your requirements.
So, why wait? Take a look at the various PDF editing apps available on the Google Play Store, find one that suits your needs, and start editing your PDF files with ease on your Android device today!


