Introduction
Java Virtual Machine (JVM) is a crucial component for running Java applications on various operating systems. It acts as an interpreter between the Java code and the underlying hardware, allowing compatibility and portability of the programs. Whether you’re a developer or simply need to run Java applications on your computer, downloading and installing JVM is essential.
In this guide, we will walk you through the step-by-step process of downloading Java Virtual Machine. Whether you’re using Windows, macOS, or Linux, the process is relatively similar. By following these instructions, you will have JVM up and running on your device in no time, ready to execute Java programs smoothly.
Before diving into the steps, it’s important to note that JVM comes bundled with the Java Development Kit (JDK) or the Java Runtime Environment (JRE). These packages include not only the JVM but also other tools and libraries necessary for developing or running Java applications. You can choose to install the JDK if you’re a developer or the JRE if you only need to run Java programs.
So, without further ado, let’s get started on downloading Java Virtual Machine and unleashing its power on your computer.
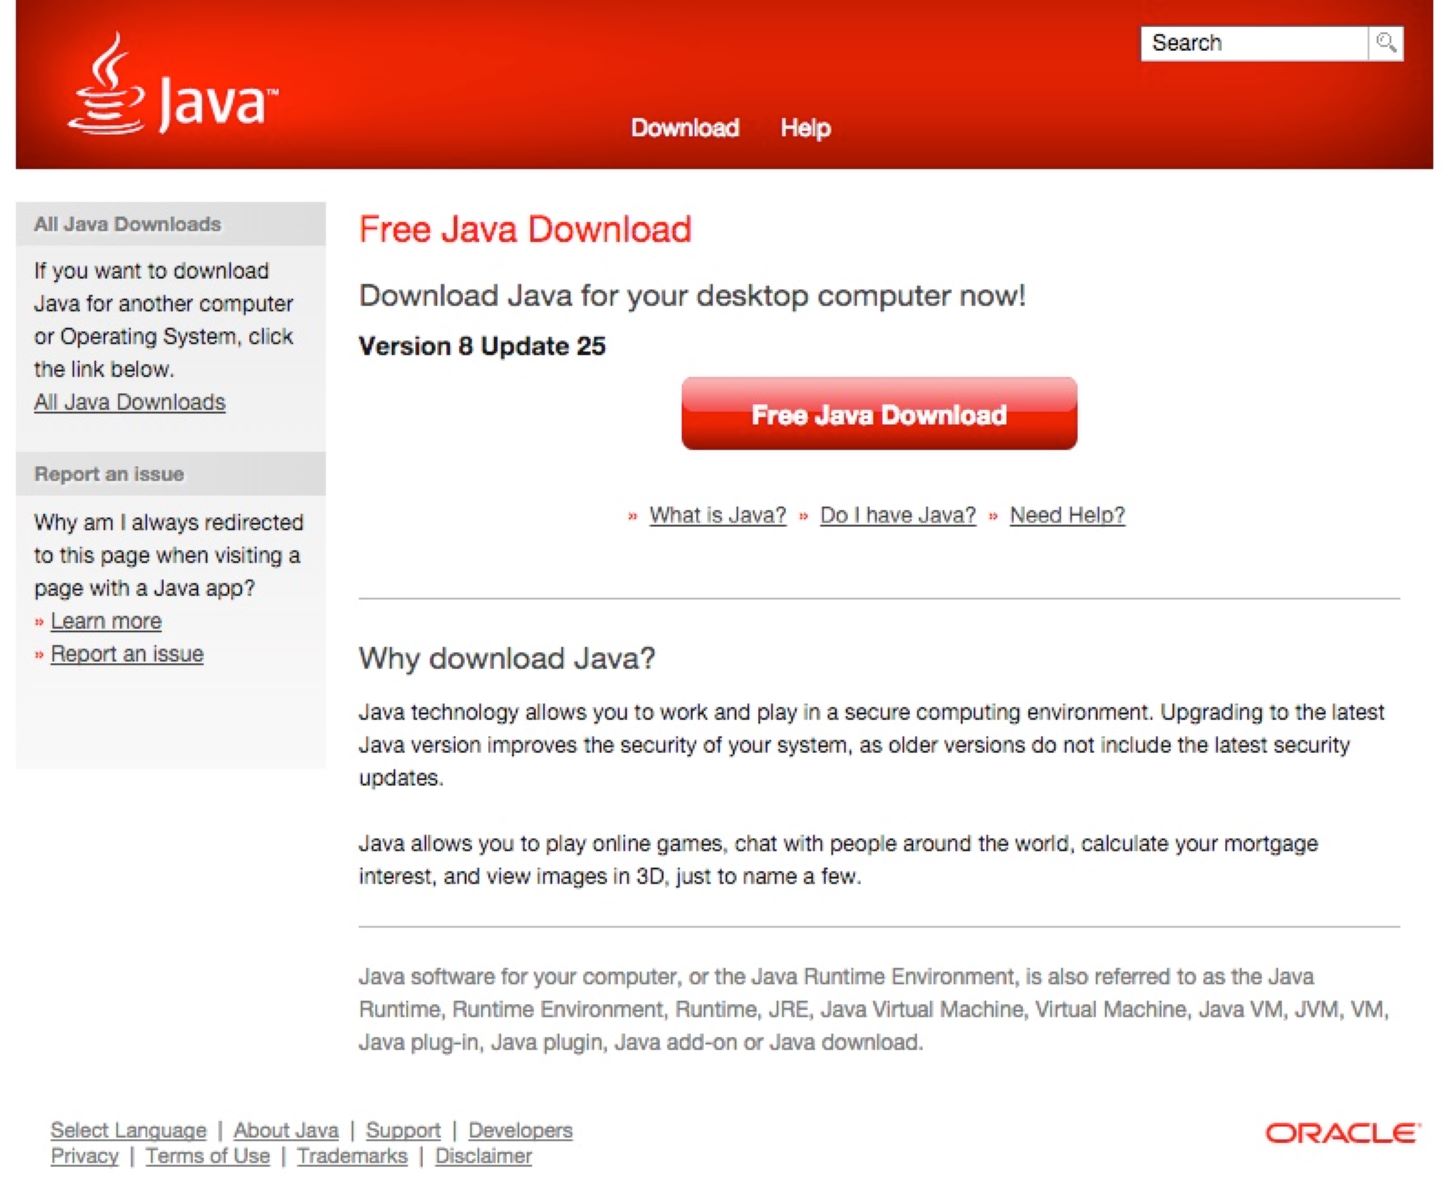
Step 1: Go to the Official Java Website
The first step to download Java Virtual Machine is to visit the official website of Java. Launch your preferred web browser and type in the URL: www.java.com. Once the website loads, you will be greeted with the homepage, which provides information about Java and its various offerings.
On the Java website, you will find the latest version of Java available for download. Java is known for its frequent updates, so it’s recommended to always install the latest version to ensure optimal performance and security. The homepage usually displays a prominent “Download” button, which you should click to proceed to the download page.
Alternatively, you can navigate to the “Downloads” or “Java SE” section on the website. From there, you can select the appropriate version of Java Virtual Machine based on your requirements.
Once you’re on the download page, make sure to review any important information or release notes related to the version you’re about to download. This can provide insights into new features, bug fixes, or any known issues that you should be aware of.
Additionally, the Java website might offer other downloads and tools related to Java, such as the Java Development Kit (JDK), documentation, or additional libraries. Make sure to focus on downloading the Java Virtual Machine specifically, as it is the primary component required for running Java applications.
With the official Java website loaded and the appropriate version selected, you’re now ready to proceed with the next step of accepting the terms and conditions to initiate the download process.
Step 2: Accept the Terms and Conditions
After landing on the Java download page, you will typically find a checkbox or a button that asks you to accept the terms and conditions before proceeding with the download. It’s essential to carefully read and understand these terms to ensure that you comply with the licensing agreements and usage restrictions associated with Java Virtual Machine.
By accepting the terms and conditions, you acknowledge that you will use the software in accordance with the specified guidelines and limitations. These terms outline important legal aspects, including copyright, intellectual property rights, and restrictions on reverse engineering or modification of the JVM.
To proceed with the download and installation, click on the checkbox or button that confirms your acceptance of the terms and conditions. By doing so, you demonstrate your agreement to abide by the terms set forth by Oracle, the company behind Java.
It’s worth mentioning that Oracle periodically updates these terms and conditions, so it’s crucial to review them each time you download a new version of Java Virtual Machine. Staying informed ensures that you are aware of any changes or updates to the licensing terms and preserves the legality of your usage.
Once you have accepted the terms and conditions, you can move forward to the next step, where you choose the specific version of Java Virtual Machine that suits your needs and matches your operating system.
Step 3: Choose the Version of Java Virtual Machine
Choosing the right version of Java Virtual Machine (JVM) is crucial to ensure compatibility with your operating system and to take advantage of the latest features and improvements. The Java website typically provides multiple versions, giving you the flexibility to select the one that best fits your needs.
Before selecting a version, consider factors such as your operating system, the Java applications you intend to run, and any specific requirements or dependencies. The website usually provides clear indications on which version is recommended for different operating systems.
If you’re unsure about which version to choose, it is common practice to opt for the latest stable release, as it incorporates the latest bug fixes, security patches, and performance enhancements. However, keep in mind that in certain cases, older versions might be necessary due to compatibility issues with legacy applications or specific hardware configurations.
If you’re a developer, consult the documentation and requirements of your development environment or framework to determine which JVM version is recommended or required for your projects. Development tools and libraries may have specific version dependencies that you need to consider.
Once you have identified the appropriate JVM version, you can proceed to the next step, where you select the corresponding operating system variant for your device.
Step 4: Select the Operating System
Selecting the correct operating system variant is crucial when downloading Java Virtual Machine (JVM) to ensure compatibility and optimal performance. The Java website offers different versions of JVM tailored to various operating systems, including Windows, macOS, and various flavors of Linux.
Take note of your operating system and carefully choose the corresponding variant from the available options. This ensures that you download the right package that seamlessly integrates with your specific operating system.
If you are using a Windows operating system, you will typically find options for 32-bit and 64-bit versions. To determine which to choose, consider the architecture of your system. Most modern computers are 64-bit, but if you are unsure, you can check by going to your computer’s System Properties or consulting the manufacturer’s specifications.
For macOS users, JVM versions are typically compatible with the latest macOS releases. Ensure that you select the version that matches your macOS version.
For Linux users, the Java website provides options for various distributions such as Ubuntu, Fedora, and CentOS. Make sure to select the version that corresponds to your specific Linux distribution to ensure the best compatibility and performance.
In some cases, the Java website may also offer options for other operating systems such as Solaris or FreeBSD, depending on your specific requirements.
Once you have identified and selected the correct operating system variant, you are now ready to proceed to the next step: downloading the Java Virtual Machine setup file.
Step 5: Download the Java Virtual Machine Setup
Once you have chosen the appropriate version of Java Virtual Machine (JVM) for your operating system, it’s time to download the setup file. The Java website provides a straightforward and user-friendly interface to initiate the download process.
On the download page, you will typically find a button or link labeled “Download” or “Download Now” associated with the selected JVM version. Click on this button to initiate the download.
Before the download begins, your web browser may prompt you to confirm the action or specify a download location on your computer. Ensure that you choose a suitable location for the downloaded setup file so that you can easily locate it later during the installation process.
Depending on your internet connection speed and the size of the JVM setup file, the download may take a few seconds to a few minutes. During this time, it is recommended to avoid interrupting the download process or closing the browser tab to prevent any potential issues.
While the JVM setup file is downloading, it’s a good opportunity to review the documentation or release notes for the chosen version. These resources can provide valuable insights into new features, bug fixes, or known issues associated with the JVM version you’re about to install.
Once the download is complete, you’re now ready to move on to the next step: running the Java Virtual Machine setup file and initiating the installation process.
Step 6: Run the Setup File
With the Java Virtual Machine (JVM) setup file successfully downloaded to your computer, it’s time to run the file and begin the installation process. Running the setup file is a straightforward process that varies slightly depending on your operating system.
Locate the downloaded JVM setup file on your computer. It is usually saved in the default download folder or the location you specified during the download. Double-click on the setup file to initiate the installation wizard.
On Windows, you may encounter a User Account Control (UAC) prompt asking for your permission to proceed with the installation. Click “Yes” to authorize the setup application to make changes to your system.
The installation wizard will guide you through the installation process. You may be presented with options or settings for customizing the installation. It is generally recommended to stick with the default settings unless you have specific requirements or preferences.
Read the prompts and instructions carefully as you progress through the installation wizard. The wizard may display information about the version you are installing, the destination folder where JVM will be installed, and any additional components or features that will be included.
Once you have reviewed and confirmed the installation settings, click on the “Install” or “Next” button to begin the installation process. The setup program will then extract and copy the necessary files to your computer.
The installation process may take a few moments to complete, depending on the speed of your computer and the chosen installation options. It is advisable not to interrupt the process or shut down your computer during this time.
Once the installation is finished, you have successfully run the JVM setup file on your computer. The next step is to complete the installation process, which we will cover in the next section.
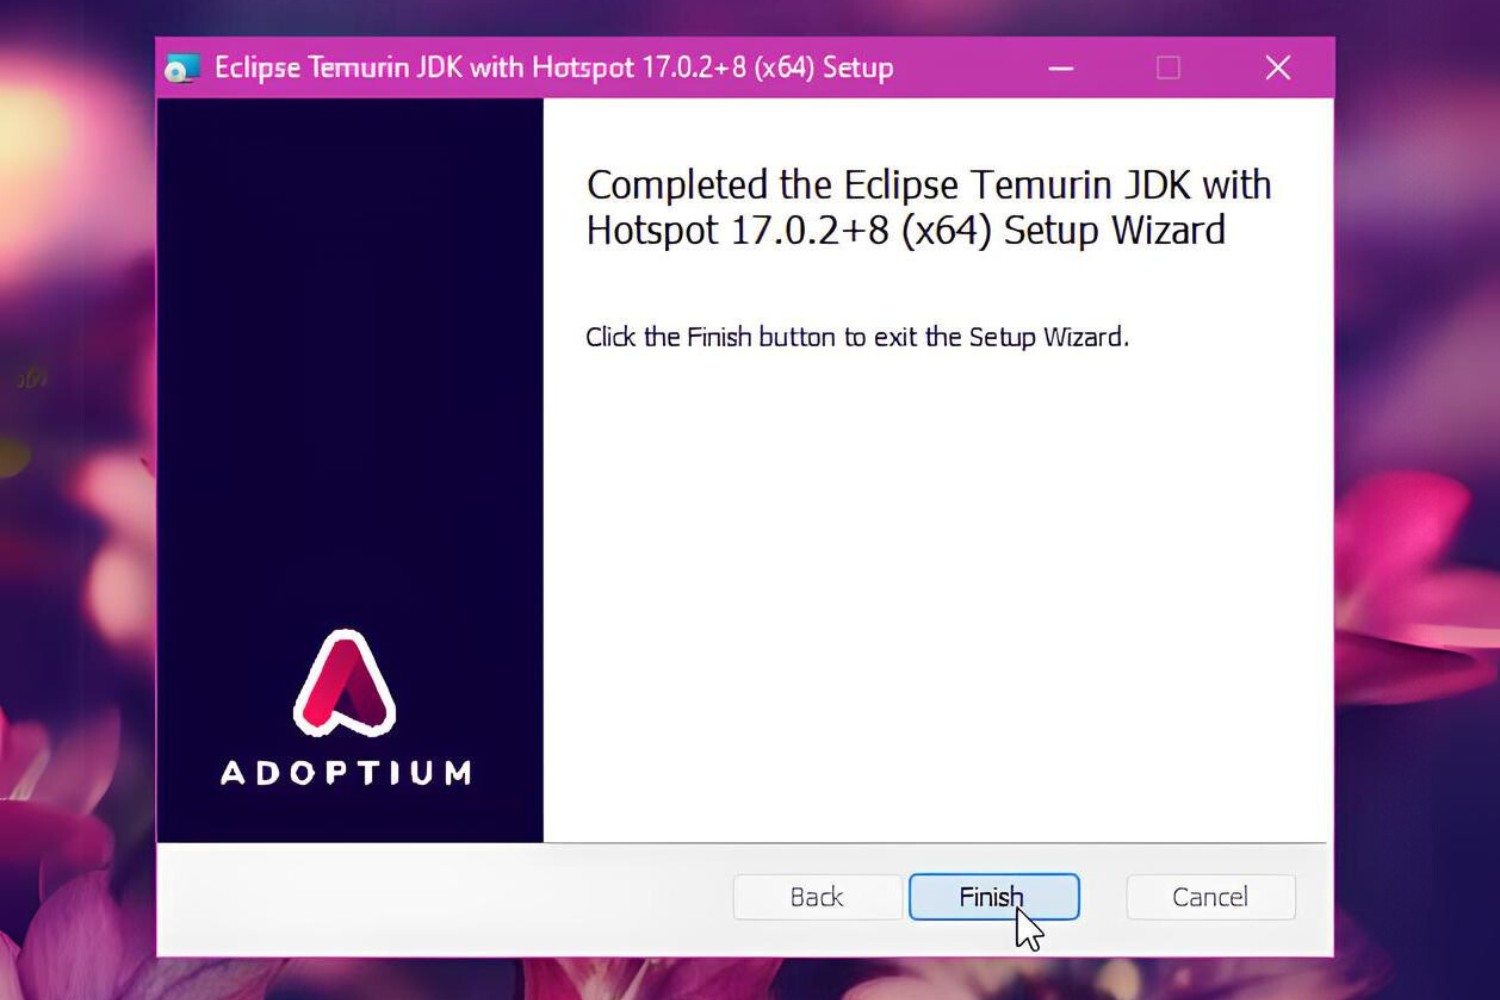
Step 7: Complete the Installation Process
Congratulations! You have successfully run the Java Virtual Machine (JVM) setup file on your computer. Now it’s time to complete the installation process to ensure that JVM is fully installed and ready to use.
After the installation wizard finishes copying the necessary files to your computer, you may be presented with a completion screen or a confirmation message indicating that Java Virtual Machine has been installed successfully. Take a moment to review this information and ensure that there are no error messages or warnings.
Once the installation is complete, it is recommended to restart your computer. This helps ensure that any system settings or configurations associated with JVM are properly initialized.
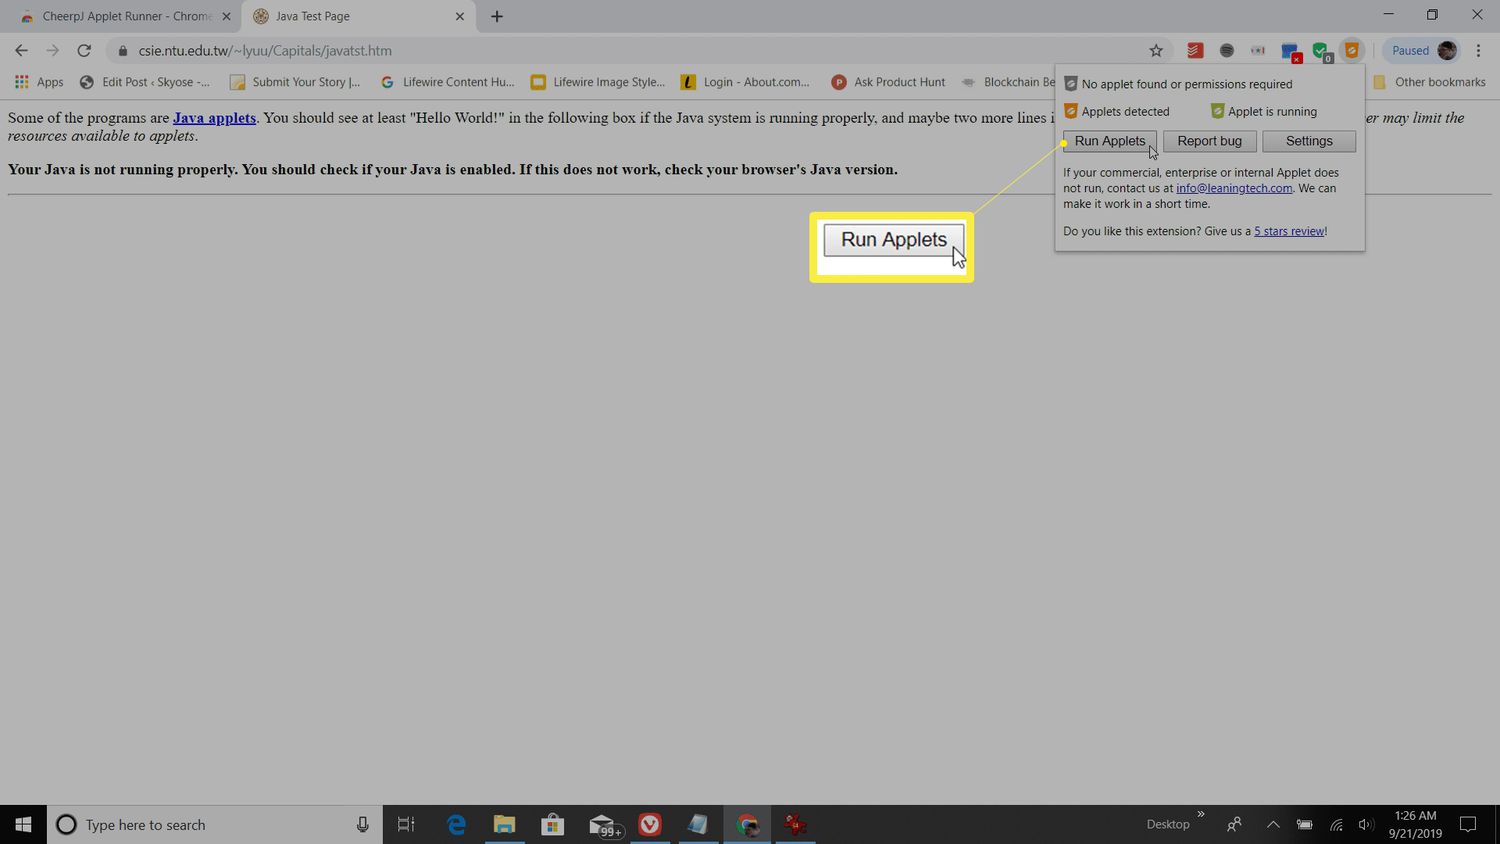
After restarting your computer, you can verify that Java Virtual Machine is installed correctly by opening a command prompt or terminal window and typing “java -version”. This command should display the Java version information, confirming that JVM is successfully installed and accessible from the command line.
Now that Java Virtual Machine is installed, you can start running Java applications or utilize other Java-related tools and libraries on your computer. Developers can set up their development environments, while non-developers can enjoy the benefits of JVM by running Java-based applications or applets.
Keep in mind that as with any software, JVM may require periodic updates to address security vulnerabilities or introduce new features. It is essential to keep your JVM installation up to date by regularly checking for updates either through the Java website or via automatic updates if enabled on your system.
By completing the installation process, you have successfully installed Java Virtual Machine on your computer. Enjoy the wide world of Java applications and explore the limitless possibilities that JVM offers!
Conclusion
In this guide, we have walked you through the step-by-step process of downloading and installing Java Virtual Machine (JVM) on your computer. JVM is a crucial component for running Java applications, providing compatibility and portability across different operating systems.
We started by visiting the official Java website, where you can find the latest version of JVM available for download. After accepting the terms and conditions, we guided you through selecting the appropriate version of JVM and the corresponding operating system variant.
Once you had chosen the right version, we explained how to download the JVM setup file from the official website. After downloading, we covered the process of running the setup file and initiating the installation process.
Finally, we concluded by emphasizing the importance of completing the installation process and restarting your computer to ensure a successful installation. We also mentioned the relevance of keeping JVM updated to benefit from the latest features, bug fixes, and security enhancements.
Now that you have successfully installed JVM, you can enjoy running Java applications, developing your own projects, or exploring the vast Java ecosystem. Java’s versatility and wide usage make it a powerful programming language, and with JVM, you have the foundation to take full advantage of it.
We hope this guide has provided you with the necessary information and guidance to download and install Java Virtual Machine with ease. Happy Java programming and may your JVM experience be smooth and enjoyable!