Introduction
Welcome to our guide on how to delete data from an external hard drive. External hard drives are a great way to store and backup your important files, but over time, you may find that some files are no longer needed or taking up valuable space. Whether you want to make room for new files or simply declutter your storage, deleting data from your external hard drive is a straightforward process.
In this guide, we will walk you through the step-by-step process of deleting data from an external hard drive, ensuring that you can free up space without any hassle. We will cover both the basic method of deleting files and folders, as well as optional steps to securely erase the deleted data to protect your privacy.
Before we get started, it’s important to note that deleting data from an external hard drive is a permanent action. Once deleted, the files cannot be recovered unless you have a backup. Therefore, it is crucial to double-check and ensure that you are deleting the correct files or folders. Now, let’s dive into the steps to delete data from your external hard drive.
Step 1: Connect the external hard drive to your computer
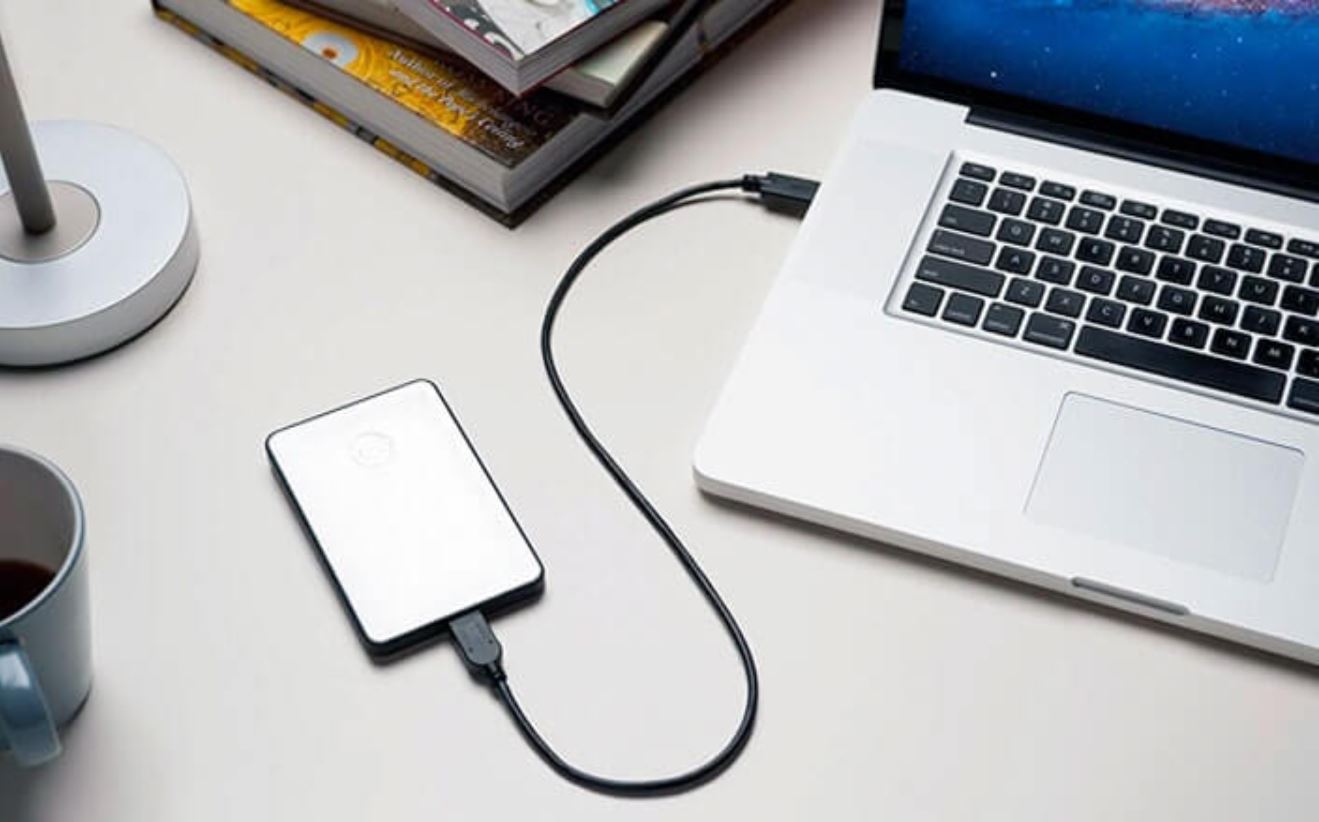
The first step in deleting data from an external hard drive is to establish a connection between the hard drive and your computer. Depending on the type of external hard drive you have, the connection method may vary.
If you have a portable external hard drive, it typically connects to your computer via a USB cable. Ensure that the USB cable is securely plugged into both the external hard drive and an available USB port on your computer.
For desktop external hard drives, they might connect through USB, eSATA, or even wirelessly. Follow the manufacturer’s instructions to properly connect and establish a stable connection between your external hard drive and computer.
Once the connection is made, your computer should recognize the external hard drive. You may see a notification or an icon appear on your desktop indicating that the external hard drive is detected and ready for use.
Before proceeding to the next step, it’s essential to ensure that your computer has recognized the external hard drive and that it is accessible. You can easily verify this by opening your file explorer (Windows) or finder (Mac) and checking if the external hard drive is listed in the available drives or devices section.
Once you have successfully connected the external hard drive to your computer and verified its accessibility, you are ready to move on to the next step.
Step 2: Open the file explorer/finder
After connecting the external hard drive to your computer, the next step is to open the file explorer (Windows) or finder (Mac) to access the files and folders on your external hard drive.
To open the file explorer on a Windows computer, you can either click on the folder icon located on the taskbar or press the “Windows key + E” shortcut on your keyboard. This will launch the file explorer window, where you can navigate through your computer’s drives and folders.
On a Mac computer, you can open the finder by clicking on the smiley face icon located on the dock or by pressing “Command + Spacebar” to open Spotlight search and typing “finder” before hitting enter.
Once the file explorer or finder window is open, you should see a sidebar or a list of available drives and devices on the left-hand side. Look for the name or icon of your external hard drive and click on it to access its contents.
Upon selecting your external hard drive, the file explorer or finder window will display all the files and folders stored on the device. You can navigate through the folders and subfolders just like you would navigate through your computer’s internal storage.
By opening the file explorer or finder, you have gained access to the files and folders on your external hard drive, allowing you to proceed to the next step of selecting the data you wish to delete.
Step 3: Locate the external hard drive
Once you have opened the file explorer (Windows) or finder (Mac), the next step is to locate your external hard drive within the file directory. This will allow you to easily identify and access the specific files and folders you want to delete.
In the file explorer (Windows), you will find the drives listed under the “This PC” or “My Computer” section on the left-hand side of the window. Look for the name or icon that represents your external hard drive. It might be labeled with the brand name or a specific model number. Click on the label to expand and display the contents of the drive.
For Mac users, you will find the external hard drive listed in the finder sidebar under “Devices” or “Locations.” It will be represented by its name or icon. Click on the label to reveal the files and folders contained within the external hard drive.
If you have trouble locating your external hard drive in the file directory, you can also use the search function within the file explorer or finder. Simply type in the name of your external hard drive, and the system will display any matching results.
Once you have successfully located your external hard drive in the file directory, you are ready to proceed to the next step of selecting the specific files and folders that you want to delete.
Step 4: Select the files or folders you want to delete
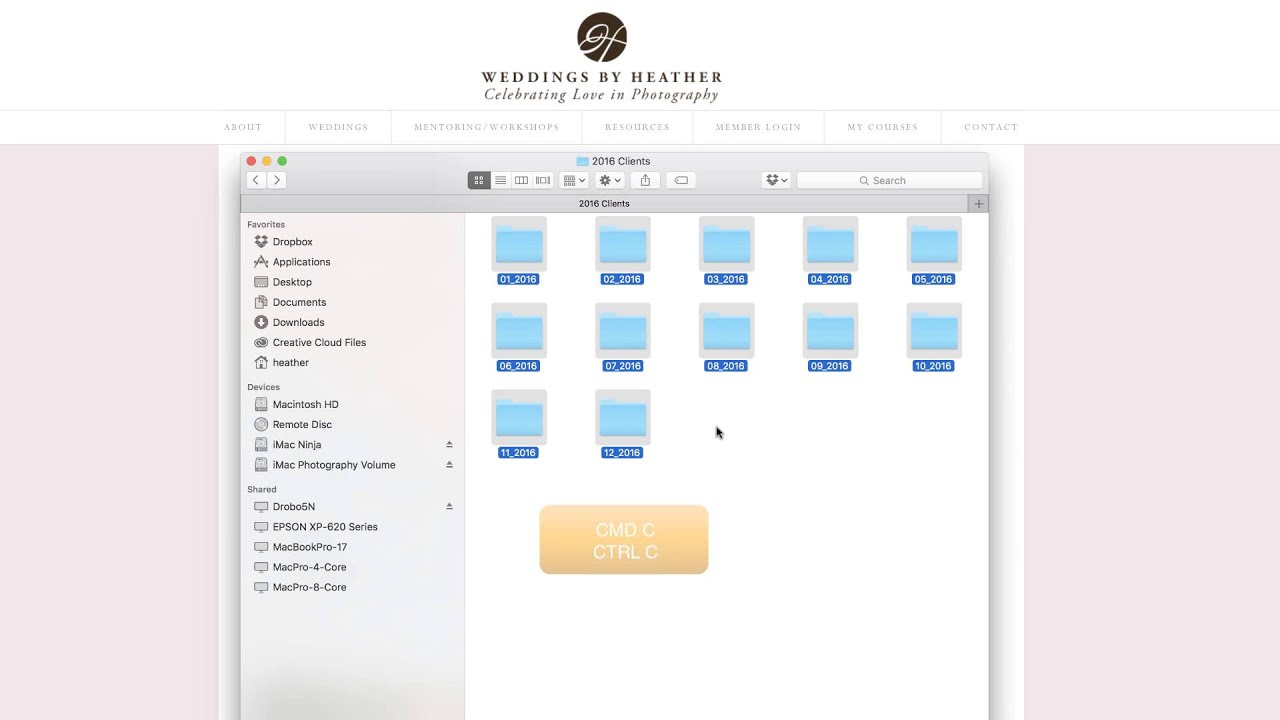
Now that you have located your external hard drive in the file explorer (Windows) or finder (Mac), it’s time to select the specific files or folders that you wish to delete. This step allows you to have full control over the data you want to remove from your external hard drive.
To select individual files, simply navigate through the folders and subfolders on your external hard drive and click on the files you want to delete. You can hold down the “Ctrl” key (Windows) or the “Command” key (Mac) to select multiple files at once. The selected files will be highlighted or displayed with a checkmark.
If you want to delete an entire folder along with its contents, click on the folder to highlight it, and then proceed to the next step. Keep in mind that deleting a folder will permanently remove all files and subfolders contained within it.
If you want to select all the files and folders within your external hard drive, you can use the “Ctrl + A” shortcut (Windows) or the “Command + A” shortcut (Mac). This will highlight all the files and folders on the external hard drive, allowing you to delete them collectively.
Before proceeding to the next step, double-check that you have selected the correct files and folders for deletion. It’s important to be cautious and ensure that you don’t accidentally select and delete any important files.
Now that you have successfully selected the files or folders you want to delete, you are ready to move on to the next step, where we will discuss how to delete them properly.
Step 5: Right-click or use the delete shortcut
Once you have selected the files or folders you want to delete from your external hard drive, it’s time to proceed with the actual deletion process. There are a couple of methods you can use to delete the selected data.
The most common method is to right-click on the selected files or folders. A context menu will appear, showing a list of options. Look for the “Delete” or “Move to Trash” option and click on it. This action will send the selected files or folders to the recycle bin (Windows) or trash (Mac).
Another method is to use the delete shortcut on your keyboard. For Windows users, simply press the “Delete” key. For Mac users, press the “Command + Delete” keys. This will initiate the deletion process and move the selected files or folders to the recycle bin or trash.
It’s important to note that deleting files or folders using these methods only moves them to the recycle bin or trash, rather than permanently deleting them from your external hard drive. This allows you to retrieve them if needed before emptying the recycle bin or trash.
If you want to bypass the recycle bin or trash and permanently delete the selected data from your external hard drive right away, you can use the “Shift + Delete” shortcut on Windows or the “Command + Option + Delete” shortcut on Mac. However, exercise caution when using this method, as the deleted data cannot be easily recovered.
Now that you have performed the initial deletion process, you are almost done. In the next step, we will discuss how to confirm the deletion and ensure that the selected files or folders are permanently removed from your external hard drive.
Step 6: Confirm the deletion
After you have right-clicked on the selected files or folders and chosen the “Delete” or “Move to Trash” option, a confirmation prompt will usually appear to confirm your intention to delete the files or folders from your external hard drive.
In the confirmation prompt, you will typically be asked to confirm whether you want to move the selected files or folders to the recycle bin (Windows) or trash (Mac). This prompt serves as a safety measure to prevent accidental deletions.
Take a moment to review the prompt and make sure it accurately lists the files or folders you want to delete. If everything looks correct, proceed with confirming the deletion by clicking “Yes”, “OK”, or a similar affirmative option.
Once you have confirmed the deletion, the selected files or folders will be moved to the recycle bin or trash, depending on your operating system. They will no longer be visible in the file explorer (Windows) or finder (Mac), indicating that they have been successfully deleted from your external hard drive.
However, it’s important to note that the deletion is not yet permanent. The files or folders are still recoverable from the recycle bin or trash until they are permanently removed.
In the next step, we will discuss how to properly empty the recycle bin or trash and ensure that the deleted data is permanently erased from your external hard drive.
Step 7: Empty the trash or recycle bin (optional)
After deleting the files or folders from your external hard drive, they are typically moved to the recycle bin (Windows) or trash (Mac), where they will be stored temporarily until you decide to permanently remove them from your system.
Emptying the trash or recycle bin is an optional step but recommended if you want to free up space on your external hard drive and ensure that the deleted data cannot be easily recovered.
To empty the recycle bin in Windows, simply right-click on the recycle bin icon on your desktop or in the file explorer. From the context menu, choose the “Empty Recycle Bin” option. Confirm the action when prompted, and the recycle bin will be emptied, permanently deleting the deleted files from your external hard drive.
For Mac users, emptying the trash is also straightforward. Click on the trash icon in the dock or open the finder and select “Empty Trash” from the “Finder” menu or the right-click context menu. Confirm the action when prompted, and the trash will be emptied, permanently removing the deleted files from your external hard drive.
Keep in mind that once you empty the trash or recycle bin, the deleted files cannot be easily recovered. Therefore, it’s crucial to double-check and ensure that you have selected the correct files and folders for permanent deletion.
If you decide not to empty the trash or recycle bin immediately, the deleted files will remain in the bin until it reaches its storage capacity or until you manually empty it. However, be aware that leaving the deleted files in the trash or recycle bin still takes up space on your external hard drive.
With the trash or recycle bin emptied, you have successfully completed the deletion process for the selected files or folders from your external hard drive. However, if you want to take an extra step to ensure the secure deletion of the data, continue to the next optional step.
Step 8: Securely erase the deleted data (optional)
While deleting files and emptying the trash or recycle bin may remove the deleted data from your external hard drive, it is still possible for skilled individuals to recover that data using specialized software. If you are concerned about privacy and want to ensure the complete and secure erasure of the deleted data, you can take an additional step to securely erase it from your external hard drive.
There are several methods you can use to securely erase the deleted data:
- Formatting the external hard drive: Formatting the external hard drive will erase all data stored on it, including the deleted data. Keep in mind that this method will delete all the files and folders on the external hard drive, so make sure to back up any important data before proceeding. To format the external hard drive, right-click on its icon in the file explorer (Windows) or finder (Mac), and select the “Format” option. Follow the on-screen instructions to complete the formatting process.
- Using data erasure software: There are various data erasure software programs available that can securely overwrite the deleted data on your external hard drive, making it nearly impossible to recover. These programs typically offer different levels of security, such as multiple passes or military-grade algorithms. Some popular data erasure software options include CCleaner, Eraser, and DBAN (Darik’s Boot and Nuke).
- Physically destroying the external hard drive: If you have highly sensitive data that must not be recovered under any circumstances, physically destroying the external hard drive is the most secure method. This can be done by shredding the hard drive, using a drill to make holes in it, or even by using a professional hard drive destruction service.
Choose the method that best suits your needs and the level of security you require. It’s important to note that securely erasing the deleted data from your external hard drive is an optional step and may not be necessary for every situation.
With this optional step, you have completed the process of deleting and securely erasing the data from your external hard drive, ensuring that it cannot be easily recovered. Now you can confidently utilize the newly freed up space on your external hard drive for storing new files or data.
Conclusion
Congratulations! You have successfully learned how to delete data from an external hard drive. By following the step-by-step guide provided, you can confidently navigate through the process of deleting unwanted files and folders, freeing up space on your external hard drive, and ensuring the security of your data.
Remember, when deleting data from your external hard drive, always double-check the files and folders you have selected to avoid accidentally deleting important information. Take advantage of the various methods available, such as right-clicking and using the delete shortcut, to streamline the deletion process.
If you want to go the extra mile in securing your data, consider emptying the recycle bin or trash to permanently remove deleted files, and optionally, securely erase the deleted data using formatting, data erasure software, or physically destroying the external hard drive.
As always, it’s essential to maintain backups of your important files to avoid any data loss. Regularly backing up your external hard drive will give you peace of mind and ensure that your valuable information is safe and accessible.
Now that you are equipped with the knowledge and tools to delete data from your external hard drive, you can efficiently manage your storage space and keep your files organized. Remember to exercise caution and make informed decisions when deleting data to avoid any unintended consequences.
Thank you for following along with our guide. We hope this information has been helpful to you in managing your external hard drive and optimizing your storage efficiency.