Introduction
Welcome to our guide on how to delete an Administrator account in Windows 10. The Administrator account on your computer is a powerful one, allowing you to make changes to system settings and install software. However, there may come a time when you no longer need the Administrator account or want to remove it for security reasons. In this article, we will walk you through several methods to delete an Administrator account in Windows 10.
It is important to note that deleting an Administrator account will permanently remove all its associated files, settings, and data. Therefore, it is recommended to back up any important files before proceeding with the deletion. Additionally, it is advisable to create a new standard user account to replace the Administrator account if you still require administrative privileges.
We will be discussing four different methods to delete the Administrator account in Windows 10. The first method involves using the Settings app, the second method utilizes the Command Prompt, the third method utilizes the Computer Management tool, and the fourth method involves using System Restore. Depending on your preference and expertise, you can choose the method that suits you best.
Before we begin, please ensure that you have administrative privileges or have access to an account with administrative rights. Without administrative rights, you will not be able to delete the Administrator account or make any significant changes to your computer’s settings.
Now, let’s dive into the details of each method on how to delete an Administrator account in Windows 10. Follow the step-by-step instructions in the following sections to successfully remove the Administrator account from your computer.
Method 1: Deleting Administrator Account through Settings
If you prefer a straightforward method with a graphical user interface, you can delete the Administrator account using the Settings app in Windows 10. Here’s how:
- Open the Start menu and click on the “Settings” gear icon. Alternatively, you can press the “Windows key + I” keyboard shortcut to open the Settings app directly.
- In the Settings window, click on the “Accounts” option.
- In the left sidebar, select the “Family & other users” tab.
- Scroll down to the “Other users” section and click on the Administrator account you want to delete.
- Click on the “Remove” button.
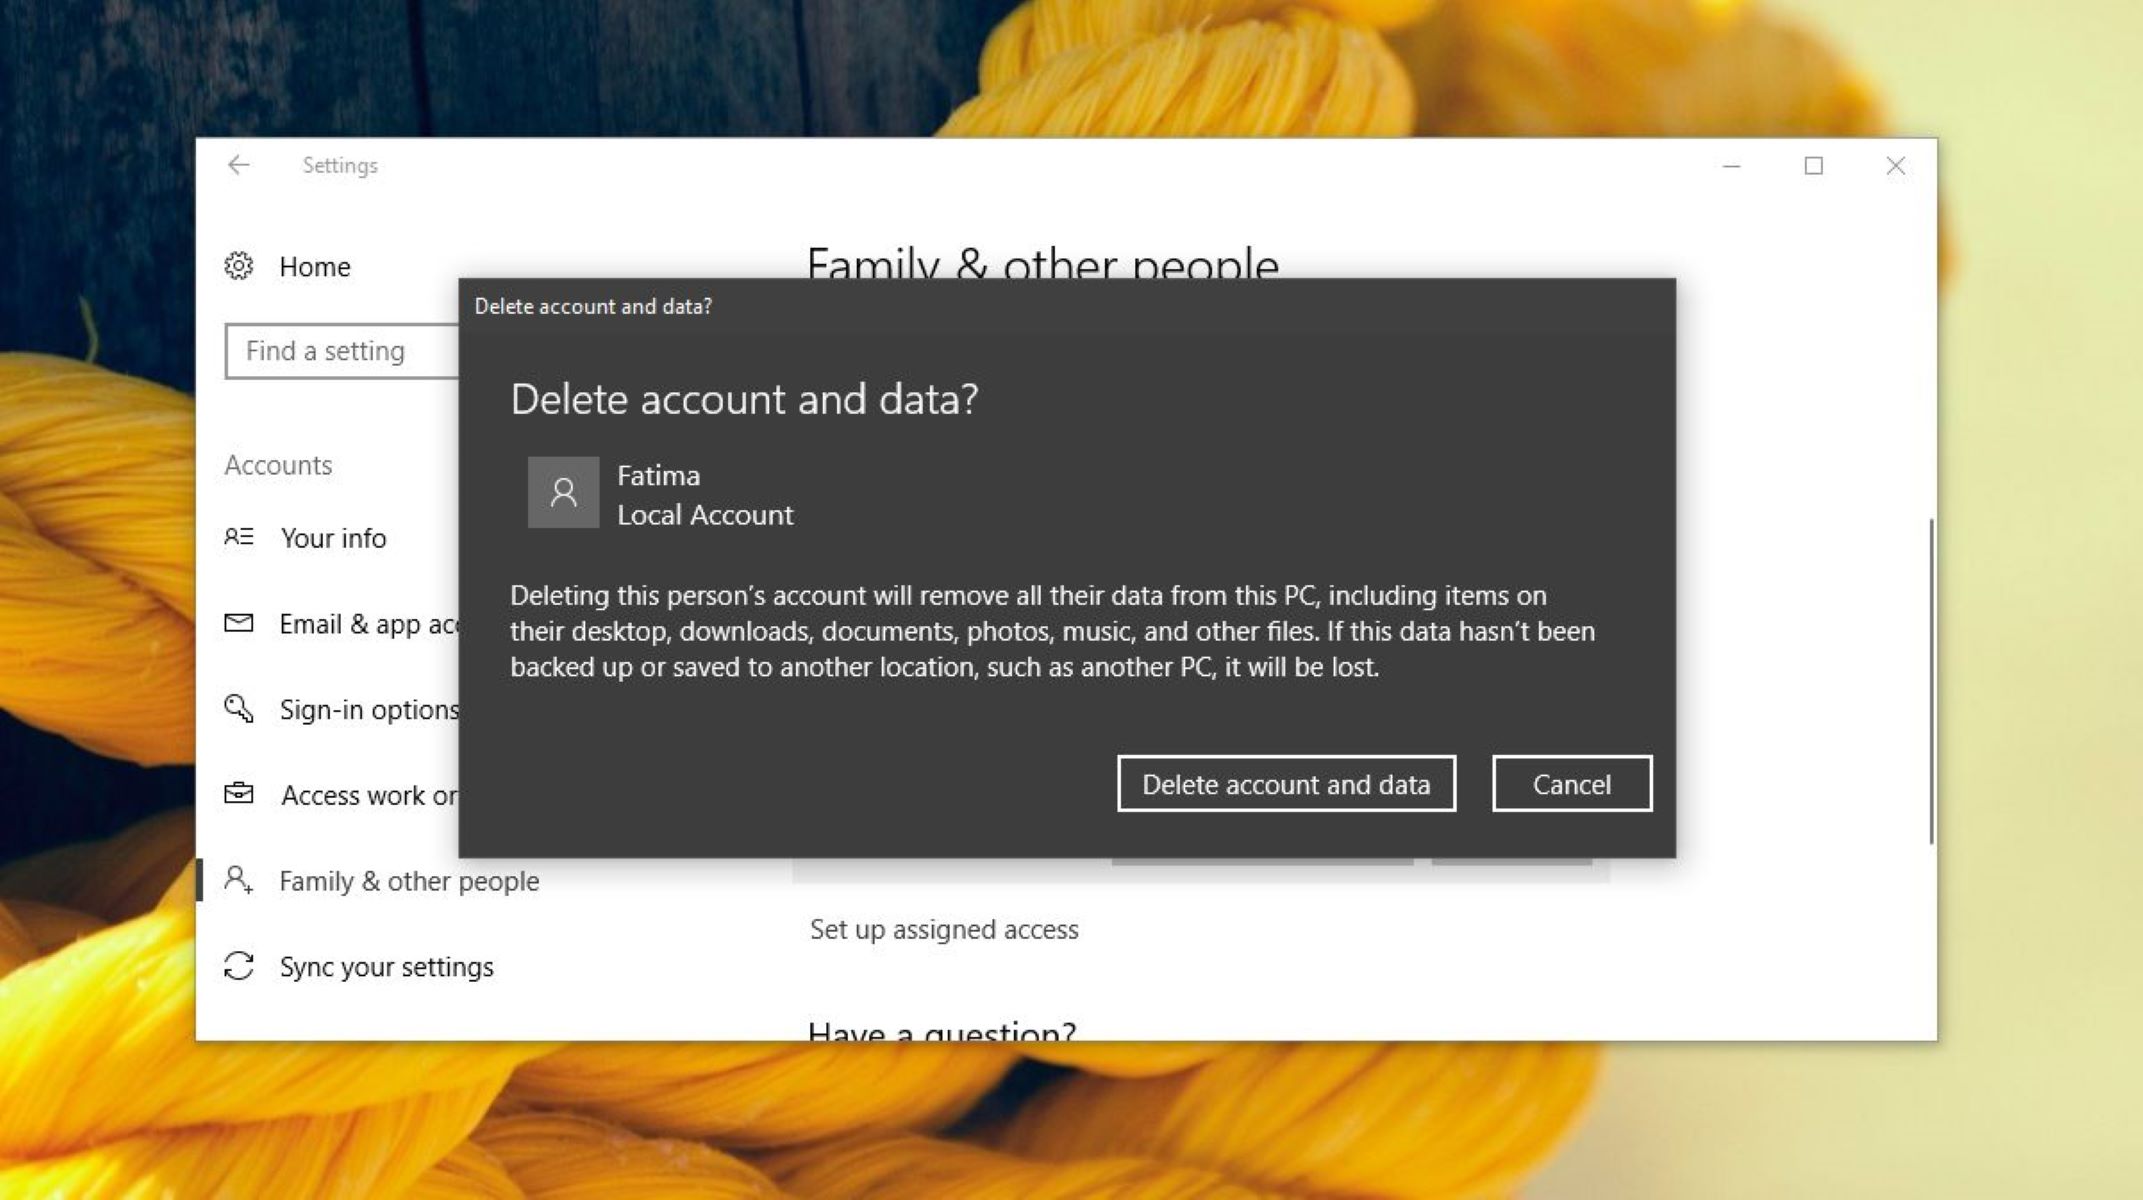
- A confirmation dialog box will appear. Review the information and click on the “Delete account and data” button.
- Windows 10 will proceed to delete the Administrator account and its associated files, settings, and data.
Once the deletion process is complete, the Administrator account will no longer be available on your Windows 10 computer.
It is important to note that the “Remove” button may be grayed out if the account you are attempting to delete is signed in or is the only Administrator account on the computer. In such cases, you may need to create another Administrator account first or sign in to a different user account with administrative privileges to proceed with the deletion.
This method offers a simple and intuitive way to delete an Administrator account without the need for any technical expertise. However, if you prefer using the Command Prompt or prefer more advanced methods, feel free to explore the following sections.
Method 2: Removing Administrator Account via Command Prompt
If you are comfortable using the command line interface, you can remove the Administrator account in Windows 10 using the Command Prompt. Here’s how:
- Press the “Windows key + R” keyboard shortcut to open the Run dialog box.
- Type “cmd” in the Run dialog box and press Enter to open the Command Prompt.
- In the Command Prompt window, type the following command and press Enter:
net user Administrator /delete - Confirm the deletion by typing “Y” and pressing Enter.
Windows 10 will proceed to delete the Administrator account using the Command Prompt. Once the deletion process is complete, the Administrator account will no longer be available on your computer.
It is important to note that the Command Prompt method requires administrative privileges. Therefore, if your current user account does not have administrative rights, you will need to run the Command Prompt as an administrator. To do this, right-click on the Command Prompt icon in the Start menu and select “Run as administrator.”
The Command Prompt method offers more control over the deletion process and is useful for users who prefer working with commands. However, ensure that you exercise caution while using the Command Prompt, as any incorrect commands can have unintended consequences on your system.
Now that you have learned how to remove the Administrator account using the Command Prompt, you can proceed to the next method if you want to explore alternative options or prefer a different approach.
Method 3: Deleting Administrator Account through Computer Management
If you have advanced knowledge of Windows administrative tools, you can delete the Administrator account using the Computer Management tool in Windows 10. Here’s how:
- Right-click on the “Start” button or press the “Windows key + X” keyboard shortcut to open the Power User menu.
- From the Power User menu, select “Computer Management.”
- In the Computer Management window, navigate to “Local Users and Groups” in the left sidebar and click on “Users.”
- In the middle panel, you will see a list of user accounts. Right-click on the Administrator account you want to delete and select “Delete.”
- A confirmation dialog box will appear. Review the information, and if you are certain about deleting the account, click “Yes” to proceed.
Windows 10 will remove the Administrator account through the Computer Management tool. Once the deletion process is complete, the Administrator account will no longer be visible in the list of user accounts.
It is worth noting that the Computer Management method provides more control over user account management and is particularly useful for advanced users or system administrators. However, exercise caution when making changes through this tool, as any incorrect modifications can negatively impact your computer’s functionality.
If you are not comfortable using the Computer Management tool or prefer another method, you can proceed to the next section to learn about an alternative approach to deleting the Administrator account in Windows 10.
Method 4: Using System Restore to Remove Administrator Account
If you want to revert your computer’s settings back to a previous state and remove the Administrator account along with any changes made to it, you can use the System Restore feature in Windows 10. Here’s how to do it:
- Press the “Windows key + R” keyboard shortcut to open the Run dialog box.
- Type “rstrui” in the Run dialog box and press Enter to open the System Restore window.
- In the System Restore window, click on “Next” to proceed.
- Select a restore point that predates the creation or modification of the Administrator account.
- Review the details of the restore point and click on “Finish” to start the restoration process.
- Windows 10 will then restore your computer’s settings to the selected restore point, effectively removing the Administrator account along with any changes made to it.
It is important to note that using System Restore will remove not just the Administrator account but also any other system changes made since the selected restore point. Therefore, ensure that you have a backup of any important files or data, as they may be affected by the restoration process.
System Restore is a powerful tool that allows you to undo system changes, including the creation or modification of user accounts. It is particularly useful if you want to eliminate the Administrator account and revert your computer’s settings to a specific point in time.
Now that you have learned about the different methods to delete the Administrator account in Windows 10, you can choose the method that suits your preferences and expertise. Remember to exercise caution while making changes to user accounts and always back up any important data before proceeding.
Conclusion
Deleting an Administrator account in Windows 10 can be necessary for various reasons, such as security concerns or when it is no longer needed. In this article, we have explored four different methods to remove the Administrator account from your computer.
First, we discussed the straightforward method of deleting the Administrator account through the Settings app. This method is ideal for users who prefer a graphical user interface and a simple step-by-step process.
Next, we explored the Command Prompt method, which is suitable for users with command line knowledge and those who prefer a more advanced approach.
We also delved into the Computer Management method, which allows for more control over user account management and is particularly useful for advanced users or system administrators.
Lastly, we discussed using the System Restore feature to revert your computer’s settings back to a previous state, effectively removing the Administrator account along with any changes made to it.
It is important to remember that deleting an Administrator account permanently removes all its associated files, settings, and data. Therefore, it is crucial to back up any important files before proceeding with the deletion.
Additionally, it is advisable to create a new standard user account to replace the Administrator account if you still require administrative privileges. This will ensure that you have a user account with appropriate permissions to perform necessary tasks.
Overall, by following the methods outlined in this guide, you can successfully delete the Administrator account in Windows 10 and tailor your user accounts to meet your needs and preferences.


