Introduction
Are you ready to take your turkey cooking skills to the next level? Look no further than your trusty electric pressure cooker. This versatile kitchen appliance can revolutionize the way you cook your Thanksgiving turkey, delivering tender, juicy results in a fraction of the time compared to traditional methods. Whether you’re a seasoned pressure cooker user or a novice looking to impress your guests, this guide will teach you everything you need to know about cooking a delicious turkey in an electric pressure cooker.
The electric pressure cooker, also known as an Instant Pot, has gained immense popularity in recent years. Its ability to cook food quickly- sealed tightly and under high pressure- allows for faster cooking times without sacrificing flavor or moisture. The intense pressure generated within the cooker helps to tenderize the turkey and infuse it with mouthwatering flavor, resulting in a succulent main dish that will leave your family and friends begging for seconds.
Not only does the electric pressure cooker save you valuable time in the kitchen, but it also offers several other benefits. First and foremost, it preserves the natural juices of the turkey, ensuring that it remains moist and tender throughout the cooking process. Additionally, the enclosed cooking environment prevents the loss of heat and moisture, resulting in a beautifully browned skin and enhanced flavor profile.
Furthermore, cooking your turkey in an electric pressure cooker frees up valuable oven space, allowing you to prepare other dishes simultaneously and minimizing the stress of managing multiple cooking times. This can be a game-changer when you’re hosting a large gathering or cooking for a holiday feast.
In the following sections, we’ll explore the step-by-step process of cooking a turkey in an electric pressure cooker. From selecting the right turkey to checking for doneness, we’ll cover all the essential information you need to achieve turkey-cooking perfection. So, roll up your sleeves, put on your chef’s hat, and let’s get started on creating a memorable and delicious Thanksgiving centerpiece with your electric pressure cooker.
Benefits of Cooking Turkey in an Electric Pressure Cooker
Cooking a turkey in an electric pressure cooker offers numerous advantages that make it a preferred method for many home cooks. Here are the key benefits you can expect when using this innovative cooking tool:
- Time and Energy Efficient: One of the most significant benefits of using an electric pressure cooker to cook your turkey is the reduced cooking time. A turkey that would typically take hours in the oven can be cooked to perfection in a fraction of the time, thanks to the high-pressure cooking environment. This not only saves valuable time but also reduces energy consumption, making it an eco-friendly option.
- Tender and Juicy Results: The sealed environment of the electric pressure cooker helps to retain the natural juices of the turkey, resulting in a moist and tender final product. The pressurized cooking process breaks down the tough fibers in the meat, ensuring that it is succulent and flavorful.
- Flavor Infusion: The intense pressure inside the cooker allows for better flavor penetration. As you season the turkey, the flavors are infused into the meat, giving it a depth of taste that is hard to achieve with other cooking methods. You can experiment with various herbs, spices, and aromatics to create a customized flavor profile.
- Convenient and Versatile: Using an electric pressure cooker frees up oven space, especially during busy holiday cooking times. You can easily cook your turkey while simultaneously preparing other dishes without the need for multiple cooking appliances. The electric pressure cooker also offers versatility in terms of cooking options. You can sear the turkey before pressure cooking or use the cooker for other cooking techniques like braising or slow cooking.
- Safe and User-Friendly: Electric pressure cookers are equipped with modern safety features that ensure a worry-free cooking experience. They come with built-in pressure release valves, automatic temperature control, and locking mechanisms that prevent accidents. Moreover, the user-friendly interface and preset cooking functions make it easy even for beginners to use the cooker confidently.
With all these benefits, it’s no wonder that more and more people are turning to electric pressure cookers for their turkey cooking needs. Not only do you save time and energy, but you also achieve tender, flavorful results that will impress your guests and make you a holiday cooking hero.
Selecting the Right Turkey for Pressure Cooking
When it comes to cooking a turkey in an electric pressure cooker, choosing the right bird is crucial for achieving optimal results. Here are key factors to consider when selecting a turkey for pressure cooking:
- Size: The size of the turkey is one of the most critical factors to consider. Ensure that the turkey fits comfortably in your electric pressure cooker without touching the sides or lid. Most pressure cookers can accommodate turkeys up to 12 to 14 pounds, but be sure to double-check the size capacity of your specific model. This will ensure even cooking and prevent any safety issues.
- Fresh or Frozen: Both fresh and frozen turkeys can be cooked in an electric pressure cooker. If you opt for a frozen turkey, make sure to thaw it completely before cooking. Thawing can be done in the refrigerator over several days or using the cold water method for faster results.
- Bone-In or Boneless: Consider whether you prefer a bone-in or boneless turkey. Bone-in turkeys tend to result in more flavorful and succulent meat, while boneless turkeys offer convenience in carving and serving. Both options work well in an electric pressure cooker, so choose based on your personal preference.
- Quality: Choose a high-quality turkey from a trusted source to ensure the best flavor and texture. Look for turkeys that are fresh, plump, and free from any signs of discoloration or blemishes. Organic or free-range turkeys can provide added flavor and tenderness.
- Preparation: Some turkeys come pre-seasoned or infused with flavors. While this can be convenient, make sure to check the ingredients and seasonings used to ensure they align with your taste preferences and dietary restrictions.
Remember to plan ahead and purchase your turkey in advance, allowing enough time for thawing if needed. It’s also a good idea to consult your electric pressure cooker’s instruction manual to confirm the recommended turkey size and any additional guidelines specific to your model. With the right turkey selected, you’re ready to move on to the next steps of preparing and seasoning your bird for pressure cooking.
Preparing the Turkey for Cooking
Now that you have selected the perfect turkey for pressure cooking, it’s time to prepare it for the cooking process. Follow these steps to ensure your turkey is properly prepped:
- Thawing: If using a frozen turkey, make sure to thaw it completely before cooking. Thawing in the refrigerator is the safest method and requires planning ahead. Allow approximately 24 hours of thawing time per 4-5 pounds of turkey. Alternatively, you can use the cold water method, where you submerge the sealed turkey in cold water, changing the water every 30 minutes until thawed.
- Cleaning: Rinse the turkey thoroughly with cold water to remove any excess moisture or ice crystals. Pat it dry with paper towels, both inside and out.
- Removing Giblets and Neck: Check the turkey’s cavities for any giblets, such as the neck, heart, liver, and gizzard. These can be set aside for later use in gravy or stuffing. If desired, remove the neck to create extra space inside the cavity for stuffing or aromatics.
- Trussing: Trussing the turkey involves tying the legs together and securing the wings against the body using kitchen twine. This helps maintain the shape of the turkey during cooking and promotes even heat distribution.
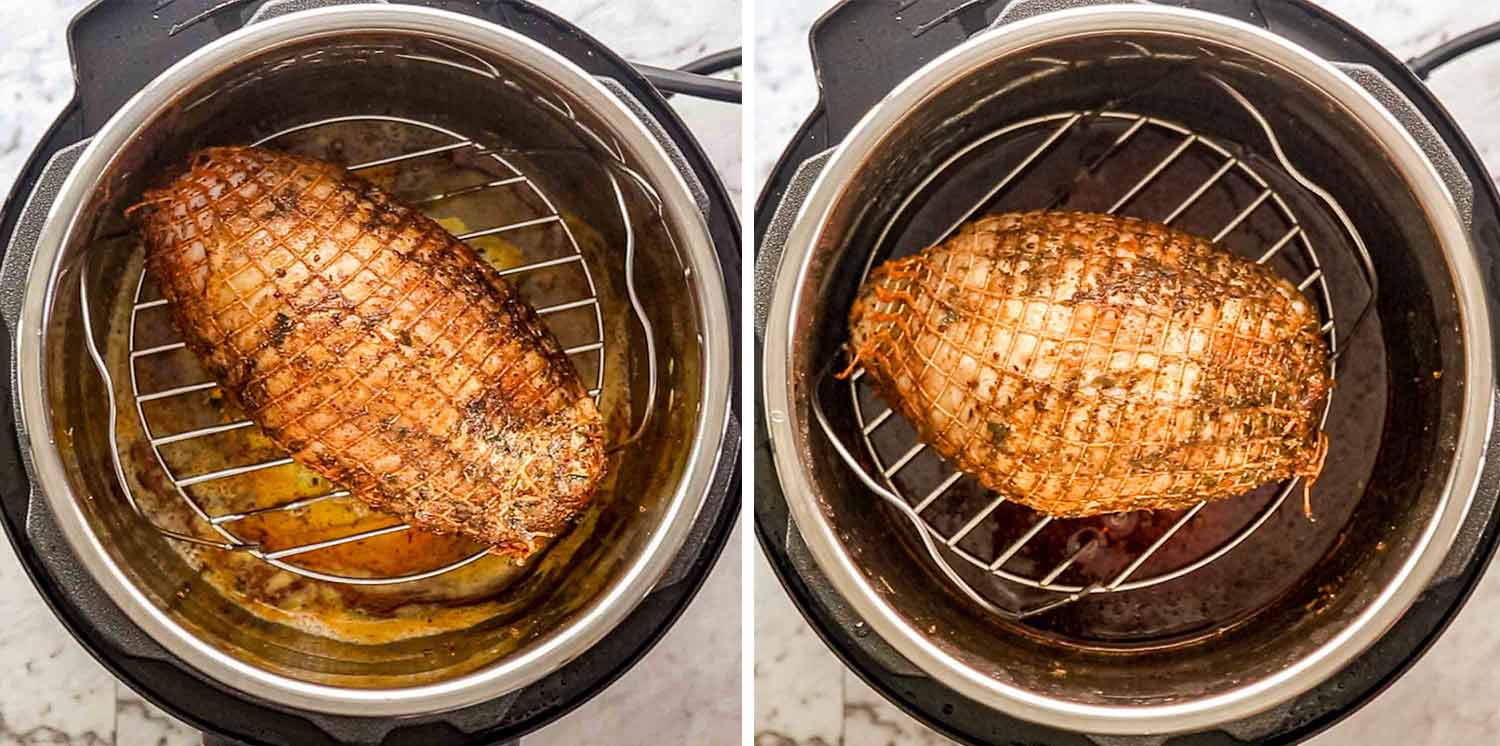
- Elevating and Trimming: Place a trivet or a wire rack at the bottom of your electric pressure cooker, creating a platform for the turkey to sit on. This prevents the turkey from sticking to the bottom and allows for more even cooking. If necessary, trim any excess skin or fat from the turkey to avoid unnecessary grease buildup in the pressure cooker.
- Brining (Optional): Consider brining your turkey to enhance its flavor and tenderness. Brining involves soaking the turkey in a mixture of water, salt, sugar, and additional seasonings for several hours or overnight. This step is optional but can greatly enhance the taste and texture of the final product.
Once the turkey is fully prepared, you’re ready to move on to the next step: seasoning and flavoring the bird to perfection. By following these preparation steps, you ensure that your turkey is clean, properly thawed, and ready to absorb all the delicious flavors during the cooking process.
Seasoning and Flavoring Options
Seasoning and flavoring your turkey is an essential step to elevate its taste and create a delicious and memorable meal. Here are some seasoning and flavoring options to consider for your pressure cooked turkey:
- Traditional Seasoning: For a classic and timeless flavor profile, season your turkey with a combination of salt, black pepper, and garlic powder. You can also add herbs like thyme, rosemary, and sage to enhance the savory notes.
- Herb Butter Rub: Create an herb-infused butter by mixing softened butter with minced herbs such as thyme, rosemary, sage, and parsley. Rub this flavorful mixture all over the turkey, including under the skin, to impart a rich, aromatic taste.
- Citrus and Herb Blend: Give your turkey a bright and zesty touch by stuffing the cavity with lemon, orange, and/or lime wedges along with fresh herbs. The citrus juices and herbal aromas will infuse the meat, adding a refreshing and tangy dimension to the flavor.
- Spice Rubs: Experiment with spice blends to add an extra kick to your turkey. Options like cumin, paprika, chili powder, and even a touch of cinnamon can bring depth and complexity to the flavor profile.
- Aromatics: Consider adding aromatics such as onions, garlic cloves, and bay leaves to the cavity of the turkey. These ingredients release their flavors during cooking, infusing the meat with their aromatic essence.
- Basting: While not necessary, basting the turkey with pan drippings or a mixture of butter and broth during the cooking process can enhance the moisture and add extra flavor to the skin. Baste every 30 minutes or so for a beautifully caramelized and flavorful result.
Feel free to create your own unique combination of seasonings and flavors based on your preferences. Don’t be afraid to get creative and experiment with different ingredients to bring out the best in your turkey. Just remember to season both the outside and inside of the turkey for an evenly balanced taste experience.
Now that your turkey is seasoned to perfection, it’s time to move on to the actual cooking process. Follow the upcoming steps carefully to ensure a moist and tender turkey that will wow your guests.
Cooking Steps for a Turkey in an Electric Pressure Cooker
Now that your turkey is prepped and seasoned, it’s time to cook it in your electric pressure cooker. Follow these steps for a successful and flavorful turkey:
- Add Liquid: Start by adding liquid to the bottom of the pressure cooker. This can be chicken or turkey broth, water, or a combination of both. The liquid ensures proper pressure build-up and helps to keep the turkey moist during cooking.
- Place the Trivet: Set the trivet or wire rack in the pressure cooker, making sure it sits above the liquid. This elevates the turkey and prevents it from sitting in the liquid while cooking.
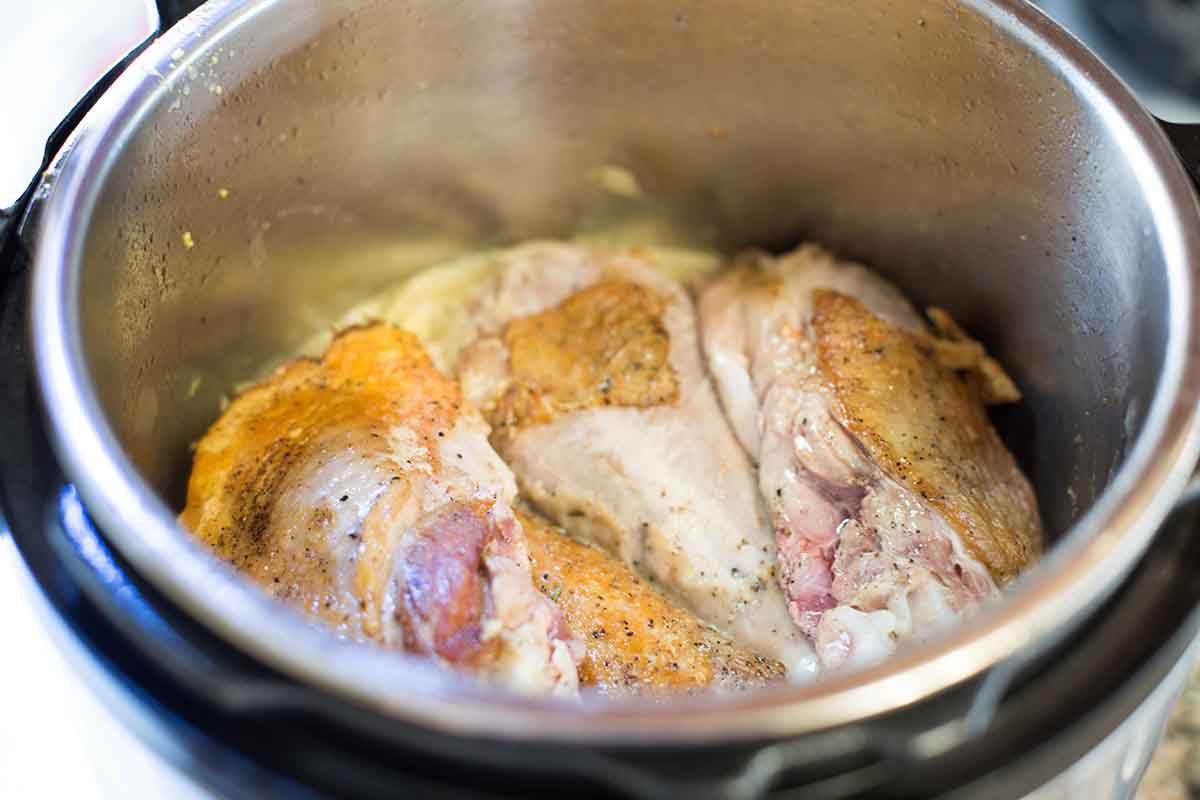
- Position the Turkey: Carefully place the seasoned turkey on the trivet, breast side facing up. Close the lid of the pressure cooker, making sure it is properly sealed.
- Select Cooking Time: Refer to your pressure cooker’s instruction manual or recipe guidelines for the recommended cooking time. As a general rule of thumb, pressure cook the turkey for about 6-8 minutes per pound at high pressure.
- Set Cooking Pressure and Time: Adjust the pressure cooker settings to reach high pressure and set the cooking time accordingly. The cooker will take some time to come up to pressure before the countdown starts.
- Cooking Process: Once the cooking time is complete, allow the pressure to release naturally for about 10-15 minutes. This helps the turkey to retain its moisture and prevents overcooking. After the natural release, you can perform a quick release to completely depressurize the cooker.
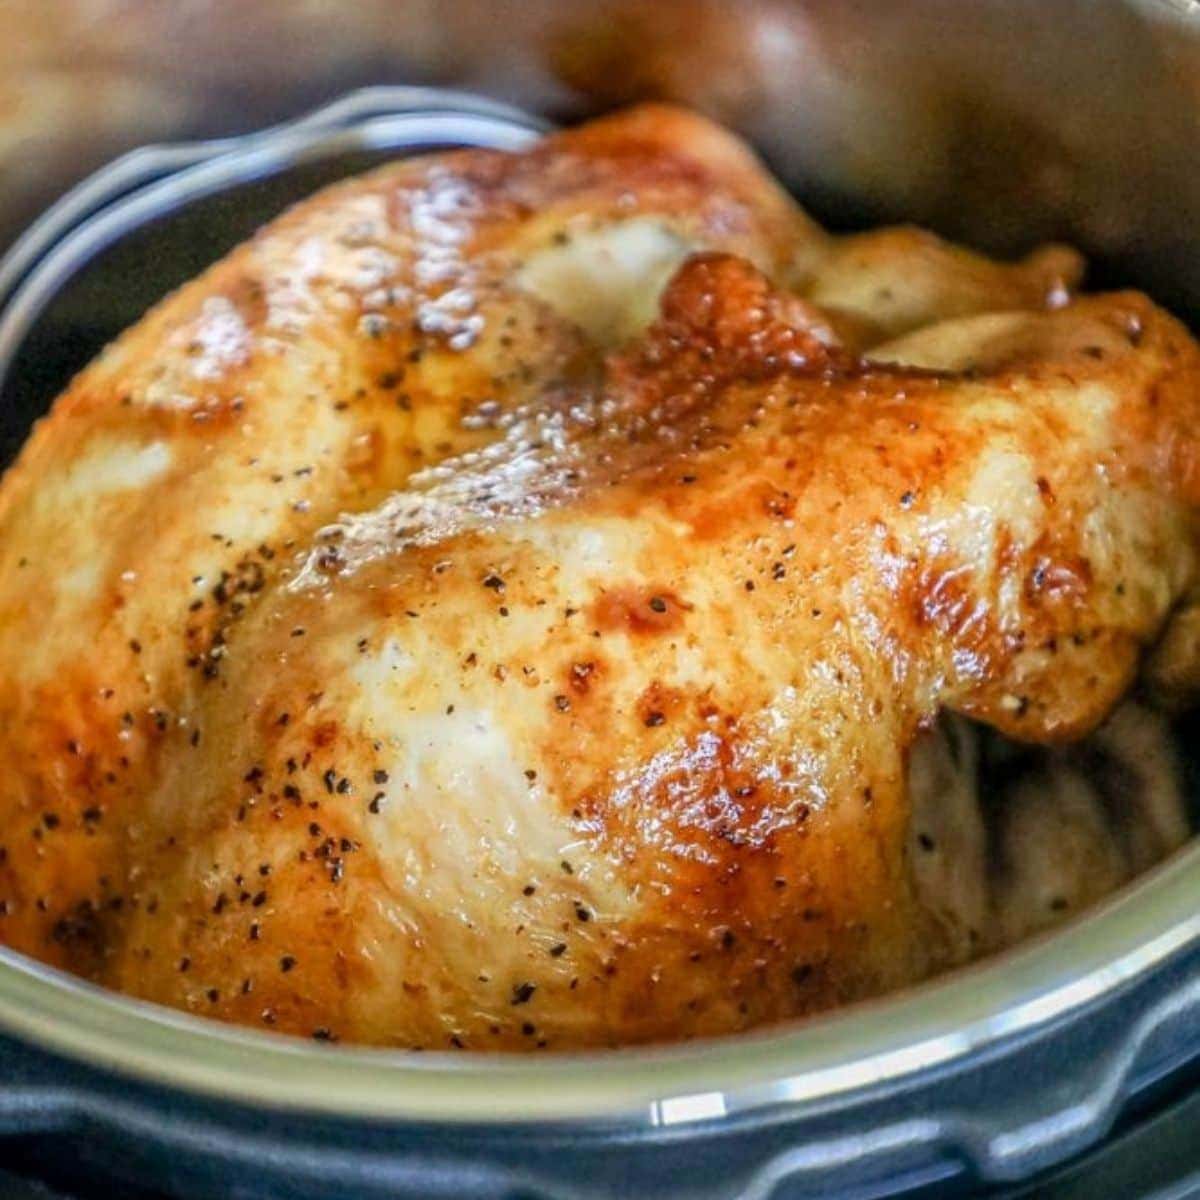
- Check Internal Temperature: Carefully open the pressure cooker and use a meat thermometer to check the internal temperature of the turkey. It should read 165°F (74°C) in the thickest part of the breast and thigh. If needed, you can continue cooking the turkey for a few more minutes under low pressure.
- Resting Time: Remove the turkey from the pressure cooker and let it rest for about 15-20 minutes before carving. This allows the juices to redistribute and results in a more tender and flavorful turkey.
After following these cooking steps, you’ll be rewarded with a succulent, perfectly cooked turkey ready to be carved and served. Remember to be cautious when handling the hot pressure cooker and use oven mitts or tongs as necessary. With the cooking process complete, it’s time to move on to the next section to learn about the different methods of pressure release and how to check for doneness.
Natural Release vs Quick Release
After pressure cooking your turkey in an electric pressure cooker, you have two options for releasing the pressure: natural release and quick release. Each method has its benefits, and the choice depends on your cooking preferences and time constraints. Here’s a breakdown of each method:
- Natural Release: Natural release involves allowing the pressure inside the cooker to decrease gradually on its own. This is achieved by simply turning off the heat and letting the pressure cooker sit undisturbed. The release can take anywhere from 10 to 15 minutes or more, depending on the size of the turkey and the pressure level. Natural release is beneficial as it helps the turkey retain its juices, preventing overcooking and maintaining tenderness. It also reduces the risk of food spewing out from the pressure cooker when the lid is opened. However, it does require additional waiting time before the pressure is fully released.
- Quick Release: Quick release involves manually releasing the pressure from the cooker using the pressure release valve. This method is best when you’re short on time and eager to check on your turkey or proceed with the next steps of your meal preparation. To perform a quick release, carefully move the pressure release valve to the venting position. The steam and pressure will escape, causing a hissing sound. It’s crucial to protect your hands and face from the hot steam. Quick release allows for immediate access to the cooked turkey, but it does slightly increase the risk of the meat becoming tougher due to a sudden pressure drop.
It’s important to follow the recommended release method stated in your recipe or pressure cooker’s instruction manual. In most cases, a natural release is highly recommended for turkeys, as it helps maintain the texture and succulence of the meat. However, if time is a constraint or you’re comfortable with a slight texture variation, a quick release can be a viable option.
Remember to exercise caution when performing a quick release and always use oven mitts or tongs to handle the pressure release valve. Additionally, be patient during natural release, allowing the pressure inside the cooker to fully dissipate before opening the lid. Once the pressure has been released, you can proceed to check the turkey for doneness.
Checking the Turkey for Doneness
Checking the doneness of your pressure-cooked turkey is crucial to ensure that it is cooked to perfection and safe to eat. Here are a few methods you can use to determine if your turkey is cooked thoroughly:
- Internal Temperature: Using a meat thermometer, check the temperature of the thickest part of the turkey’s thigh and breast. The turkey is considered safe to eat when the internal temperature reaches 165°F (74°C) in both areas. Insert the thermometer into the meat, avoiding contact with the bone for an accurate reading.
- Visual Inspection: Take a look at the turkey’s exterior. It should have a golden brown color, and the skin should be crisp. If the skin appears pale or undercooked, you can broil the turkey under a preheated broiler for a few minutes to achieve a crispy texture.
- Joint Mobility: Check the joints of the turkey by gently moving the legs and wings. If the joints move easily and the meat is tender, it is a good sign that the turkey is cooked thoroughly.
- Clear Juices: Pierce the turkey with a fork or skewer in the thickest part of the thigh or breast. The juices that come out should be clear, without any traces of pink or red. If the juices appear clear, it indicates that the turkey is fully cooked.
It’s important to note that the cooking times provided in recipes are just guidelines. Factors such as the size and type of pressure cooker, as well as the starting temperature of the turkey, can affect the cooking time. That’s why using a meat thermometer is crucial to ensure accuracy and avoid any risk of undercooking or overcooking.
If your turkey is not yet fully cooked, you can simply reseal the pressure cooker and continue cooking for a few more minutes, until it reaches the desired temperature. Remember to allow for additional resting time after cooking to allow the turkey to continue cooking in residual heat and for the juices to redistribute.
By using one or more of these methods, you can confidently determine whether your pressure-cooked turkey is safe to eat and perfectly cooked. Once you’ve confirmed that it’s done, it’s time to move on to carving and serving your mouthwatering creation.
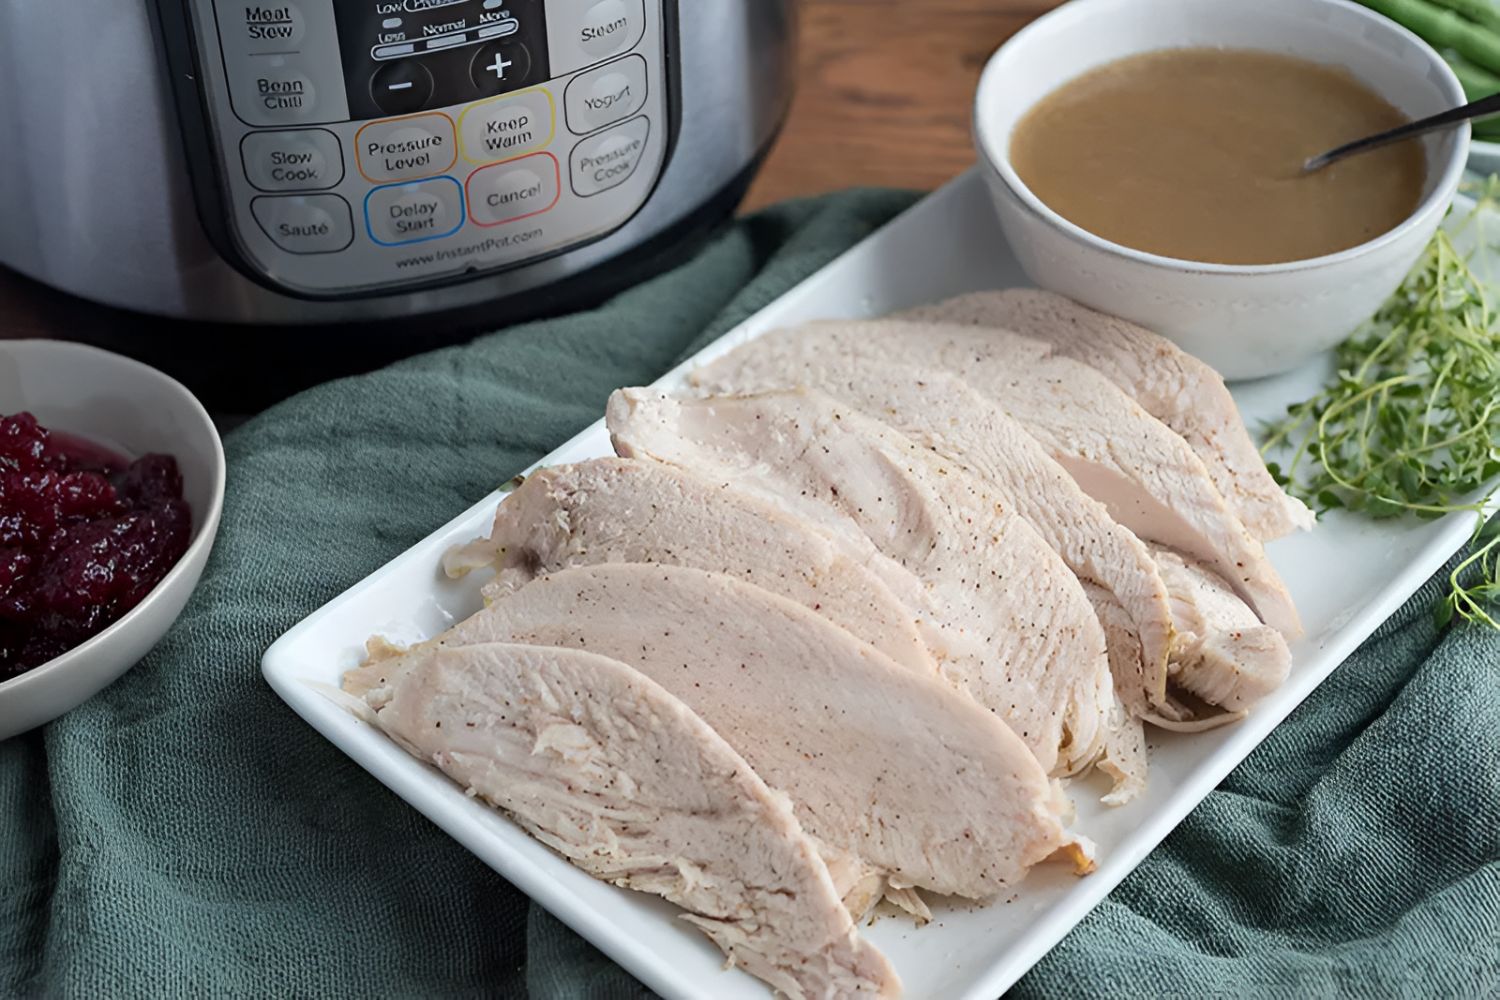
Carving and Serving Your Pressure Cooked Turkey
After all the hard work and anticipation, it’s finally time to carve and serve your perfectly pressure-cooked turkey. Follow these steps to ensure beautiful presentation and delicious slices:
- Resting Time: Allow the turkey to rest for about 15-20 minutes after removing it from the pressure cooker. This resting period allows the juices to redistribute throughout the meat, resulting in a tender and flavorful turkey.
- Secure the Turkey: Use a carving board with a groove or a rimmed baking sheet to catch any juices that may escape during carving. Place a clean kitchen towel or silicone trivet underneath to prevent the turkey from sliding while you carve.
- Remove Trussing: Start by removing any twine or ties used to secure the turkey’s legs and wings. Set them aside for later use or discard them.
- Separate the Drumsticks and Thighs: Hold the turkey steady with a carving fork or tongs. Use a sharp carving knife to cut through the joint that connects each drumstick and thigh to the turkey’s body. Apply gentle pressure and make clean, even cuts.
- Slice the Breast Meat: Locate the breastbone in the center of the turkey. Use the carving knife to make vertical slices along one side of the breast, starting from the upper portion near the breastbone and working your way down to the bottom. Repeat the process on the other side. Each slice should be about a ½ inch thick.
- Serve the Turkey: Transfer the carved pieces to a serving platter, arranging them in an appealing manner. If desired, you can garnish the platter with fresh herbs, citrus slices, or other decorative elements. Pour any accumulated juices over the turkey slices for added flavor and moisture.
Remember to work slowly and carefully while carving, ensuring the knife is sharp for clean and precise cuts. If you encounter any resistance or difficulty, adjust your angle or find a joint to navigate through to separate the pieces properly.
Serve your pressure-cooked turkey alongside your favorite Thanksgiving sides, such as roasted vegetables, mashed potatoes, cranberry sauce, and stuffing. Don’t forget to provide a serving platter and utensils for your guests to help themselves to the delicious turkey slices.
With the carving complete and the table set, it’s time to gather with your loved ones and savor the fruits of your labor. Enjoy the moist and flavorful goodness of your pressure-cooked turkey, knowing that you’ve created a memorable and delicious centerpiece for your holiday meal.
Tips and Tricks for Cooking Turkey in an Electric Pressure Cooker
Cooking a turkey in an electric pressure cooker can yield exceptional results, but it’s always helpful to have some extra tips and tricks up your sleeve. Here are some insider tips to ensure a successful and flavorful turkey:
- Use a Meat Thermometer: Invest in a reliable meat thermometer to accurately gauge the turkey’s internal temperature. This ensures that it’s cooked to perfection and prevents overcooking.
- Brine for Extra Moisture: Consider brining the turkey in a seasoned saltwater solution before cooking. This helps to tenderize the meat and infuse it with additional moisture and flavor.
- Experiment with Seasonings: Don’t be afraid to get creative with your seasoning blends. Try different combinations of herbs, spices, and aromatics to customize the flavor of your turkey and enhance its taste profile.
- Use a Trivet or Rack: Elevate the turkey using a trivet or wire rack placed in the bottom of the pressure cooker. This prevents the turkey from sitting in its own juices, ensuring it cooks evenly and maintaining crisp skin.
- Avoid Overcrowding: Ensure that there is enough space around the turkey for proper heat circulation. Overcrowding the pressure cooker can result in uneven cooking and may impact the final texture of the meat.
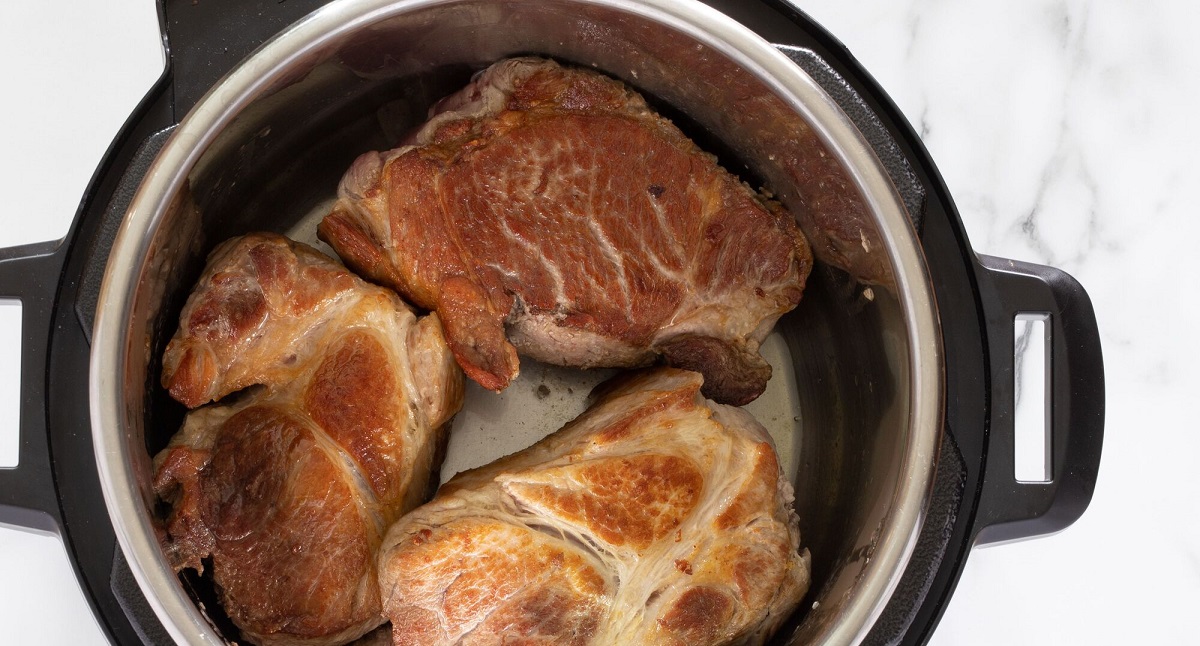
- Utilize the Sauté Function: Take advantage of the sauté function on your electric pressure cooker to sear the turkey before pressure cooking. This helps to lock in juices and adds an extra layer of flavor to the finished dish.
- Let the Turkey Rest: After cooking, allow the turkey to rest before carving. This lets the juices settle, resulting in more tender and succulent meat.
- Save the Cooking Liquid: Don’t discard the flavorful cooking liquid in the pressure cooker. Strain and save it to use as a base for gravy or as a flavor enhancer in other recipes.
- Practice Food Safety: Follow proper food safety guidelines when handling and cooking your turkey. Thoroughly wash your hands, utensils, and surfaces before and after handling raw poultry to prevent cross-contamination.
- Plan for the Additional Cooking Time: Remember that the cooking time on the recipe does not account for the time needed to bring the pressure cooker to pressure. Factor in this additional time to your overall cooking plans.
By incorporating these tips and tricks into your pressure cooking routine, you’ll be well-equipped to create a delicious and impressive turkey that will leave your guests asking for seconds. Enjoy the process, experiment with flavors, and make this Thanksgiving or special occasion truly memorable with your perfectly pressure-cooked turkey!
Conclusion
Cooking a turkey in an electric pressure cooker opens up a world of possibilities for achieving a tender, flavorful, and beautifully cooked bird. The benefits of using an electric pressure cooker, such as time efficiency and moisture retention, make it a popular choice among home cooks.
In this guide, we’ve covered everything you need to know to successfully cook a turkey in an electric pressure cooker. From selecting the right turkey to seasoning it to perfection, and from understanding the different pressure release methods to checking for doneness, you now have the knowledge and confidence to create a memorable holiday centerpiece.
Remember to follow safety guidelines and allow the pressure cooker to come to a full natural release before opening the lid. Take your time when carving the turkey, ensuring clean and precise cuts to present a visually appealing platter of delicious slices.
With the aroma of a perfectly cooked turkey filling your kitchen, it’s time to gather your loved ones and share in the joy of a scrumptious meal. Whether it’s a Thanksgiving feast or a special occasion, your electric pressure cooker turkey will wow your guests and leave a lasting impression.
Don’t forget to experiment with different seasonings, techniques, and flavors to customize your turkey according to your tastes and preferences. Embrace the versatility of your electric pressure cooker and enjoy the convenience it brings to your cooking process.
Now that you have the knowledge and skills to cook a turkey in an electric pressure cooker, it’s time to put them into practice. Have fun, be creative, and savor every juicy, flavorful bite. Happy cooking, and may your pressure-cooked turkey be the star of the show!