Introduction
Welcome to the world of cooking with a Cuisine Art electric pressure cooker, where convenience meets deliciousness. If you’re a fan of spaghetti squash, you’re in for a treat. In this guide, we will show you how to cook spaghetti squash to perfection using your Cuisine Art electric pressure cooker.
Spaghetti squash is a versatile vegetable that is loved by many for its unique texture and ability to mimic traditional pasta. With its mild flavor and low calorie count, it’s an excellent substitute for traditional noodles in various dishes. Not only is it a great option for those following a low-carb or gluten-free diet, but it’s also packed with essential vitamins, minerals, and dietary fiber.
While there are several ways to cook spaghetti squash, using an electric pressure cooker can save you time and effort. The pressure cooker effectively cooks the squash, infusing it with flavor and tenderizing it to perfection in a fraction of the time compared to traditional methods.
In the following sections, we will guide you through the step-by-step process of cooking spaghetti squash in your Cuisine Art electric pressure cooker. From preparation to serving, you’ll learn all the tips and tricks for a delicious and hassle-free cooking experience. So, let’s dive in and discover how easy it is to create a mouthwatering spaghetti squash dish with your electric pressure cooker.
What is a Spaghetti Squash?
Before we delve into the cooking process, let’s first understand what spaghetti squash is. Spaghetti squash, also known as vegetable spaghetti, is a winter squash variety that gets its name from the unique strands it forms when cooked. Its oblong shape and yellow skin make it easily recognizable.
Unlike traditional squash varieties, such as butternut or acorn squash, spaghetti squash has a mild flavor and a texture that resembles spaghetti noodles. When cooked, the flesh of the squash can be easily scraped into thin strands, resembling spaghetti strands. This characteristic gives spaghetti squash its versatile nature, making it an excellent substitute for pasta in various dishes.
Spaghetti squash is not only a delicious alternative to traditional pasta, but it also offers several health benefits. It is naturally low in calories and carbohydrates, making it a suitable choice for those looking to manage their calorie intake or follow a low-carb diet. Additionally, it is a good source of dietary fiber, vitamins C and B6, as well as minerals like manganese and potassium.
When selecting a spaghetti squash, look for one that feels firm and heavy for its size. Avoid selecting squash with soft spots or blemishes. Once you’ve chosen a quality squash, it is time to prepare and cook it using your Cuisine Art electric pressure cooker.
Benefits of Cooking Spaghetti Squash in an Electric Pressure Cooker
Cooking spaghetti squash in an electric pressure cooker offers numerous advantages that make it an ideal method for preparing this versatile vegetable. Here are some of the key benefits:
- Time Efficiency: One of the primary benefits of using an electric pressure cooker is the significant reduction in cooking time. Cooking spaghetti squash typically takes around 45 minutes to an hour in the oven or on the stovetop, but with an electric pressure cooker, you can cut that time down to just a fraction. The pressurized environment of the cooker accelerates the cooking process, allowing you to enjoy your delicious spaghetti squash in a fraction of the time.
- Tender and Flavorful Results: The pressure created within the cooker works wonders on the texture of spaghetti squash. It helps to soften the flesh and make it tender, resulting in a perfectly cooked vegetable that easily separates into spaghetti-like strands. Additionally, the sealed environment helps to retain the natural flavors of the squash, ensuring a more flavorful end result.
- Retains Nutritional Value: Cooking spaghetti squash in an electric pressure cooker helps preserve its nutritional value. The shorter cooking time and minimal exposure to water or steam help retain the vitamins, minerals, and dietary fiber present in the squash. This means you can enjoy all the health benefits of spaghetti squash without sacrificing their nutritional value.
- Convenient and Easy: Electric pressure cookers are designed to be user-friendly and require minimal effort. Once you’ve prepared the squash and set it up in the cooker, you can simply set the timer and let the pressure cooker do its magic. The automated features and built-in safety mechanisms make the process hassle-free and ensure a smooth cooking experience.
- Versatile Cooking Options: Electric pressure cookers often come with various cooking settings and presets, allowing you to customize the cooking process to suit your preferences. Whether you want the squash to be slightly firm or extremely tender, you can adjust the cooking time accordingly. This versatility ensures that you can achieve the desired texture and consistency for your spaghetti squash dishes.
With these benefits in mind, it’s no wonder why cooking spaghetti squash in an electric pressure cooker has become a popular method among home cooks. It’s a convenient, time-saving, and efficient way to create delicious and healthy spaghetti squash meals. Now that you’re aware of the advantages, let’s move on to the step-by-step process of cooking spaghetti squash in your Cuisine Art electric pressure cooker.
Step 1: Preparation
Before diving into the cooking process, it’s important to properly prepare the spaghetti squash for your electric pressure cooker. Follow these steps for a successful preparation:
- Wash the Squash: Start by rinsing the spaghetti squash under cool running water to remove any dirt or debris that may be present on its surface. This will ensure that you’re working with a clean and safe ingredient.
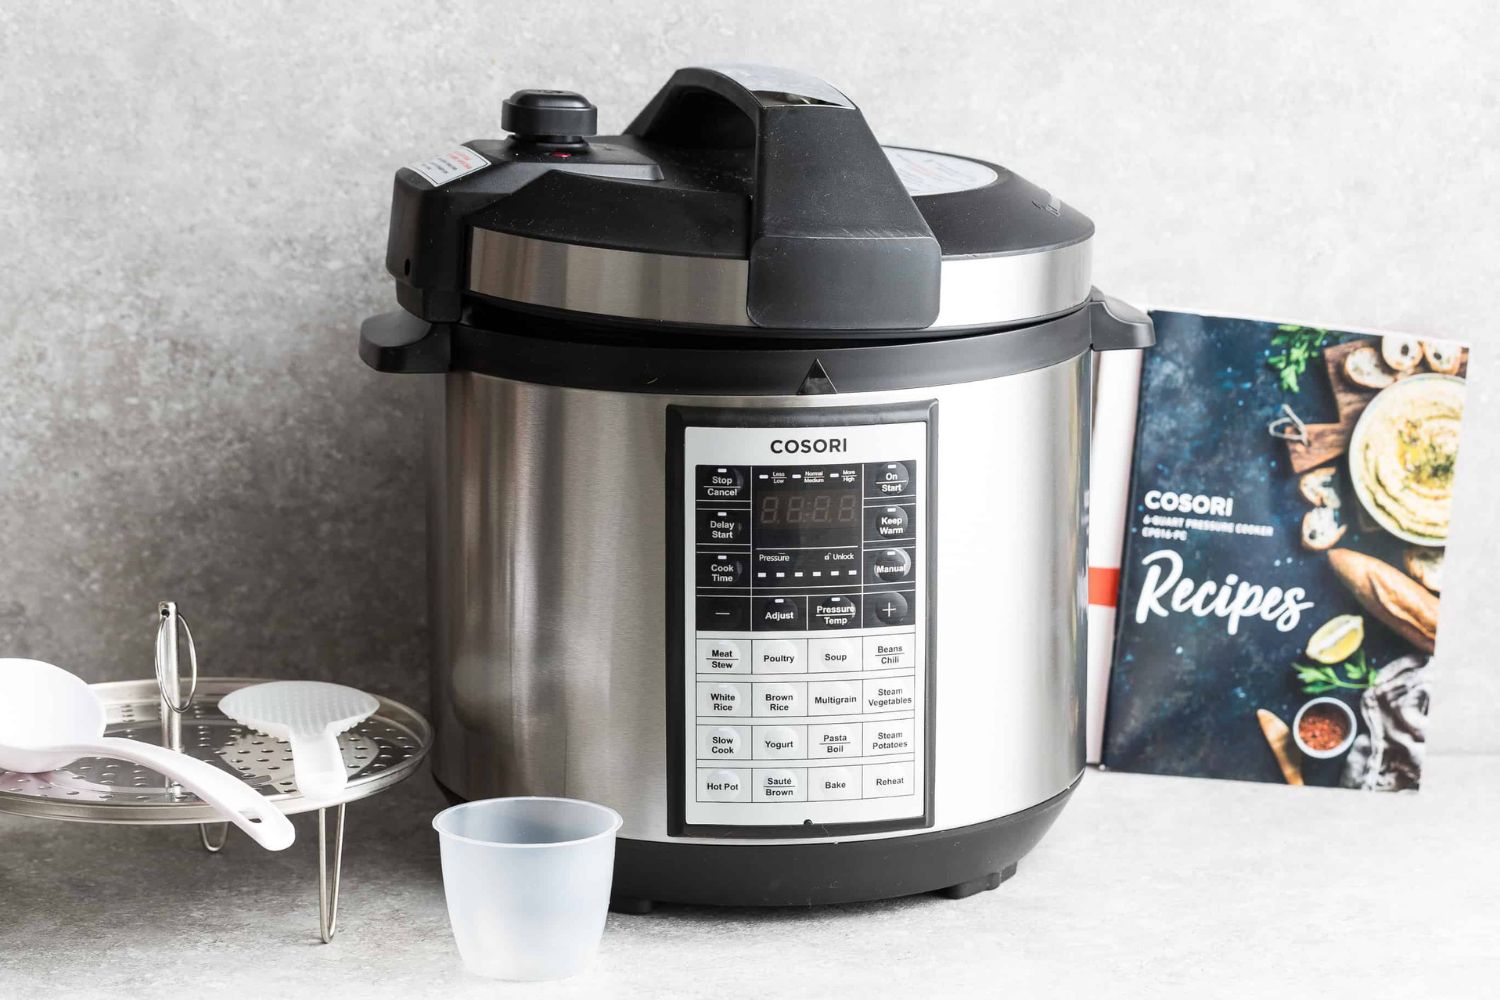
- Gather Your Tools: Assemble the necessary tools and ingredients for the preparation process. You’ll need a sharp knife, cutting board, spoon, and your Cuisine Art electric pressure cooker.
- Set Up the Pressure Cooker: Familiarize yourself with the user manual of your electric pressure cooker and ensure that all the necessary components are clean and in working order. This will help streamline the cooking process and ensure optimal safety.
- Select the Size: Determine the size of the spaghetti squash and adjust the cooking settings accordingly. Smaller squash will typically require less cooking time, while larger ones may need a bit more time to cook through.
- Prick the Squash: Using a fork or a small paring knife, carefully prick the surface of the squash in a few places. This will help prevent the squash from bursting during the cooking process by allowing steam to escape.
By following these preparation steps, you’ll ensure that your spaghetti squash is ready to be transformed into a delicious and satisfying meal. Now that you’ve prepared the squash, it’s time to move on to the next step: cutting the spaghetti squash.
Step 2: Cutting the Spaghetti Squash
Once you’ve properly prepared the spaghetti squash, it’s time to cut it into halves. Follow these steps to safely and effectively cut the squash:
- Stabilize the Squash: Place the spaghetti squash on a stable surface, such as a cutting board, to prevent it from rolling or moving while cutting. This will help ensure your safety and make the cutting process easier.
- Cut off the Ends: Using a sharp knife, carefully slice off both ends of the spaghetti squash. This will create a flat surface at both ends, making it easier to cut it in half.
- Halve the Squash: Holding the squash firmly with one hand, carefully cut it in half lengthwise, from top to bottom, using a sharp knife. Apply gentle pressure and let the knife glide through the squash. Take your time and be cautious while cutting.
- Remove the Seeds: Once the squash is halved, use a spoon to scoop out the seeds and any stringy pulp from the center. Make sure to remove all the seeds to prevent them from interfering with the cooking process.
Remember to exercise caution while cutting the spaghetti squash, as it can be quite firm and require some effort to slice through. Take your time and maintain a firm grip on the knife and the squash for optimal safety.
With the spaghetti squash now properly cut, you’re on your way to a delicious and satisfying meal. The next step involves preparing the pressure cooker for cooking the squash, so let’s move on to Step 3 in the process.
Step 3: Preparing the Pressure Cooker
With the spaghetti squash cut and ready, it’s time to prepare your electric pressure cooker for cooking. Follow these steps to ensure the cooker is ready to create a perfectly cooked spaghetti squash:
- Add Liquid: Most electric pressure cookers require the addition of a small amount of liquid to create the necessary steam and build pressure. Check your electric pressure cooker’s user manual for the recommended amount of liquid. Common options include water, vegetable broth, or chicken broth.
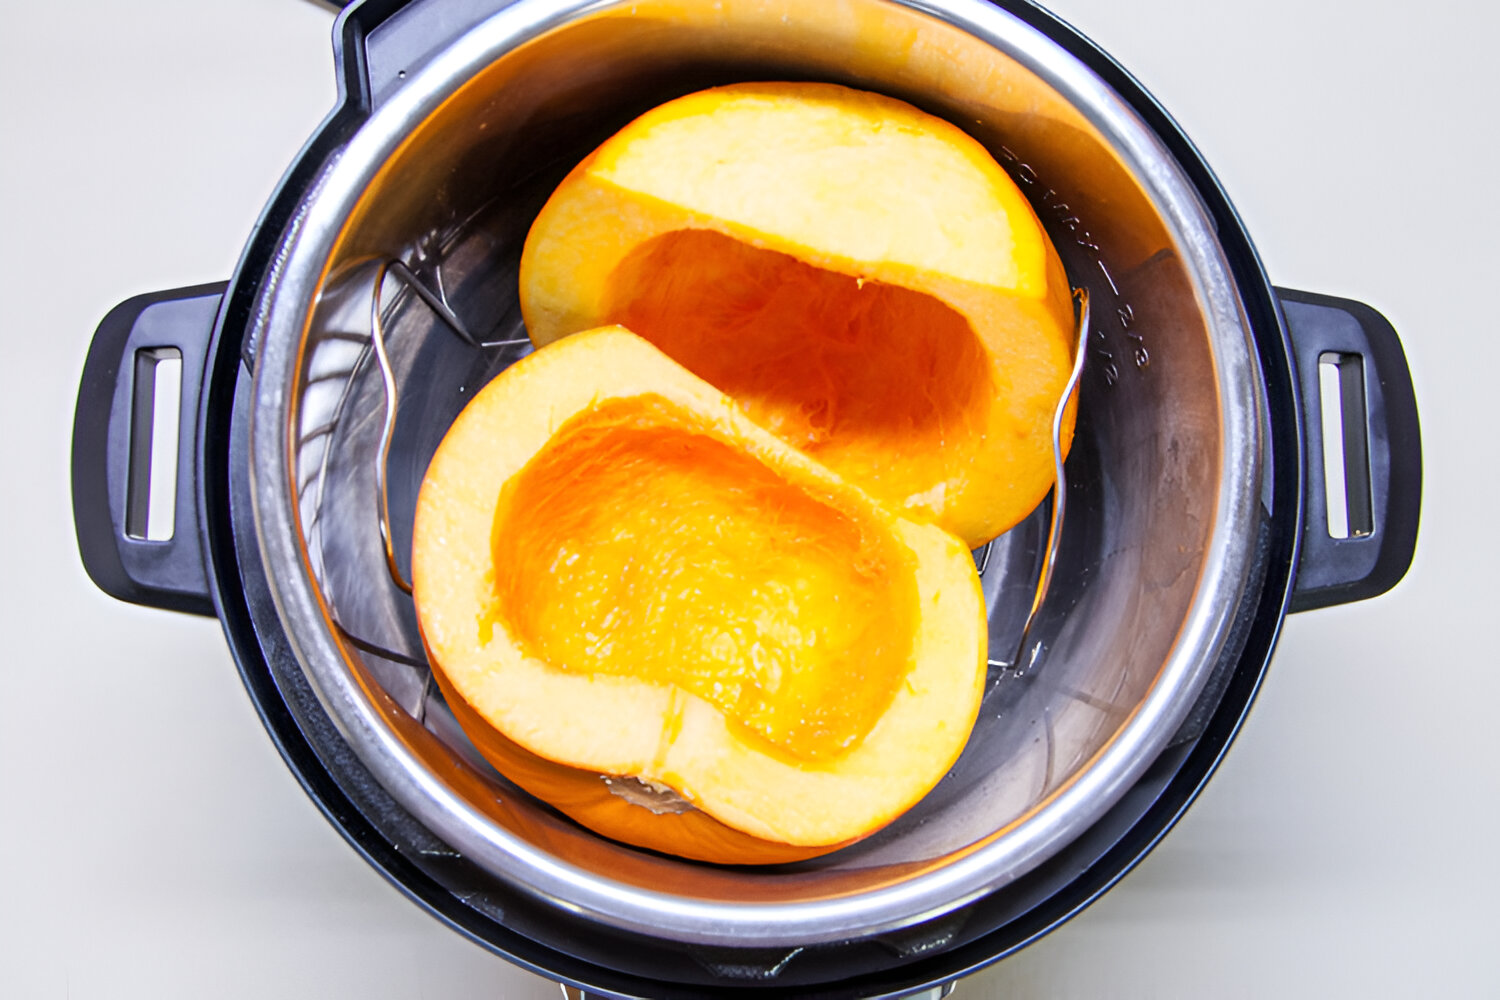
- Place the Trivet: Inside the pressure cooker pot, place the trivet or steamer basket that came with your cooker. This will keep the spaghetti squash elevated above the liquid, preventing it from becoming waterlogged during cooking.
- Add the Squash: Carefully place the halved spaghetti squash, cut side up, on the trivet or steamer basket inside the pressure cooker. Ensure that both halves are positioned securely and won’t tip over during the cooking process.
- Secure the Lid: Make sure the pressure cooker’s lid is securely in place. Follow the manufacturer’s instructions for properly locking the lid to ensure a safe cooking experience.
- Set the Cooking Time: Use your electric pressure cooker’s manual or preset settings to select the appropriate cooking time for spaghetti squash. Generally, 7-10 minutes on high pressure is sufficient, but adjust the time based on the size and desired tenderness of your squash.
Once you’ve completed these steps, the pressure cooker is now prepared and ready to cook the spaghetti squash. The next step will guide you through the cooking process, so let’s move on to Step 4!
Step 4: Cooking the Spaghetti Squash
Now that your pressure cooker is prepared, it’s time to cook the spaghetti squash to perfection. Follow these steps to ensure a well-cooked and flavorful result:
- Set the Pressure: Start by setting your electric pressure cooker to the appropriate pressure setting. Most spaghetti squash recipes recommend cooking at high pressure, but refer to your cooker’s manual for specific instructions.
- Set the Timer: Use the cooking time recommendations from your recipe or adjust based on the size of your spaghetti squash. Generally, 7-10 minutes of cooking time at high pressure is sufficient. Remember, cooking times may vary, so it’s essential to customize the timing based on your preferences.
- Start the Cooking Process: Once you’ve set the pressure and timer, start the cooking process by pressing the appropriate button on your electric pressure cooker. It may take a few minutes for the cooker to reach the desired pressure, so be patient and follow the on-screen instructions.
- Allow Natural Pressure Release: After the cooking time is complete, allow the pressure to release naturally. This process can take anywhere from 5 to 15 minutes, depending on the cooker and the amount of squash being cooked. Natural release helps the squash continue cooking gently and ensures better texture and flavor.
While the spaghetti squash is cooking, you can prepare any desired sauces or toppings to accompany the cooked strands later. This allows you to create a complete and satisfying meal once the squash is ready to be served.
As the cooking process nears its end, you’re one step closer to enjoying a delicious spaghetti squash dish. In the next step, you’ll learn how to release the pressure and safely open the cooker, so let’s move on to Step 5!
Step 5: Releasing the Pressure and Opening the Cooker
With the spaghetti squash cooked to perfection in your pressure cooker, it’s time to release the pressure and safely open the cooker. Follow these steps for a smooth and safe process:
- Natural Pressure Release: After the cooking time has completed, allow the pressure inside the cooker to release naturally. This can take anywhere from 5 to 15 minutes, depending on the size of the spaghetti squash. Do not attempt to open the cooker until the pressure has fully released.
- Check the Pressure Indicator: Before proceeding, ensure that the pressure indicator on your electric pressure cooker has dropped, indicating that it is safe to open. This helps prevent any accidental burns or injuries.
- Open the Lid: Once the pressure indicator has dropped, carefully unlock and open the lid of your electric pressure cooker. Open it away from your face to avoid any potential steam release.
- Remove the Squash: Using a pair of heat-resistant gloves or tongs, carefully lift the cooked spaghetti squash out of the pressure cooker. Place it on a heatproof surface or cutting board to cool slightly before proceeding.
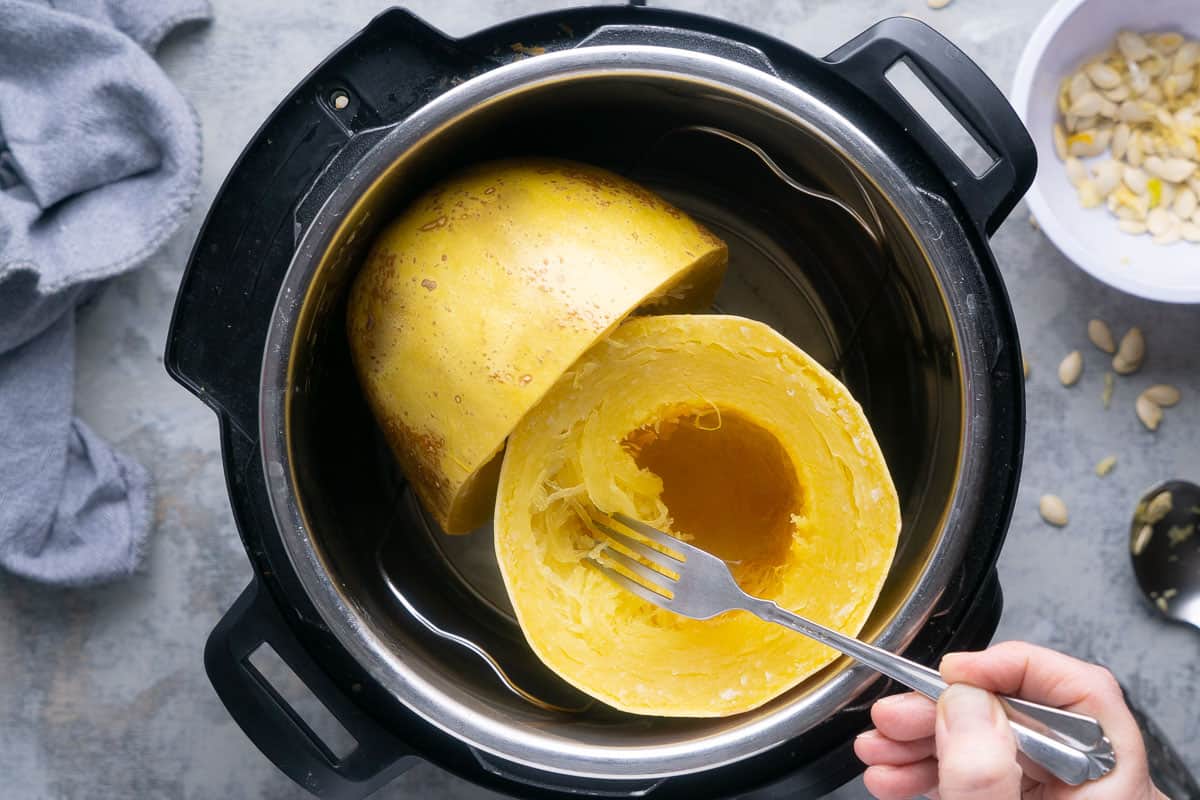
- Test for Doneness: To ensure that the squash is fully cooked, insert a fork into the flesh. If it easily punctures the flesh, and the strands separate easily, the spaghetti squash is done. If it feels too firm, you can place it back in the cooker for a few more minutes of cooking time.
With the pressure released and the cooker safely opened, you’re ready to move on to the next step: separating the spaghetti squash strands. Let’s continue to Step 6!
Step 6: Separating the Strands
Now that your cooked spaghetti squash is out of the pressure cooker, it’s time to separate the strands. Follow these steps to easily transform the squash into spaghetti-like strands:
- Allow the Squash to Cool: Before handling the cooked spaghetti squash, allow it to cool slightly to avoid any burns. You can let it sit for 5-10 minutes to make it easier and safer to handle.
- Hold the Squash: Take one half of the cooked spaghetti squash and hold it firmly with a fork or pair of tongs. This will help you maintain a steady grip while separating the strands.
- Scrape the Flesh: Using a fork, gently scrape the flesh of the squash in a downward motion from top to bottom. You’ll notice that the flesh easily separates into long strands that resemble spaghetti noodles. Continue scraping until you’ve loosened and removed all the strands from the squash.
- Repeat for the Other Half: Once you’ve finished separating the strands from one half of the squash, repeat the process for the other half. Use the same gentle scraping motion to extract all the strands.
As you separate the strands, you can lightly toss them with a fork to ensure they are evenly mixed and coated. This step will help distribute any flavors or sauces you plan to serve with the spaghetti squash.
With the strands separated, your spaghetti squash is now ready to be served and enjoyed. In the next step, you’ll learn how to plate and garnish your spaghetti squash dish, so let’s move on to Step 7!
Step 7: Serving and Enjoying
After the spaghetti squash strands have been separated, it’s time to plate your dish and add the finishing touches. Follow these steps to serve and enjoy your delicious spaghetti squash creation:
- Transfer the Strands: Carefully transfer the separated spaghetti squash strands to a serving platter or individual plates. Use a fork or tongs to handle the strands gently, ensuring they remain intact.
- Add Your Favorite Sauce: Once the strands are plated, you can choose to serve them as is or enhance the flavor by adding your favorite sauce. Whether it’s a classic marinara sauce, a creamy Alfredo sauce, or a pesto sauce, drizzle it over the spaghetti squash strands for added flavor.
- Garnish and Season: Customize your dish by adding garnishes such as freshly grated Parmesan cheese, chopped herbs like basil or parsley, or a sprinkle of red pepper flakes for some heat. Season with salt and pepper to taste.
- Pair with Protein or Vegetables: Enjoy the spaghetti squash on its own, or complement it with your choice of proteins like grilled chicken, shrimp, or tofu. You can also serve it alongside steamed vegetables or a fresh salad for a well-rounded meal.
- Serve and Enjoy: Once you’ve added your desired toppings and accompaniments, serve the spaghetti squash immediately. It’s best enjoyed while still warm.
Now it’s time to savor the flavors and textures of your homemade spaghetti squash dish. Grab a fork and dig into this nutritious and satisfying meal.
Keep in mind that leftover spaghetti squash can be stored in an airtight container in the refrigerator for a few days. Simply reheat in the microwave or on the stovetop for a quick and easy meal later on.
With Step 7 complete, it’s time to put your newfound spaghetti squash cooking skills to the test. Remember to experiment with different sauces, toppings, and sides to create a truly personalized dish. Enjoy the tasty and healthy benefits of cooking spaghetti squash in your electric pressure cooker!
Tips and Tricks
As you master the art of cooking spaghetti squash in your electric pressure cooker, consider these tips and tricks to enhance your cooking experience:
- Choose the right size: When selecting a spaghetti squash, opt for one that fits comfortably inside your pressure cooker. It should not be too big that it can’t fit or too small that it gets lost in the cooker.
- Adjust cooking time: Cooking times may vary depending on the size and tenderness you prefer for your spaghetti squash. Keep a close eye on the cooking process and adjust the time accordingly to achieve the desired texture.
- Experiment with seasonings: While plain spaghetti squash is delicious, don’t be afraid to experiment with different seasonings. Try adding herbs, spices, or even a dash of lemon juice to infuse additional flavors into the strands.
- Save the seeds: Instead of discarding the seeds, consider roasting them as a tasty snack. Rinse off any excess pulp, toss the seeds with olive oil and your choice of seasoning, and roast them in the oven for a crunchy treat.
- Double-check the seal: Before cooking, ensure that the pressure cooker’s seal is properly in place. This will help create a tight seal and prevent steam from escaping during the cooking process.
- Serve as a base: Spaghetti squash can serve as an excellent base for various dishes. Top it with your favorite meatballs and sauce, sautéed vegetables, or even a stir-fry for a versatile and nutritious meal.
- Freeze leftovers: If you have leftover cooked spaghetti squash, freeze it in airtight containers or freezer bags for future use. It can be a convenient addition to soups, stews, or stir-fries.
With these tips and tricks, you will be able to elevate your spaghetti squash cooking game and create a variety of delicious and nutritious dishes using your electric pressure cooker.
Now that you have all the knowledge and guidance needed to cook spaghetti squash in your electric pressure cooker, it’s time to get started. Enjoy the process, experiment with flavors, and savor the delicious results. Happy cooking!
Conclusion
Cooking spaghetti squash in your Cuisine Art electric pressure cooker opens up a world of possibilities for creating delicious and healthy meals. With the right techniques and tips, you can quickly transform this versatile vegetable into a satisfying pasta alternative.
Throughout this guide, we’ve walked you through the step-by-step process of cooking spaghetti squash in your electric pressure cooker. From preparing the squash to separating the strands and adding your favorite toppings, each step was designed to help you achieve a perfectly cooked dish.
By using an electric pressure cooker, you can enjoy the benefits of time efficiency, tender and flavorful results, and the retention of nutritional value. The convenience and versatility of an electric pressure cooker make it an invaluable tool in your kitchen.
Remember to select the right-sized spaghetti squash, adjust cooking times to suit your preferences, and don’t be afraid to experiment with flavors and seasonings. The possibilities are endless, and you can customize your spaghetti squash dishes to suit your taste.
We hope this guide has provided you with the knowledge and confidence to explore the world of spaghetti squash in your electric pressure cooker. So, grab your ingredients and get ready to create delicious and healthy meals that will delight your taste buds and nourish your body.
Happy cooking!