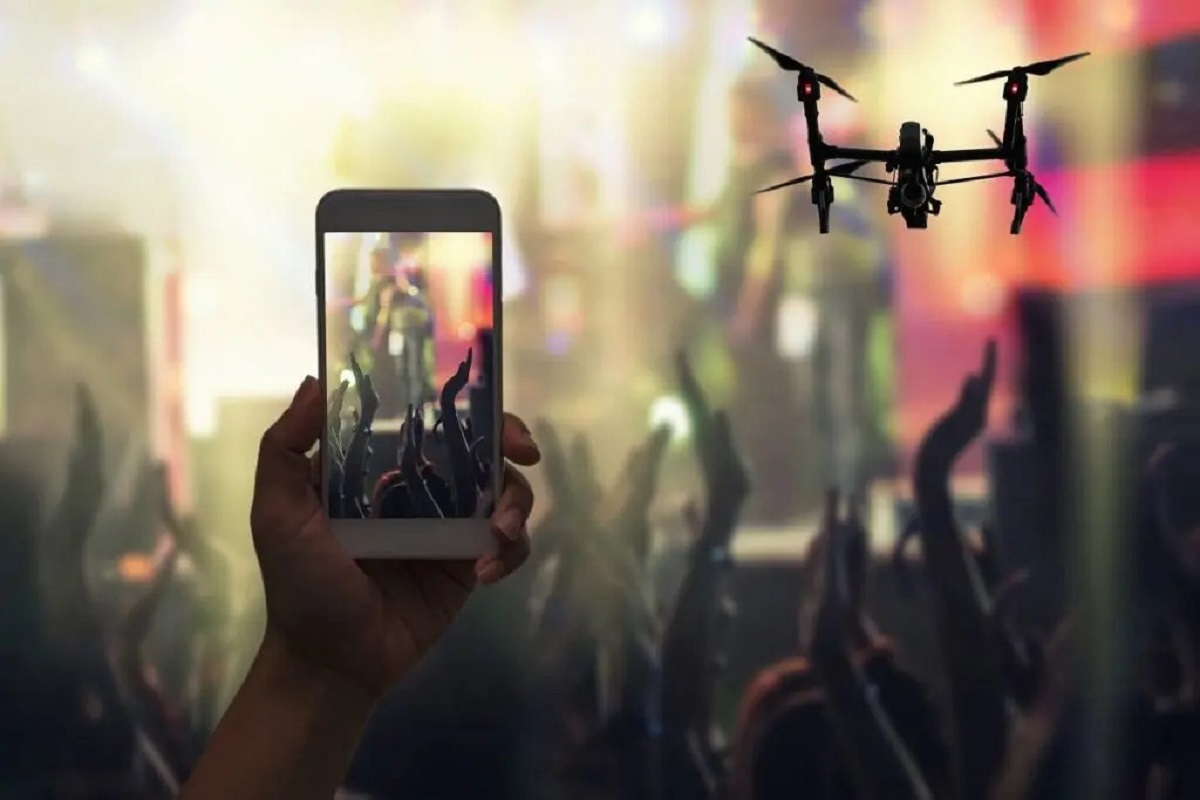
Introduction
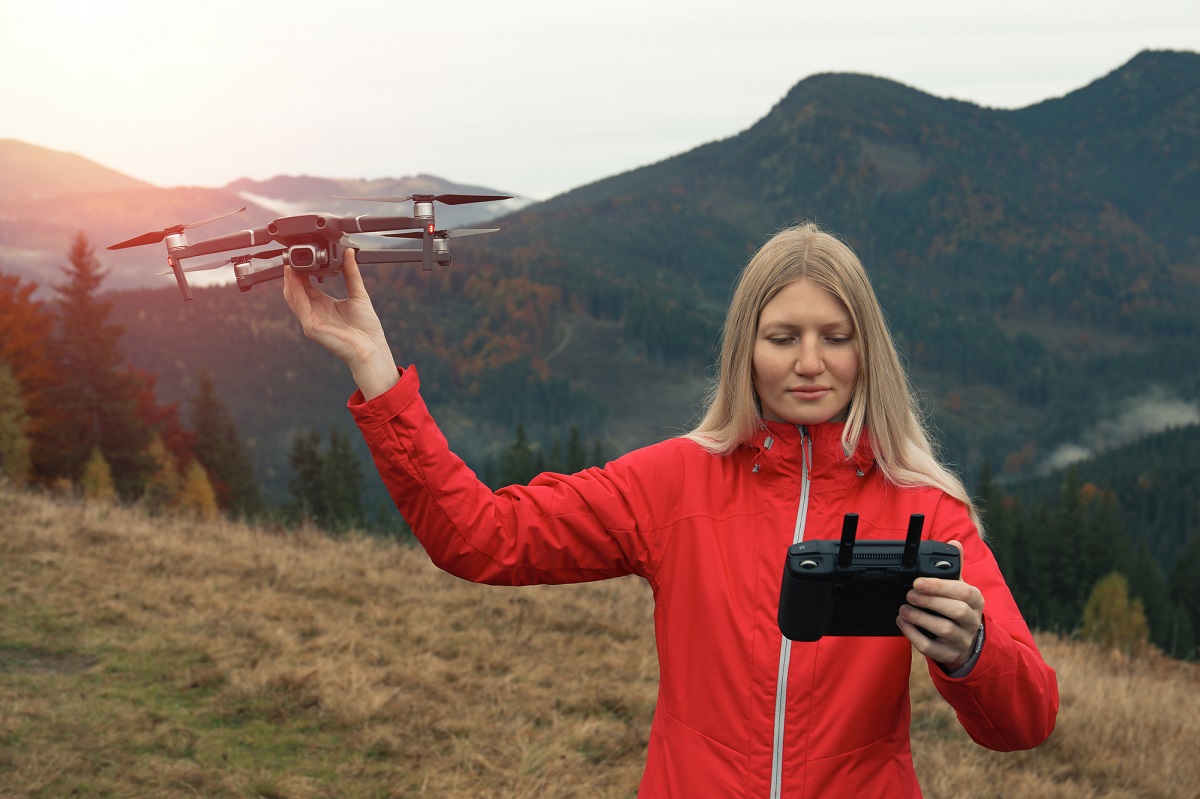
Connecting your drone to your phone opens up a world of possibilities, allowing you to take full advantage of its capabilities and capture stunning aerial footage with ease. Whether you’re an avid photographer, a passionate filmmaker, or simply an enthusiast looking to explore the skies, connecting your drone to your phone is an essential step.
By establishing a connection between your drone and your phone, you gain access to a variety of features and functionalities that enhance your overall drone experience. From real-time video feeds to remote control capabilities, connecting your drone to your phone allows you to take full control of your aerial adventures.
In this comprehensive guide, we will walk you through the step-by-step process of connecting your drone to your phone. Whether you’re using an iOS or Android device, the instructions provided here will ensure that you are able to establish a seamless connection without any hassle.
We will explore the compatibility requirements, the installation of the necessary app, the process of connecting your drone to your phone, and how to navigate the app interface. We will also cover advanced settings and troubleshooting tips to help you address any issues that may arise during the connection process.
So, if you’re ready to unlock the full potential of your drone and take your aerial photography or videography to the next level, let’s dive into the step-by-step process of connecting your drone to your phone.
Step 1: Check Compatibility
Before connecting your drone to your phone, it’s crucial to ensure that your drone and phone are compatible. Different drone models have varying compatibility requirements, so it’s essential to check the manufacturer’s guidelines or user manual for specific details.
First, you’ll want to check if your drone requires a specific mobile operating system, such as iOS or Android. Additionally, verify the minimum software version required for the drone app to function properly on your phone.
Next, consider the hardware requirements. Some drones may require specific hardware features, such as a gyroscope or compass, to ensure optimal functionality. It’s important to make sure your phone has these necessary components.
Another aspect to consider is the connectivity options. Drones generally connect to phones through Wi-Fi or Bluetooth. Ensure that your phone supports the required connectivity method for your drone model.
Lastly, check if your drone app is available for download on your phone’s app store. Most drone manufacturers provide their apps on both the Apple App Store for iOS devices and Google Play Store for Android devices. Make sure your app is compatible with your phone’s operating system.
By carefully checking the compatibility requirements, you can ensure that your drone and phone are capable of establishing a seamless connection. This step sets the foundation for the successful connection process, providing you with a smooth and uninterrupted drone experience.
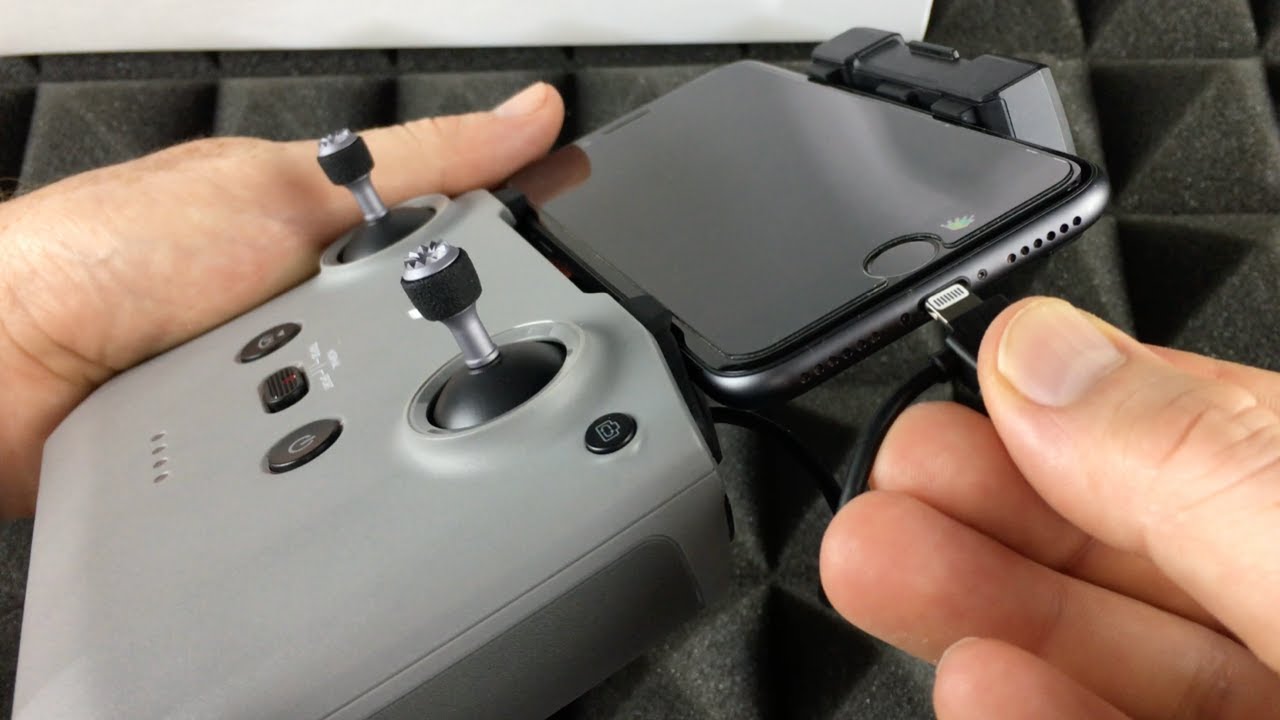
Step 2: Install the App
Once you’ve confirmed the compatibility between your drone and phone, the next step is to install the corresponding drone app on your device. This app serves as a bridge between your drone and phone, enabling you to control, monitor, and access various features and settings.
To begin, open your phone’s app store, either the Apple App Store for iOS devices or the Google Play Store for Android devices. Search for the official app provided by the drone manufacturer.
Look for the app that corresponds to your specific drone model. It’s important to note that different drone models may have different apps, so ensure that you download the correct one.
Once you’ve found the app, tap on the “Install” or “Get” button to initiate the download and installation process. Depending on your internet connection speed, the app installation may take a few moments to complete.
After the installation is finished, locate the app on your phone’s home screen or in your app drawer. Tap on the app icon to launch it.
Upon launching the app for the first time, you may be prompted to grant certain permissions, such as access to your device’s location or camera. These permissions are necessary for the app to function properly and provide you with the best experience.
Follow the on-screen prompts to complete any setup or registration processes that may be required. This may involve creating an account with the drone manufacturer or connecting to your drone through a Wi-Fi or Bluetooth connection.
Once the app is installed and set up, you’re one step closer to connecting your drone to your phone. In the next step, we will guide you through the process of powering on your drone and preparing it for the connection.
Step 3: Power on Your Drone
Now that the app is installed on your phone, it’s time to power on your drone. This step is crucial as it initializes the drone’s systems and prepares it for the connection with your phone.
First, locate the power button on your drone. This button is usually located on the battery or the body of the drone itself. Press and hold the power button until you see or hear signs of the drone coming to life. This may include lights blinking or the drone making a startup sound.
Once the drone is powered on, give it a few moments to fully initialize. During this time, the drone’s internal systems are booting up, and it’s establishing its connection with the remote control or the app on your phone.
Make sure your drone is placed on a stable surface and away from any obstacles or obstructions. This will ensure that it maintains a steady connection with your phone and remains safe during the connection process.
It’s essential to follow the specific startup procedure outlined in your drone’s user manual. Each drone model may have slightly different instructions for powering on and initializing. Refer to the manual for any additional steps or precautions that need to be followed.
Once your drone is powered on and ready, proceed to the next step to enable Wi-Fi or Bluetooth on your phone to establish the connection with your drone.
Step 4: Enable Wi-Fi/Bluetooth on Your Phone
To connect your drone to your phone, you’ll need to enable either Wi-Fi or Bluetooth on your phone, depending on the connectivity method supported by your drone model. Follow the instructions below to enable the appropriate option:
If your drone connects via Wi-Fi:
1. Open the settings menu on your phone and navigate to the Wi-Fi settings.
2. Toggle the Wi-Fi switch to “On” to enable Wi-Fi connectivity.
3. Wait for your phone to scan for available Wi-Fi networks.
4. Look for the Wi-Fi network name or SSID that corresponds to your drone. The network name should be mentioned in your drone’s user manual or displayed on the drone itself.
5. Tap on the drone’s Wi-Fi network to connect. You may need to enter a password if prompted. Again, refer to your drone’s user manual for any specific details.
6. Once connected, your phone will display a Wi-Fi icon indicating a successful connection to your drone’s network.
If your drone connects via Bluetooth:
1. Open the settings menu on your phone and navigate to the Bluetooth settings.
2. Toggle the Bluetooth switch to “On” to enable Bluetooth connectivity.
3. Wait for your phone to scan for nearby Bluetooth devices.
4. Look for your drone’s name or device ID in the list of available Bluetooth devices. This information can typically be found in your drone’s user manual or on the drone itself.
5. Tap on your drone’s name to establish a Bluetooth connection.
6. Once connected, your phone will display a Bluetooth icon indicating a successful connection to your drone.
Enabling Wi-Fi or Bluetooth on your phone is an essential step to establish a connection with your drone. Ensure that the appropriate connectivity method is enabled before proceeding to the next step.
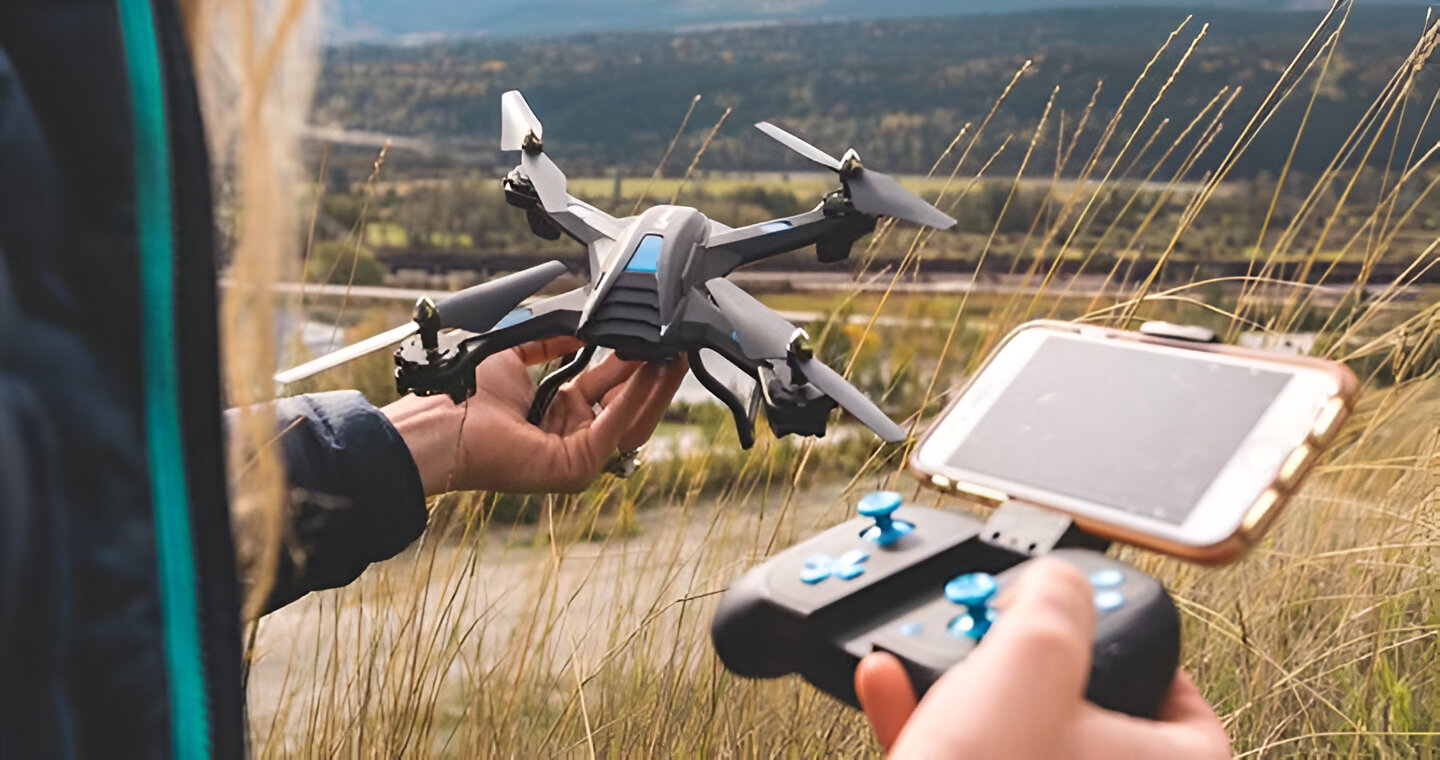
Step 5: Connect Your Drone to Your Phone
Now that you have enabled Wi-Fi or Bluetooth on your phone, it’s time to establish the connection between your drone and your phone. Follow the instructions below to connect your drone to your phone:
1. Open the drone app on your phone. The app should be already installed and ready to use from the previous steps.
2. Look for a button or option within the app that says “Connect” or “Pair.” Select this option to initiate the connection process.
3. The app will start scanning for available drones. Make sure your drone is powered on and ready to establish a connection.
4. Once the app detects your drone, it will display the name or model of the drone on the screen. Tap on the drone’s name to select it.
5. The app will attempt to establish a connection between your phone and the drone. This process may take a few seconds or longer, depending on your specific drone model.
6. Once the connection is established, you will receive a confirmation message or notification on the app indicating a successful connection. The app interface may also display a live video feed or status information from the drone.
7. At this point, your drone is successfully connected to your phone, allowing you to access various features and settings through the app.
It’s worth noting that the connection process may vary slightly depending on the drone app and model you are using. Make sure to refer to the app’s user manual or help section if you encounter any difficulties during the connection process.
Now that your drone and phone are connected, you’re ready to explore the app interface and begin utilizing the remote control and other functionalities. In the next step, we will guide you through navigating the app’s interface and using its features effectively.
Step 6: Navigate the App Interface
Now that your drone is connected to your phone, it’s important to familiarize yourself with the app interface. Each drone app may have a slightly different layout and set of features, but there are generally similar elements you’ll find across most apps. Here’s how to navigate the app interface:
1. Home Screen: When you open the app, you’ll likely land on the home screen. This screen may display options such as flight modes, camera settings, or a live video feed from your drone. Take a moment to explore the available options and get an overview of the app’s functionality.
2. Flight Controls: In the app, you’ll find virtual flight controls that mimic the physical controls of a remote controller. These on-screen controls allow you to pilot your drone, control its movement, and adjust its altitude. Spend some time practicing with these controls to get comfortable flying your drone from your phone.
3. Camera Settings: Most drone apps provide access to camera settings, such as resolution, shutter speed, and exposure settings. These settings allow you to customize your image and video capture according to your preferences and the specific requirements of your aerial photography or videography project.
4. Flight Planning: Some apps offer features for flight planning and waypoint navigation. This allows you to pre-program flight paths, waypoints, and even automate certain tasks for more complex shots. Take advantage of these features to capture precisely calculated aerial footage.
5. Telemetry Data: The app may display real-time telemetry data from your drone, including battery status, GPS coordinates, altitude, and speed. Monitoring these metrics can help ensure a safe and efficient flight and allow you to make informed decisions during your aerial adventures.
6. Media Gallery: Drone apps often include a media gallery where you can view and manage the photos and videos you’ve captured with your drone. This feature allows you to review and share your aerial footage directly from the app.
Familiarizing yourself with the different sections and features of the app will help you make the most of your drone’s capabilities. Spend some time exploring the app’s interface, experimenting with the various options and settings, and mastering the flight controls.
By becoming comfortable with the app interface, you’ll be able to confidently navigate your drone and capture breathtaking aerial shots, transforming your smartphone into a powerful control center for your drone adventures.
Step 7: Utilize Remote Control Functions
With your drone connected to your phone, you now have access to a range of remote control functions that allow you to pilot your drone with precision and control. Understanding and utilizing these functions effectively will enhance your drone flying experience. Here are some key remote control functions to take advantage of:
1. Takeoff and Landing: The app should have dedicated buttons or controls for initiating takeoff and landing sequences. These functions allow you to safely launch your drone into the air and bring it back down smoothly.
2. Flight Modes: Explore the different flight modes available in the app. These modes can include options like Sport Mode for faster and more agile flights, GPS Mode for stable hovering and precise positioning, or Follow Me Mode for automated tracking of a moving subject.
3. Joysticks: The app interface should feature virtual joysticks that mimic the physical joysticks on a traditional drone controller. Use these joysticks to control the drone’s movement, adjusting pitch, roll, yaw, and throttle to maneuver the drone through the air.
4. Auto Return Home: Most drones have an auto return home function that allows them to automatically return to their takeoff location. This can be triggered from the app interface and is particularly useful in case of emergencies or when the drone goes out of range.
5. Gimbal Control: If your drone is equipped with a gimbal for stabilizing the camera, the app should provide controls to adjust the gimbal position. This allows you to tilt or pan the camera to capture different angles and perspectives.
6. Emergency Stop: In case of any unforeseen circumstances or emergencies, familiarize yourself with the emergency stop function available in the app. This will immediately stop the motors and bring the drone to a safe halt.
Take the time to understand each remote control function provided by the app. Practice using them in a safe and open area to gain confidence and fine-tune your piloting skills.
Remember to adhere to local regulations, always keep your drone within line of sight, and fly responsibly. Utilizing the remote control functions effectively will not only make your drone flying experience more enjoyable but also enable you to capture stunning aerial footage and create incredible memories.
Step 8: Access Live Video Feed
One of the most exciting features of connecting your drone to your phone is the ability to access a live video feed directly on your device. This allows you to see in real-time what your drone’s camera sees, giving you a bird’s-eye view from the sky. Here’s how to access the live video feed:
1. Open the drone app on your phone. Ensure that your drone is connected and powered on.
2. Look for a button or option within the app that corresponds to live video or FPV (first-person view) mode. It may be represented by an icon resembling a camera or a small screen.
3. Tap on the button or option to initiate the live video feed. The app will establish a connection to your drone’s camera and start streaming the video feed.
4. Once the live video feed is active, you should see a real-time visualization of what your drone’s camera captures. This includes the view from the sky, allowing you to explore your surroundings and plan your shots.
5. Take advantage of the various controls provided in the app to adjust the camera’s position and settings as needed. This will allow you to capture the desired angles and perspectives.
6. Enjoy the immersive experience of piloting your drone while simultaneously viewing the live video feed on your phone’s screen. Use this visual feedback to navigate your drone safely and capture stunning aerial shots.
Having access to the live video feed enhances your control and composition skills, as you can frame your shots with precision and make informed decisions while flying. It also provides a thrilling and immersive experience, making you feel like you’re right in the middle of the action.
Remember to ensure a stable and strong connection between your drone and phone to maintain a smooth and uninterrupted live video feed. Avoid flying in areas with poor signal strength or interference that may disrupt the video transmission.
Enjoy exploring and capturing breathtaking aerial footage as you utilize the live video feed feature on your drone app.
Step 9: Configure Advanced Settings
Connecting your drone to your phone gives you access to a range of advanced settings and configurations that can enhance your aerial photography or videography experience. These settings allow you to customize your drone’s behavior, adjust camera parameters, and fine-tune various aspects of its performance. Here’s how to configure advanced settings:
1. Open the drone app on your phone and ensure that your drone is connected and powered on.
2. Look for a settings or options menu within the app interface. This menu may be represented by an icon with gears or three stacked dots.
3. Tap on the settings menu to access the advanced settings and configurations.
4. Explore the available options and menus within the settings. Common advanced settings include flight modes, camera settings, exposure settings, video resolution, image stabilization, and much more.
5. Adjust the settings according to your preferences and the specific requirements of your aerial photography or videography project. Take your time to experiment with different settings and find the optimal configurations for achieving the desired results.
6. Once you have configured the advanced settings, make sure to save and apply the changes before exiting the settings menu.
It’s important to familiarize yourself with the user manual or documentation provided by the drone manufacturer to understand the specific details and options available in the advanced settings of your drone app. These settings vary depending on the model and capabilities of your drone.
Keep in mind that while configuring advanced settings can greatly enhance your drone’s performance, it’s important to strike a balance between customization and stability. Avoid making drastic changes without proper knowledge or understanding of their implications.
Regularly review and update your advanced settings as needed, considering factors such as lighting conditions, desired shot composition, weather conditions, and the specific requirements of your projects.
By taking advantage of the advanced settings available on the drone app, you can elevate your aerial photography or videography to new heights, capturing stunning footage and pushing the boundaries of creativity.
Step 10: Troubleshooting Tips
While connecting your drone to your phone is generally a smooth and straightforward process, occasional issues or challenges may arise. It’s important to be prepared and equipped with troubleshooting strategies to overcome any obstacles. Here are some troubleshooting tips to help you out:
1. Check Battery Levels: Ensure that both your drone and your phone have sufficient battery levels. Low battery levels can lead to connectivity issues or unexpected disconnections.
2. Restart the App: Sometimes, restarting the drone app can resolve minor connectivity or performance issues. Close the app completely and relaunch it to establish a fresh connection with your drone.
3. Verify Connectivity Settings: Double-check that you have correctly enabled Wi-Fi or Bluetooth on your phone, based on the required connectivity method for your specific drone model.
4. Reset Network Settings: If you’re experiencing persistent connection problems, try resetting the network settings on your phone. This can help resolve any configuration conflicts or issues with your device’s network settings.
5. Reboot Your Drone: Powering off and then on your drone can sometimes clear any temporary glitches or errors it may encounter during the connection process. Make sure to follow the proper startup procedure outlined in your drone’s user manual.
6. Update Firmware: Keep your drone’s firmware updated to ensure compatibility with the drone app and any new features or bug fixes. Check the manufacturer’s website or the app settings for firmware updates and install them if available.
7. Check for Interference: Avoid flying your drone in areas with heavy Wi-Fi signal interference or crowded radio frequencies. Interference can disrupt the connection between your drone and your phone. Consider changing the location or using Wi-Fi extenders to improve signal quality.
8. Contact Manufacturer Support: If you have attempted the troubleshooting tips above and are still experiencing issues, reach out to the drone manufacturer’s customer support for assistance. They can provide specific guidance and help resolve any technical challenges.
Remember to always prioritize safety while troubleshooting. Do not attempt risky maneuvers or fly in hazardous conditions when facing connectivity or performance issues with your drone.
By utilizing these troubleshooting tips, you can overcome common challenges and ensure a smooth and enjoyable experience when connecting your drone to your phone.
Conclusion
Connecting your drone to your phone opens up a world of possibilities, allowing you to fully leverage the capabilities of your drone and capture breathtaking aerial footage. By following the step-by-step process outlined in this guide, you can establish a seamless connection and unlock a range of features and functionalities.
We began by ensuring the compatibility between your drone and phone, checking for necessary hardware, software, and connectivity requirements. Next, we walked through the installation of the drone app, enabling you to control and monitor your drone from your phone.
We then covered the essential steps of powering on your drone, enabling Wi-Fi or Bluetooth on your phone, and establishing a connection between the two devices. This connection allowed you to access a live video feed and utilize remote control functions, giving you the ability to pilot your drone with precision and control.
We delved into navigating the app interface, familiarizing ourselves with flight controls, camera settings, and other useful features. Furthermore, we discussed configuring advanced settings to customize your drone’s behavior and fine-tune its performance to cater to your specific needs.
Lastly, we provided troubleshooting tips to help you overcome any issues or challenges that may arise during the connection process. By following these tips, you can troubleshoot and resolve common problems, ensuring a smooth and uninterrupted drone flying experience.
Remember to always fly responsibly, adhere to local regulations, and prioritize safety at all times. Regularly update your drone’s firmware and stay up to date with the latest features and enhancements provided by the drone manufacturer.
By connecting your drone to your phone, you can elevate your aerial photography or videography to new heights, capturing stunning footage and creating unforgettable memories. So, dive into the process, enjoy the freedom of flying, and embrace the incredible possibilities that await you in the sky!