Introduction
Gaming on a laptop has become increasingly popular, allowing gamers to enjoy their favorite titles on the go. While many gamers prefer using a mouse and keyboard, others prefer the familiarity and comfort of a controller. If you’re someone who enjoys using a wired PlayStation 4 (PS4) controller, you’ll be glad to know that it’s possible to connect it to your gaming laptop with the help of a Strikepack.
The Strikepack is a device that adds extra functionality to your controller, including the ability to connect it to a computer. By following a few simple steps, you can easily connect your wired PS4 controller with a Strikepack to your gaming laptop and start enjoying your favorite games with the comfort and precision of a controller. In this tutorial, we’ll walk you through the process of connecting your wired PS4 controller with a Strikepack on your gaming laptop.
Before we dive into the steps, there are a few things you’ll need. Firstly, ensure that you have a Strikepack for your PS4 controller. You can purchase one online or at your local gaming store. Additionally, make sure your gaming laptop has the necessary USB ports to connect the Strikepack and controller. Lastly, you’ll need a stable internet connection to download and install the necessary software. Once you have these items ready, you’ll be well on your way to connecting your wired PS4 controller with a Strikepack on your gaming laptop.
Now that you have a general understanding of what we’ll be covering in this tutorial, let’s move on to the first step – installing the necessary software.
Step 1: Installing the necessary software
Before you can connect your wired PS4 controller with a Strikepack on your gaming laptop, you need to install the required software. This software acts as a bridge, allowing your laptop to recognize and communicate with the controller through the Strikepack. Follow these steps to get started:
- Connect your gaming laptop to a stable internet connection.
- Open a web browser and visit the official website of the Strikepack manufacturer.
- Look for the “Downloads” or “Support” section on the website.
- Search for the software specifically designed for your gaming laptop’s operating system (e.g., Windows, macOS).
- Click on the download link for the software and save it to a convenient location on your laptop.
- Once the download is complete, locate the downloaded file on your laptop and double-click on it to start the installation process.
- Follow the on-screen instructions provided by the software installer to complete the installation. Make sure to read through each step carefully to ensure a successful installation.
- After the installation is complete, restart your gaming laptop to apply any necessary changes.
Congratulations! You have successfully installed the necessary software for connecting your wired PS4 controller with a Strikepack on your gaming laptop. With the software in place, you’re now ready to move on to the next step – connecting the Strikepack to your gaming laptop.
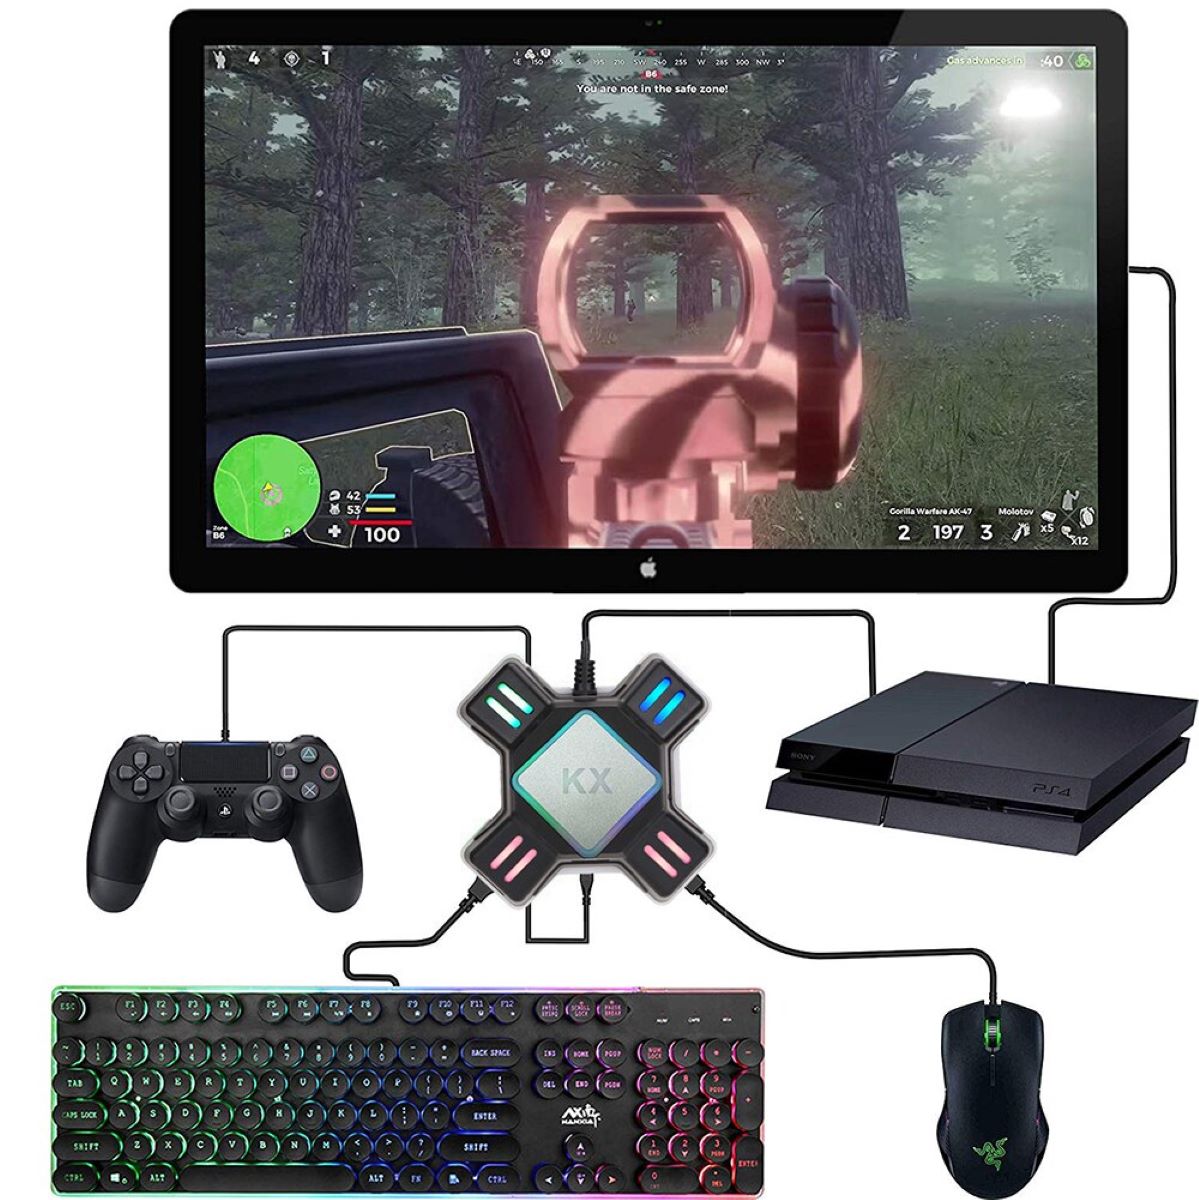
Step 2: Connect the Strikepack to your gaming laptop
Now that you have the necessary software installed, it’s time to connect the Strikepack to your gaming laptop. Follow these steps to ensure a proper connection:
- Locate the USB cable that came with your Strikepack. It should have one end that is compatible with the Strikepack and the other end that can be inserted into a USB port on your gaming laptop.
- Plug the USB cable into the designated slot on the Strikepack. Ensure that it is firmly connected.
- Take the other end of the USB cable and insert it into an available USB port on your gaming laptop. It’s best to use a USB port that is easily accessible and provides a stable connection.
- Wait for a few moments to allow your gaming laptop to recognize the Strikepack. You may see a notification or hear a sound indicating that a new device has been connected.
- Once the Strikepack is recognized, it’s essential to verify that the connection is successful. You can do this by checking the device manager on your gaming laptop. Navigate to the device manager, locate the Strikepack under the “USB devices” or “Other devices” section, and ensure that it is listed without any errors or warnings.
Great job! You have now successfully connected the Strikepack to your gaming laptop. With the Strikepack linked to your laptop, you’re one step closer to connecting your wired PS4 controller. Let’s move on to the next step – connecting the wired PS4 controller to the Strikepack.
Step 3: Connect the wired PS4 controller to the Strikepack
Now that the Strikepack is successfully connected to your gaming laptop, it’s time to connect your wired PS4 controller to the Strikepack. Follow these steps to establish the connection:
- Locate the USB port on the Strikepack and ensure it’s free from any obstructions or debris.
- Take the USB cable that is attached to your wired PS4 controller and plug it into the USB port on the Strikepack. Make sure it is securely inserted.
- Once the connection is established, your gaming laptop should recognize the wired PS4 controller. Similar to the previous step, you may receive a notification or hear a sound indicating that a new device has been connected.
- To ensure that the wired PS4 controller is properly recognized, open the device manager on your gaming laptop and navigate to the “Human Interface Devices” section.
- Look for the controller’s name listed in the device manager. It should include “PS4” or a similar indication to signify that it is the wired PS4 controller.
- Verify that the controller is listed without any errors or warnings. If there are any issues, such as a yellow exclamation mark or a warning symbol, try disconnecting and reconnecting the controller, making sure it is securely attached to the Strikepack.
Excellent! You have now successfully connected your wired PS4 controller to the Strikepack. The next step involves configuring the controller settings to ensure optimal performance. Let’s move on to step 4 – configuring the controller settings on your gaming laptop.
Step 4: Configure the controller settings
Now that your wired PS4 controller is connected to the Strikepack and recognized by your gaming laptop, it’s essential to configure the controller settings to ensure optimal performance. Follow these steps to customize the controller settings:
- Open the software that you previously installed for the Strikepack on your gaming laptop. It should have an icon or shortcut on your desktop or in the Start menu.
- Once opened, locate the controller settings menu or options within the software. This may vary depending on the manufacturer and software version, but it is usually labeled as “Controller Settings” or something similar.
- Within the controller settings menu, you’ll find various options to customize your wired PS4 controller’s behavior. This may include sensitivity adjustments, button mapping, and additional features specific to the Strikepack.
- Take some time to explore and experiment with these settings to find what works best for you. Adjust the sensitivity if the controller feels too responsive or not sensitive enough. Remap buttons if you prefer a different layout.
- Make sure to save your changes and apply the settings before exiting the controller settings menu.
Wonderful! You have successfully configured the controller settings for your wired PS4 controller connected to the Strikepack. With the settings customized to your liking, you’re ready to test out the controller on your favorite games. Let’s move on to step 5 – testing the controller on your gaming laptop.
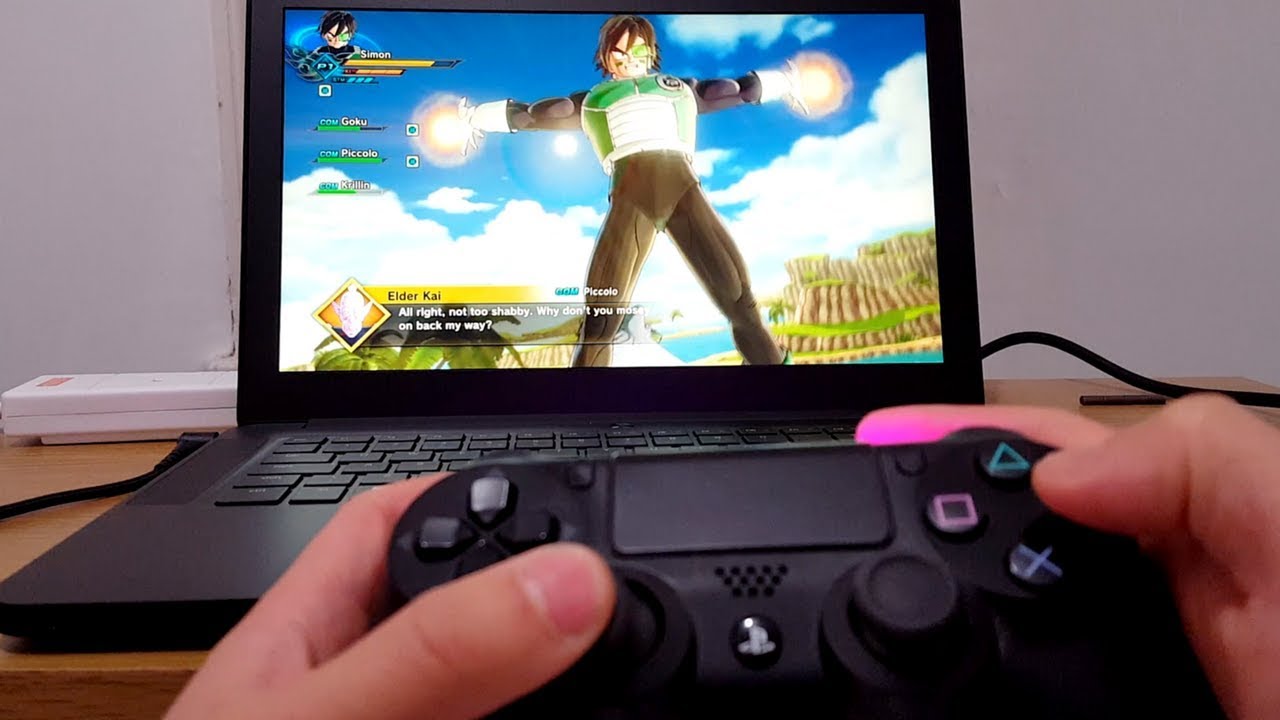
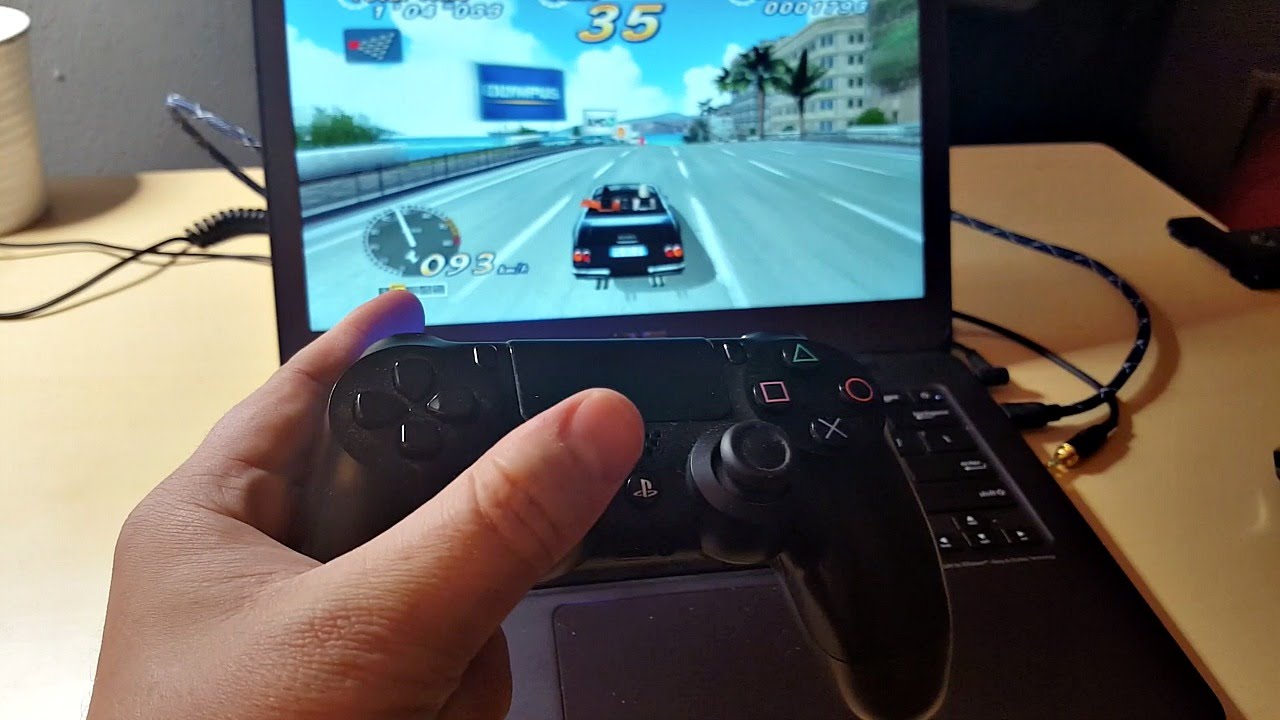
Step 5: Test the controller on your favorite games
Now that you have connected and configured your wired PS4 controller with the Strikepack on your gaming laptop, it’s time to put it to the test. Follow these steps to ensure that your controller works seamlessly with your favorite games:
- Launch one of your favorite games that supports controller input on your gaming laptop.
- In the game’s settings or options menu, navigate to the controller settings.
- Look for an option to enable controller input or to select the type of controller you are using. Choose the appropriate option for a PS4 controller.
- Once the controller input is enabled, start playing the game and see if the controller responds to your commands.
- Take some time to adjust to the controller’s feel and responsiveness. If needed, revisit the controller settings within the game to make any necessary tweaks, such as sensitivity or button mapping specific to the game itself.
- Play a few rounds or levels of the game to ensure that the controller functions as expected and provides a smooth gaming experience.
Great job! You have successfully tested your wired PS4 controller connected to the Strikepack on your gaming laptop. Now you can enjoy your favorite games with the comfort and precision of a controller, enhancing your gaming experience. Feel free to explore other games and genres to make the most out of your connected setup.
Remember, if you encounter any issues during the testing phase, you can go back and fine-tune the settings both within the Strikepack software and the game’s controller settings. Additionally, check for any updates or patches for both the Strikepack and your games, as these updates may improve compatibility and performance.
With your wired PS4 controller successfully connected and optimized for gaming on your laptop, you’re now ready to enjoy countless hours of immersive gameplay. Happy gaming!
Conclusion
Connecting a wired PS4 controller to a Strikepack on your gaming laptop opens up a world of gaming possibilities. With the comfort and precision of a controller, you can enjoy your favorite games on the go. In this tutorial, we covered the steps to connect your wired PS4 controller with a Strikepack on your gaming laptop, from installing the necessary software to configuring the controller settings. Let’s recap what we’ve learned:
Firstly, we emphasized the importance of having the necessary software installed on your gaming laptop. The software acts as a bridge, allowing your laptop to communicate with the controller through the Strikepack. We then moved on to the steps of connecting the Strikepack to your gaming laptop and ensuring a proper connection. Next, we discussed connecting the wired PS4 controller to the Strikepack, verifying that the controller is recognized by your laptop. Lastly, we explored the process of configuring the controller settings to suit your preferences and testing the controller on your favorite games to ensure optimal performance.
By following these steps, you can seamlessly integrate your wired PS4 controller with a Strikepack on your gaming laptop and enjoy the benefits of a controller-enhanced gaming experience.
Now that you have successfully connected and tested your wired PS4 controller, it’s time to dive into the world of gaming and explore your favorite titles with newfound comfort and precision. Remember to continue exploring the controller settings to fine-tune your experience and make gaming even more enjoyable. Whether you’re playing intense action games or immersive adventure titles, your wired PS4 controller combined with the Strikepack will provide you with an intuitive and responsive gaming experience.
Enjoy the freedom and versatility that comes with gaming on your laptop with a wired PS4 controller and a Strikepack. Get ready to embark on epic gaming adventures that will keep you entertained for hours on end. Happy gaming!