Introduction
Having a Samsung Smart TV allows you to access an array of entertainment options right from the comfort of your living room. From streaming your favorite shows and movies to browsing the web, a reliable Wi-Fi connection is essential for a seamless Smart TV experience. In this guide, we will walk you through the steps to connect your Samsung Smart TV to Wi-Fi so you can start enjoying all the features it offers.
Connecting your Smart TV to Wi-Fi opens up a world of possibilities. You can easily stream content from popular apps like Netflix, Hulu, and Amazon Prime Video or explore the vast collection of videos and music available on YouTube. Additionally, you can access social media platforms or browse the internet to stay connected with friends and family, or even use your TV as a second screen for work or gaming purposes.
Before you proceed with the setup process, ensure that you have the following: a Wi-Fi network with internet access, the Wi-Fi password (if applicable), and your Samsung Smart TV powered on. Once you have these essentials, you’re ready to get started!
Step 1: Turn on the TV and navigate to the settings menu
The first step to connect Wi-Fi in your Samsung Smart TV is to turn on the TV and access the settings menu. To do this, grab the TV remote control and press the power button to turn on the TV.
Once the TV is turned on, you will be greeted with the home screen. Use the arrow buttons on the remote control to navigate to the settings menu. The location of the settings menu may vary depending on your TV model, but it is usually represented by a gear icon or labeled as “Settings” or “Menu.”
Once you have located the settings menu, press the “Enter” or “OK” button on the remote control to enter the settings menu. This will open up a host of options for you to customize your TV settings.
Now that you have successfully accessed the settings menu, you are ready to proceed to the next step, where you will select the network option and choose the wireless connection.
Step 2: Select the Network option and choose the wireless connection
Once you have entered the settings menu on your Samsung Smart TV, it’s time to connect to a Wi-Fi network. Look for the “Network” or “Network Settings” option in the menu and select it using the remote control.
Within the Network settings, you will find a list of available connection options. Choose the option that says “Wireless” or “Wi-Fi” to proceed with the wireless connection setup.
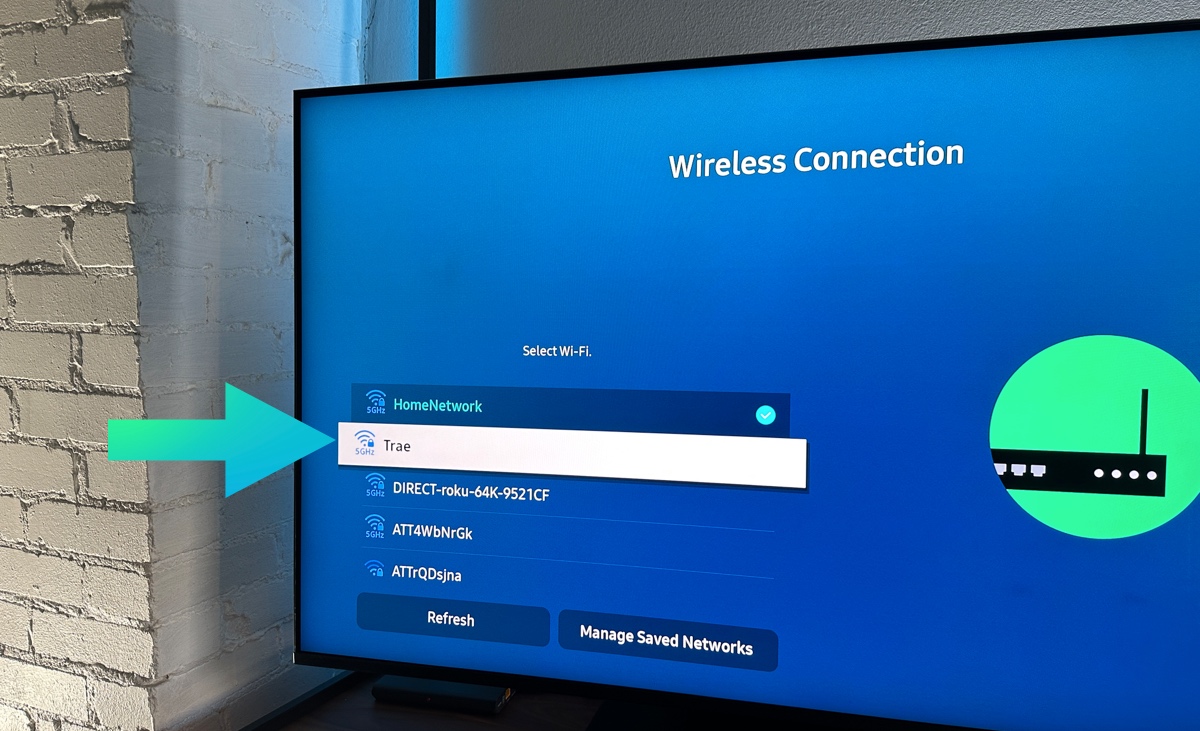
At this point, your TV will start scanning for nearby Wi-Fi networks. It may take a few moments for the scan to complete, so be patient. Once the scan is finished, a list of available Wi-Fi networks will be displayed on your screen.
Use the arrow buttons on your remote control to navigate through the list of available networks. Each network will be labeled with its name (also known as the SSID) and signal strength. Locate your desired Wi-Fi network from the list.
If you are unable to find your Wi-Fi network in the list, make sure that your router is powered on and broadcasting the network. You can also try moving the TV closer to the router to improve the signal strength.
Once you have located your Wi-Fi network, highlight it and press the “Enter” or “OK” button on the remote control to select it. This will prompt you to enter the Wi-Fi password if the network is secured with one.
Continue to the next step to learn how to enter the Wi-Fi password and complete the connection setup.
Step 3: Search for available Wi-Fi networks
Now that you have selected the wireless connection option in the Network settings of your Samsung Smart TV, it’s time to search for available Wi-Fi networks. This step will allow you to connect your TV to your desired Wi-Fi network.
Once you are in the Network settings, your TV will begin scanning for nearby Wi-Fi networks. This process may take a moment, so be patient. As the scan progresses, a list of available Wi-Fi networks will be displayed on your screen.
Using your remote control, navigate through the list of available networks. Pay attention to the network names (also known as SSIDs) and their signal strengths. This will help you identify your desired Wi-Fi network from the list.
If you are having trouble finding your Wi-Fi network, ensure that your router is powered on and broadcasting the network. You can also try moving your TV closer to the router to improve the signal strength.
Once you have located your desired Wi-Fi network, select it by highlighting it and pressing the “Enter” or “OK” button on your remote control. If the network is secured with a password, a pop-up window will appear prompting you to enter the Wi-Fi password.
Use the arrow keys and the on-screen keyboard to type in the Wi-Fi password. Take your time to enter the correct characters as passwords are case-sensitive. If you make a mistake, use the remote control to navigate to the delete or backspace button and correct the entry.
After entering the Wi-Fi password, double-check for any errors and make sure all characters are correct. Once you are confident that the password is accurate, select the “Connect” or similar option on the screen to initiate the connection process.
Your Samsung Smart TV will now attempt to connect to the selected Wi-Fi network. This may take a few moments as the TV establishes a connection with the router. Once the connection is established, you will move on to the next step to test the connection and confirm a successful setup.
Step 4: Enter the Wi-Fi password if required
After selecting your desired Wi-Fi network in the previous step, you may be prompted to enter the Wi-Fi password. This is necessary for connecting your Samsung Smart TV to a secured wireless network.
On your TV screen, you will see a pop-up window or an on-screen keyboard where you can enter the Wi-Fi password. Use the arrow keys on your remote control to navigate through the characters and the “Enter” or “OK” button to select them.
Take your time to accurately enter the Wi-Fi password. It is essential to enter the password exactly as it appears, including any uppercase or lowercase letters, numbers, or special characters. Pay attention to any on-screen indicators that show the character input, such as asterisks or dots.
If you make a mistake while entering the password, use the remote control to navigate to the delete or backspace button and correct the entry. Some TV models may also provide an option to show the password as you type, allowing you to verify your input.
Once you have entered the Wi-Fi password, double-check your input to ensure there are no typos or mistakes. Once you are confident that the password is correct, select the “Connect” or similar option on the screen to initiate the connection process.
Your Samsung Smart TV will now attempt to establish a connection with the selected Wi-Fi network using the provided password. The TV will send the authentication details to the router, and if the password is correct, the connection will be established.
If the password is incorrect, the TV will display an error message or prompt you to re-enter the password. In this case, review your input and try again. It is also worth checking that you are connecting to the correct Wi-Fi network and using the correct password provided by your internet service provider.
Once the connection is successfully established, you are ready to move on to the next step to test the connection and confirm that the Wi-Fi setup is complete.
Step 5: Test the connection and confirm the successful connection
After entering the Wi-Fi password and initiating the connection process, it’s important to test the connection and ensure that your Samsung Smart TV is successfully connected to the Wi-Fi network.
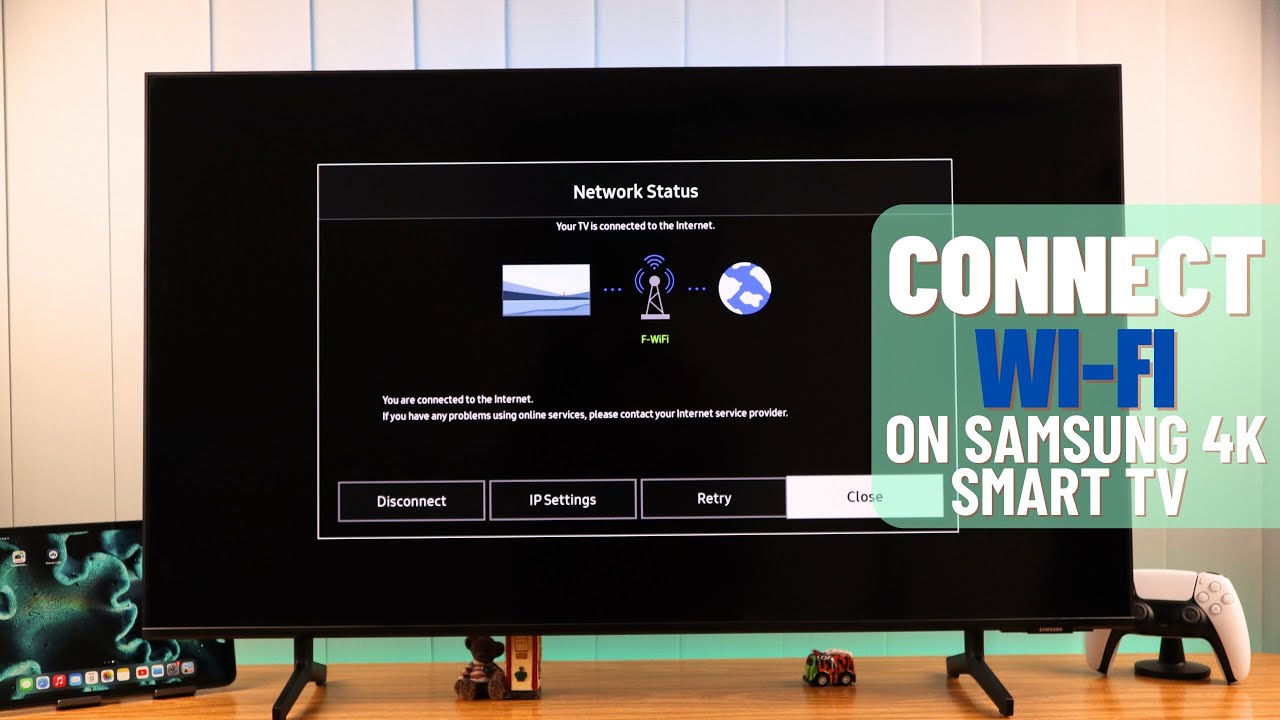
To test the connection, navigate back to the main settings menu on your TV using the remote control. Look for an option called “Network” or “Network Settings” and select it.
Within the Network settings, you should see the status of the Wi-Fi connection. It should indicate that the connection is established and show the name of the connected Wi-Fi network. This confirms that your Samsung Smart TV is now connected to Wi-Fi.
Additionally, some TV models provide a signal strength indicator. This can give you an idea of the quality of your Wi-Fi connection. Ideally, you want a strong signal strength for smooth streaming and browsing experiences.
To further confirm that the connection is successful, you can launch a streaming app or open a web browser on your Samsung Smart TV. If you are able to access and stream content or browse websites without any issues, it means that your TV is successfully connected to Wi-Fi.
If you encounter any issues during the testing phase, such as slow internet speed or difficulty accessing content, try the following troubleshooting steps:
- Restart your Samsung Smart TV and router to refresh the connection.
- Move your TV closer to the router to improve signal strength.
- Make sure there are no physical obstructions between your TV and the router.
- Check other devices connected to the same Wi-Fi network to see if they are experiencing similar issues.
- Contact your internet service provider to ensure there are no connectivity issues on their end.
By following these troubleshooting steps, you can address common Wi-Fi connection issues and optimize your Smart TV experience.
Once you have successfully tested the Wi-Fi connection and confirmed that your Samsung Smart TV is working seamlessly with the network, you can now enjoy all the features and benefits your Smart TV has to offer.
Troubleshooting common Wi-Fi connection issues
While connecting your Samsung Smart TV to Wi-Fi is typically a straightforward process, there may be instances where you encounter common Wi-Fi connection issues. Here are some troubleshooting steps to help you address and resolve these issues:
- 1. Check your Wi-Fi network: Ensure that your Wi-Fi network is functioning properly. Check if other devices connected to the same network are experiencing any issues. If the problem seems to be specific to your TV, try connecting another device to the Wi-Fi network to see if it works properly.
- 2. Restart your TV and router: Sometimes, a simple restart can resolve connectivity problems. Power off your Samsung Smart TV and unplug it from the power source. Similarly, turn off your router and disconnect it from the power source. Wait for a few minutes, then plug in and power on both devices. Once they have restarted, attempt to reconnect your TV to the Wi-Fi network.
- 3. Check Wi-Fi signal strength: Weak Wi-Fi signal can cause connection issues. Ensure that your TV is within a reasonable range of your Wi-Fi router. If possible, move your TV closer to the router to improve the signal strength. Also, check if there are any physical obstructions such as walls or large objects blocking the Wi-Fi signal that can be repositioned.
- 4. Verify Wi-Fi password: Double-check for any typos or mistakes when entering the Wi-Fi password. Remember that passwords are case-sensitive, so ensure that correct capitalization is used. If you are unsure about the password, you can confirm it with your internet service provider or check the router settings.
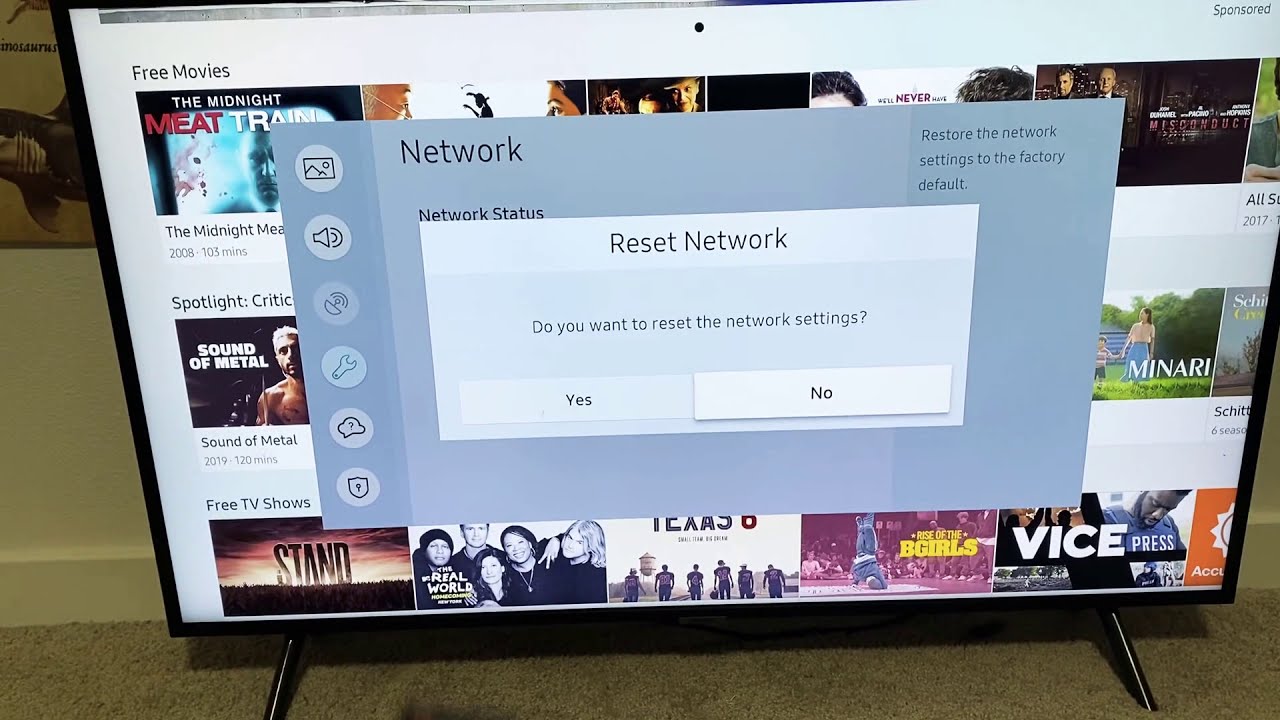
- 5. Reset network settings on your TV: If the above steps do not work, you can try resetting the network settings on your Samsung Smart TV. Go to the Network settings, select the option to reset network settings, and follow the on-screen prompts. After the reset, set up the Wi-Fi connection again from scratch.
- 6. Check for firmware updates: Outdated firmware on your Samsung Smart TV can lead to connectivity issues. Check for any available firmware updates for your TV model. If updates are available, follow the instructions provided by Samsung to install them. Firmware updates can often include bug fixes and improvements for Wi-Fi connectivity.
- 7. Contact your internet service provider: If you have tried all of the above troubleshooting steps and are still experiencing Wi-Fi connection issues, it may be helpful to reach out to your internet service provider. They can check if there are any network outages or specific configuration settings required for your TV to connect to their network.
By following these troubleshooting steps, you can resolve common Wi-Fi connection issues and ensure a stable and reliable connection for your Samsung Smart TV.
Conclusion
Connecting your Samsung Smart TV to Wi-Fi is a crucial step in unlocking the full potential of your entertainment experience. Whether you’re streaming your favorite shows and movies, browsing the internet, or using your TV as a second screen, a reliable Wi-Fi connection is essential.
In this guide, we have walked you through the process of connecting your Samsung Smart TV to Wi-Fi in a systematic manner. From turning on the TV and navigating to the settings menu to selecting the wireless connection and entering the Wi-Fi password, we have provided step-by-step instructions to help you successfully connect your TV to your desired Wi-Fi network.
We also discussed the importance of testing the connection and troubleshooting common Wi-Fi connection issues. By following the troubleshooting steps outlined, you can address common connectivity problems and ensure a seamless Wi-Fi experience on your Samsung Smart TV.
Now that you have successfully connected your Samsung Smart TV to Wi-Fi, you can fully enjoy the range of features and entertainment options it offers. Stream your favorite content, browse the web, stay connected with friends and family, or explore the multitude of apps available at your fingertips.
Remember to keep your Wi-Fi network secure by using a strong and unique password and regularly updating your network settings. This will help protect your personal information and ensure a safe online experience.
Should you encounter any further issues or have additional questions, don’t hesitate to consult the user manual or contact Samsung support for further assistance. They are equipped to provide expert guidance tailored to your specific model and situation.
With a successful Wi-Fi connection established, you are now ready to immerse yourself in a world of entertainment and connectivity, all from the comfort of your Samsung Smart TV. Enjoy!