Introduction
Connecting a USB modem to your tablet can greatly expand its functionality, allowing you to access the internet on-the-go without relying on Wi-Fi networks. By leveraging the mobile data capabilities of a USB modem, you can stay connected and productive wherever you are.
In this guide, we will walk you through the step-by-step process of connecting a USB modem to your tablet. Whether you have an Android tablet or an iPad, these instructions will help you establish a stable and reliable internet connection.
Before we get started, it’s important to note that not all tablets are compatible with USB modems. It is essential to check the specifications of your tablet and ensure it supports USB connectivity. Additionally, you will need a USB modem and a data SIM card from your mobile service provider in order to proceed with the setup.
Once you have confirmed the compatibility and gathered the necessary equipment, you can proceed with the following steps to establish a connection between your USB modem and tablet. By the end of this guide, you will be well-equipped to access the internet on your tablet using a USB modem.
Step 1: Check Compatibility
Before proceeding with connecting a USB modem to your tablet, it is crucial to ensure that your tablet is compatible with USB connectivity. Not all tablets have the necessary hardware and software capabilities to support USB modems.
To check compatibility, first, consult the user manual or manufacturer’s website of your tablet. Look for information regarding USB connectivity and if it supports USB modems. If you are unable to find this information, you can also reach out to the manufacturer’s customer support for assistance.
Additionally, check the type of USB port available on your tablet. Most tablets have either a micro USB or USB-C port. Ensure that your USB modem is compatible with the USB port on your tablet. If not, you may need to use a USB adapter or converter to establish a connection.
Compatibility also extends to the tablet’s operating system. Check if your tablet uses Android, iOS, or any other operating system and verify its compatibility with the USB modem you intend to use. Some operating systems may have specific requirements or restrictions when it comes to USB modems.
If your tablet passes the compatibility check, you can proceed to the next step of inserting the SIM card into the USB modem. However, if your tablet is not compatible, consider other alternatives such as using a portable Wi-Fi hotspot or tethering your tablet to a smartphone with mobile data capabilities.
Step 2: Insert the SIM Card
Once you have confirmed the compatibility of your tablet with a USB modem, it’s time to insert the SIM card into the modem. The SIM card is essential for accessing mobile data and establishing an internet connection on your tablet.
Here’s how you can insert the SIM card:
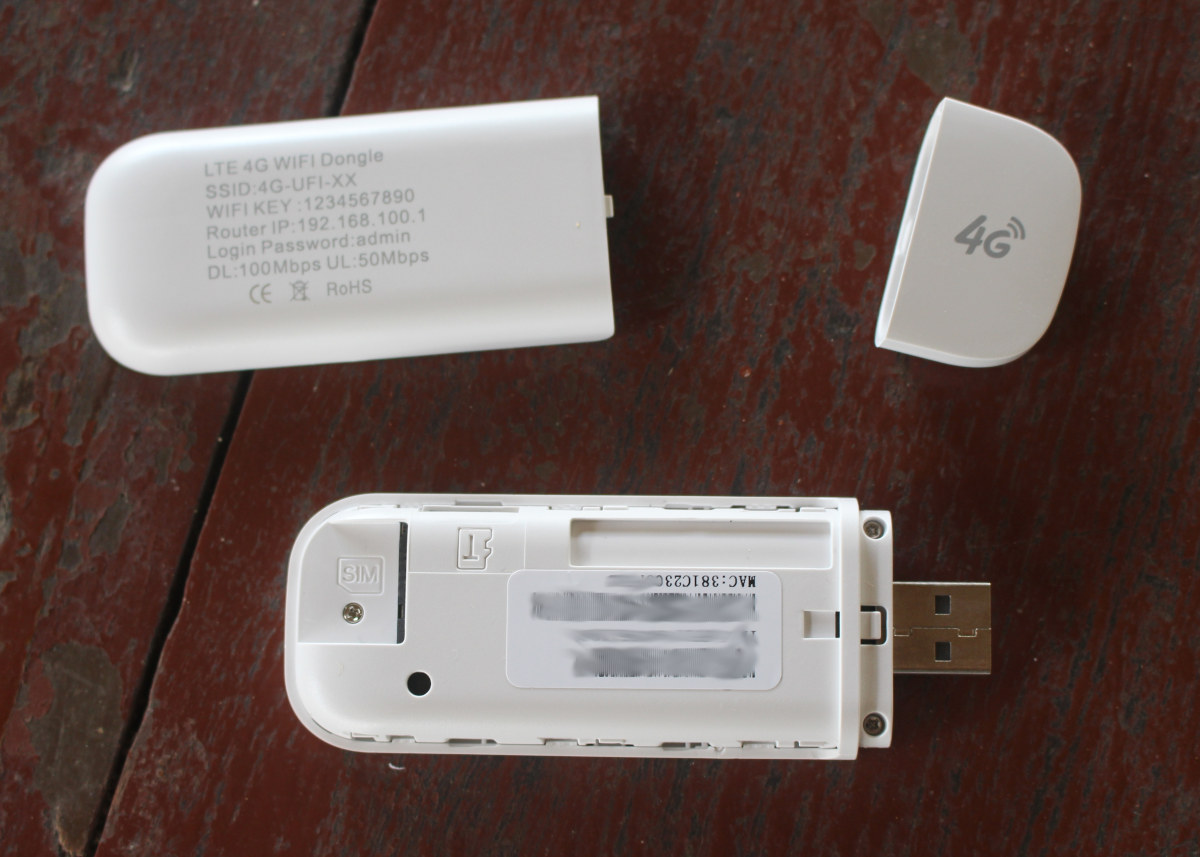
- Locate the SIM card slot on your USB modem. It is usually located on the side or bottom of the modem, marked with a SIM card symbol.
- Using your fingernail or a small tool, gently push to open the SIM card slot cover.
- Take the SIM card provided by your mobile service provider and insert it into the slot, ensuring it is properly aligned with the contacts in the slot.
- Close the SIM card slot cover securely.
Note: Some USB modems may require a micro SIM card, while others may use a standard SIM card. Make sure you insert the correct size of SIM card as per your modem’s specifications.
Once you have inserted the SIM card correctly, move on to the next step of connecting the USB modem to your tablet.
Step 3: Connect the USB Modem to the Tablet
Now that you have inserted the SIM card into the USB modem, it’s time to connect the modem to your tablet. Follow these steps to establish a physical connection:
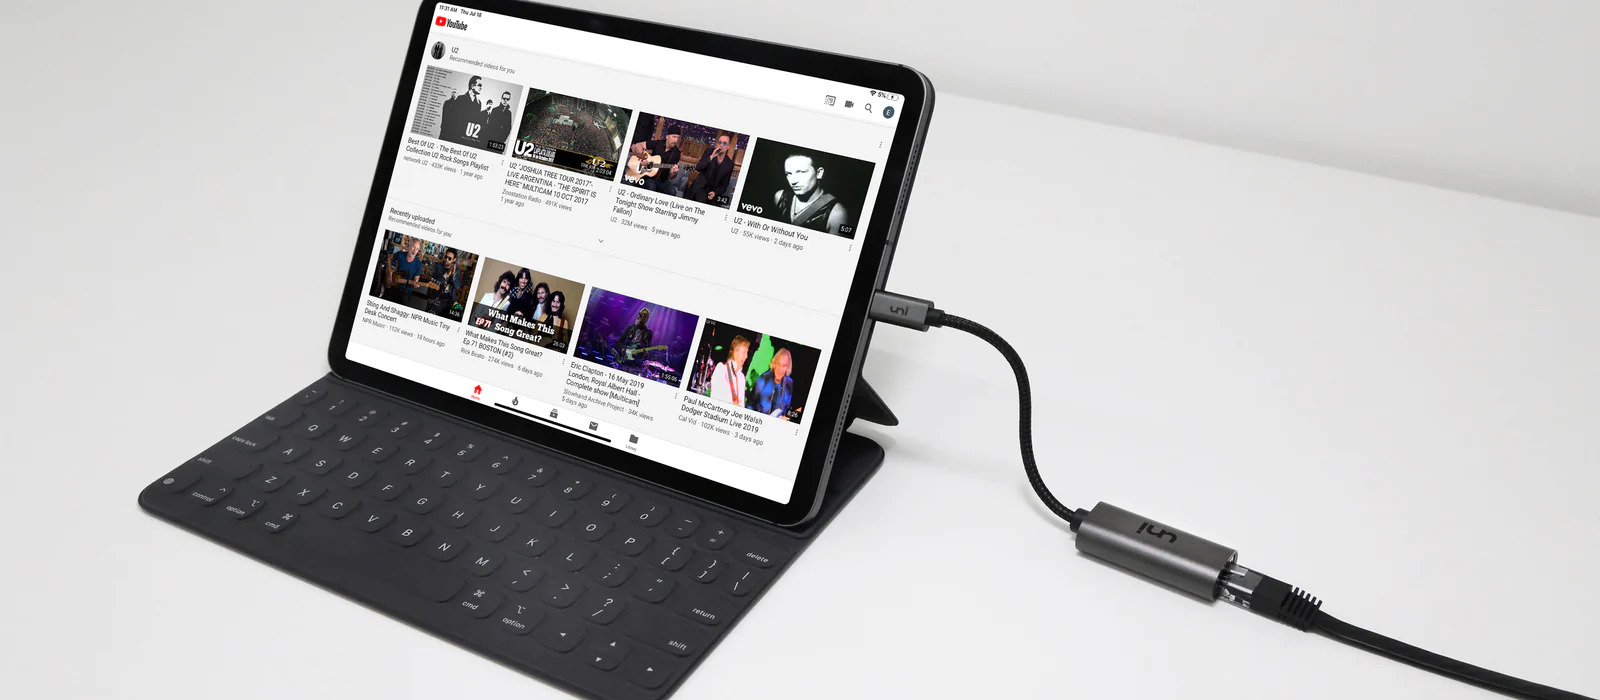
- Locate the USB port on your tablet. It is typically located on the bottom or sides of the device.
- Take the USB cable that came with your USB modem and plug one end into the USB port on the modem.
- Plug the other end of the USB cable into the USB port on your tablet.
- Ensure that the connection is secure and tight, as a loose connection can affect the performance of the modem.
- Once the USB modem is connected to the tablet, you should see a notification on your tablet’s screen indicating a new USB device has been detected.
At this point, the physical connection between the USB modem and tablet is established. However, for the modem to function properly, you may need to install the necessary drivers on your tablet. In the next step, we will guide you through the driver installation process.
Step 4: Install the Necessary Drivers
In order for your tablet to recognize and properly communicate with the USB modem, you may need to install the necessary drivers. These drivers are specific to the make and model of your USB modem and are responsible for enabling the modem’s functionality on your tablet.
Here’s how you can install the necessary drivers:
- If your USB modem came with a driver installation CD, insert the CD into your computer’s CD drive.
- Follow the on-screen instructions to install the drivers onto your tablet. Make sure to select the appropriate drivers for your tablet’s operating system.
- If your USB modem doesn’t come with an installation CD, you can check the manufacturer’s website for driver downloads. Look for the specific model of your USB modem and download the corresponding drivers for your tablet’s operating system.
- Once downloaded, locate the driver file on your tablet and double-click on it to start the installation process.
- Follow the prompts provided by the driver installation wizard to complete the installation. It may require you to restart your tablet for the new drivers to take effect.
After the drivers have been successfully installed on your tablet, the USB modem should be recognized by your tablet’s operating system. You can proceed to the next step to configure the USB modem settings.
Step 5: Configure the USB Modem Settings
After installing the necessary drivers, it’s time to configure the settings of your USB modem to establish a successful internet connection on your tablet. The configuration process may vary slightly depending on the make and model of your USB modem.
Here are the general steps to configure the USB modem settings:
- Open the settings menu on your tablet and locate the “Network” or “Connections” section.
- Select the option to manage network connections or configure a new mobile network.
- Choose the option to add a new network or connection, and then select the “USB Modem” or similar option.
- Enter the required information, such as the APN (Access Point Name), username, and password. This information can be obtained from your mobile service provider.
- Save the settings and exit the configuration menu.
Once you have configured the USB modem settings, it’s time to establish a connection to the internet using your USB modem and tablet.
Note: The exact steps and options may vary depending on your tablet’s operating system and the interface of your USB modem. If you encounter any difficulties during the configuration process, refer to the user manual of your USB modem or consult the manufacturer’s support resources.
Step 6: Connect to the Internet
With the USB modem settings properly configured, you can now connect to the internet on your tablet. Follow these steps to establish a connection:
- Ensure that the USB modem is connected to your tablet and powered on.
- Go to the network or connections settings menu on your tablet.
- Find the option to connect to a network or enable mobile data.
- Select the USB modem as the preferred network or mobile data option.
- Your tablet will now attempt to establish a connection using the USB modem.
- Wait for a moment as the connection is established. You may see a loading or connecting icon on your tablet’s screen.
- Once connected, you should see indicators such as signal strength or a mobile data icon on your tablet’s status bar.
- Open a web browser or any other internet-enabled application on your tablet to verify that you can access the internet.
Congratulations! You have successfully connected to the internet using the USB modem on your tablet. Enjoy the freedom of browsing, streaming, and staying connected wherever you go.
If, for any reason, you are unable to establish a connection, refer to the troubleshooting tips in the next step to resolve common issues that may occur.
Step 7: Troubleshooting Common Issues
While connecting a USB modem to your tablet is generally a straightforward process, you may encounter some common issues along the way. Here are some troubleshooting tips to help you resolve them:
- No internet connection: Ensure that your USB modem has a stable network connection and that your data plan is active. Check the signal strength indicators on your tablet and try moving to a different location with better reception.
- Driver issues: If your tablet is not recognizing the USB modem, reinstall the drivers or update them to the latest version provided by the manufacturer. Check for any compatibility issues between the drivers and your tablet’s operating system.
- Incorrect APN settings: Double-check the APN settings you entered during the configuration process. Contact your mobile service provider if you are unsure about the correct APN details.
- USB connection problems: Make sure the USB cable is securely connected to both the USB modem and your tablet. Try using a different USB cable or port to eliminate any potential connection issues.
- Power-related issues: Ensure that the USB modem has sufficient power to maintain a stable connection. If possible, connect it to a power source or use a USB hub with additional power supply.
- Software conflicts: Check for any conflicting software installed on your tablet that may interfere with the USB modem’s functionality. Disable or uninstall such software, if necessary.
- Restart your devices: Sometimes, a simple restart of both your USB modem and tablet can resolve connection issues. Turn off both devices, wait for a few seconds, and then power them back on.
If the above troubleshooting steps do not resolve the issues, consult the user manual of your USB modem or contact the manufacturer’s customer support for further assistance.
By following the steps outlined in this guide and troubleshooting any encountered problems, you should be able to connect your USB modem to your tablet successfully and enjoy uninterrupted internet access on-the-go.
Conclusion
Connecting a USB modem to your tablet can be a game-changer, allowing you to access the internet wherever you are without relying on Wi-Fi networks. By following the step-by-step process outlined in this guide, you can successfully connect your USB modem to your tablet and enjoy uninterrupted internet connectivity.
Remember to check the compatibility of your tablet with USB modems before proceeding. Insert the SIM card into the USB modem and establish a physical connection between the modem and tablet using the appropriate USB cable. Install the necessary drivers and configure the USB modem settings to enable a smooth connection.
If you encounter any issues during the setup process, refer to the troubleshooting tips provided to help resolve common problems. Don’t hesitate to reach out to the manufacturer’s support resources or customer service for additional guidance.
With your USB modem connected to your tablet, you can browse the web, stream media, and stay productive on-the-go. Enjoy the convenience and flexibility of having uninterrupted internet access wherever you need it!