Introduction
Connecting your Mac to a smart TV can open up a world of entertainment possibilities, giving you the freedom to stream your favorite movies, TV shows, and videos on a bigger screen. Whether you want to enjoy a Netflix binge-watching session or showcase a presentation to a larger audience, connecting your Mac to a smart TV is easier than you might think. In this guide, we will walk you through the steps required to seamlessly connect your Mac to your smart TV.
Before we dive into the details, it’s essential to note that there are multiple methods to connect your Mac to a smart TV, depending on the models and devices you have. The most common methods involve using an HDMI cable or using AirPlay if you have an Apple TV. By following the steps outlined in this guide, you will be able to establish a connection and start enjoying your favorite content on the big screen in no time.
It’s important to ensure compatibility between your Mac and the smart TV before attempting to establish a connection. Some older Mac models may not support certain connection methods or display resolutions. Additionally, you will need an HDMI cable if you choose to go that route, so make sure you have one handy. Now, let’s explore the step-by-step process of connecting your Mac to a smart TV through various methods.
Step 1: Check Compatibility
Before you begin connecting your Mac to a smart TV, it’s crucial to ensure compatibility between your devices. Not all Mac models or smart TVs support the same connection methods or display resolutions. Here’s what you need to do:
- Identify the model of your Mac and the specifications of your smart TV. Check the user manuals or visit the manufacturer’s website for detailed information.
- Verify if your Mac has the necessary ports for connecting to a TV. Most modern Macs come equipped with an HDMI or Thunderbolt port, which are compatible with smart TVs. Older Mac models may require an adapter to connect to HDMI.
- Check the supported resolutions of your smart TV and your Mac. Ensure that the display resolutions are compatible to avoid any display issues.
- If you have an Apple TV, make sure it’s connected to your smart TV and on the same Wi-Fi network as your Mac. AirPlay requires both devices to be connected on the same network.
By performing these compatibility checks, you can save time and ensure a smooth connection process. It’s also a good idea to update your Mac’s operating system and the software on your smart TV to the latest versions to maximize compatibility and functionality.
Once you have confirmed compatibility between your Mac and smart TV, you can proceed to the next steps to establish a connection and start enjoying your favorite content on the big screen.
Step 2: Connect via HDMI Cable
One of the most common and straightforward methods to connect your Mac to a smart TV is through an HDMI cable. Follow these steps to establish a connection:
- Ensure both your Mac and smart TV are powered on, and the HDMI cable is connected securely to both devices.
- On your Mac, go to the Apple menu, then select “System Preferences.”
- Within the System Preferences window, click on “Displays.”
- Under the Display tab, you’ll see a list of available displays. Your smart TV should be listed as a secondary display option.
- Select the TV from the list and adjust the display settings according to your preferences. You can choose the resolution and arrangement of the displays for an optimal viewing experience.
- Once the settings are adjusted, you should see your Mac screen mirrored or extended on the smart TV. You can now navigate your Mac as usual, and the content will be displayed on the TV screen.
It’s important to note that some Mac models may require an adapter to connect to HDMI. In such cases, ensure you have the appropriate adapter and follow the manufacturer’s instructions to connect it to your Mac.
If you encounter any issues with the connection, make sure the HDMI cable is securely connected and try restarting both your Mac and smart TV. If the problem persists, refer to the troubleshooting section later in this guide for additional tips.
Connecting your Mac to a smart TV via HDMI cable provides a simple and reliable way to enjoy your content on a larger screen. However, if you have an Apple TV, you can also connect your Mac wirelessly through AirPlay, which we’ll explore in the next step.
Step 3: Adjust Display Settings
Once you have successfully established a connection between your Mac and smart TV, you may want to adjust the display settings to optimize your viewing experience. Here’s how:
- On your Mac, go to the Apple menu and select “System Preferences.”
- In the System Preferences window, click on “Displays.”
- Under the Display tab, you will see options to adjust the resolution, brightness, and arrangement of the displays.
- To change the resolution, click on the “Scaled” option and select the resolution that best suits your needs. You may need to experiment with different resolutions until you find the one that provides the optimal balance between clarity and screen real estate.
- Adjust the relative position of your Mac and smart TV by dragging and aligning the display thumbnails in the Arrangement tab. This ensures that the cursor seamlessly moves between the screens and that content is displayed correctly.
- Explore additional display settings such as brightness, contrast, and color calibration to fine-tune the visual output.
By adjusting these display settings, you can customize the viewing experience to your preferences and make the content on your smart TV look the way you want. Experiment with different options until you find the ideal settings that provide the best picture quality.
Remember, the availability of certain display settings may vary depending on your Mac model and the capabilities of your smart TV. Consult the user manuals or online resources for specific details related to your devices.
Now that you have set up the display settings, you’re ready to explore the next step in our guide, which is connecting your Mac to a smart TV through AirPlay.
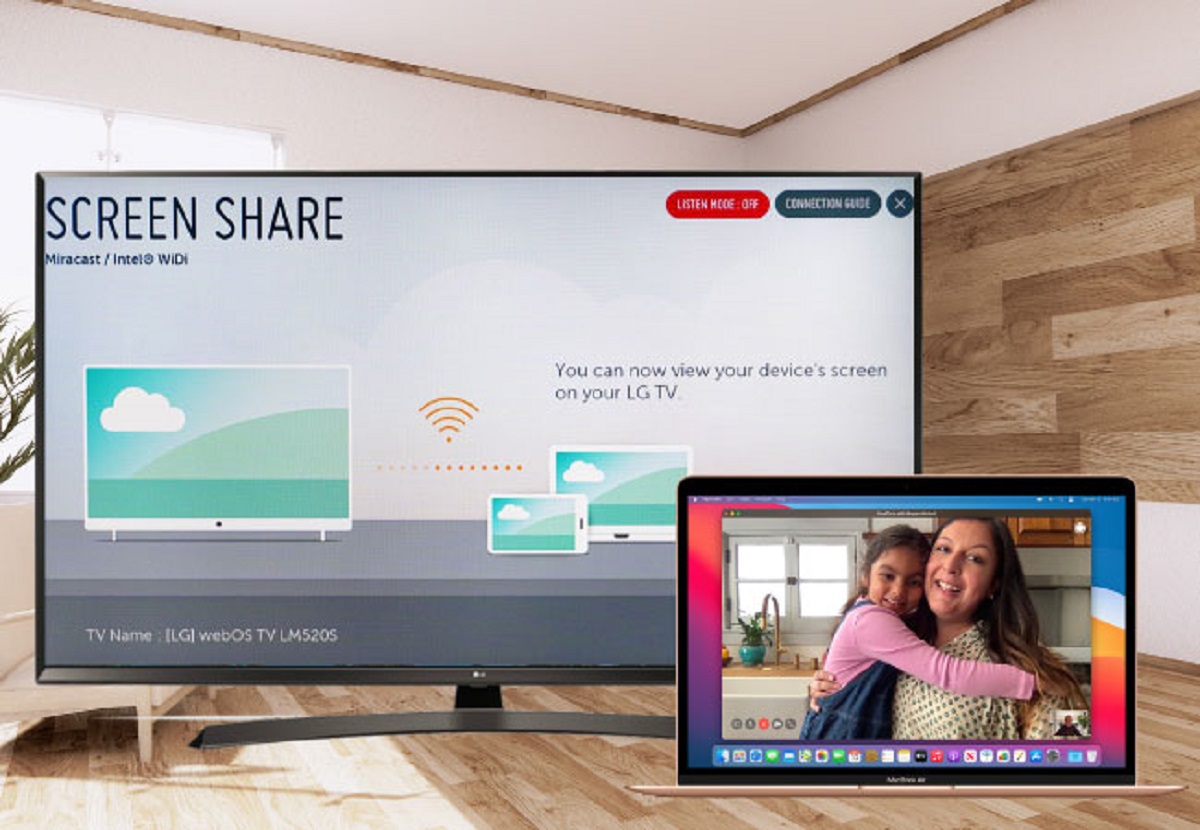
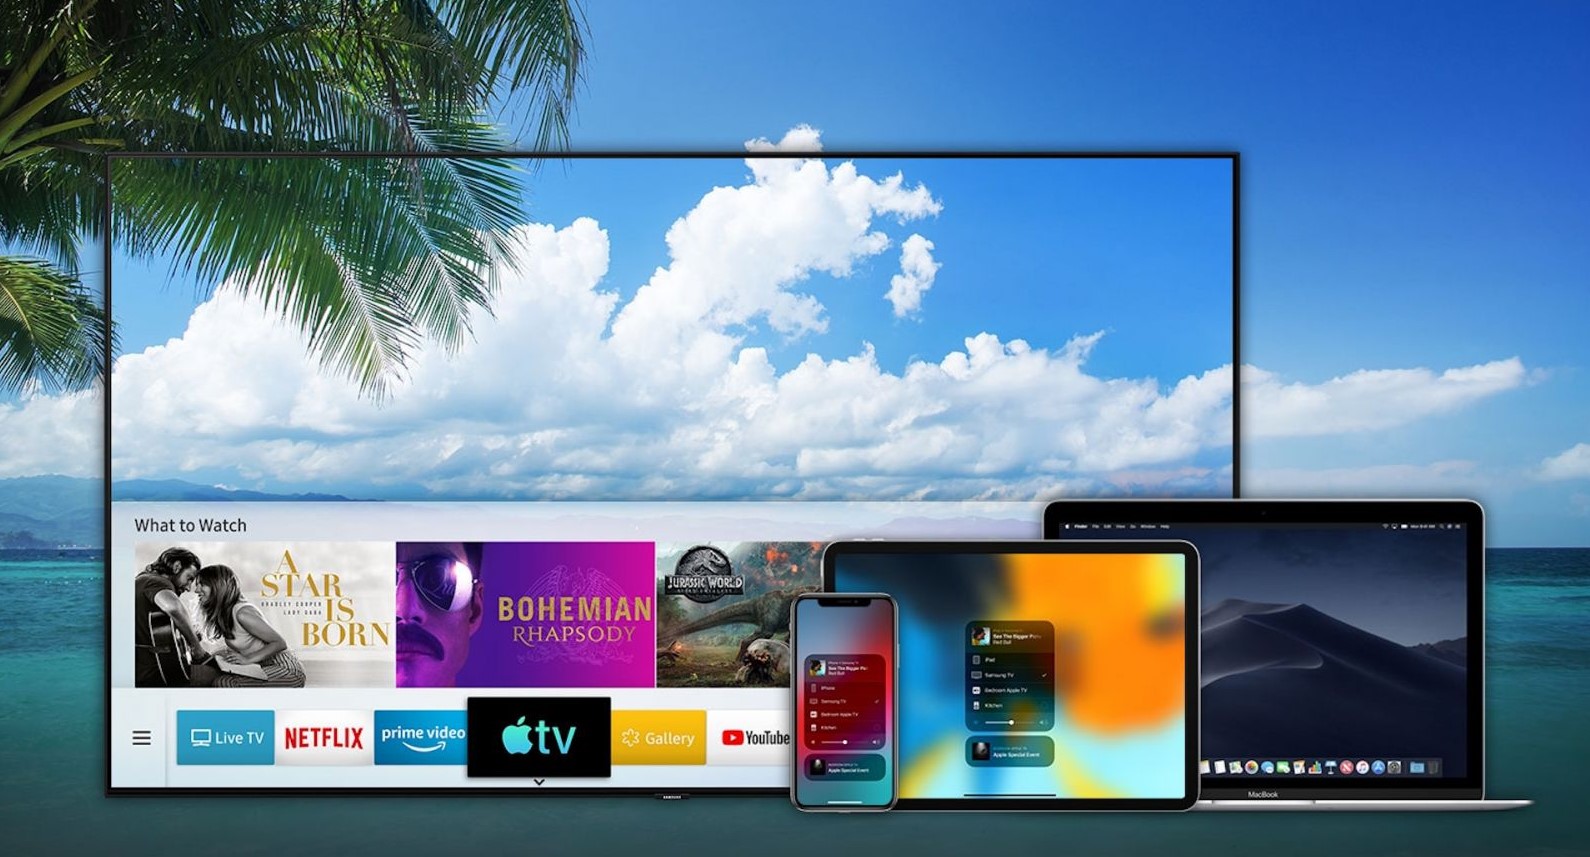
Step 4: Connect through AirPlay
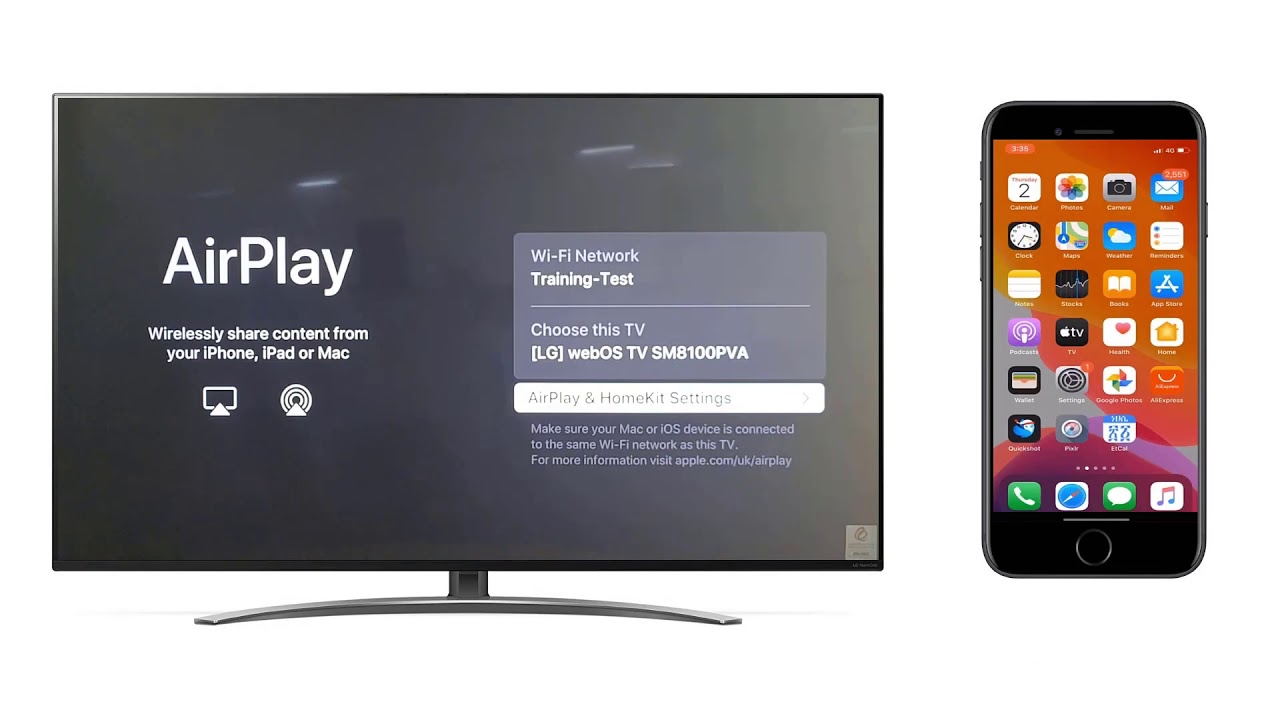
If you own an Apple TV or a smart TV with AirPlay support, you can connect your Mac wirelessly and seamlessly using AirPlay. Follow these steps to establish an AirPlay connection:
- Ensure that your Mac and Apple TV or smart TV are connected to the same Wi-Fi network.
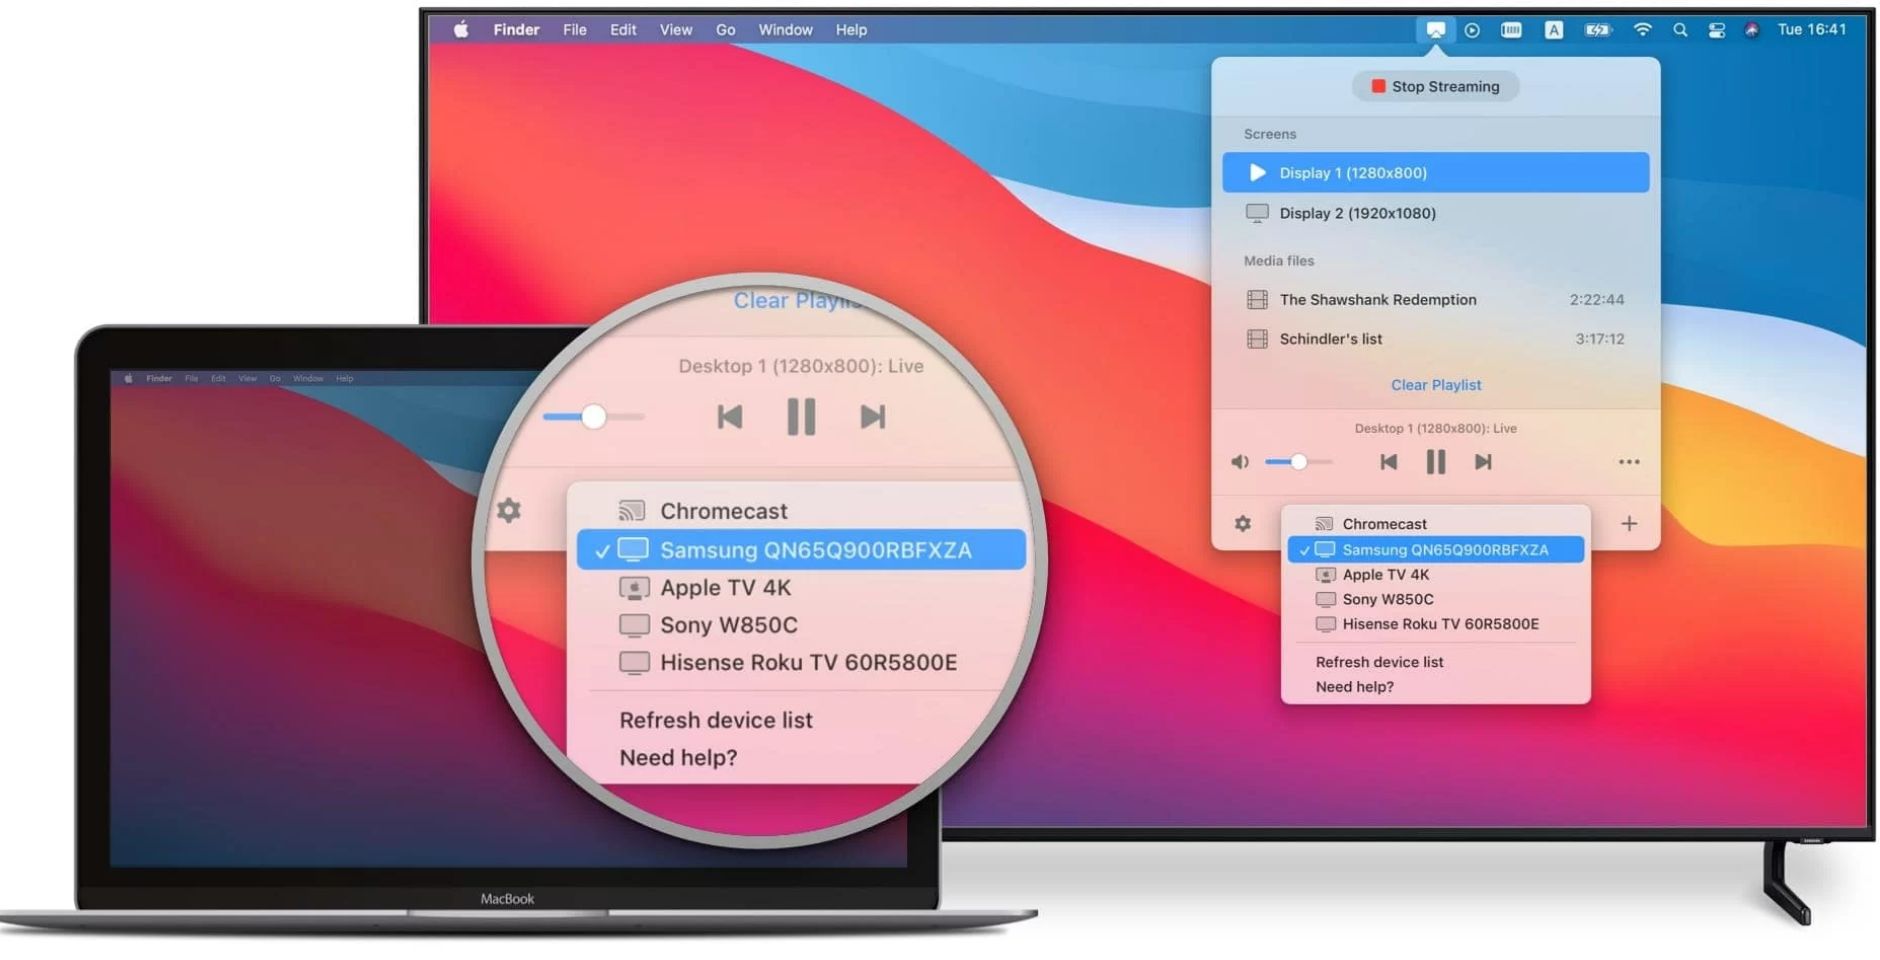
- On your Mac, click on the AirPlay icon in the menu bar, usually represented by a rectangle with an upward arrow in the lower right corner. If you don’t see the AirPlay icon, go to “System Preferences” and select “Displays.”
- In the AirPlay menu, you should see a list of available AirPlay devices. Select your Apple TV or smart TV from the list.
- If prompted, enter the AirPlay code or password displayed on the TV screen to establish the connection.
- Once connected, you can choose to mirror your Mac screen on the TV or extend your desktop to the TV for dual-screen functionality.
- You can now play videos, share presentations, or stream content wirelessly from your Mac to the TV using AirPlay.
AirPlay provides the added convenience of wireless connectivity, allowing you to enjoy content from your Mac on the big screen without the need for any cables. It’s worth noting that while most newer smart TVs support AirPlay, some older models may not. Check the specifications of your TV to ensure AirPlay compatibility.
If you encounter any issues with AirPlay connectivity, make sure your devices are on the same Wi-Fi network, restart your Mac, Apple TV, or smart TV, and try reconnecting. If the problem persists, refer to the troubleshooting section in this guide for additional solutions.
Now that you’re familiar with connecting your Mac to a smart TV through AirPlay, let’s move on to the next step and explore some troubleshooting tips to overcome common challenges.
Step 5: Troubleshooting Tips
While connecting your Mac to a smart TV is a relatively straightforward process, you may encounter some challenges along the way. Here are some troubleshooting tips to help you overcome common issues:
- Check the HDMI connection: Ensure that the HDMI cable is securely plugged into both your Mac and smart TV. Sometimes, a loose connection can cause display issues.
- Restart your devices: Try restarting both your Mac and smart TV. This simple step can often resolve connectivity or compatibility issues.
- Update software: Make sure that your Mac, Apple TV (if applicable), and smart TV have the latest software updates installed. Updating to the latest versions can help address any known bugs or compatibility issues.
- Reset display settings: If you’re experiencing display issues, navigate to the System Preferences > Displays on your Mac and choose the “Default for Display” option to reset the settings to their default values.
- Disable firewall or security software: Sometimes, certain firewall or security settings on your Mac might interfere with the connection. Temporarily disable or configure them to allow communication between your Mac and smart TV.
- Try an alternative connection method: If you’re unable to establish a connection through HDMI or AirPlay, consider using other available connection options, such as VGA or DVI adapters, depending on your Mac and TV capabilities.
- Consult the user manuals: If all else fails, refer to the user manuals or online support resources for your Mac, Apple TV, or smart TV. These resources often provide troubleshooting guides specific to your devices.
Remember, each troubleshooting step should be performed one at a time, and you should test the connection after each step to check if the issue is resolved.
By following these troubleshooting tips, you can overcome common challenges and ensure a smooth and reliable connection between your Mac and smart TV.
With that, you’ve reached the end of our guide on how to connect a Mac to a smart TV. We hope this guide has been helpful in assisting you with establishing a connection and enjoying your favorite content on the big screen.
Conclusion
Connecting your Mac to a smart TV can greatly enhance your viewing experience and allow you to enjoy your favorite content on a larger screen. Whether you choose to connect via an HDMI cable or utilize the convenience of AirPlay, the process is straightforward, and with a few simple steps, you can establish a seamless connection.
In this guide, we covered the essential steps to connect your Mac to a smart TV. We began by emphasizing the importance of checking compatibility between your devices to ensure a smooth connection process. Then, we explored connecting via HDMI cable, adjusting display settings, utilizing AirPlay, and troubleshooting common issues.
Remember to verify the compatibility of your devices, update their software, and ensure a secure and stable connection. Additionally, familiarize yourself with the available display settings to optimize your viewing experience.
If you encounter any difficulties, be sure to follow our troubleshooting tips, such as checking your HDMI connections, restarting your devices, and updating software. These steps can often resolve common issues and help you achieve a successful connection.
By following the guidance provided in this guide, you can connect your Mac to a smart TV effortlessly and enjoy a more immersive and enjoyable viewing experience. So, grab some popcorn, sit back, and indulge in your favorite movies, TV shows, and videos on the big screen!