Introduction
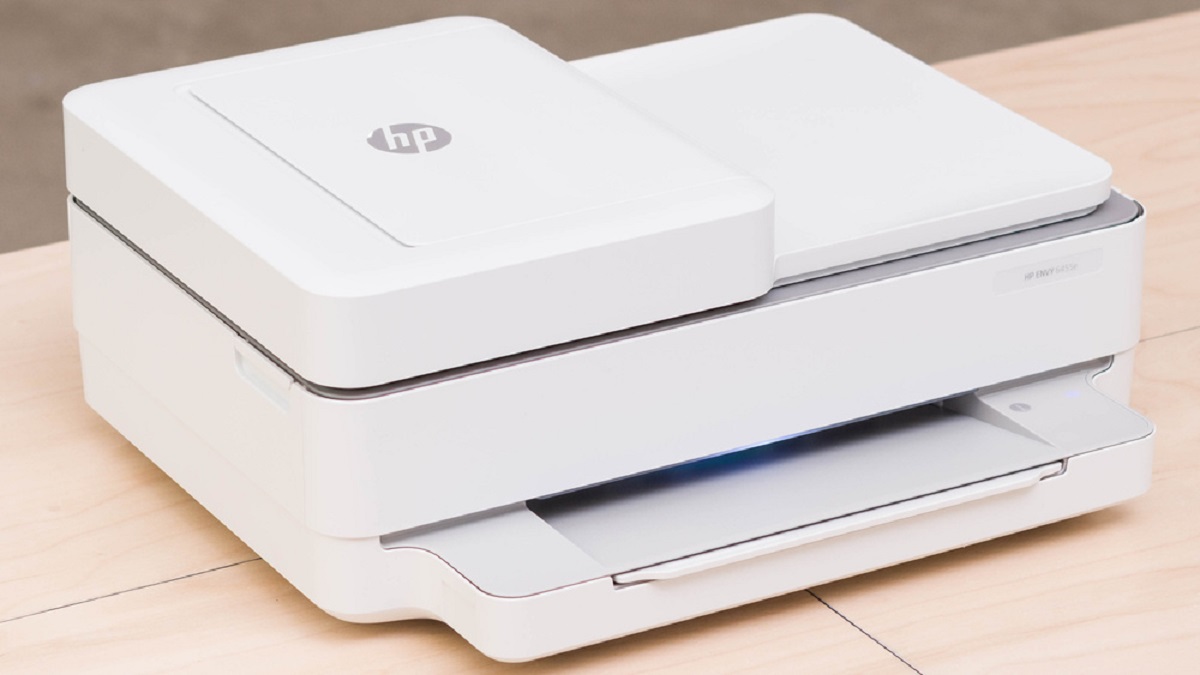
Connecting the HP Envy Pro 6455 printer to your Wi-Fi network is essential for seamless printing and scanning without the need for USB cables. With wireless connectivity, you can conveniently print from multiple devices in your home or office. Whether you’re using a laptop, smartphone, or tablet, setting up your printer to connect to Wi-Fi is a straightforward process.
In this guide, we will walk you through the step-by-step instructions to connect your HP Envy Pro 6455 printer to your Wi-Fi network. By following these simple steps, you will be up and running in no time.
First, make sure that your printer is turned on and ready to be set up. Once powered on, you can access the printer’s control panel to navigate to the network settings. From there, you will have the option to select the Wireless Setup Wizard, which will guide you through the process of connecting to your Wi-Fi network.
It’s important to note that you will need your Wi-Fi network name (SSID) and password to successfully connect your printer. If you don’t have this information readily available, make sure to retrieve it before proceeding with the setup.
Once you’ve completed the Wi-Fi setup, it’s recommended to print a network configuration report as a confirmation of the successful connection. This report will provide you with valuable information about your printer’s network settings, which can be useful for troubleshooting or future reference.
Now that you have a brief overview of what to expect, let’s dive into the step-by-step process of connecting your HP Envy Pro 6455 printer to your Wi-Fi network.
Step 1: Turn on the HP Envy Pro 6455 printer
The first step in connecting your HP Envy Pro 6455 printer to Wi-Fi is to ensure that the printer is turned on. Locate the power button on the printer and press it to power on the device. You may need to wait for a few moments as the printer initializes.
Once the printer is powered on, you should see the control panel light up and display the HP logo or the home screen. This indicates that the printer is ready to be set up for Wi-Fi connectivity.
If your printer was previously turned off, it is recommended to check the power cord connection and ensure that it is securely plugged into a power source. Once confirmed, press the power button to turn on the printer.
Depending on the model, your HP Envy Pro 6455 printer’s power button may be located on the front or top of the device. Look for the power symbol or button icon on the printer’s control panel or refer to the printer’s user manual for specific instructions.
By making sure that your HP Envy Pro 6455 printer is turned on, you are now ready to proceed to the next step in the Wi-Fi setup process, which involves accessing the printer’s control panel.
Step 2: Access the printer’s control panel
After ensuring that your HP Envy Pro 6455 printer is turned on, the next step is to access the printer’s control panel. The control panel is where you can navigate the printer’s settings and make adjustments to various functions, including the Wi-Fi setup.
Locate the control panel on your HP Envy Pro 6455 printer. On most models, the control panel is a touchscreen display located on the front of the printer. It may vary in size and layout depending on the specific printer model.
To access the control panel, gently tap or press the screen to wake it up from sleep mode. You should see a display with various icons and options. If you are prompted to enter a PIN or passcode, refer to the printer’s user manual for the specific code or instructions on how to bypass this step.
Once you successfully access the control panel, you are now ready to navigate through the printer’s settings and proceed with the Wi-Fi setup. Continue to the next step to learn how to locate the network settings option.
Note: If you are having trouble accessing the printer’s control panel, ensure that the control panel is not locked or disabled. Some printers have a lock button or feature that prevents unauthorized access. Refer to the printer’s user manual for instructions on how to unlock the control panel, if necessary.
Step 3: Navigate to the Network Settings
Once you have accessed the control panel of your HP Envy Pro 6455 printer, the next step is to navigate to the network settings. The network settings menu is where you can configure your printer to connect to your Wi-Fi network.
Look for an icon or option on the control panel that represents the printer’s settings. It is usually symbolized by a gear or wrench icon. Tap or select this icon to access the printer’s settings menu.
Within the settings menu, look for the network setup or network settings option. It may be labeled differently depending on the printer model and manufacturer. Once located, tap or select this option to proceed to the next step.
In some cases, the network settings option may be directly visible on the control panel without the need to access the settings menu. If this is the case, simply tap or select the network settings option to proceed.
If you are unable to locate the network settings option, refer to the printer’s user manual for specific instructions and diagrams that can help you navigate to the correct menu. The user manual will provide detailed information on the control panel layout and navigation for your HP Envy Pro 6455 printer.
Now that you have successfully accessed the network settings menu, it’s time to move on to the next step and begin the Wi-Fi setup process.
Step 4: Choose the Wireless Setup Wizard option
Once you have navigated to the network settings menu on your HP Envy Pro 6455 printer’s control panel, the next step is to select the Wireless Setup Wizard option. This option will guide you through the process of connecting your printer to your Wi-Fi network.
Look for the Wireless Setup Wizard option within the network settings menu. It may be labeled as “Wireless Setup,” “Wi-Fi Setup,” or something similar, depending on your printer model.
Tap or select the Wireless Setup Wizard option to initiate the setup process. The printer will now search for available Wi-Fi networks within range.
Be patient as the printer scans for networks. This may take a few moments. Once the scanning process is complete, a list of available networks should appear on the control panel display.
Scroll through the list of networks using the touch screen or navigation keys on the control panel. Look for your Wi-Fi network name (SSID) and select it from the list.
If your Wi-Fi network name does not appear in the list, make sure that your printer is within range of your Wi-Fi router. If you still don’t see your network, try refreshing the list or manually entering your network name.
Once you have selected your Wi-Fi network, you will be prompted to enter the Wi-Fi password to complete the connection. This ensures that only authorized devices can connect to your network.
Now that you have chosen the Wireless Setup Wizard option and selected your Wi-Fi network, let’s move on to the next step and enter the Wi-Fi password to establish the connection.
Step 5: Select your Wi-Fi network
After choosing the Wireless Setup Wizard option on your HP Envy Pro 6455 printer, the next step is to select your Wi-Fi network from the list of available networks.
On the control panel of your printer, you will see a list of Wi-Fi networks that are within range. Scroll through the list using the touch screen or navigation keys to find your Wi-Fi network.
The Wi-Fi network names (SSIDs) are usually displayed in alphabetical order. Look for the name of your network and select it from the list.
If you don’t see your network in the list, make sure that your printer is within range of your Wi-Fi router. If you’re using a dual-band router, verify that your printer supports the frequency (2.4GHz or 5GHz) used by your network.
In some cases, your Wi-Fi network name may be hidden or not broadcasted. If this is the case, you can manually enter your network name by selecting the “Enter SSID” or “Manual Entry” option.
Once you have selected your Wi-Fi network, the printer will attempt to establish a connection. This process may take a few seconds as the printer communicates with the network.
It’s important to note that some Wi-Fi networks require additional authentication methods, such as entering a username and password combination or providing a WPS PIN. If prompted, follow the on-screen instructions to complete the authentication process and connect to your Wi-Fi network.
After successfully selecting your Wi-Fi network, it’s time to enter the Wi-Fi password to finalize the connection. Proceed to the next step for instructions on how to enter the password.
Step 6: Enter the Wi-Fi password
Once you have selected your Wi-Fi network on the HP Envy Pro 6455 printer, the next step is to enter the Wi-Fi password. This password is required to establish a secure connection between your printer and the Wi-Fi network.
On the control panel of your printer, you will see a screen or dialog box that prompts you to enter the Wi-Fi password. Use the on-screen keyboard or the numeric keypad, if available, to enter the password.
Take care to enter the password accurately, as it is case-sensitive and must match the exact characters and spaces of your Wi-Fi network password.
If you make a mistake while entering the password, most printers provide an option to delete or correct individual characters. Use the arrow keys or the backspace key on the on-screen keyboard to make corrections.
Once you have entered the Wi-Fi password, verify that it is correct, and proceed to the next step to establish the connection.
It’s important to note that the Wi-Fi password may be displayed as asterisks or dots on the control panel for security purposes. This is to prevent unauthorized individuals from viewing your password.
If you are unsure of your Wi-Fi password, you can usually find it on the back or bottom of your Wi-Fi router. If you have changed the default password or cannot locate it, consult your router’s user manual or contact your Internet Service Provider (ISP) for assistance.
Once you have successfully entered the Wi-Fi password, the HP Envy Pro 6455 printer will attempt to establish a connection to your Wi-Fi network. This process may take a few moments as the printer communicates with the network and verifies the password.
Once the connection is established, you can proceed to the next step to confirm the successful connection between your printer and your Wi-Fi network.
Step 7: Confirm the connection
After entering the Wi-Fi password on your HP Envy Pro 6455 printer, the next step is to confirm the connection between your printer and your Wi-Fi network. This ensures that your printer is successfully connected and ready to be used wirelessly.
Once you have entered the Wi-Fi password, the printer will attempt to establish a connection to your Wi-Fi network. This process may take a few moments as the printer communicates with the network and verifies the password.
On the control panel of your printer, you may see a message or notification indicating the status of the connection attempt. Look for messages such as “Connected” or “Connection Successful.”
If the connection is successful, you can proceed to the next step, which is to print a network configuration report to confirm the details of your network connection.
In some cases, if the connection is not successful, you may see an error message or notification. This could indicate that the Wi-Fi password was entered incorrectly or that there may be an issue with your Wi-Fi network. Double-check the Wi-Fi password and ensure that your printer is within range of your Wi-Fi router.
If you continue to experience issues with the Wi-Fi connection, consult the printer’s user manual or contact the HP support team for further assistance. They can provide troubleshooting guidance and help resolve any connectivity issues.
Once you have confirmed a successful connection, you can move on to the next step and print a network configuration report for future reference.
It’s important to note that a confirmation of the connection between your printer and your Wi-Fi network allows you to print wirelessly from any device connected to the same network. This adds convenience and flexibility to your printing experience.
Step 8: Print a network configuration report
After confirming the successful connection between your HP Envy Pro 6455 printer and your Wi-Fi network, the final step is to print a network configuration report. This report provides valuable information about your printer’s network settings and can be useful for troubleshooting or future reference.
To print the network configuration report, access the printer’s control panel and navigate to the settings menu. Look for an option related to reports or network information.
Select the network configuration report option and follow any on-screen prompts to initiate the printing process. The printer will generate a report that includes details such as the printer’s IP address, network status, SSID (Wi-Fi network name), and more.
Once the report is printed, review the information to ensure that the network settings are correct and that your printer is connected to the intended Wi-Fi network.
Keep the network configuration report in a safe place for future reference. It can come in handy if you need to troubleshoot any network connectivity issues or make changes to your network settings.
If the report does not print or if any information appears to be incorrect, consult the printer’s user manual or contact HP support for further guidance. They can help you troubleshoot any issues and ensure that your printer is properly configured.
By printing a network configuration report, you have completed the setup process of connecting your HP Envy Pro 6455 printer to your Wi-Fi network. You can now enjoy the convenience of wirelessly printing from any device connected to the same network.
Conclusion
Connecting your HP Envy Pro 6455 printer to your Wi-Fi network opens up a world of convenience and flexibility for your printing needs. With wireless connectivity, you can easily print from multiple devices without the hassle of USB cables.
In this step-by-step guide, we walked you through the process of setting up your HP Envy Pro 6455 printer to connect to your Wi-Fi network. From turning on the printer to printing a network configuration report, each step was designed to ensure a seamless and successful connection.
By following the instructions outlined in this guide, you can easily navigate the printer’s control panel, select your Wi-Fi network, enter the Wi-Fi password, and confirm the connection. The final step of printing a network configuration report allows you to verify and keep track of your printer’s network settings.
If you encounter any issues or have questions along the way, refer to the printer’s user manual or reach out to HP support for further assistance. They are always ready to help you troubleshoot and ensure a smooth setup process.
Now that your HP Envy Pro 6455 printer is successfully connected to your Wi-Fi network, you can enjoy the convenience of wireless printing. Whether you’re printing important documents, family photos, or creative projects, your printer is ready to meet your needs with ease.
Remember to keep your Wi-Fi network secure by regularly updating your Wi-Fi password and using encryption protocols. This will protect your network from unauthorized access and keep your printing activities private.
We hope this guide has been helpful in connecting your HP Envy Pro 6455 printer to your Wi-Fi network. Enjoy the freedom and convenience of wireless printing!


