Introduction
Connecting a cable to your LG Smart TV can provide you with access to a wide range of channels and programming options. Whether you want to enjoy your favorite shows, catch up on the latest news, or delve into the world of movies and sports, connecting a cable to your TV allows you to do it all with ease. This guide will walk you through the process of connecting a cable to your LG Smart TV, ensuring that you can start enjoying your favorite content in no time.
With the advancement of technology, the days of manually tuning channels and adjusting antennas are long gone. Instead, modern televisions like LG Smart TVs offer seamless integration with cable boxes, making it easier than ever to connect and set up your cable service. By following the steps outlined in this guide, you can make sure that your LG Smart TV is linked to your cable box correctly and that you are getting the most out of your cable subscription.
Before we dive into the steps, it’s essential to gather the necessary equipment. You will need an HDMI cable, a compatible cable box, and of course, your LG Smart TV. Having these items ready before you start will help streamline the setup process and ensure a smooth connection.
Step 1: Gather the necessary equipment
Before you begin connecting your cable to your LG Smart TV, it’s important to gather all the necessary equipment. Here’s what you’ll need:
- HDMI cable: Look for a high-quality HDMI cable that is long enough to reach from your cable box to your LG Smart TV. HDMI cables transmit audio and video signals in high-definition, ensuring you get the best possible picture and sound quality.
- Cable box: Make sure you have a compatible cable box that is provided by your cable service provider. This box is essential for receiving and decoding the cable signals and transmitting them to your TV.
- LG Smart TV: Ensure that your LG Smart TV is set up and ready to go. Make sure it is powered on and connected to a stable internet connection.
Once you have gathered these items, you are ready to move on to the next step of connecting your cable to your LG Smart TV. Having all the equipment ready will ensure a smooth and hassle-free setup process.
Step 2: Connect the cable box to the TV
Now that you have gathered all the necessary equipment, it’s time to connect your cable box to your LG Smart TV. Follow these steps:
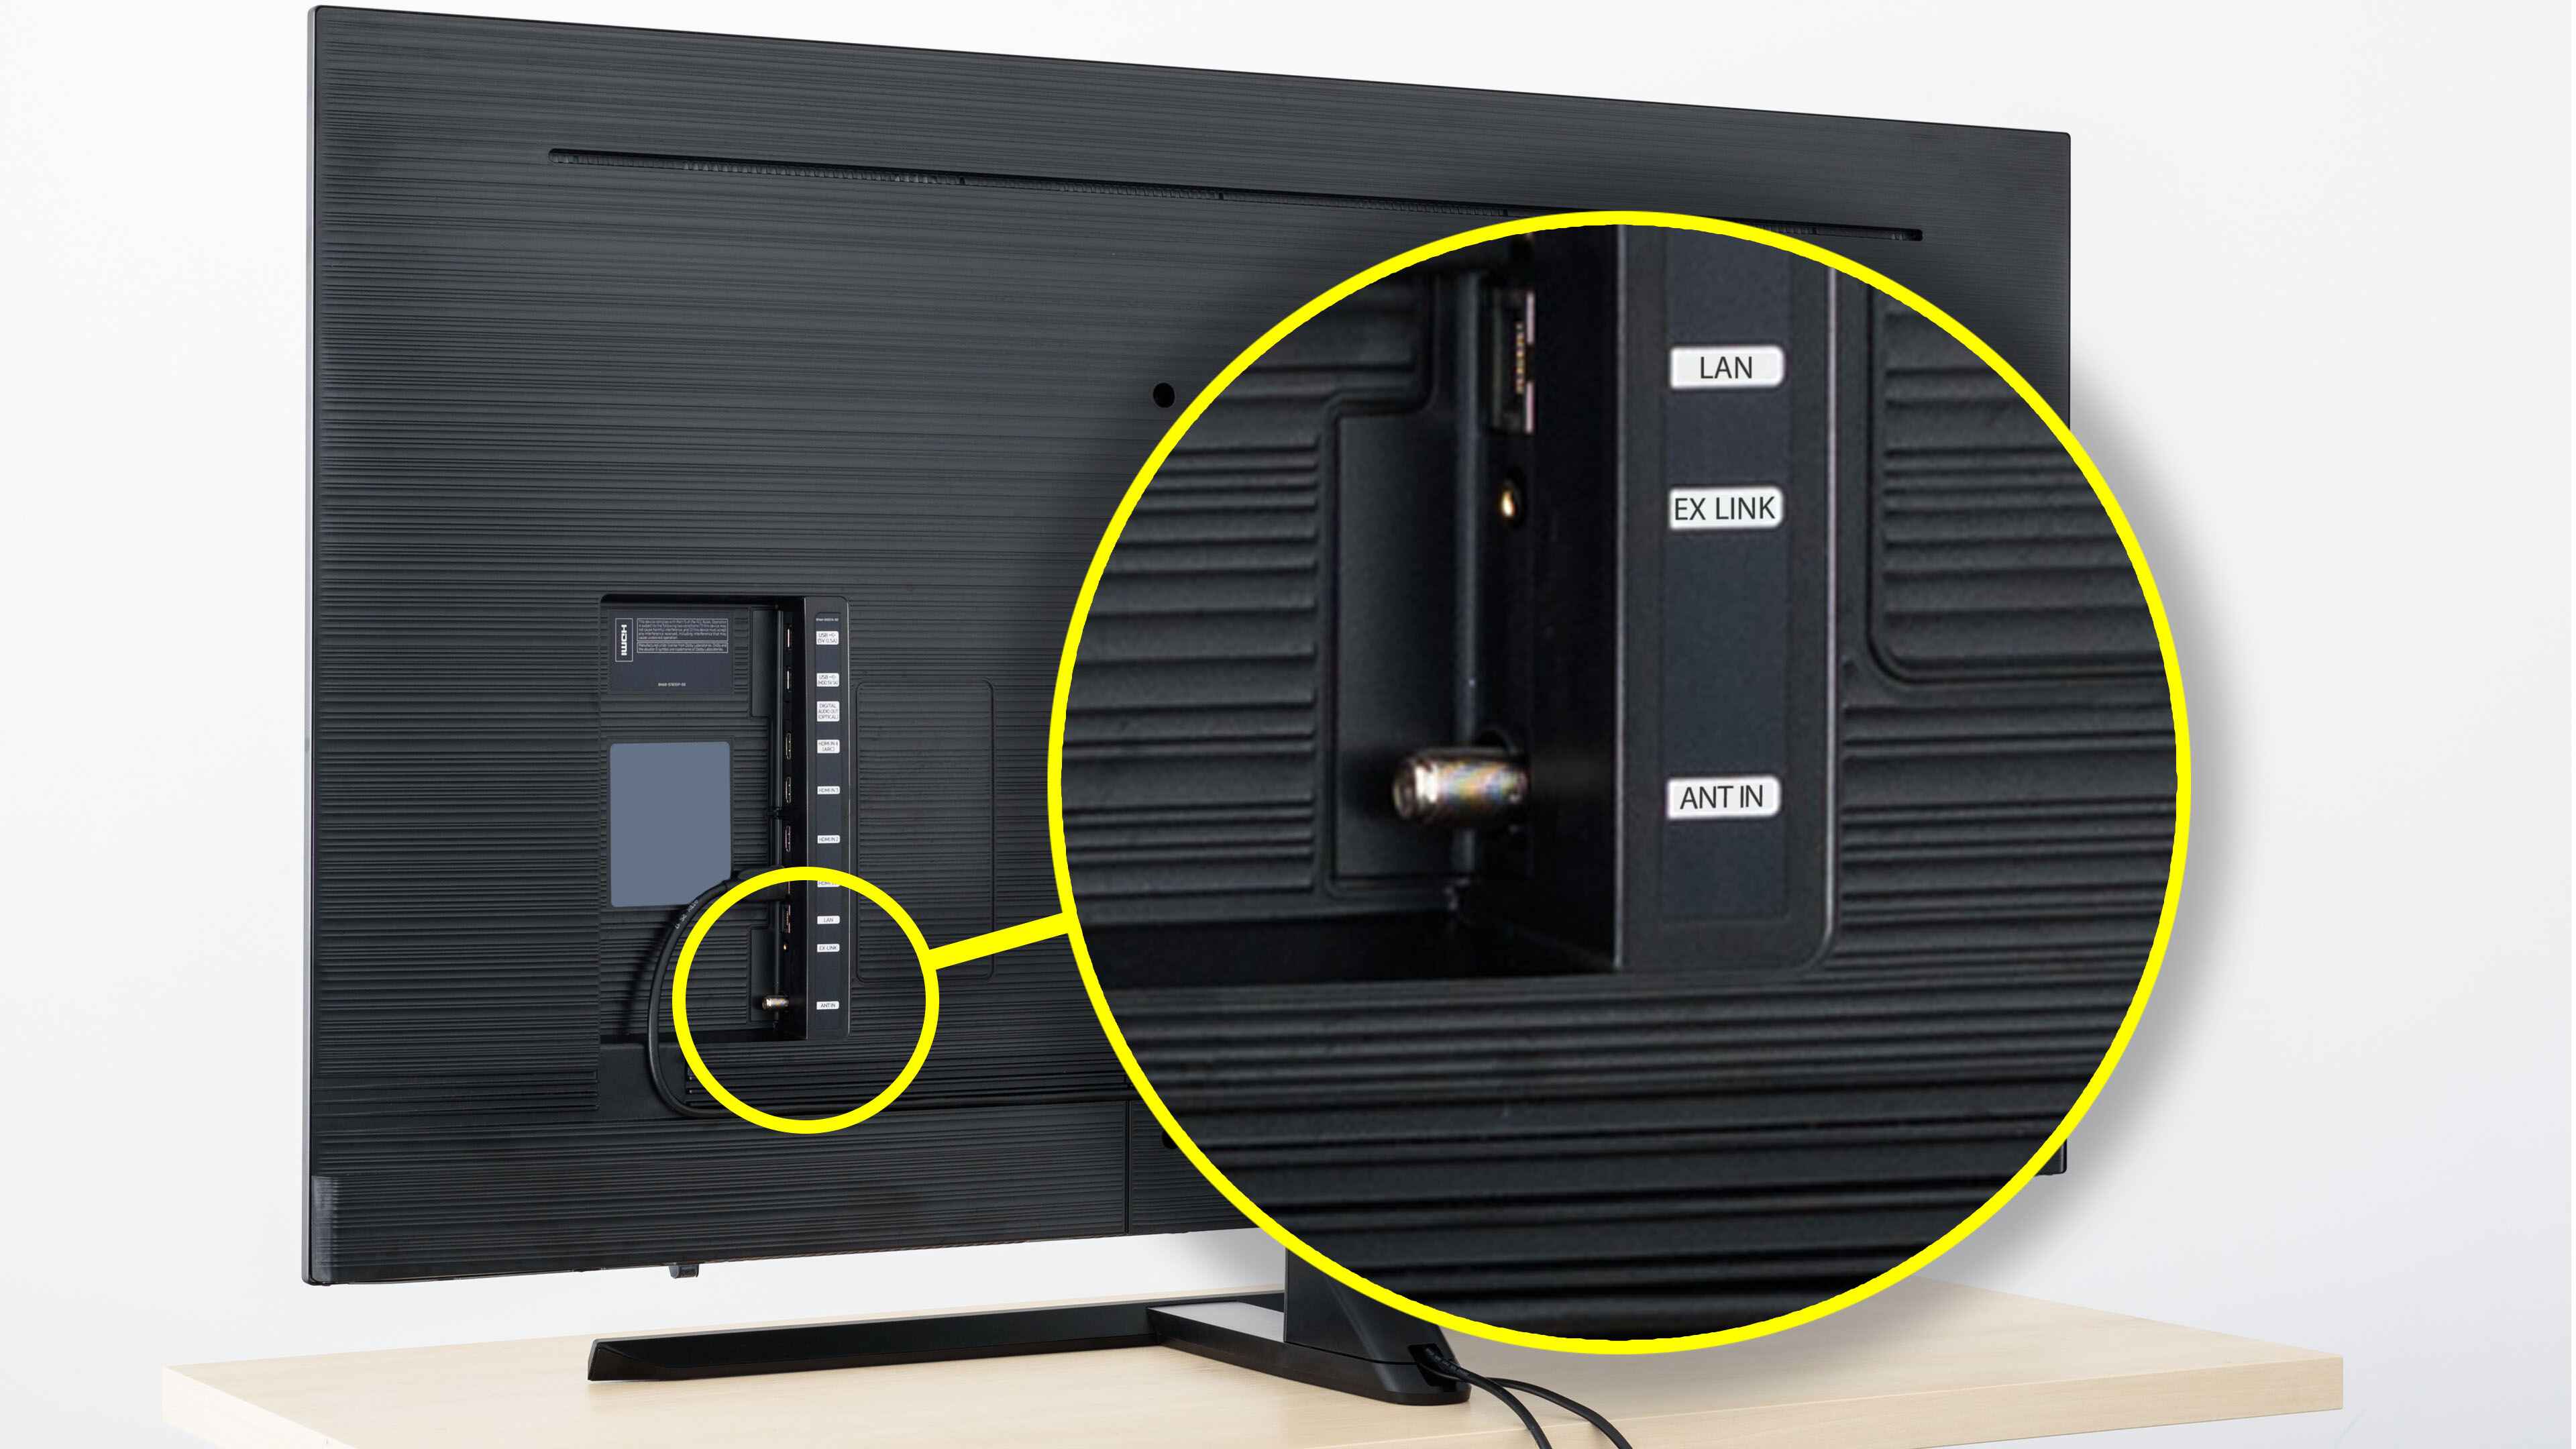
- Locate the HDMI port on your cable box. It is usually labeled as “HDMI Out” or something similar.
- Take one end of the HDMI cable and insert it into the HDMI port on the cable box.
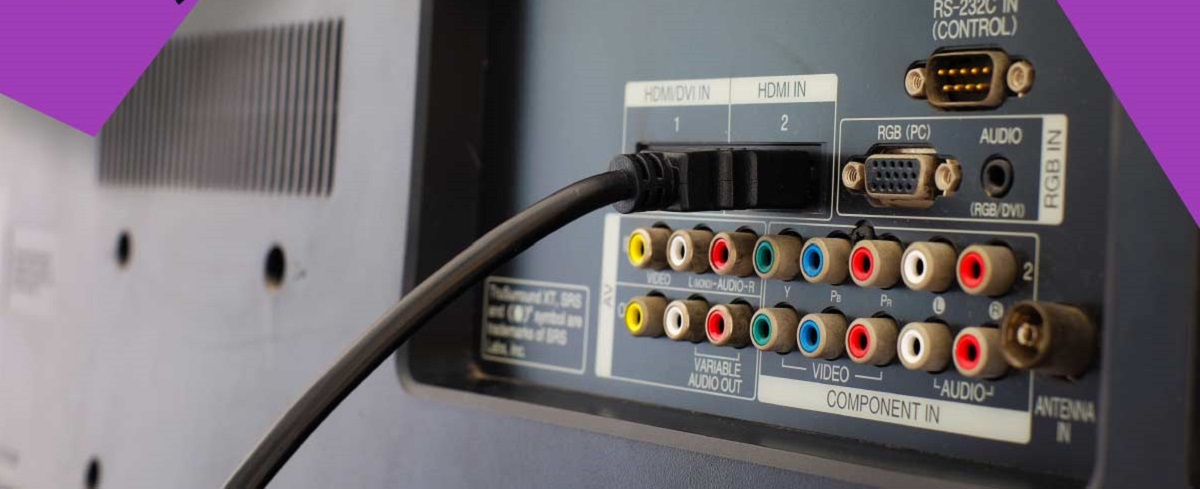
- Locate the HDMI port on your LG Smart TV. It is usually labeled as “HDMI In” or something similar.
- Connect the other end of the HDMI cable to the HDMI port on your LG Smart TV.
Ensure that the HDMI cable is securely plugged into both the cable box and the TV. This will ensure a stable and reliable connection.
It’s important to note that if you have multiple HDMI ports on your LG Smart TV, you should remember which port you connected your cable box to. This will be helpful when configuring the settings in the next step.
Once you have successfully connected the cable box to your LG Smart TV, you are ready to move on to the next step of configuring the cable box settings.
Step 3: Configure the cable box settings
After connecting the cable box to your LG Smart TV, it’s time to configure the settings on your cable box. This step involves ensuring that your cable box is properly set up to receive and transmit signals to your TV. Follow these steps:
- Turn on your LG Smart TV and the cable box.
- Using your TV remote, navigate to the input/source selection menu.
- Select the HDMI input port that corresponds to the port you connected the cable box to.
- On your cable box remote, access the settings menu. This can usually be done by pressing the “Menu” button.
- Within the settings menu, look for the options related to audio and video output.
- Make sure that the audio output is set to the desired format, such as stereo, surround sound, or HDMI audio.
- Similarly, check the video output settings and select the appropriate resolution for your TV.
- Save the changes made to the settings and exit the menu.
By configuring these settings, you ensure that the audio and video signals transmitted from the cable box to your LG Smart TV are optimized for the best viewing experience.
Keep in mind that the specific steps and options may vary depending on the model of your cable box. Consult the user manual or contact your cable service provider if you encounter any difficulties during the configuration process.
Once you have successfully configured the settings on your cable box, you are ready to fine-tune the settings on your LG Smart TV in the next step.
Step 4: Fine-tune the TV settings
Now that you have configured the settings on your cable box, it’s time to fine-tune the settings on your LG Smart TV to optimize your viewing experience. Follow these steps:
- On your LG Smart TV remote, press the “Menu” button to access the TV settings menu.
- Navigate to the picture settings or display settings section.
- Adjust the picture mode to your preference. You can choose from preset options like vivid, standard, cinema, or customize the settings manually.
- Fine-tune the brightness, contrast, sharpness, and other picture settings according to your preference.
- Next, navigate to the audio settings section.
- Adjust the sound mode to your liking, choosing from options like standard, movie, music, or custom settings.
- Make any additional audio adjustments, such as adjusting the volume level, equalizer settings, or enabling virtual surround sound.
- Once you have made all the desired changes, save the settings and exit the menu.
By fine-tuning the settings on your LG Smart TV, you can enhance the picture and sound quality to suit your personal preferences. This step enables you to optimize the viewing experience based on the content you are watching.
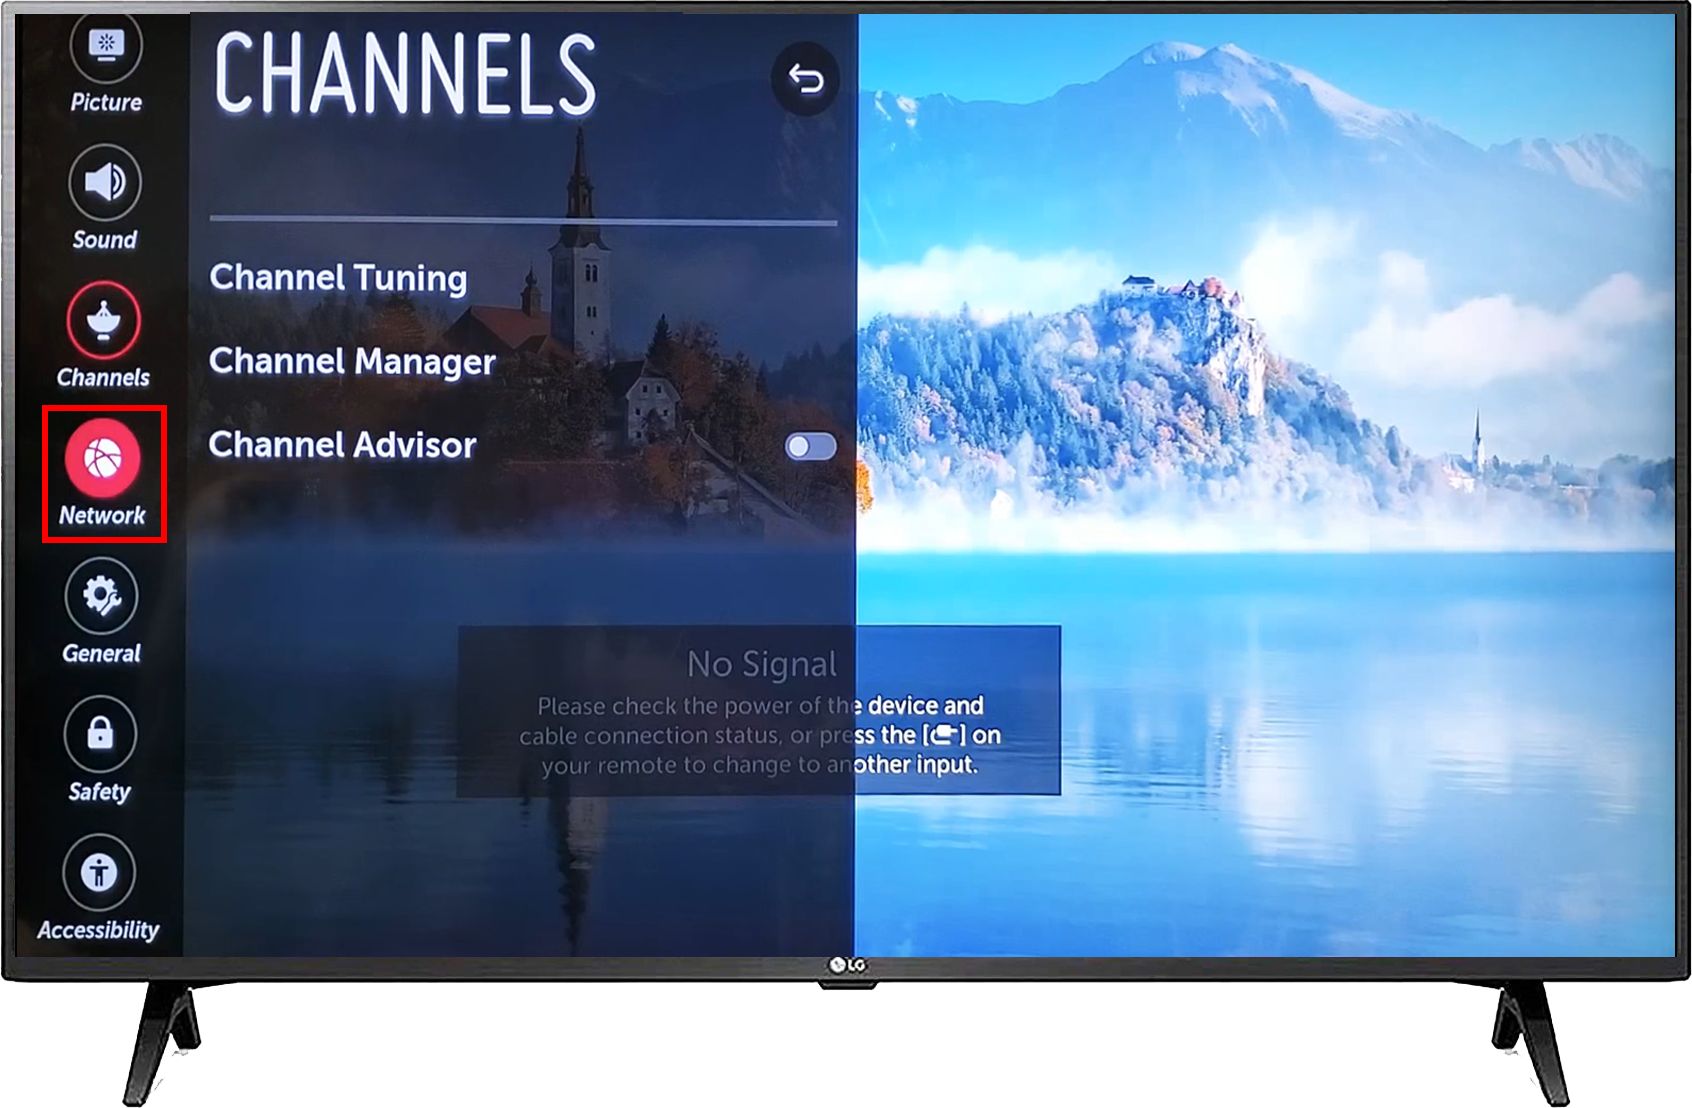
Additionally, you may also explore other settings on your LG Smart TV, such as network settings, smart features, and additional audio and video settings, to further customize your TV experience.
Now that you have fine-tuned the settings on your LG Smart TV, you are ready to move on to the final step of testing the connection to ensure everything is working correctly.
Step 5: Test the connection
After connecting and configuring your cable box and LG Smart TV, it’s crucial to test the connection to ensure everything is set up correctly. Here’s how to test the connection:
- Turn on your LG Smart TV and cable box.
- Select the input/source on your TV remote that corresponds to the HDMI port you connected the cable box to.
- Check if the cable box displays a channel or program on your LG Smart TV screen.
- Use the remote control for your cable box to navigate through different channels and verify that the TV is receiving the cable signals.
- Make sure the picture and sound quality is clear and without any issues.
- If any issues arise, double-check the connections between the cable box and the TV. Ensure that the HDMI cable is securely plugged into both devices.
- Reset the cable box and the TV if necessary, following the instructions provided by the respective manufacturers.
- If the connection remains problematic, reach out to your cable service provider or LG support for further assistance.
Testing the connection ensures that the cable signals are being properly received and displayed on your LG Smart TV. It allows you to verify that both the hardware and software configurations are set up correctly.
If the connection test is successful and you can access and navigate through different channels on your TV, congratulations! You have successfully connected your cable to your LG Smart TV.
Now you can sit back, relax, and enjoy a wide variety of content with the convenience and features of your LG Smart TV.
Conclusion
Connecting your cable to your LG Smart TV opens up a world of entertainment possibilities. With just a few simple steps, you can enjoy your favorite shows, movies, and sports right from the comfort of your living room. Here’s a recap of the steps outlined in this guide:
- Gather the necessary equipment, including an HDMI cable, compatible cable box, and your LG Smart TV.
- Connect the cable box to the TV using an HDMI cable.
- Configure the settings on the cable box to ensure optimal audio and video output.
- Fine-tune the settings on your LG Smart TV to enhance the picture and sound quality.
- Test the connection to ensure everything is functioning correctly.
By following these steps, you can enjoy a seamless and immersive viewing experience on your LG Smart TV. Remember to refer to the user manuals provided with your cable box and TV for specific instructions and troubleshooting tips.
Should you encounter any difficulties during the setup process, do not hesitate to reach out to your cable service provider or LG support for assistance. They will be able to provide you with additional guidance tailored to your specific setup.
Now that you have successfully connected your cable to your LG Smart TV, sit back, relax, and enjoy the endless entertainment options at your fingertips. Whether it’s binge-watching your favorite series, keeping up with the latest news, or immersing yourself in cinematic experiences, your LG Smart TV and cable connection have you covered.