Introduction
In the digital age, staying connected to the internet has become an essential aspect of our daily lives. Whether we are traveling for business or pleasure, having access to a reliable internet connection is crucial. However, not all hotels provide an ethernet connection in the rooms, leaving guests to rely solely on the hotel’s Wi-Fi network.
While most devices can easily connect to hotel Wi-Fi, there are instances where you may need to connect multiple devices or share the internet connection with others. This is where a switch comes in handy. By connecting a switch to the hotel Wi-Fi, you can expand the number of devices that can access the network.
In this guide, we will walk you through the steps to connect a switch to a hotel Wi-Fi network. Whether you’re a business traveler needing to connect multiple devices or a family on vacation wanting to share the internet connection, this guide will help you make the most of the hotel’s Wi-Fi network.
Please note that before attempting to connect a switch to a hotel Wi-Fi network, it is essential to check the hotel’s policy regarding external devices and network connections. Some hotels may have restrictions or additional requirements that need to be met.
Step 1: Check hotel Wi-Fi policy
Before connecting a switch to the hotel’s Wi-Fi network, it is crucial to familiarize yourself with the hotel’s Wi-Fi policy. Certain hotels may have specific rules or restrictions regarding the use of external devices or network connections. Understanding the policy will help you ensure compliance and avoid any potential issues during your stay.
Here are a few steps to follow when checking the hotel’s Wi-Fi policy:
- Review the hotel’s website or contact the front desk: Start by visiting the hotel’s official website and navigating to the FAQ or amenities section. Look for information regarding internet access and any restrictions on bringing external devices.
- Ask the front desk or concierge: If you are unable to find the necessary information on the hotel’s website, contact the front desk or concierge for assistance. They will be able to provide you with the hotel’s Wi-Fi policy and any additional guidelines or restrictions.
- Read terms and conditions: If the hotel provides an in-room guest directory or Wi-Fi terms and conditions, give it a thorough read. Look for any specific rules related to external devices, network connections, or bandwidth limitations.
By taking the time to understand the hotel’s Wi-Fi policy, you can ensure that you connect and use your switch in accordance with the hotel’s guidelines. This will help maintain a positive experience for both you and other guests, as well as avoid any potential disruptions or penalties.
Step 2: Gather necessary equipment
Before connecting your switch to the hotel Wi-Fi, it’s important to gather all the necessary equipment to ensure a smooth setup process. Here are the essential items you will need:
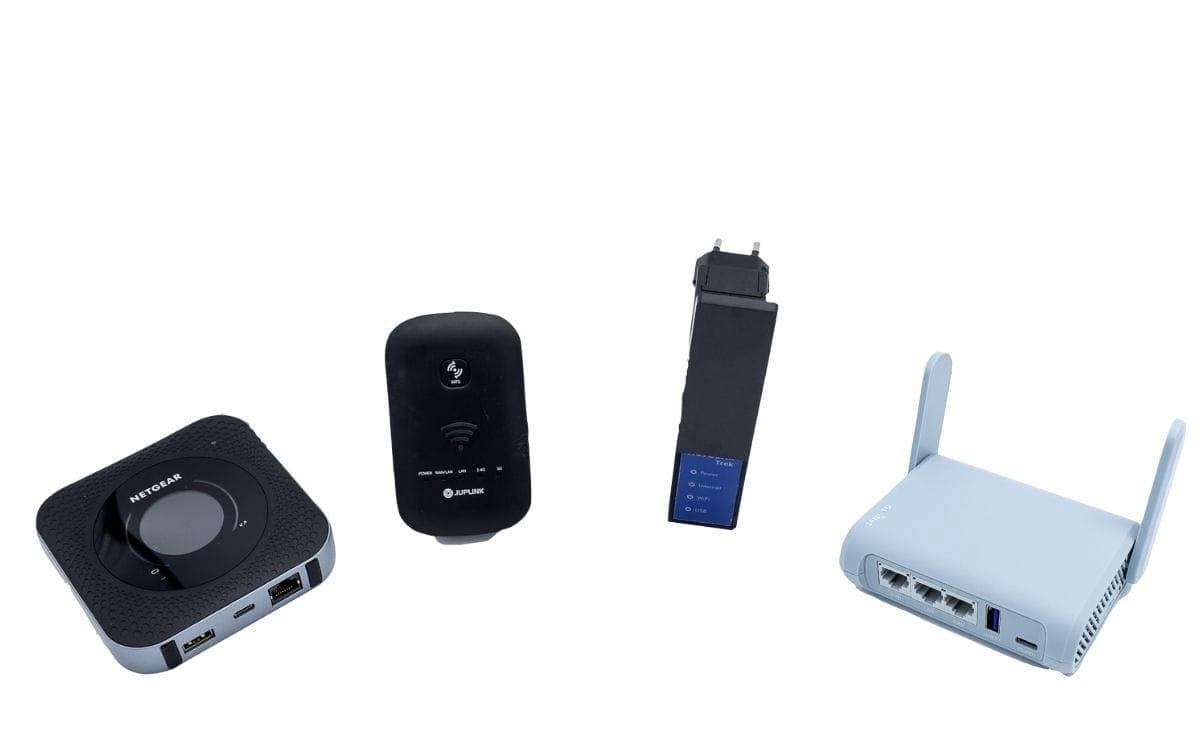
- Switch: Choose a switch that suits your needs. Consider the number of devices you plan to connect and the available ports on the switch. A basic Ethernet switch with multiple ports should suffice for most situations.
- Power adapter: Ensure that your switch comes with a compatible power adapter. This will provide the necessary power to the switch.
- Ethernet cable: You’ll need an Ethernet cable to connect the switch to your devices and the hotel’s Wi-Fi network. Make sure the length is sufficient for your setup.
- Devices to connect: Determine what devices you’ll be connecting to the switch. This can include laptops, smartphones, tablets, gaming consoles, or any other devices that require internet access.
Once you have gathered all the necessary equipment, make sure to check that everything is functioning properly. Ensure that the switch powers on, the Ethernet cable is in good condition, and all the devices you plan to connect are working correctly. It’s always a good idea to do a quick test to verify that everything is in working order before proceeding to the next step.
Having all the required equipment at hand will save you time and make the setup process more efficient. It allows you to address any potential issues or missing items before attempting to connect the switch to the hotel Wi-Fi network.
Step 3: Connect the switch to the power source
Once you have gathered all the necessary equipment, it’s time to connect the switch to a power source. Here’s how:
- Locate a nearby power outlet: Find a power outlet within reach of where you plan to set up your switch. Ensure that it is in an accessible and safe location.
- Connect the power adapter: Take the power adapter that came with your switch and plug it into the power outlet.
- Connect the power adapter to the switch: Connect the other end of the power adapter cable to the designated power port on the switch. Make sure it is securely plugged in.
- Switch on the power: Once the switch is connected to the power source, switch it on using the power button or switch located on the device itself.
At this point, your switch should be receiving power, and you can proceed to the next step of connecting it to the hotel Wi-Fi network. It’s worth noting that some switches may have additional features or settings that can be configured at this stage. Refer to the manufacturer’s instructions or user manual if you need to adjust any specific settings.
By properly connecting the switch to the power source, you ensure that it receives the necessary power to function and allow devices to connect to the network. This step is crucial in setting up a stable and reliable network connection for your devices.
Step 4: Connect the switch to the hotel Wi-Fi
Now that your switch is powered on and ready to go, it’s time to connect it to the hotel’s Wi-Fi network. Follow these steps:
- Locate the Wi-Fi settings on your switch: Depending on the switch model, there may be a dedicated section or menu for Wi-Fi settings. Consult the user manual or manufacturer’s instructions to locate the Wi-Fi settings on your specific switch.
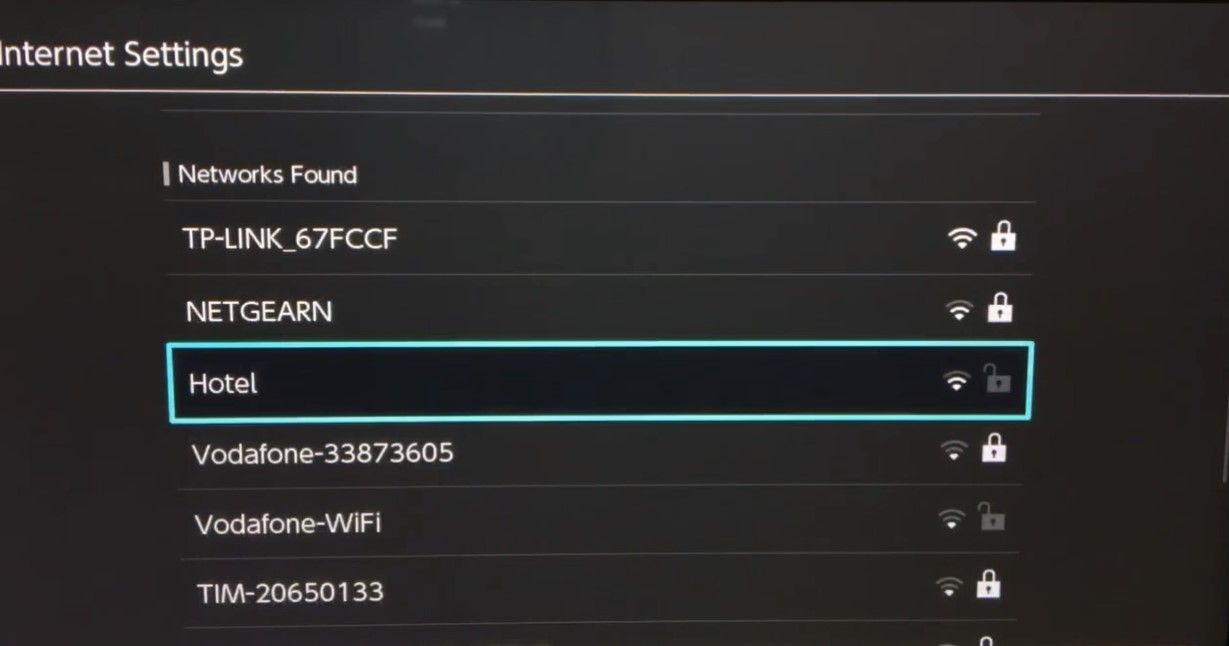
- Access the Wi-Fi network list: Once you have accessed the Wi-Fi settings on your switch, it should display a list of available Wi-Fi networks. Select the network provided by the hotel. The network name (SSID) should be provided either in the hotel guest directory or at the front desk.
- Enter the Wi-Fi password (if necessary): If the hotel’s Wi-Fi network is password-protected, you will need to enter the password to connect. This password is usually provided at the front desk or in the hotel guest directory. Enter the password using the switch’s interface or designated keyboard, if applicable.
- Wait for the connection to establish: After entering the Wi-Fi password, the switch will attempt to establish a connection to the hotel’s Wi-Fi network. This process may take a few moments, so allow some time for the switch to connect.
Once the switch has successfully connected to the hotel’s Wi-Fi network, you’ll be ready to proceed to the next step of configuring the network settings on the switch. It’s important to note that the switch has effectively become a bridge between your devices and the hotel’s Wi-Fi network, allowing multiple devices to connect and share the internet connection.
By connecting the switch to the hotel’s Wi-Fi network, you’re expanding the number of devices that can access the network and ensuring a seamless internet connection for all your connected devices.
Step 5: Configure network settings on switch
After successfully connecting the switch to the hotel’s Wi-Fi network, it’s important to configure the network settings on the switch to ensure optimal performance. Here are the steps to follow:
- Access the switch’s configuration interface: Most switches have a web-based interface that allows you to configure various settings. Refer to the user manual or manufacturer’s instructions to access the configuration interface.
- Set up DHCP or static IP addresses: Depending on your preference and network requirements, you can choose to configure the switch with either DHCP or static IP addresses. DHCP (Dynamic Host Configuration Protocol) automatically assigns IP addresses to devices on the network, while static IP addresses require manual configuration.
- Configure VLAN (Virtual Local Area Network) settings (if applicable): If you require VLANs for separate network segments or to isolate certain devices, configure the VLAN settings on the switch. This allows for more flexibility and better network management.
- Enable QoS (Quality of Service) settings: If you anticipate heavy network traffic or have specific devices or applications that require priority, enable QoS settings on the switch. This helps ensure a smooth and consistent internet experience.
- Save and apply the configuration: Once you have adjusted the necessary network settings, save and apply the configuration on the switch. This will ensure that the changes take effect and the switch operates according to your preferences.
Keep in mind that the specific steps and options for configuring network settings may vary depending on the switch model and manufacturer. It’s important to consult the user manual or online documentation for detailed instructions for your particular switch.
Configuring the network settings on the switch allows you to customize and optimize the network performance based on your specific needs. It ensures that the switch functions efficiently and provides a stable and reliable internet connection for all your connected devices.
Step 6: Test the connection
After connecting the switch to the hotel’s Wi-Fi network and configuring the network settings, it’s important to test the connection to ensure that everything is working as expected. Performing a connection test helps you identify any issues or potential areas for improvement. Follow these steps to test the connection:
- Check the status lights on the switch: Take note of the status lights on the switch. Most switches have indicator lights that show the status of the network connection. Look for any solid or blinking lights that indicate a successful connection.
- Connect your devices to the switch: Connect your devices to the switch using Ethernet cables. These can include laptops, smartphones, tablets, or any other devices that require internet access. Ensure that each device is connected securely to one of the switch’s ports.
- Open a web browser: On one of the connected devices, open a web browser and visit a website to test the internet connection. Choose a website that loads quickly and reliably, such as Google or a popular news site.
- Check the internet speed: Use a speed testing tool to measure the speed of your internet connection. There are various online speed testing websites that can provide accurate results. Make a note of the upload and download speeds to evaluate the performance of your connection.
- Test connectivity on multiple devices: Repeat the previous steps on multiple devices connected to the switch. This ensures that the connection is stable and consistent across all devices.
If the connection test is successful and all of your devices are able to access the internet without any issues, then you have successfully connected the switch to the hotel Wi-Fi network. However, if you encounter any difficulties or notice any performance issues, you may need to troubleshoot or adjust the network settings on the switch.
Regular testing of the connection helps you maintain a reliable and efficient internet connection for all your connected devices. It allows you to address any potential issues promptly, ensuring a seamless online experience during your stay.
Conclusion
Connecting a switch to a hotel’s Wi-Fi network can greatly expand the number of devices that can access the internet and enhance your overall connectivity experience. By following the steps outlined in this guide, you can successfully connect your switch to the hotel’s Wi-Fi network and configure it for optimal performance.
Remember to always check the hotel’s Wi-Fi policy before connecting any external devices to ensure compliance with their guidelines. Gathering the necessary equipment and properly connecting the switch to the power source are crucial steps to provide the necessary power and connectivity for your devices.
Connecting the switch to the hotel Wi-Fi network and configuring network settings allows you to tailor the connection to your specific needs. Whether you choose to enable QoS settings, configure VLANs, or set up static IP addresses, these options provide you with more control and customization.
Lastly, don’t forget to test the connection once everything is set up. Testing the connection helps identify any possible issues and ensures a reliable internet connection for all your devices. If you encounter any difficulties, consult the user manual or seek further assistance from the manufacturer or hotel staff.
Now that you have the knowledge and understanding of how to connect a switch to a hotel’s Wi-Fi, you can confidently tackle this task and enjoy a seamless internet connection during your stay. Happy connecting!