Introduction
Welcome to our guide on how to connect a case fan to a Raspberry Pi! If you are looking to keep your Raspberry Pi cool and ensure optimal performance, adding a case fan can be a great solution. The Raspberry Pi is a powerful microcomputer that can generate heat during intensive tasks or when operating in warm environments. By installing a fan, you can improve the longevity and efficiency of your Raspberry Pi by dissipating heat effectively.
In this article, we will walk you through the step-by-step process of connecting a case fan to your Raspberry Pi. You don’t need to be an expert in electronics to follow along; we will provide clear instructions and guidance for each stage of the installation.
Before we begin, it’s important to note that there are several variations of Raspberry Pi models available, each with different pin configurations. We will primarily focus on the most common Raspberry Pi models, such as the Raspberry Pi 3 and Raspberry Pi 4, which utilize the 40-pin GPIO header. However, the general principles we discuss can be applied to other models with minor pin configuration adjustments.
To successfully complete this project, you will need a few essential materials, which we will cover in the next section. Once you have everything ready, we can start the process by preparing the Raspberry Pi itself.
Required Materials
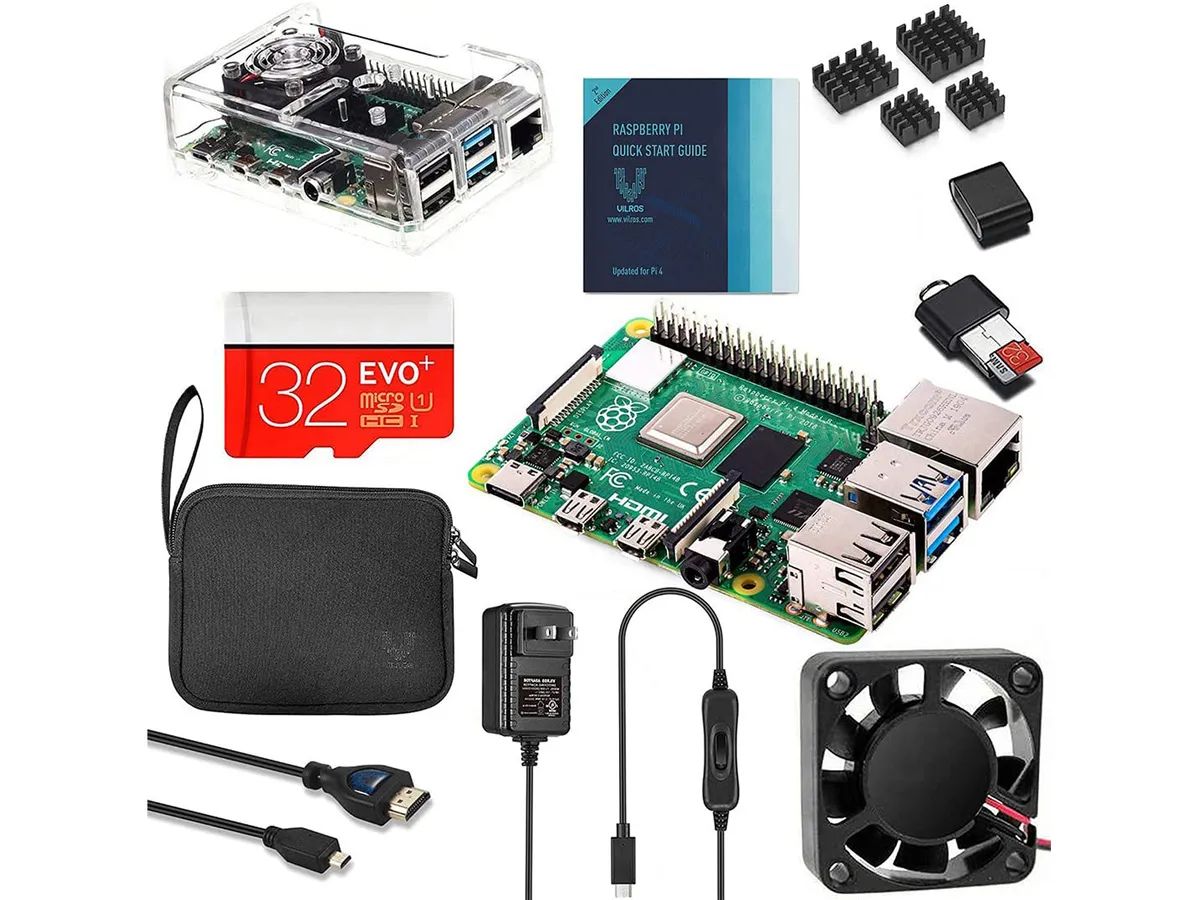
Before you begin connecting a case fan to your Raspberry Pi, make sure you have all the necessary materials. Here’s a list of the items you will need:
- A Raspberry Pi (Model 3 or 4 recommended, but other models can work with minor adjustments)
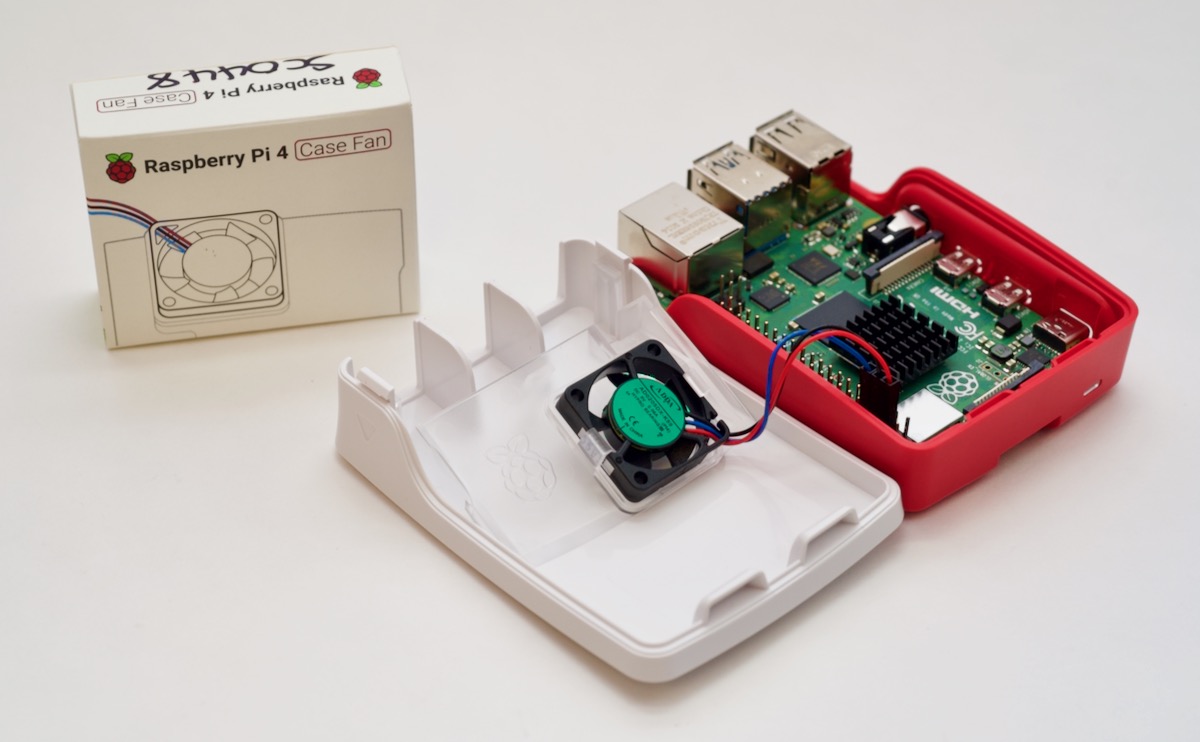
- A case for the Raspberry Pi that has fan mounting capabilities
- A case fan that is compatible with your case (check for fan size and voltage requirements)
- A female-to-female jumper wire or a soldering iron and solder (depending on your fan’s wiring)
- A small Phillips screwdriver (if your case requires screws for mounting the fan)
- Optional: heat sinks or thermal adhesive for better heat dissipation
It’s important to ensure that the case you choose has proper ventilation and mounting options for a fan. Many cases designed specifically for Raspberry Pi include pre-drilled holes and brackets for mounting a fan. Make sure to check the specifications of your case to confirm compatibility.
The case fan you choose should be compatible with your case and the Raspberry Pi’s power requirements. It’s important to consider the voltage and current requirements of the fan to avoid any potential damage to your Raspberry Pi. Most case fans operate at 5V or 12V, so make sure to choose a fan that matches your Raspberry Pi’s pin configuration.
If your fan has loose wires, you can either use female-to-female jumper wires to connect it to the Raspberry Pi or solder the fan wires directly to the GPIO pins (ensuring correct polarity). If you are not comfortable with soldering, using jumper wires is a simpler and safer alternative.
Optional heat sinks or thermal adhesive can further enhance the cooling performance of your Raspberry Pi. These small metal heat sinks can be attached to the main processor and other heat-generating components to aid in heat dissipation. Thermal adhesive ensures effective thermal transfer between the heat sink and the component.
Now that you have all the necessary materials, let’s move on to preparing your Raspberry Pi for fan installation in the next section.
Step 1: Prepare the Raspberry Pi
Before you can connect a case fan to your Raspberry Pi, you need to prepare the Raspberry Pi itself. Follow these steps:
- Ensure that your Raspberry Pi is powered off and disconnected from any power source.
- If you have a case for your Raspberry Pi, remove the top cover or side panel to access the GPIO header.
- Take a close look at the GPIO header on the Raspberry Pi. Note the pin numbering and layout for reference later.
- If your Raspberry Pi has any existing jumper wires or connections in the GPIO header area, gently remove them to make space for the fan connection.
- If you have not already done so, install any necessary heat sinks to the Raspberry Pi’s main processor and other heat-generating components. Follow the manufacturer’s instructions for proper placement.
- Make sure the Raspberry Pi is in a well-ventilated area, free from any obstructions or objects that may impede the airflow.
By following these steps, you have now prepared the Raspberry Pi for the case fan installation. Keeping the Raspberry Pi cool is important to ensure optimal performance and prevent any potential damage due to overheating. With the Raspberry Pi ready, we can now move on to identifying the wiring of the case fan in the next step.
Step 2: Identify the Fan’s Wiring
Before connecting the case fan to your Raspberry Pi, it’s essential to identify the wiring of the fan properly. This step will help you determine the correct connections and ensure the fan operates correctly. Follow these steps:
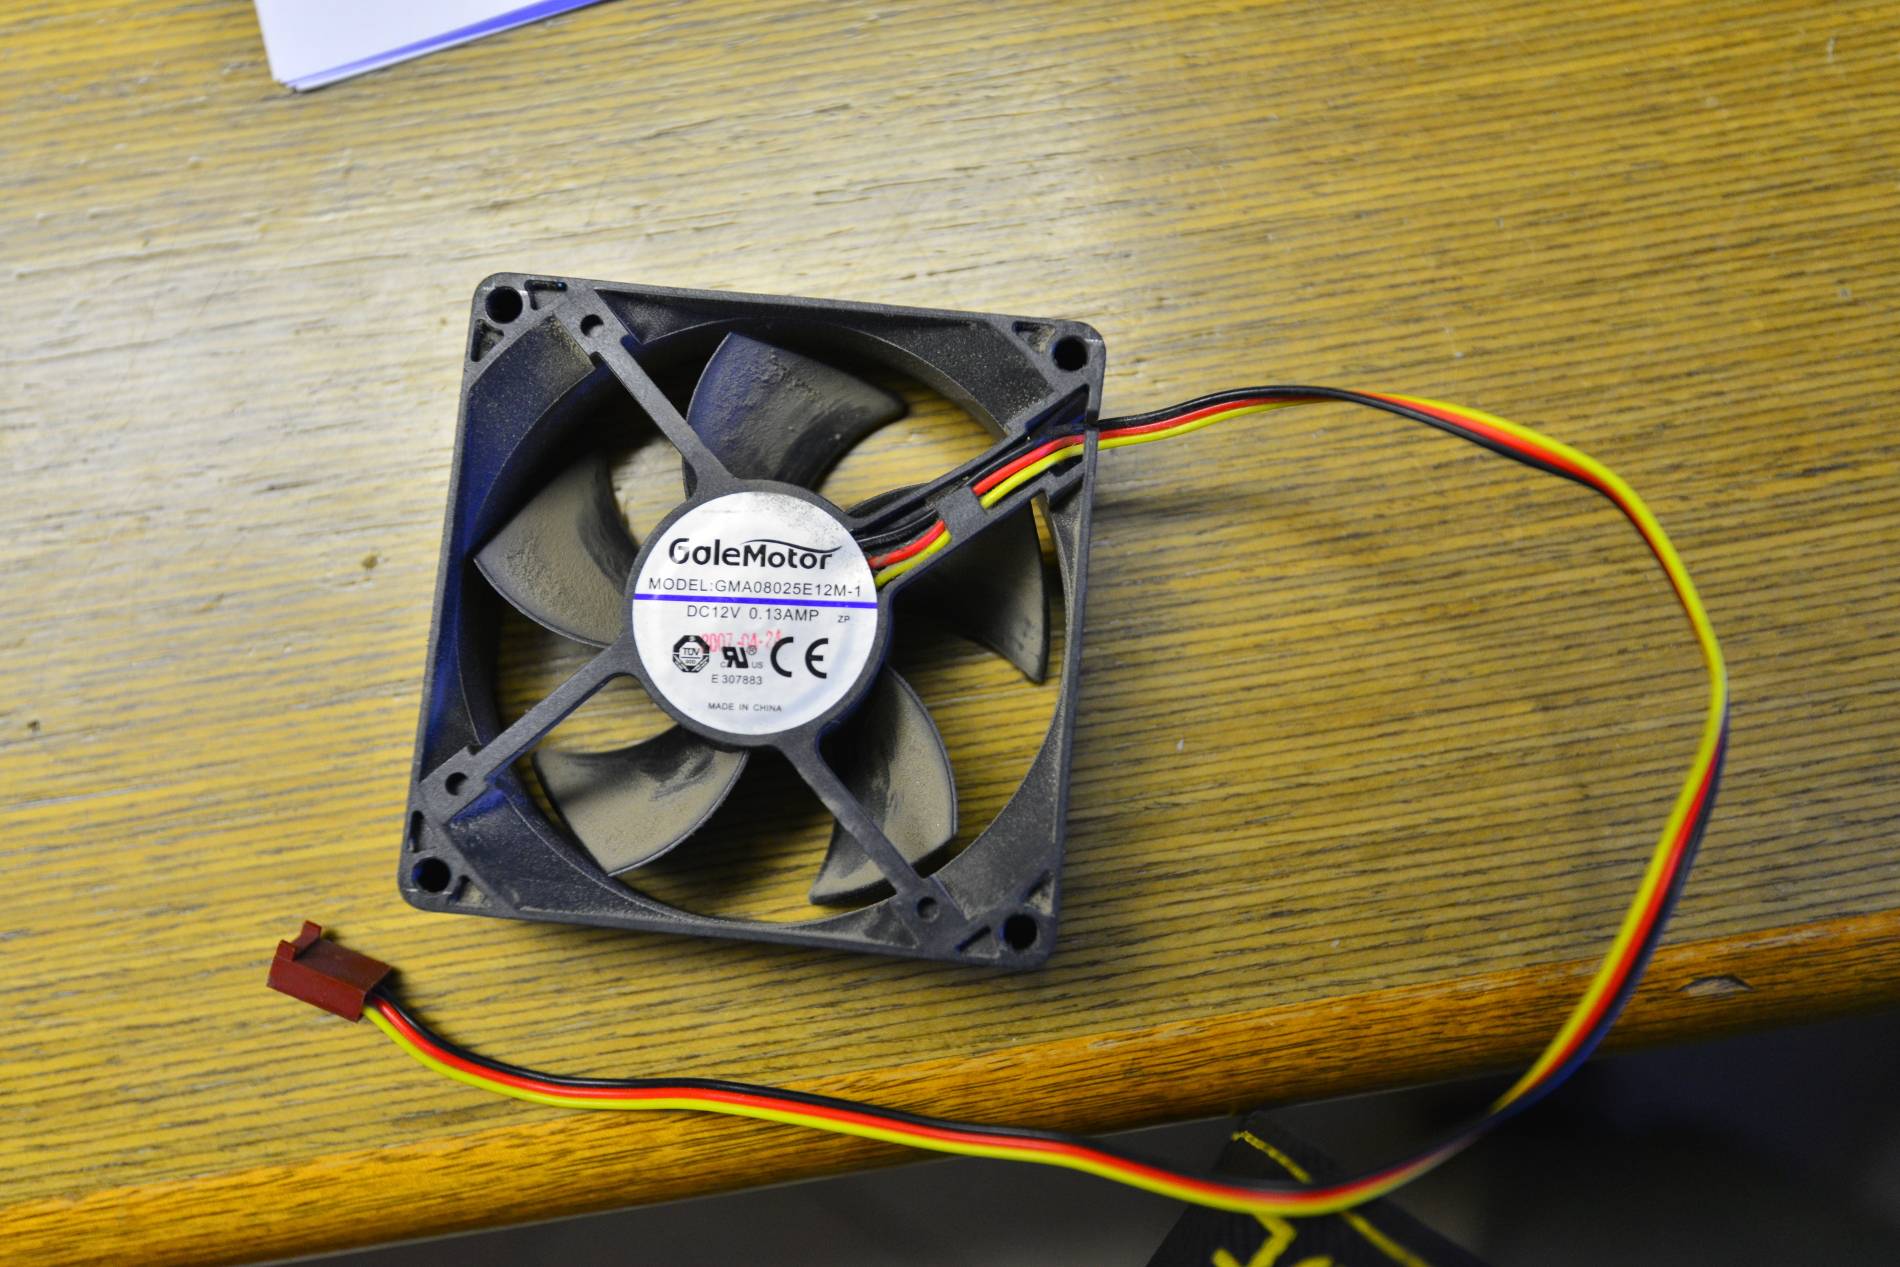
- Inspect the fan’s connector or wires to identify the positive (+) and negative (-) terminals. Most case fans have a red wire for the positive connection and a black wire for the negative connection.
- If your case fan has more than two wires, consult the manufacturer’s documentation or specifications to determine the purpose of each wire. Some fans have additional wires for speed control or RGB lighting, but for basic cooling, you only need to focus on the positive and negative connections.
- Note the voltage requirement of the fan. Most case fans operate at 12V or 5V, so make sure to choose a fan that matches the voltage level of your Raspberry Pi GPIO pins.
- If necessary, refer to the fan’s product manual or search for a wiring diagram online. This additional information can provide specific details on the fan’s wiring and pinout.
By identifying the fan’s wiring, you now have a clear understanding of which wires correspond to the positive and negative terminals. This knowledge will be crucial for connecting the fan to your Raspberry Pi in the next step. Make sure to double-check the wiring and voltage requirements before proceeding.
Step 3: Connect the Fan to the Raspberry Pi
Now that you have identified the wiring of your case fan, it’s time to connect it to your Raspberry Pi. The process may vary depending on whether you’re using jumper wires or soldering the fan directly. Follow these steps for your preferred method:
Using Jumper Wires:
- Take a female-to-female jumper wire and connect one end to the positive terminal of the case fan. The positive terminal is usually denoted by a red wire.
- Connect the other end of the jumper wire to the 5V pin on the Raspberry Pi’s GPIO header. Ensure that you connect to the correct pin by referencing the pinout diagram or guidelines specific to your Raspberry Pi model.
- Next, take another female-to-female jumper wire and connect one end to the negative terminal of the case fan. The negative terminal is usually denoted by a black wire.
- Connect the other end of the jumper wire to any of the ground (GND) pins on the Raspberry Pi’s GPIO header. Again, ensure you’re connecting to the correct pin by referring to the pinout diagram or guidelines.
Using Soldering:
- If you’re comfortable with soldering, you can solder the fan’s wires directly to the GPIO pins on the Raspberry Pi.
- First, identify the GPIO pins that correspond to the 5V and GND connections. Double-check the pinout diagram for your specific Raspberry Pi model.
- Cut the fan’s wires to an appropriate length, leaving enough slack to connect them to the GPIO pins without straining the connections.
- Strip a small portion of insulation from the ends of the wires.
- Solder the positive wire to the GPIO pin corresponding to 5V and the negative wire to the GND pin.
- Ensure that the solder joints are secure and insulated, and double-check that there are no loose wires or shorts.
By connecting the case fan to your Raspberry Pi, you’ve taken a crucial step towards ensuring optimal cooling and performance. Once the connections are secure, you can move on to testing the fan in the next step.
Step 4: Test the Fan
After connecting the case fan to your Raspberry Pi, it’s important to test its functionality before mounting it onto the case. This step will allow you to ensure that the fan is properly configured and operating correctly. Follow these steps to test the fan:
- Make sure that your Raspberry Pi is connected to a power source and turned on.
- If you connected the fan using jumper wires, double-check the connections to ensure they are secure and properly aligned.
- If you soldered the fan’s wires directly to the GPIO pins, check for any loose connections or shorts.
- Once you’re confident in the connections, power on your Raspberry Pi.
- Observe the case fan to see if it starts spinning once the Raspberry Pi is powered on. You should be able to hear the fan running and feel the airflow if you place your hand near the fan.
- Check the temperature of your Raspberry Pi using appropriate software or tools. You should notice a decrease in temperature if the fan is functioning correctly.
If the fan is not spinning or not functioning as expected, double-check the connections and wiring. Ensure that the fan is receiving power and that the positive and negative terminals are correctly connected to the GPIO pins.
If the fan is working properly, congratulations! You have successfully connected and tested the case fan on your Raspberry Pi. In the next step, we will move on to mounting the fan onto the case.
Step 5: Mount the Fan onto the Case
With the case fan connected and tested, the final step is to mount it onto the case of your Raspberry Pi. Properly securing the fan will maximize its cooling efficiency and maintain its stability during operation. Follow these steps to mount the fan onto the case:
- If your case has pre-drilled holes for mounting the fan, carefully align the screw holes on the fan with the corresponding holes on the case.
- Using a small Phillips screwdriver, insert and tighten the screws to secure the fan onto the case. Be careful not to overtighten, as it may damage the case or fan.
- If your case does not have pre-drilled holes, you may need to use adhesive or mounting brackets to secure the fan. Follow the manufacturer’s instructions for the specific case and fan combination.
- Ensure that the fan is securely attached to the case without any wobbling or loose connections.
Once the fan is securely mounted onto the case, take a moment to double-check the wiring and connections. Ensure that there are no loose wires or connections that may interfere with the fan’s operation.
With the fan properly mounted and connected, you can now close the case or reattach any removed parts. Make sure that the fan and Raspberry Pi are safely enclosed within the case, allowing for proper airflow.
Congratulations! You have successfully connected, tested, and mounted a case fan to your Raspberry Pi. This extra cooling capability will help ensure that your Raspberry Pi operates at optimal temperatures for continuous and reliable performance.
Conclusion
Adding a case fan to your Raspberry Pi is a simple yet effective way to maintain optimal performance and prevent overheating. By following the steps outlined in this guide, you have learned how to connect, test, and mount a case fan onto your Raspberry Pi’s case.
First, we emphasized the importance of cooling your Raspberry Pi to ensure its longevity and efficiency. We then discussed the materials required for this project, such as the Raspberry Pi itself, a compatible case, a case fan, and optional heat sinks.
Next, we walked you through the step-by-step process, starting with preparing the Raspberry Pi, identifying the fan’s wiring, and making the necessary connections. We covered both the jumper wire and soldering techniques, ensuring that you have options based on your comfort level and preferences.
We then explained the significance of testing the fan to ensure its proper functionality. By observing the fan’s operation and monitoring the temperature of your Raspberry Pi, you can verify that everything is working as expected.
Finally, we discussed how to mount the fan onto the case securely. Whether your case has pre-drilled holes or requires alternative mounting methods, we provided guidance to ensure a stable and efficient installation.
By successfully completing these steps, you now have a Raspberry Pi equipped with a case fan, ready to handle any demanding tasks or operating conditions. Enjoy improved cooling and peace of mind knowing that your Raspberry Pi is operating optimally.
Remember, proper cooling is crucial for maintaining the performance and longevity of your Raspberry Pi. Regularly clean the fan and ensure that it remains free from debris or dust. Additionally, monitor the temperature of your Raspberry Pi to prevent any potential issues related to overheating.
Thank you for following this guide, and we hope it has been helpful in your journey to connect a case fan to your Raspberry Pi!