Introduction
Welcome to this guide on how to clone your SSD with Macrium Reflect. If you’re unfamiliar with the term “cloning,” it refers to creating an exact copy of your SSD onto another SSD. This can be incredibly useful when you want to upgrade your current SSD to a larger capacity or replace a failing one without losing any of your data or system configurations.
Macrium Reflect is a powerful and user-friendly disk imaging and cloning software for Windows operating systems. It allows you to create an exact replica of your SSD, ensuring that all your files, applications, and settings are transferred seamlessly to the new drive.
So why should you consider cloning your SSD? There are several reasons. First and foremost, it saves you the hassle of reinstalling your operating system, applications, and settings on a new drive. This not only takes time but also opens up the possibility of errors or missing configurations during the setup process.
Additionally, cloning preserves your entire system as it is, including your personalized settings, installed software, and even your desktop layout. It ensures a smooth transition from one drive to another, minimizing any disruptions to your workflow.
In this guide, we will walk you through the process of cloning your SSD using Macrium Reflect. We will cover everything from downloading and installing the software, preparing your drives for cloning, and configuring the necessary settings for a successful clone. By the end of this guide, you’ll be equipped with the knowledge and confidence to perform a hassle-free SSD clone.
So, let’s begin the journey of cloning your SSD with Macrium Reflect and discover the convenience and peace of mind it brings.
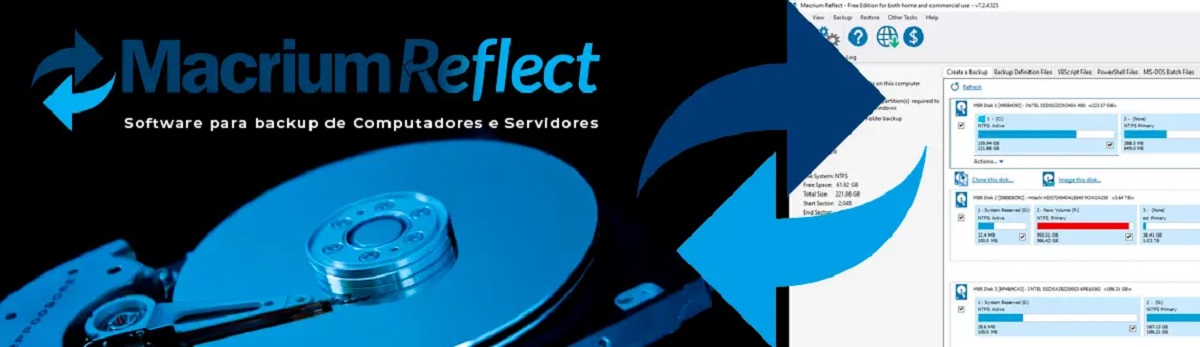
What is Macrium Reflect?
Macrium Reflect is a popular disk imaging and cloning software designed for Windows operating systems. It offers advanced features and intuitive functionality to help you easily create backups and clone your SSD. With Macrium Reflect, you can ensure the safety and security of your data by having a reliable backup solution in place.
One of the key features of Macrium Reflect is its ability to create disk images. A disk image is an exact copy of the entire contents of your SSD, including the operating system, applications, files, and settings. With this disk image, you can restore your system to its previous state in case of data loss or system failure.
Macrium Reflect also provides the option to clone your SSD. Cloning involves creating an identical copy of your original SSD onto a new drive. This allows you to migrate your entire system, including all files and settings, to a new SSD without the need for manual reinstallation or configuration.
One of the standout features of Macrium Reflect is its ease of use. The software comes with a user-friendly interface that guides you through the cloning process step by step. It provides clear instructions, making it accessible even for users with limited technical knowledge.
In addition to its simplicity, Macrium Reflect offers various customization options for advanced users. You can choose to include or exclude specific files or folders from the clone, resize the partitions on the target drive, and even schedule automatic backups or clones at regular intervals.
Macrium Reflect is also known for its reliability. The software uses advanced algorithms to ensure the integrity of your data during the imaging or cloning process. It performs sector-by-sector copying, ensuring that every bit of information is accurately reproduced on the new drive.
Furthermore, Macrium Reflect offers a range of backup and restore capabilities. You can create incremental backups, differential backups, or even create a backup of specific files or folders. This flexibility allows you to tailor your backup strategy according to your specific needs.
Overall, Macrium Reflect is a powerful and feature-rich software that provides a comprehensive solution for SSD cloning and data backup. Whether you’re a home user or a business professional, Macrium Reflect offers the tools and functionalities needed to safeguard your valuable data and ensure a seamless migration to a new SSD.
Why should you clone your SSD?
Cloning your SSD can offer numerous benefits and is a preferred method when you want to upgrade or replace your current solid-state drive. Here are some compelling reasons why you should consider cloning your SSD:
1. Time and Effort Savings: Cloning your SSD saves you the hassle of reinstalling your operating system, applications, and settings on a new drive. This process can be time-consuming and prone to errors or missing configurations. With cloning, you can simply transfer everything from your old SSD to the new one, minimizing downtime and eliminating the need to reinstall and reconfigure your system.
2. Seamless Transition: When you clone your SSD, you ensure a smooth transition from one drive to another. Your personalized settings, installed software, and even your desktop layout are preserved. This means that once the cloning process is complete, you can pick up right where you left off without any disruption to your workflow.
3. Data and System Integrity: Cloning ensures that all your files, applications, and system configurations are transferred exactly as they were on the original SSD. This includes your operating system files, user profiles, documents, multimedia files, and more. By maintaining the integrity of your data and system, you can avoid potential data loss or compatibility issues that may arise from performing a fresh installation.
4. Preservation of User Settings and Software: Cloning your SSD preserves all your custom settings, preferences, and installed software. This is particularly useful if you have tweaked your system settings, configured specific software options, or have rare or hard-to-find software installed. You won’t have to go through the hassle of reconfiguring your system or reinstalling your software after the cloning process.
5. Upgrade to Larger Capacity: If you’re running out of storage space on your current SSD, cloning allows you to upgrade to a larger capacity drive without having to manually transfer your data. You can simply clone the contents of your existing SSD onto the new drive, expanding your storage capacity while retaining all your files and system configurations.
6. Easy Migration to a New Device: If you’re planning to upgrade your computer or switch to a new device, cloning your SSD makes the migration process seamless. You can clone your existing SSD onto the new computer or device, ensuring that all your files, applications, and settings are transferred to the new system without any hassle or compatibility issues.
7. Peace of Mind: By cloning your SSD, you have the peace of mind knowing that your data is secure throughout the cloning process. Cloning creates an exact replica of your SSD, reducing the risk of data loss or corruption during the transfer. You can rest assured that your valuable files and important system configurations are preserved.
Overall, cloning your SSD with Macrium Reflect offers convenience, time savings, and peace of mind. It allows for a seamless transition to a new drive or system, ensuring that all your data and settings are preserved. Whether you’re upgrading your storage capacity or migrating to a new device, SSD cloning provides an efficient and reliable solution.
Preparing for the clone
Before you proceed with the cloning process using Macrium Reflect, it’s important to prepare your system and devices to ensure a smooth and successful clone. These preparations will help minimize any potential disruptions and ensure that your data is protected during the cloning process. Here are the steps to follow:
1. Backup Your Data: It’s always a good practice to create a backup of your important data before proceeding with any disk cloning or modification. This ensures that even if something goes wrong during the cloning process, your data will remain safe and accessible.
2. Check Disk Health: Use a disk health monitoring tool to check the health of your source SSD. This will help identify any potential issues or errors that could affect the cloning process. If you notice any problems, such as bad sectors or imminent failure warnings, it’s recommended to resolve these issues before proceeding with the clone.
3. Determine the Target Drive: Decide on the new SSD that will serve as the target drive for the cloning process. Ensure that the capacity of the target drive is larger or equal to the source SSD to accommodate all the data and partitions successfully.
4. Free Up Space: If your source SSD has limited free space, consider deleting or transferring unnecessary files to create more space before initiating the clone. This will help prevent any errors or issues that may arise due to insufficient space on the target drive.
5. Update Macrium Reflect: Make sure that you have the latest version of Macrium Reflect installed on your system. Check for any available updates and install them if necessary. Updated software often includes bug fixes and improved functionality, ensuring a smoother and more reliable cloning experience.
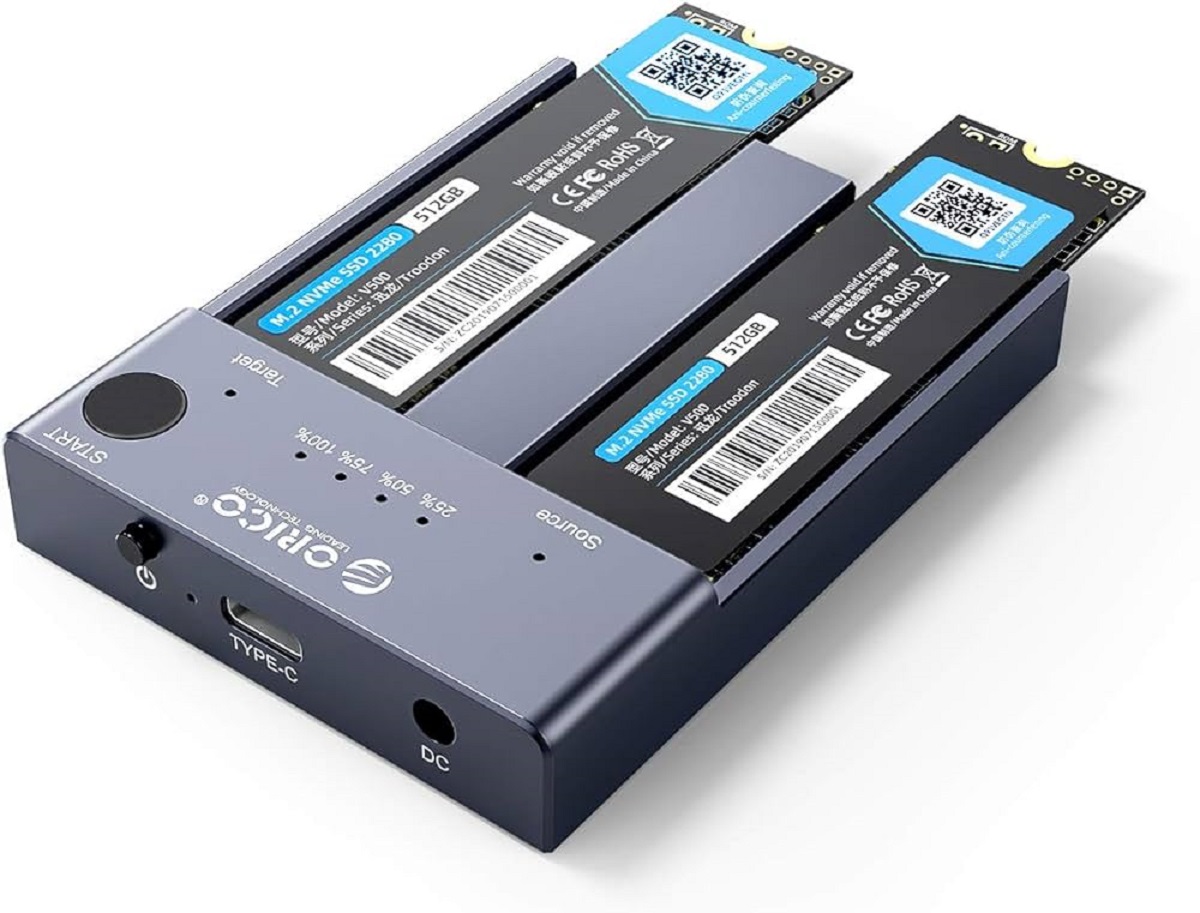
6. Gather Required Hardware: If needed, gather the necessary cables and adapters to connect the new SSD to your computer. Ensure that you have a suitable connection, such as SATA or USB, depending on the type of SSD and available ports on your system.
7. Create a Recovery Option: Before cloning, it’s recommended to create a recovery option or rescue media using Macrium Reflect. This allows you to boot your system from an external device in case of any unforeseen issues during or after the cloning process. Creating a rescue media ensures that you have a backup plan in place, adding an extra layer of protection for your data.
By following these preparation steps, you can ensure a smoother and more successful cloning process. Taking the time to backup your data, check the health of your SSD, free up space, and gather the necessary hardware will help mitigate any potential issues and provide a solid foundation for the upcoming cloning process with Macrium Reflect.
Step 1: Download and Install Macrium Reflect
The first step in cloning your SSD using Macrium Reflect is to download and install the software on your computer. Macrium Reflect offers a free edition that provides the necessary features for SSD cloning. Follow the steps below to get started:
1. Go to the Macrium Reflect website: Open your preferred web browser and navigate to the Macrium Reflect website. The official website is the most reliable source for downloading the software.
2. Choose the Free Edition: On the Macrium Reflect website, navigate to the “Downloads” or “Free downloads” section. Look for the Free Edition of Macrium Reflect and click on the download link. This will initiate the download process.
3. Save the installer: Once the download is complete, locate the installer file on your computer and double-click on it. Follow the on-screen instructions to proceed with the installation. You may be prompted to choose a destination folder or agree to the software’s terms and conditions.
4. Select installation options: During the installation process, you may encounter various options to choose from. It is recommended to leave the default settings as they are, as they are generally optimized for most users. However, feel free to customize the installation options according to your preferences if necessary.
5. Complete the installation: Once you have selected any desired installation options, click on the “Install” or “Finish” button to begin the installation process. The installation may take a few moments to complete, so please be patient.
6. Launch Macrium Reflect: After the installation is finished, you will be presented with the option to launch Macrium Reflect. Click on the corresponding button or close the installer window and manually launch the software from your desktop or Start menu.
7. Optional registration: Macrium Reflect may prompt you to register the software, but this step is typically optional for the free edition. Feel free to register if you wish to receive updates and notifications from the Macrium Reflect team.
By following these steps, you can easily download and install Macrium Reflect on your computer, preparing it for the SSD cloning process. Now that Macrium Reflect is installed, you are ready to move on to the next step and begin the SSD cloning process.
Step 2: Connect Your New SSD
Once you have downloaded and installed Macrium Reflect, the next step in cloning your SSD is to connect your new SSD to your computer. Follow the steps below to ensure proper connection:
1. Power Off Your Computer: Before connecting any hardware, it’s essential to power off your computer completely. This ensures a safe environment for the hardware installation process.
2. Choose the Right Connection Type: Determine the appropriate connection type for your new SSD. Depending on your computer’s available ports and the type of SSD you have, you may need to use a SATA cable or a USB adapter to establish the connection.
3. Open Your Computer Case: If you are connecting an internal SSD, you will need to open your computer’s case to access the internal components. Follow the manufacturer’s instructions or consult a computer technician if you are unsure how to safely open your computer.
4. Locate the Appropriate Port: Identify the appropriate port to connect your new SSD. For internal SSDs, locate an empty SATA port on your motherboard. For external SSDs, connect the USB cable or adapter to an available USB port on your computer.
5. Secure the Connection: Gently insert the SATA cable into the SATA port, ensuring a snug fit. If you are connecting an external SSD using a USB adapter, insert one end of the cable into the adapter and the other end into the USB port.
6. Close Your Computer Case: If you connected an internal SSD, close your computer case carefully, ensuring that all screws are securely fastened. This will protect your computer’s internal components and ensure proper functioning.
7. Power On Your Computer: Once your new SSD is connected, power on your computer. The system will detect the newly connected drive and assign it a drive letter.
8. Verify the Connection: Open the “This PC” or “My Computer” window to verify that your new SSD has been detected and is showing as available. Confirm that the drive letter assigned to the new SSD matches the one displayed in your cloning software.
By following these steps, you will successfully connect your new SSD to your computer, allowing Macrium Reflect to recognize it as the target drive for the cloning process. With the new SSD properly connected, you are now ready to proceed to the next step and create a rescue media using Macrium Reflect.
Step 3: Create a Macrium Reflect Rescue Media
Creating a rescue media using Macrium Reflect is an essential step before proceeding with the SSD cloning process. A rescue media allows you to boot your system from an external device in case of any unforeseen issues during or after the cloning process. Follow the steps below to create a Macrium Reflect rescue media:
1. Launch Macrium Reflect: Open Macrium Reflect on your computer. If you just installed the software, you can find it in your Start menu or on your desktop. Make sure you have administrative privileges to perform this step.
2. Navigate to the “Other Tasks” Menu: In the Macrium Reflect interface, locate the “Other Tasks” menu on the left-hand side. Click on it to expand the menu and reveal additional options.
3. Select “Create Rescue Media”: From the “Other Tasks” menu, click on the “Create Rescue Media” option. This will launch the Rescue Media Builder wizard, which will guide you through the process of creating a rescue media.
4. Choose the Rescue Media Type: The Rescue Media Builder wizard will ask you to select the type of rescue media you want to create. You can choose between a USB stick or an ISO image, depending on your preference and available resources. USB media is recommended for ease of use.
5. Select the Target USB Drive: If you choose to create a rescue media on a USB drive, connect a suitable USB stick to your computer. In the Rescue Media Builder wizard, select the connected USB drive as the target for the rescue media.
6. Set Rescue Media Options: Customize the rescue media options according to your preferences. You can choose to include additional drivers or perform a check for Macrium Redeem codes if applicable. Leave the default options selected unless you have specific requirements.
7. Start the Rescue Media Creation: Once you have selected the rescue media type and customized the options, click on the “Build” or “Create” button to start the creation process. Macrium Reflect will now begin the process of creating the rescue media on the selected USB drive.
8. Verify the Rescue Media Creation: After the creation process is complete, verify that the rescue media has been created successfully. Ensure that the USB drive is bootable by restarting your computer and booting from the rescue media. Follow any on-screen prompts to confirm that the rescue media is functioning as intended.
9. Safely Eject the USB Drive: Once you have confirmed the functionality of the rescue media, safely eject the USB drive from your computer. This ensures that no data is being written or read from the drive, preventing any potential data loss or corruption.
By following these steps, you will successfully create a Macrium Reflect rescue media. This rescue media will serve as a backup plan in case any issues arise during the SSD cloning process. With a rescue media created, you are now ready to move on to the next step and begin the actual cloning process in Macrium Reflect.
Step 4: Launch Macrium Reflect
After creating a rescue media, the next step in cloning your SSD is to launch Macrium Reflect. Follow the steps below to launch the software and begin the cloning process:
1. Connect the Rescue Media: If you created a rescue media on a USB drive, connect the USB drive to your computer. Ensure that your computer is powered off before proceeding.
2. Power On Your Computer: Power on your computer and immediately access the boot menu. The key to access the boot menu may vary depending on your computer’s manufacturer. Common keys include F2, F8, F10, or Del. Consult your computer’s manual or look for on-screen instructions during startup to determine the correct key.
3. Choose the Rescue Media: In the boot menu, select the option to boot from the rescue media. This will allow your computer to boot into the Macrium Reflect environment from the connected USB drive.
4. Wait for Macrium Reflect to Load: Once the rescue media is selected, wait for Macrium Reflect to load. This may take a few moments depending on your computer’s speed and the size of the rescue media.
5. Launch Macrium Reflect: Once Macrium Reflect has loaded, you will be presented with a menu. Select the option to launch Macrium Reflect from the menu. This will open the software interface on your screen.
6. Grant Administrative Privileges: If prompted, provide any necessary administrative credentials to grant Macrium Reflect the required permissions to perform disk operations and access your data.
7. Ensure Source and Target Drives are Detected: In the Macrium Reflect interface, ensure that both your source SSD (the one you want to clone) and the target SSD (the new SSD you connected earlier) are detected and displayed in the list of available drives.
8. Verify Proper Cloning Settings: Before proceeding with the cloning process, review and configure the cloning settings according to your requirements. Macrium Reflect provides various options, such as choosing the partition layout, resizing partitions, or excluding certain partitions from the clone. Customize these settings as needed to meet your specific needs.
9. Save and Apply Cloning Settings: Once you have verified and customized the cloning settings, save your changes and apply the settings. This ensures that Macrium Reflect will perform the cloning operation according to your desired configurations.
10. Start the Cloning Process: After confirming the cloning settings, click on the “Clone this disk” or similar button within Macrium Reflect to start the cloning process. The cloning operation may take some time, depending on the size of your SSD and the speed of your computer.
By following these steps, you will successfully launch Macrium Reflect and prepare it for the SSD cloning process. With the software interface open, displaying the source and target drives, you are now ready to move on to the next step and select the appropriate source disk for the cloning process.
Step 5: Select the Source Disk
Once Macrium Reflect is launched and the cloning process is initiated, the next step is to select the source disk. The source disk is the SSD that you want to clone. Follow the steps below to select the source disk in Macrium Reflect:
1. Review Available Disks: In the Macrium Reflect interface, you will see a list of available disks. Carefully review the list to identify the SSD that you want to clone. Take note of the disk size, make sure it matches the SSD you intend to clone.
2. Select the Source Disk: From the list of available disks, click on the checkbox next to the source disk that you want to clone. This will indicate that you have chosen this disk as the source for the cloning process. You can typically identify the SSD by its manufacturer name, model number, or assigned drive letter.
3. Confirm the Selection: Once you have selected the source disk, verify that the correct disk is highlighted in the list. Double-check the disk size and other identifying information to ensure accuracy. This step is crucial to prevent accidentally cloning the wrong SSD and potentially losing important data.
4. Exclude Partitions (if applicable): If there are specific partitions on the source disk that you do not want to clone, you can choose to exclude them from the cloning process. In the Macrium Reflect interface, you can select individual partitions and opt to exclude them from the clone. Make sure to carefully review the partition selection and consider any data or settings you may need to preserve.
5. Save and Apply the Source Disk Selection: After confirming the selection and any optional exclusion of certain partitions, save your changes and apply the source disk selection in Macrium Reflect. This ensures that the cloning process will only copy data from the chosen source disk and exclude any excluded partitions.
6. Verify the Source Disk Selection: Double-check the Macrium Reflect interface to confirm that the correct source disk is still selected. It’s essential to review this information before proceeding to the next step, as any errors in the source disk selection can lead to unintended consequences during the cloning process.
7. Continue to the Next Step: Once you have successfully selected the source disk, you can proceed to the next step in the cloning process. This step typically involves selecting the target disk, which is the new SSD you connected earlier.
By following these steps, you will be able to select the correct source disk in Macrium Reflect for the cloning process. Remember to validate the selection carefully and ensure that all desired partitions are included or excluded according to your requirements. With the source disk selected, you are now ready to move forward with the cloning process and proceed to the next step of selecting the target disk.
Step 6: Select the Target Disk
After selecting the source disk in Macrium Reflect, the next step in the cloning process is to choose the target disk. The target disk is the new SSD that you connected to your computer for the purpose of cloning. Follow the steps below to select the target disk in Macrium Reflect:
1. Review Available Disks: In the Macrium Reflect interface, carefully review the list of available disks to identify the new SSD that you connected as the target disk. Ensure that the disk size matches the capacity of the new SSD to avoid any errors or data loss during the cloning process.
2. Select the Target Disk: From the list of available disks, click on the checkbox next to the target disk that you want to clone to. This indicates that you have chosen this disk as the destination for the cloned data. The target disk is typically identified by its manufacturer name, model number, or assigned drive letter.
3. Confirm the Selection: Once you have selected the target disk, verify that the correct disk is highlighted in the list. Double-check the disk size and any other identifying information to ensure accuracy. Confirming the selection is important to prevent any accidental data loss or cloning to an unintended disk.
4. Resize Partitions (if desired): If you want to resize the partitions on the target disk during the cloning process, Macrium Reflect provides options to customize the partition sizes. You can adjust the partition sizes to utilize the full capacity of the new SSD or allocate the available space differently according to your preferences.
5. Save and Apply the Target Disk Selection: After confirming the selection and any desired resizing of partitions, save your changes and apply the target disk selection in Macrium Reflect. This ensures that the cloning process will copy the data from the selected source disk to the chosen target disk with the specified partition sizes, if applicable.
6. Verify the Target Disk Selection: Double-check the Macrium Reflect interface to confirm that the correct target disk is still selected. It’s crucial to review this information before proceeding to the next step to avoid any mistakes or unintentional cloning to the wrong disk.
7. Proceed with the Cloning Process: Once you have successfully selected the target disk, you can proceed with the cloning process in Macrium Reflect. The software will begin copying the data from the source disk to the target disk based on your specified settings.
By following these steps, you will successfully select the appropriate target disk for the cloning process in Macrium Reflect. Ensure the accuracy of the selection, review any desired partition resizing, and confirm the target disk information to prevent any inadvertent data loss or cloning to the wrong disk. With the target disk selected, you are now ready to move forward and configure the cloning options in the next step of the process.
Step 7: Configure the Clone Options
After selecting the source and target disks in Macrium Reflect, the next step in the cloning process is to configure the clone options. These options allow you to customize the cloning process according to your specific needs. Follow the steps below to configure the clone options in Macrium Reflect:
1. Review the Clone Method: Macrium Reflect offers different clone methods, such as Intelligent Sector Copy or Exact Copy. Review the available clone methods and select the one that best suits your requirements. The default option will typically be the recommended method.
2. Choose the Partition Layout: Macrium Reflect provides options for the partition layout on the target disk. You can choose to create a partition layout that mirrors the source disk or create a new layout based on your preferences. Consider your storage needs and preferences when selecting the partition layout.
3. Check the “Optimize for SSD” Option: If you are cloning from an HDD to an SSD, Macrium Reflect provides an option to optimize the clone for SSD. Enabling this option ensures that the clone is tailored for the specific characteristics of an SSD, maximizing the performance and longevity of the new drive.
4. Exclude Certain Partitions (if desired): If there are specific partitions on the source disk that you do not want to clone, you may exclude them from the cloning process. This allows you to selectively choose which partitions to include in the clone, making the process more efficient and focused on your specific needs.
5. Resize Partitions (if required): If you want to resize the partitions on the target disk, Macrium Reflect offers options for resizing during the cloning process. You can adjust the partition sizes to utilize the full capacity of the new SSD or allocate the available space differently according to your preferences.
6. Save and Apply the Clone Options: Once you have reviewed and customized the clone options according to your requirements, save your changes and apply the clone options in Macrium Reflect. This ensures that the cloning process will be performed based on your specified clone method, partition layout, and any other selected options.
7. Verify the Clone Options: Double-check the Macrium Reflect interface to confirm that the clone options are accurately reflected before proceeding. It’s crucial to review this information to ensure that the cloning process will meet your expectations and needs.
8. Proceed with the Cloning Process: Once the clone options have been configured, you can proceed with the cloning process by clicking on the “Clone this disk” or similar button within Macrium Reflect. The software will begin the clone operation based on your selected settings.
By following these steps, you will successfully configure the clone options in Macrium Reflect for the cloning process. Review the available options, choose the appropriate clone method and partition layout, and customize the clone process according to your desired settings. With the clone options set, you are ready to move forward and initiate the cloning process in the next step.
Step 8: Start the Cloning Process
Once you have configured the clone options in Macrium Reflect, the next step is to start the actual cloning process. Follow the steps below to begin the cloning of your SSD:
1. Review the Cloning Summary: Before proceeding, take a moment to review the cloning summary in Macrium Reflect. This summary provides an overview of the clone options you have set, including the source disk, target disk, partition layout, and any other selected options. Make sure all the details are accurate and reflect your intentions.
2. Save any Open Files and Close Programs: It is important to save any open files and close any unnecessary programs or applications running on your computer. This helps prevent any data corruption or interference with the cloning process.
3. Click on the “Clone this disk” Button: In Macrium Reflect, locate the “Clone this disk” or similar button and click on it to begin the cloning process. A confirmation prompt may appear, asking you to confirm your selection to start the cloning process. Review the prompt and proceed by clicking the appropriate button.
4. Monitor the Cloning Progress: As the cloning process starts, Macrium Reflect will display the progress of the operation. You can monitor the progress in the software interface, which will provide information such as the percentage completed and estimated time remaining. During this phase, it’s essential to let the process run undisturbed and avoid interrupting the operation.
5. Wait for the Cloning Process to Complete: The duration of the cloning process depends on several factors, such as the size of your SSD, the speed of your computer, and the selected clone options. Be patient and let the process run to completion. Avoid shutting down your computer or disconnecting any drives while the cloning process is in progress.
6. Review the Cloning Results: Once the cloning process is complete, Macrium Reflect will display a summary of the results. Take a moment to review the cloning results and ensure that the operation completed successfully without any errors or issues. The summary will provide information on the time taken, the number of files cloned, and any relevant status updates.
7. Perform a Verification (optional): To ensure the integrity of the cloned data, you have the option to perform a verification process in Macrium Reflect. This process involves comparing the original and cloned SSDs to ensure that the data transferred accurately. Although optional, performing this verification can provide peace of mind and ensure that the cloning process was successful.
By following these steps, you will successfully start the cloning process in Macrium Reflect. Review the cloning summary, save any open files, and initiate the cloning process by clicking the appropriate button. Monitor the progress, allow the process to complete without interruption, and review the results to ensure a successful cloning operation. With the cloning process complete, you are now ready to move forward to the next step and verify the cloned SSD if desired.
Step 9: Verify the Clone
After completing the cloning process in Macrium Reflect, it is essential to verify the clone to ensure that the data was transferred accurately and that the new SSD is functioning correctly. Follow the steps below to verify the clone:
1. Check for Physical Connectivity: Ensure that the new SSD is properly connected to your computer. Double-check the cable connections and make sure they are secure. Incorrect or loose connections can affect the functionality of the cloned SSD.
2. Restart Your Computer: Restart your computer to allow it to recognize and initialize the new cloned SSD. This will also ensure that any temporary settings or caches are cleared, allowing the system to accurately detect the new drive.
3. Access the BIOS/UEFI Settings: During the restart process, access your computer’s BIOS or UEFI settings by pressing the appropriate key. The key to access these settings varies depending on your computer’s manufacturer. Common keys include F2, F10, F12, or Del. Consult your computer’s manual or look for on-screen instructions during startup to determine the correct key.
4. Verify the SSD in BIOS/UEFI: Once in the BIOS or UEFI settings, navigate to the “Storage” or “Drives” section and verify that the new SSD is listed and detected correctly. Check the model number, capacity, and any other relevant information to confirm that the cloned SSD is accurately recognized.
5. Boot into the Operating System: Exit the BIOS or UEFI settings and allow your computer to boot into the operating system. Once the system has booted up, access the file explorer or disk management tool to verify that the cloned SSD is visible and accessible.
6. Check for Correct Data and Settings: Open your files, applications, and settings to ensure that everything has been successfully transferred to the new cloned SSD. Verify that files are accessible, applications can be launched, and your personalized settings and configurations are intact.
7. Run Disk Health Checks: Perform disk health checks using third-party software or built-in tools to ensure that the cloned SSD is in good health and functioning optimally. This will help to identify any potential issues or errors on the disk that may have occurred during the cloning process.
8. Test Performance and Functionality: Test the performance and functionality of the cloned SSD by performing read and write tests, loading applications, and running typical tasks. Monitor the overall performance and make sure that it meets your expectations.
9. Compare File Sizes and Counts (optional): If desired, compare the file sizes and counts on the original SSD and the cloned SSD to ensure that they match. This can provide additional assurance that the data was accurately duplicated during the cloning process.
By following these steps, you will be able to successfully verify the clone of your SSD in Macrium Reflect. Checking the physical connectivity, verifying the SSD in BIOS/UEFI, accessing the operating system, checking for correct data and settings, running disk health checks, testing performance and functionality, and optionally comparing file sizes and counts will ensure that the cloned SSD is functioning correctly. With the clone verified, you can proceed confidently knowing that your data and system configurations have been accurately transferred to the new SSD.
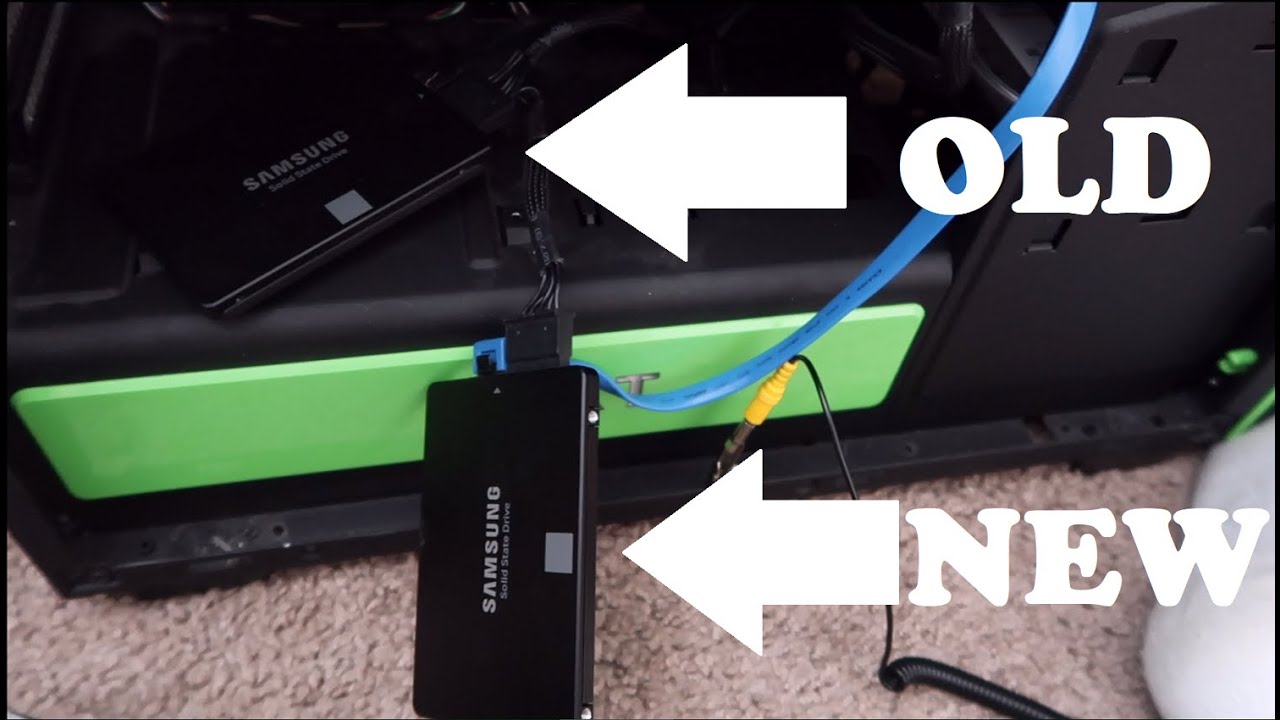
Step 10: Remove the Old SSD (Optional)
After successfully cloning your SSD and verifying that the new cloned SSD is functioning correctly, you may want to consider removing the old SSD from your system. This step is optional, but it allows you to free up space, reduce clutter, and effectively transition to the new SSD. Follow the steps below to remove the old SSD:
1. Shut Down Your Computer: Before removing any hardware, ensure that your computer is completely shut down. This will prevent any potential data loss or hardware damage during the removal process.
2. Disconnect Power and Cables: Once your computer is shut down, unplug the power cord and disconnect any cables connected to the old SSD. This includes the power cable and data cable (most likely a SATA cable) that connect the old SSD to the motherboard.
3. Open Your Computer Case: If the old SSD is installed internally, you may need to open your computer case to access the internal components. Follow the manufacturer’s instructions or consult a computer technician if you are unsure how to safely open your computer case.
4. Locate and Remove the Old SSD: Inside your computer case, locate the old SSD. It will be mounted in a drive bay or secured with screws or brackets. Carefully remove any screws or brackets holding the old SSD in place. Gently disconnect the SATA data cable and power cable from the old SSD.
5. Handle with Care: When handling the old SSD, it is important to treat it with care. Avoid touching any exposed circuitry or components on the SSD. Hold the SSD by its edges to prevent static electricity damage or physical mishandling.
6. Install Bay Covers (if required): If you removed the old SSD from an internal drive bay, replace the drive bay covers or panels that were removed during the process. This helps maintain proper airflow and aesthetics inside your computer case.
7. Close Your Computer Case: Once the old SSD has been removed and any necessary coverings are in place, carefully close your computer case. Ensure that all screws or latches are securely fastened to safeguard your computer’s internal components.
8. Connect Power and Cables to New SSD: If you haven’t done so already, connect the power and data cables to the new cloned SSD. Ensure that the connections are secure and properly aligned. This allows your computer to detect and access the newly cloned SSD.
9. Power On Your Computer: After completing the removal of the old SSD and connecting the new SSD, power on your computer. Allow your system to boot up and ensure that it recognizes the new SSD as the primary drive.
10. Verify System Stability and Performance: After booting up, run tests, load applications, and perform typical tasks to verify that your system is stable and performing optimally with the new cloned SSD as the primary drive.
By following these steps, you can safely remove the old SSD from your system, if desired, after successfully cloning and verifying the new SSD. Be cautious when handling and removing hardware components, and ensure that all connections and cables are secure when installing the new SSD. With the old SSD removed, you can now enjoy the benefits of increased storage space and improved performance with your new cloned SSD.
Conclusion
Congratulations! You have successfully learned how to clone your SSD using Macrium Reflect. Through a series of steps, you were able to download and install Macrium Reflect, connect your new SSD, create a rescue media, select the source and target disks, configure the clone options, start the cloning process, verify the clone, and, if desired, remove the old SSD. By following this guide, you have experienced the convenience and peace of mind that SSD cloning provides.
Cloning your SSD offers numerous benefits, including time and effort savings, seamless transitions, data and system integrity preservation, and easy migration to new devices. With Macrium Reflect, you have a powerful and user-friendly software that simplifies the cloning process and ensures accurate data transfer.
Remember, it is crucial to make sure that you have backed up your data and verified the clone to ensure a successful and error-free process. Additionally, always handle your SSDs with care, taking precautions to avoid static electricity and physical damage. If you encounter any issues during the cloning process, be sure to consult relevant documentation, seek assistance from technical forums, or reach out to the Macrium Reflect support team.
Now that you have successfully completed the SSD cloning process, take the opportunity to enjoy the benefits of your new SSD. Enjoy the improved performance, increased storage capacity, and seamless transition to the new drive. Regularly back up your data and consider implementing a reliable backup strategy to protect your valuable files.
Thank you for following this guide on how to clone your SSD with Macrium Reflect. With the knowledge and skills you have acquired, you can confidently tackle future SSD cloning endeavors and ensure a smooth and efficient transition to new storage solutions.