Introduction
Clearing the browser history in Firefox is an essential task for many reasons. Whether you want to maintain your privacy by removing traces of your online activity or simply wish to free up space on your device, knowing how to clear your browsing history is crucial. In this guide, we will walk you through the step-by-step process of clearing your browser history in Firefox.
Firefox is a popular web browser that offers a user-friendly interface and a wide range of features. As you browse the internet, Firefox keeps track of the websites you visit, the cookies and site data stored on your computer, and various other aspects of your online activity. While this data can be helpful for a more personalized browsing experience, it can also accumulate over time and potentially compromise your privacy.
By clearing your browser history in Firefox, you can delete this stored information and start with a clean slate. This process will remove the record of websites you’ve visited, your download history, saved form and search history, and even active logins. Additionally, clearing your browsing history can help improve your browser’s performance, as it reduces the amount of data stored on your computer.
Whether you are using Firefox on your computer, laptop, or mobile device, the steps to clear your browsing history remain the same. By following the simple instructions provided in this guide, you can easily clear your browsing history in no time.
Now, let’s dive into the step-by-step process of clearing your browser history in Firefox.
Step 1: Opening the Firefox browser menu
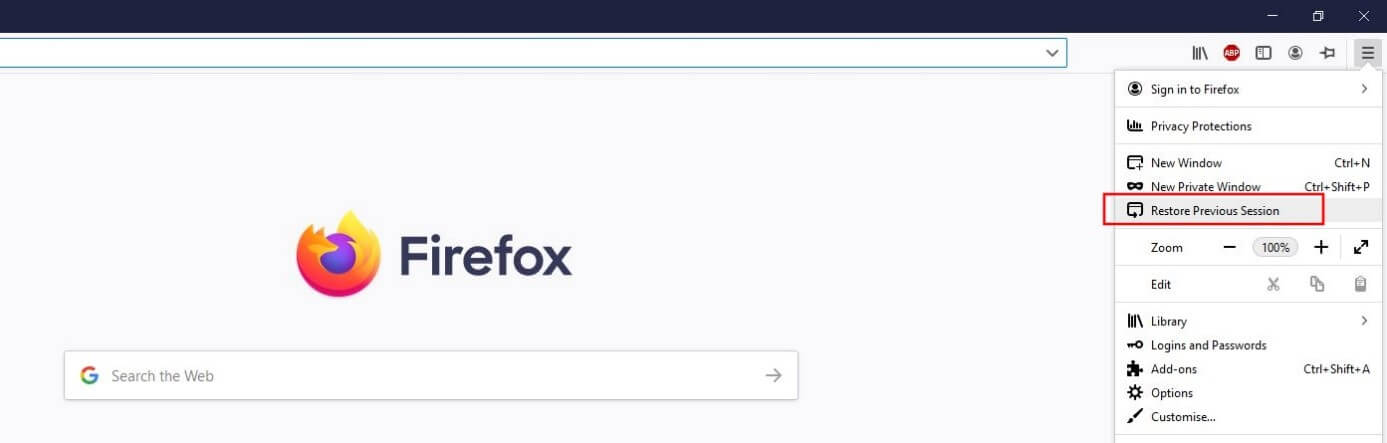
The first step to clear your browsing history in Firefox is to open the browser menu. Here’s how you can do it:
- Launch the Firefox browser on your device.
- Look for the menu button, which is represented by three horizontal lines, located in the top-right corner of the browser window. Click on it to open the menu.
- A dropdown menu will appear, displaying various options.
By clicking on the menu button, you gain access to the different settings and features of Firefox. This is where you can manage your browsing history, cookies, cache, and more.
It’s important to note that the appearance of the Firefox menu may vary slightly depending on the version you are using. However, the general steps to access the menu should remain the same.
Now that you have opened the Firefox browser menu, let’s move on to the next step and learn how to select the History option.
Step 2: Selecting the History option
Once you have opened the Firefox browser menu, the next step is to select the History option. By choosing this option, you will be able to access and manage your browsing history. Follow these steps to proceed:
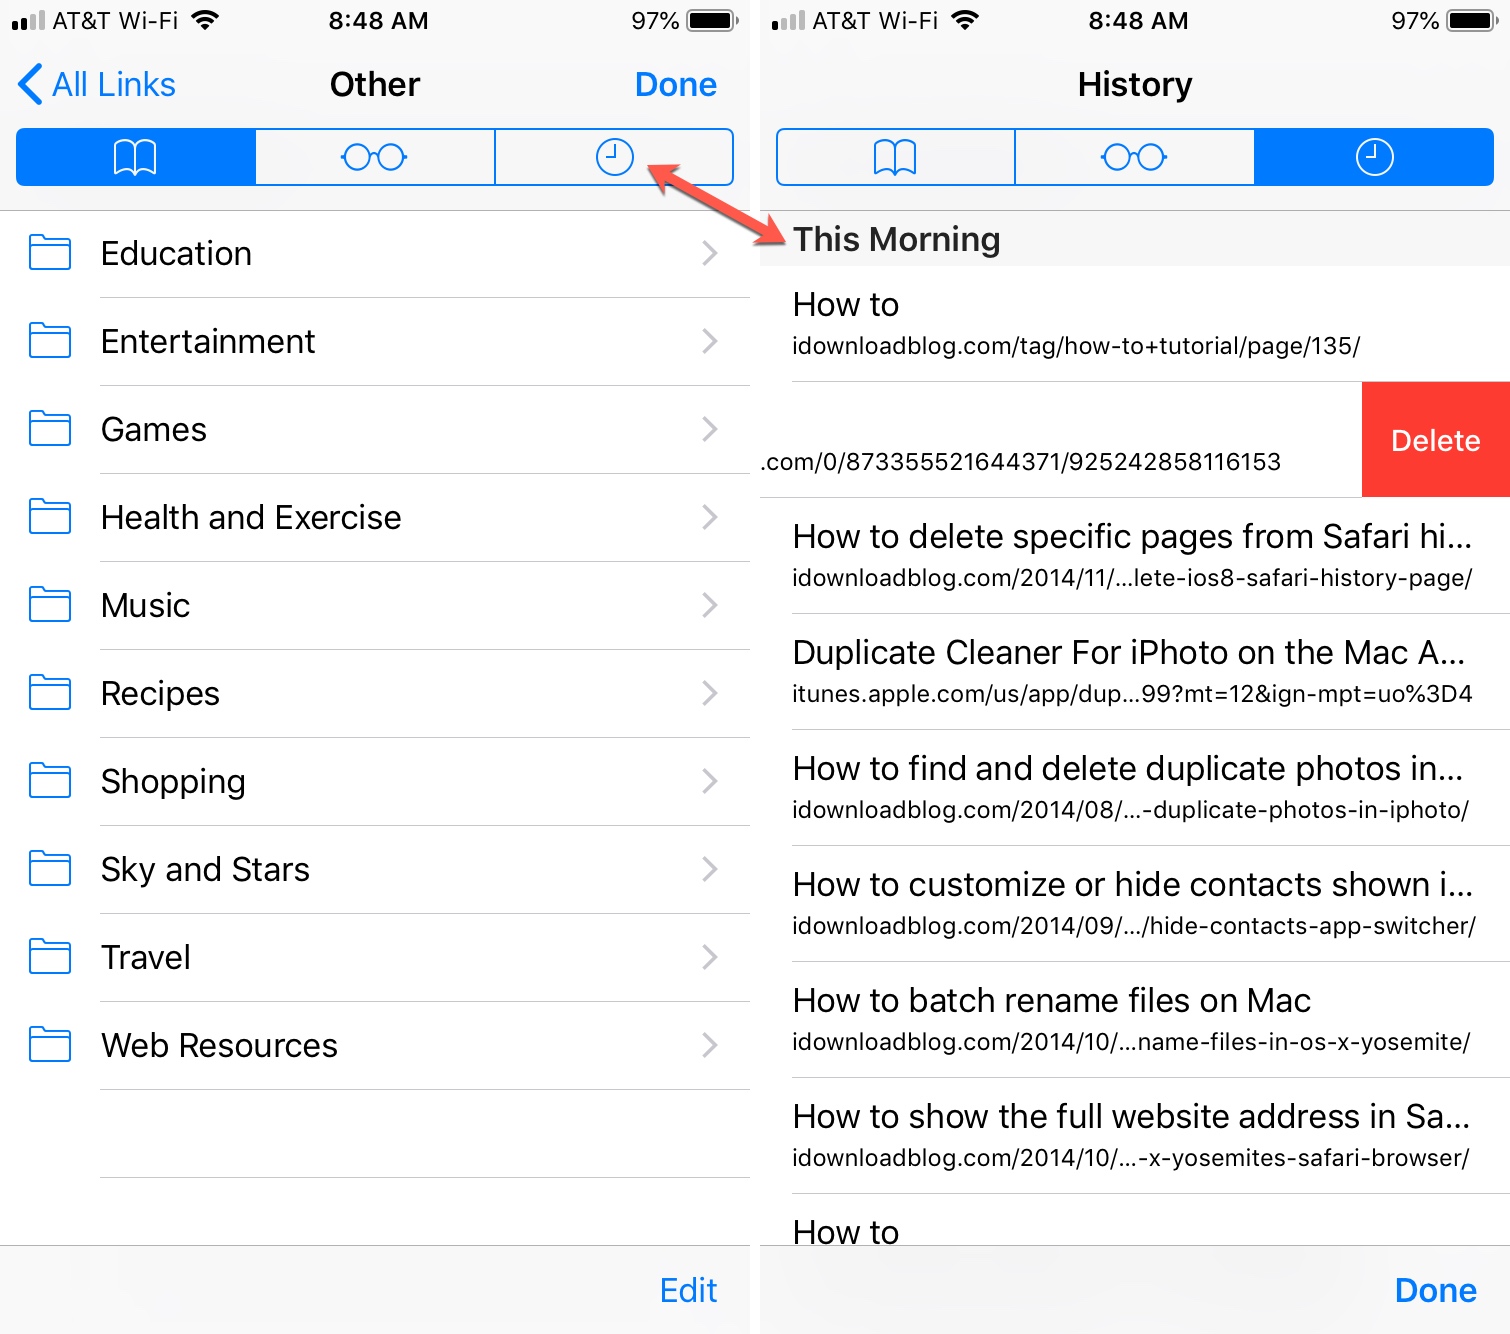
- In the Firefox menu, locate the History option. It is usually represented by a clock icon.
- Click on the History option to open the History submenu.
- A dropdown menu will appear, displaying a list of your browsing history, organized by date and time.
The History submenu in Firefox provides you with a comprehensive view of the websites you have visited in chronological order. You can use this submenu to revisit specific websites or clear specific entries from your browsing history.
Additionally, this submenu offers additional options such as searching and organizing your browsing history for more convenience. You can search for specific websites, sort your history by date, site name, or most visited, and even delete selected entries.
Now that you have successfully accessed the History submenu, let’s move on to the next step and learn how to clear your browsing history in Firefox.
Step 3: Clearing browsing history
Once you have accessed the History submenu in Firefox, you are ready to clear your browsing history. Follow these simple steps to proceed:
- In the History submenu, you will see an option called “Clear Recent History.” Click on this option.
- A dialog box will appear, presenting you with various options to customize the clearing process.
- Choose the desired time range for which you want to clear your browsing history. You can select options such as the last hour, the last two hours, the last four hours, today, or everything.
By selecting a specific time range, you have the flexibility to delete only the relevant browsing data. For instance, if you choose the last hour option, Firefox will clear the history of websites visited and other related data within that hour.
Next, you will notice several checkboxes that allow you to clear additional data alongside your browsing history. These checkboxes correspond to options such as cookies, cache, offline website data, download history, saved form and search history, and active logins.
If you want to clear all these additional data types, ensure that the corresponding checkboxes are selected. However, if there are specific items you wish to keep, make sure to uncheck the respective boxes.
Once you have chosen the desired time range and selected the additional data types to clear, you are ready to proceed with clearing your browsing history. Click on the “Clear Now” or “Clear Data” button (the wording may vary depending on your Firefox version) to initiate the deletion process.
Firefox will now start clearing your browsing history and other selected data based on the options you have chosen. The time it takes to complete this process may vary depending on the amount of data to be cleared.
Now that you have successfully cleared your browsing history in Firefox, you can enjoy a cleaner and more private browsing experience.
Step 4: Choosing the timeframe to clear
When clearing your browsing history in Firefox, you have the option to choose the timeframe for which you want to delete the data. This allows you to remove specific entries or a range of entries from your history. Follow these steps to select the desired timeframe:
- In the “Clear Recent History” dialog box, you will find the option to choose the timeframe. This option is usually labeled as “Time range to clear” or something similar.
- Click on the drop-down menu next to the timeframe option.
- You will see a list of available options to choose from.
The available options for the timeframe may vary depending on your Firefox settings and browsing history. However, common options include the last hour, the last two hours, the last four hours, today, yesterday, and everything.
If you only want to remove the websites you recently visited, you can choose a short timeframe like the last hour or the last two hours. This will ensure that only the most recent entries are deleted from your browsing history.
On the other hand, if you want to clear your entire browsing history, selecting the “everything” option will delete all the entries, providing you with a fresh start.
Remember that the timeframe you choose determines which entries will be cleared from your browsing history. Be sure to select the appropriate timeframe that aligns with your intentions of clearing the history.
Once you have selected the desired timeframe, you can proceed with clicking the “Clear Now” or “Clear Data” button to initiate the deletion process.
Now that you know how to choose the timeframe to clear, let’s move on to the next step and learn how to clear cookies and site data in Firefox.
Step 5: Clearing cookies and site data
In addition to clearing your browsing history, you may also want to clear cookies and site data in Firefox. Cookies are small files that websites save on your computer to store information such as login credentials and preferences. Clearing cookies can help protect your privacy and ensure a fresh browsing experience. Follow these steps to clear cookies and site data:
- In the “Clear Recent History” dialog box, look for the checkbox labeled “Cookies and Site Data”.
- Ensure that the checkbox is selected, indicating that you want to clear cookies and site data.
By selecting the “Cookies and Site Data” checkbox, you instruct Firefox to delete all the cookies and site data stored on your computer. This includes information related to login sessions, personalized website settings, and other browsing data that websites may have stored locally on your device.
It’s important to note that clearing cookies and site data may log you out of websites that you are currently logged into. However, this action helps protect your privacy and ensures that your browsing history remains clear.
Once you have selected the “Cookies and Site Data” checkbox, you can proceed with clicking the “Clear Now” or “Clear Data” button to initiate the deletion process.
Firefox will now clear the cookies and site data from your browser, ensuring that your privacy is maintained and your browsing experience is refreshed.
Now that you have successfully cleared cookies and site data, let’s move on to the next step and learn how to clear cache in Firefox.
Step 6: Clearing cache
Cache is a temporary storage area on your device that stores copies of recently accessed webpages. Clearing the cache in Firefox can help improve browser performance and ensure that you are viewing the most up-to-date version of a webpage. Follow these steps to clear the cache:
- In the “Clear Recent History” dialog box, look for the checkbox labeled “Cache”.
- Ensure that the checkbox is selected, indicating that you want to clear the cache.
When you select the “Cache” checkbox, Firefox will remove the temporary files stored in the cache, freeing up space on your device. By clearing the cache, you can prevent outdated or corrupted files from impacting your browsing experience.
Clearing the cache can be particularly useful if you are experiencing issues with webpages not loading correctly or displaying outdated content. By removing the cached files, you allow Firefox to retrieve fresh data from the web, ensuring a smoother browsing experience.
Once you have selected the “Cache” checkbox, you can proceed with clicking the “Clear Now” or “Clear Data” button to initiate the deletion process.
Firefox will now clear the cache, removing the temporary files that were stored on your device. The time it takes to complete this process may vary depending on the amount of data in your cache.
Now that you have successfully cleared the cache in Firefox, you can enjoy improved browser performance and a more up-to-date browsing experience.
Next, let’s move on to the next step and learn how to clear offline website data in Firefox.
Step 7: Clearing offline website data
In addition to clearing your browsing history, cookies, and cache, you may also want to clear offline website data in Firefox. Offline website data includes files and information stored locally on your device by websites you’ve visited, such as web applications or offline browsing data. Follow these steps to clear offline website data:
- In the “Clear Recent History” dialog box, look for the checkbox labeled “Offline Website Data”.
- Ensure that the checkbox is selected, indicating that you want to clear offline website data.
By selecting the “Offline Website Data” checkbox, you instruct Firefox to delete any files and data that websites have stored on your device for offline use. This can include files used for offline caching, application storage, or other website-related data.
Clearing offline website data can help free up storage space on your device and ensure that outdated or unnecessary data from websites is removed.
Once you have selected the “Offline Website Data” checkbox, you can proceed with clicking the “Clear Now” or “Clear Data” button to initiate the deletion process.
Firefox will now clear the offline website data from your device, ensuring that unnecessary files and data are removed. The time it takes to complete this process may vary depending on the amount of offline website data stored on your device.
Now that you have successfully cleared offline website data, let’s move on to the next step and learn how to clear download history in Firefox.
Step 8: Clearing download history
Clearing your download history in Firefox can help keep your browsing experience organized and maintain privacy. Firefox keeps a record of all the files you have downloaded, and clearing this history can help remove clutter and potentially sensitive information. Follow these steps to clear your download history:
- In the “Clear Recent History” dialog box, look for the checkbox labeled “Download History”.
- Ensure that the checkbox is selected, indicating that you want to clear the download history.
By selecting the “Download History” checkbox, you instruct Firefox to delete the record of all the files you have downloaded using the browser. This includes the names, locations, and other details of downloaded files.
By clearing your download history, you can ensure that others with access to your device cannot see a list of files you have downloaded in the past. This is especially useful if you are using a shared computer or want to maintain privacy.
Once you have selected the “Download History” checkbox, you can proceed with clicking the “Clear Now” or “Clear Data” button to initiate the deletion process.
Firefox will now clear your download history, removing the record of all the files you have previously downloaded. The time it takes to complete this process may vary depending on the number of entries in your download history.
Now that you have successfully cleared your download history, your browsing experience in Firefox will be more streamlined and private.
Next, let’s move on to the next step and learn how to clear saved form and search history in Firefox.
Step 9: Clearing saved form and search history
Clearing your saved form and search history in Firefox can help protect your privacy and ensure that your sensitive information is not stored on your device. Firefox remembers the information you enter into web forms and the search terms you use, but you can clear this data if you wish. Follow these steps to clear your saved form and search history:
- In the “Clear Recent History” dialog box, look for the checkbox labeled “Form & Search History”.
- Ensure that the checkbox is selected, indicating that you want to clear the saved form and search history.
By selecting the “Form & Search History” checkbox, you instruct Firefox to delete any saved form entries and search history stored on your device. This includes information such as your name, email address, phone number, and other details that you may have entered into online forms.
Clearing your saved form and search history can help prevent sensitive information from being accessible to others who may have access to your device or browser.
Once you have selected the “Form & Search History” checkbox, you can proceed with clicking the “Clear Now” or “Clear Data” button to initiate the deletion process.
Firefox will now clear your saved form and search history, removing any entries that were previously stored on your device. The time it takes to complete this process may vary depending on the amount of saved form and search history data.
Now that you have successfully cleared your saved form and search history, you can browse the web with peace of mind, knowing that your personal information is not stored on your device.
Next, let’s move on to the next step and learn how to clear active logins in Firefox.
Step 10: Clearing active logins
Clearing active logins in Firefox can be important for maintaining your online security and privacy. When you log into websites, Firefox stores your login information to provide convenient access. However, there may be times when you want to clear these active logins. Follow these steps to clear your active logins:
- In the “Clear Recent History” dialog box, look for the checkbox labeled “Active Logins”.
- Ensure that the checkbox is selected, indicating that you want to clear the active logins.
By selecting the “Active Logins” checkbox, you instruct Firefox to remove the stored login information for websites you are currently logged into. This includes usernames, passwords, and other credentials that Firefox has remembered for your convenience.
Clearing active logins can be beneficial if you share your device with others, want to protect your sensitive information, or simply want to ensure that you have to manually log in to websites for added security.
Once you have selected the “Active Logins” checkbox, you can proceed with clicking the “Clear Now” or “Clear Data” button to initiate the deletion process.
Firefox will now clear your active logins, removing the stored login information from your browser. The time it takes to complete this process may vary depending on the number of active logins stored by Firefox.
Now that you have successfully cleared your active logins, you can enjoy enhanced security and control over your online accounts.
Next, let’s move on to the final step and learn how to confirm the deletion of your browsing history in Firefox.
Step 11: Confirming the deletion of browsing history
After you have selected all the desired options to clear your browsing history, it’s important to confirm the deletion before it takes effect. Follow these steps to confirm the deletion of your browsing history in Firefox:
- Review the selected options in the “Clear Recent History” dialog box to ensure they align with your intentions.
- Double-check that the checkboxes for clearing browsing history, cookies and site data, cache, offline website data, download history, saved form and search history, and active logins are all selected or deselected as needed.
- Take a moment to verify the chosen time range and any other customized settings.
- Once you are satisfied with the selected options, click on the “Clear Now” or “Clear Data” button to proceed with the deletion process.
By clicking the confirmation button, Firefox will initiate the deletion process based on the chosen options. The time it takes to complete this process may vary depending on the amount of data to be cleared.
It’s worth noting that once the browsing history and other selected data are deleted, they cannot be recovered. Therefore, it is crucial to confirm your choices before proceeding.
After the deletion process is complete, Firefox will no longer have a record of the cleared browsing history, cookies and site data, cache, offline website data, download history, saved form and search history, and active logins.
Now that you have confirmed the deletion of your browsing history, you can enjoy a fresh and private browsing experience in Firefox.
Congratulations! You have successfully cleared your browsing history and other related data in Firefox. By regularly performing these steps, you can maintain your online privacy, free up storage space, and ensure a more efficient browsing experience.
Conclusion
Clearing your browsing history and related data in Firefox is essential for maintaining your privacy, improving browser performance, and ensuring a fresh browsing experience. Throughout this guide, we have covered the step-by-step process of clearing your browsing history in Firefox, including clearing cookies and site data, cache, offline website data, download history, saved form and search history, and active logins. By following these steps, you can effectively remove traces of your online activity and protect your sensitive information.
Opening the Firefox browser menu and selecting the History option allowed you to access your browsing history. From there, you learned how to choose the desired timeframe and select additional data types to clear. Clearing cookies and site data helped maintain your privacy, while clearing the cache improved browser performance. You also learned about clearing offline website data, download history, saved form and search history, and active logins.
Confirming the deletion of your browsing history ensured that you reviewed and verified your selected options before initiating the removal process. By being cautious and deliberate in deleting your browsing history and related data, you can have peace of mind knowing that your online activities are kept private.
Regularly clearing your browsing history and related data in Firefox can help you maintain a clutter-free browsing experience, safeguard your personal information, and even boost browser performance. We hope that this guide has provided you with the knowledge and confidence to clear your browsing history in Firefox and enjoy a more secure and efficient browsing experience.
Thank you for following this guide, and happy browsing!