Introduction
Welcome to the world of digital photography! As an aspiring photographer, it’s important to understand that the lens of your camera is the gateway to capturing stunning images. The lens plays a crucial role in determining the quality, clarity, and sharpness of your photographs. However, over time, dust, dirt, and smudges can accumulate on the lens, negatively impacting the image quality. That’s where regular lens cleaning comes into play.
In this article, we will guide you through the process of cleaning the lens of your digital camera. By following the steps outlined here, you will be able to maintain your lens in optimal condition, ensuring that every photo you capture is sharp, clear, and free from any unwanted imperfections.
Cleaning your camera lens may seem like a daunting task, but it doesn’t have to be. With the right tools, techniques, and a little bit of patience, you can easily clean the lens like a pro. So, let’s dive in and discover why cleaning the lens is important, the tools and materials you’ll need, and how to properly clean both the outside and inside of the lens.
Why Cleaning the Lens is Important
Keeping your camera lens clean is essential for several reasons. First and foremost, a clean lens ensures the highest level of image quality. When the lens is free from dust, smudges, and fingerprints, it allows for optimal light transmission, resulting in sharper and clearer images. Cleaning the lens regularly ensures that you capture the true essence of your subjects, whether it’s the vibrant colors of a landscape or the intricate details of a macro shot.
Additionally, a dirty lens can affect the autofocus performance of your camera. Dust particles or smudges on the lens can interfere with the autofocus mechanism and cause blurred or out-of-focus images. By cleaning the lens, you can maintain the overall functionality of your camera and avoid frustrating autofocus issues.
Another reason why lens cleaning is important is to prevent the accumulation of debris or dirt that can cause scratches on the lens surface. Over time, even tiny particles can scratch the lens coating, leading to permanent damage. Regular cleaning not only helps prevent scratches but also allows you to identify any potential damage or issues with the lens early on.
Furthermore, a clean lens is essential for professional photographers who want to make a good impression with their clients. Imagine showing up to a photoshoot with a dirty or smudged lens. It not only reflects poorly on your professionalism but can also result in compromised image quality. Taking the time to maintain a clean lens not only improves the aesthetics of your photography but also instills confidence in your clients.
Overall, cleaning the lens of your digital camera is crucial for preserving the quality and functionality of your equipment. It ensures that your images are sharp, clear, and true to life. By incorporating regular lens cleaning into your photography routine, you can take full advantage of your camera’s capabilities and capture stunning photographs that leave a lasting impression.
Tools and Materials Needed
Before you begin cleaning your camera lens, it’s important to gather the necessary tools and materials. Having the right equipment on hand will make the cleaning process easier and more effective. Here are the essential tools and materials you’ll need:
- Lens Cleaning Solution: Invest in a high-quality lens cleaning solution that is specifically designed for camera lenses. Avoid using household cleaning products as they may contain chemicals that can damage the lens coating.
- Microfiber Cleaning Cloth: These soft, lint-free cloths are perfect for gently wiping away dust, fingerprints, and smudges from the lens. Make sure to use a clean cloth to avoid transferring dirt or debris onto the lens.
- Lens Cleaning Pen: A lens cleaning pen is a handy tool that has a brush on one end for removing loose particles and a soft cleaning pad on the other end for removing smudges and fingerprints.
- Blower Brush: A blower brush is useful for removing loose dust and debris from the lens surface without the risk of scratching it.
- Cotton Swabs: Opt for lint-free cotton swabs to gently clean hard-to-reach areas around the lens, such as the edges and crevices.
- Camera Lens Cleaning Tissues: These disposable lens cleaning tissues are perfect for removing stubborn smudges and dirt from the lens surface.
It’s important to note that each camera manufacturer may have specific cleaning recommendations, so be sure to check your camera’s manual for any additional tools or materials that are recommended or advised against.
By having these tools and materials ready before you start cleaning, you’ll be well-equipped to effectively remove any dirt, smudges, or dust particles from your camera lens.
Preparing to Clean the Lens
Before you commence the lens cleaning process, it’s crucial to take a few preparatory steps to ensure that you don’t inadvertently damage the lens or introduce more dirt or debris to it. Here’s what you need to do:
- Find a clean and well-lit area: Look for a dust-free environment with ample lighting to properly inspect and clean your lens. Ideally, choose a space indoors where you can control the environment and minimize the risk of introducing more dust or dirt particles.
- Turn off the camera: Make sure your camera is switched off before you begin cleaning the lens. This will prevent any accidental mishaps or damage to the internal components of the camera.
- Remove the lens cap: Take off the lens cap to expose the lens surface. Inspect the lens for any visible dirt, smudges, or fingerprints. This will give you a better understanding of the areas that require cleaning.
- Check for stubborn debris: Pay close attention to the lens edges and crevices where dirt or debris may accumulate. Use a blower brush or a soft brush on the lens cleaning pen to gently remove any loose particles.
- Proper handling: Handle your camera and lens with clean hands or use lint-free gloves to minimize the risk of transferring oils or fingerprints onto the lens.
By taking the time to properly prepare for the lens cleaning process, you’ll create an optimal environment for effectively removing dirt and maintaining the cleanliness of your camera lens. These necessary steps will help you achieve the best results and prevent any accidental damage to your equipment.
Step-by-step Guide to Cleaning the Lens
Now that you’ve prepared the environment and gathered the necessary tools, let’s dive into the step-by-step process of cleaning your camera lens:
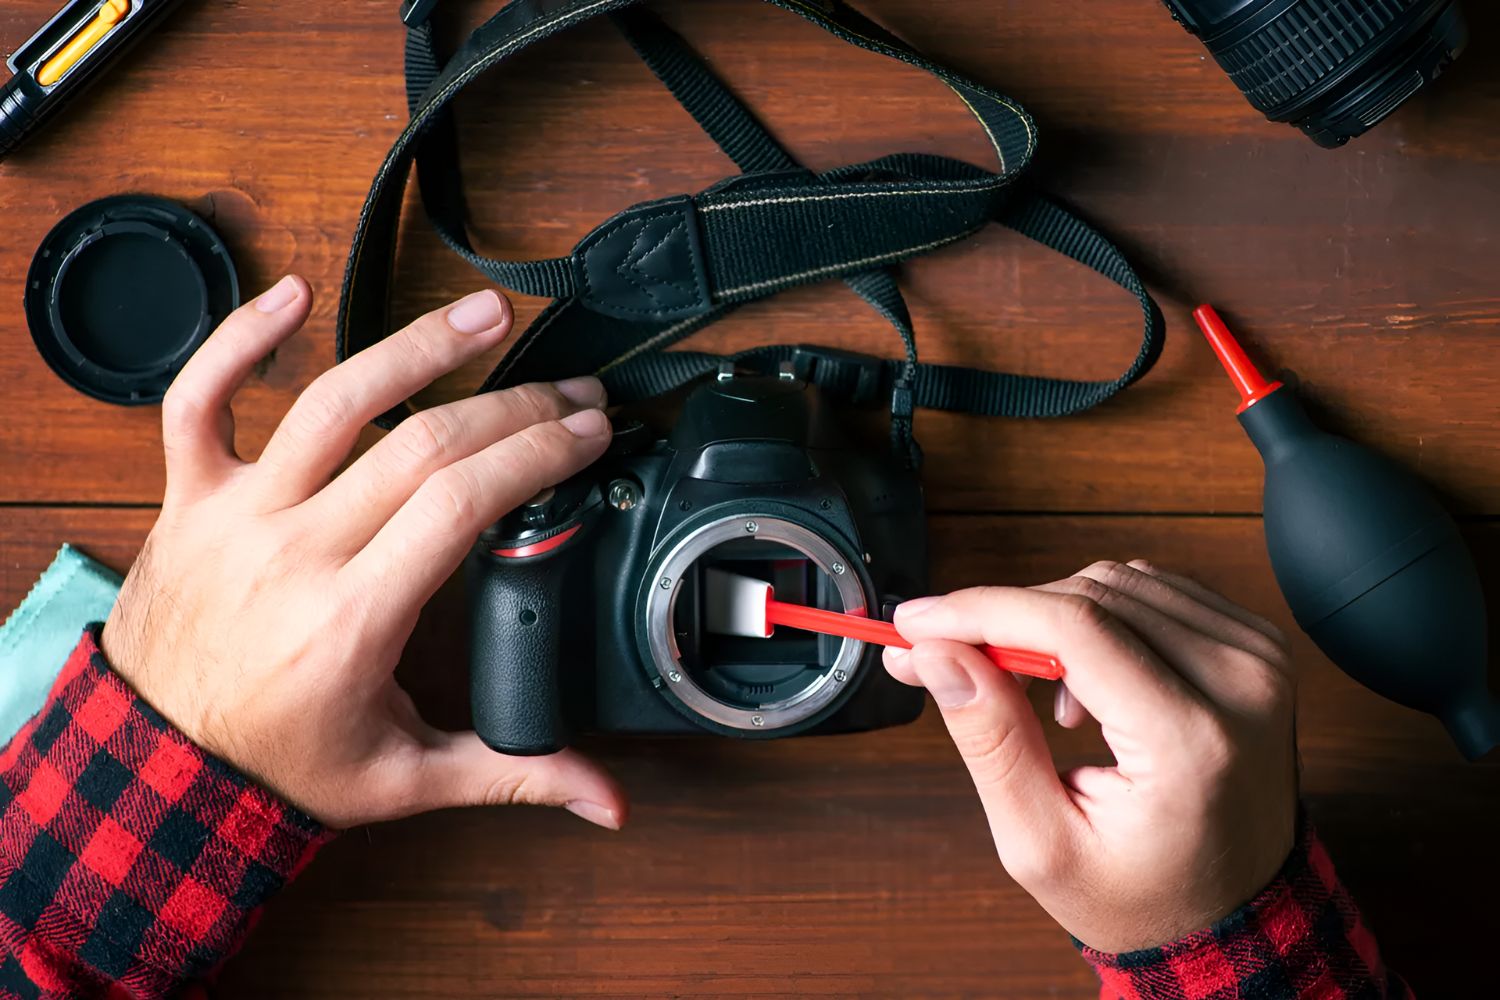
- Blow away loose particles: Start by using a blower brush to gently blow away any loose dust or debris from the lens surface. This will help prevent scratching the lens when you proceed to the next steps.
- Apply lens cleaning solution: Take a lens cleaning solution and apply a small amount to a microfiber cleaning cloth. Avoid applying the solution directly to the lens to prevent it from seeping into the mechanism. Ensure the cloth is damp, not soaked, with the solution.
- Clean in circular motions: Begin cleaning the lens using gentle circular motions. Start from the center and gradually move towards the edges. Be thorough in reaching all areas of the lens, including the corners and edges.
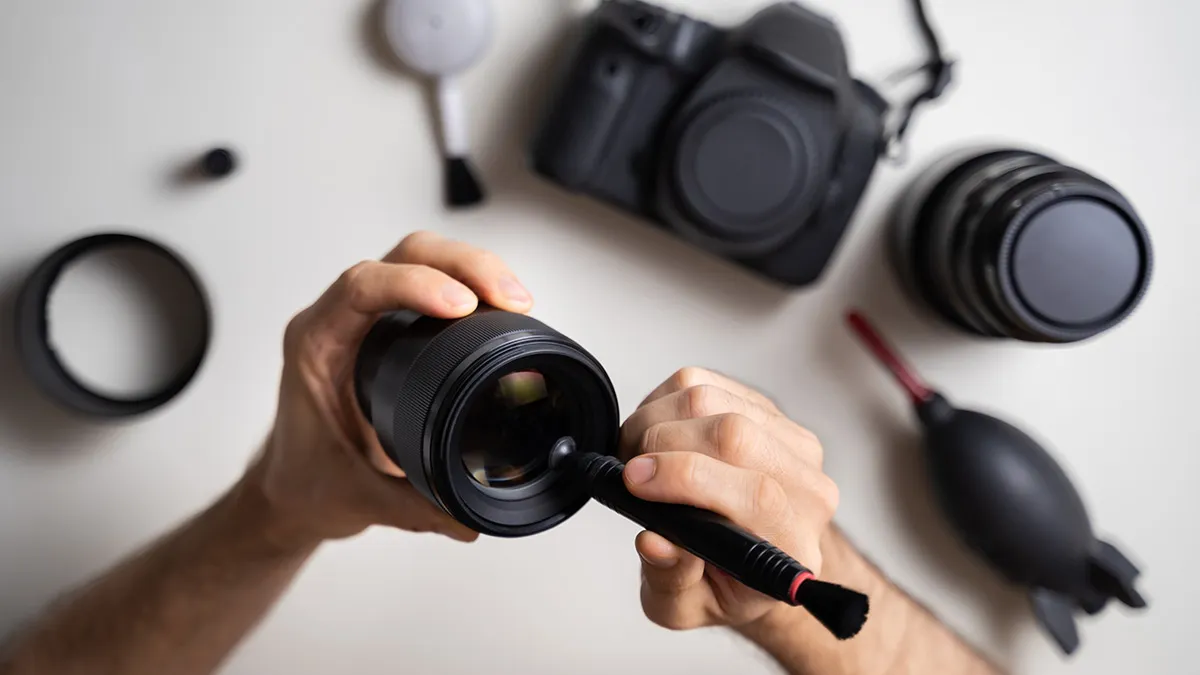
- Use lens cleaning pen: For stubborn smudges or fingerprints, you can use a lens cleaning pen. With the brush end, gently remove any loose particles, and then use the cleaning pad to carefully wipe away the smudges in circular motions.
- Inspect for any residue: After cleaning, inspect the lens for any residue or streaks. If you notice any, use a clean portion of the microfiber cloth and gently wipe the lens again in circular motions to remove the residue.
- Check the lens mount: While cleaning the lens, also take the opportunity to inspect the lens mount for any debris or dirt. Use a blower brush or a cotton swab to clean the mount if necessary.
- Dry the lens: Finally, allow the lens to air dry or use a clean, dry microfiber cloth to gently pat it dry. Make sure there is no moisture left on the lens before reattaching the lens cap.
Remember to clean the lens with gentle, steady movements to avoid any accidental damage. Take your time and be thorough in your cleaning process to ensure the lens is spotless and ready for your next photo adventure.
Cleaning the Lens from the Outside
Cleaning the exterior of your camera lens is an important step in maintaining its overall cleanliness. Here’s how you can effectively clean the lens from the outside:
- Blow away loose particles: Before you begin cleaning, use a blower brush to gently remove any loose dust or debris from the lens surface. This will prevent any scratching that may occur during the cleaning process.
- Use a microfiber cleaning cloth: Take a clean, lint-free microfiber cloth and gently wipe the lens in a circular motion. Start from the center and work your way towards the edges, ensuring that you cover the entire surface of the lens.
- Pay attention to the edges and corners: Often, dirt and debris tend to accumulate in the corners and edges of the lens. Use a cotton swab or a soft brush on a lens cleaning pen to carefully clean these areas, making sure not to apply excessive pressure.
- Remove smudges and fingerprints: If you notice any stubborn smudges or fingerprints on the lens, use a lens cleaning solution and apply a small amount to the microfiber cloth. Gently rub the affected area in circular motions until the smudge or fingerprint is removed.
- Inspect for any residue: After cleaning, inspect the lens for any residue or streaks. If you notice any, use a clean portion of the microfiber cloth and gently wipe the lens again to remove the residue.
- Check the lens hood: Don’t forget to also clean the lens hood if you have one. Wipe it with a microfiber cloth to remove any dust or smudges.
Remember to clean the lens with gentle, smooth motions to avoid any accidental damage. Avoid using excessive force or abrasive materials that could scratch the lens surface. Taking the time to properly clean the lens from the outside will help ensure that it remains free from dust, dirt, and smudges, allowing you to capture beautiful, clear images.
Using Lens Cleaning Solution
When it comes to cleaning your camera lens, using a lens cleaning solution can be an effective way to remove stubborn smudges, fingerprints, and dirt. Here’s how you can use a lens cleaning solution to ensure a thorough cleaning:
- Choose the right lens cleaning solution: It’s important to select a lens cleaning solution that is specifically designed for camera lenses. Avoid using household cleaning products as they may contain chemicals that can damage the lens coating. Look for a solution that is gentle, safe, and specifically formulated for optical surfaces.
- Apply the solution: Take a clean, lint-free microfiber cloth and apply a small amount of the lens cleaning solution. Be careful not to drench the cloth, as excess solution can seep into the lens mechanism.
- Gently wipe the lens: Starting from the center of the lens, use gentle circular motions to wipe the lens surface. Gradually move towards the edges, ensuring that you cover the entire lens area. Be thorough in your cleaning, paying extra attention to any smudges or fingerprints.
- Don’t forget the edges and corners: Use a cotton swab or a soft brush on a lens cleaning pen to clean the edges and corners of the lens, where dirt and debris may accumulate. Apply the lens cleaning solution to the swab or brush and gently clean these areas, taking care not to apply excessive pressure.
- Inspect for residue: After cleaning, inspect the lens for any residue or streaks. If you notice any, use a clean portion of the microfiber cloth and gently wipe the lens again to remove the residue.
- Avoid excessive moisture: Remember, the key is to use a minimal amount of lens cleaning solution. Excess moisture can seep into the lens, causing damage to the internal components. Use a damp cloth rather than saturating it with solution.
By using a lens cleaning solution, you can effectively remove stubborn dirt and smudges from your camera lens, ensuring that it remains clean and ready for capturing crisp, high-quality images. Remember to always use a soft, lint-free cloth and gentle motions when applying the solution to avoid any potential damage to the lens.
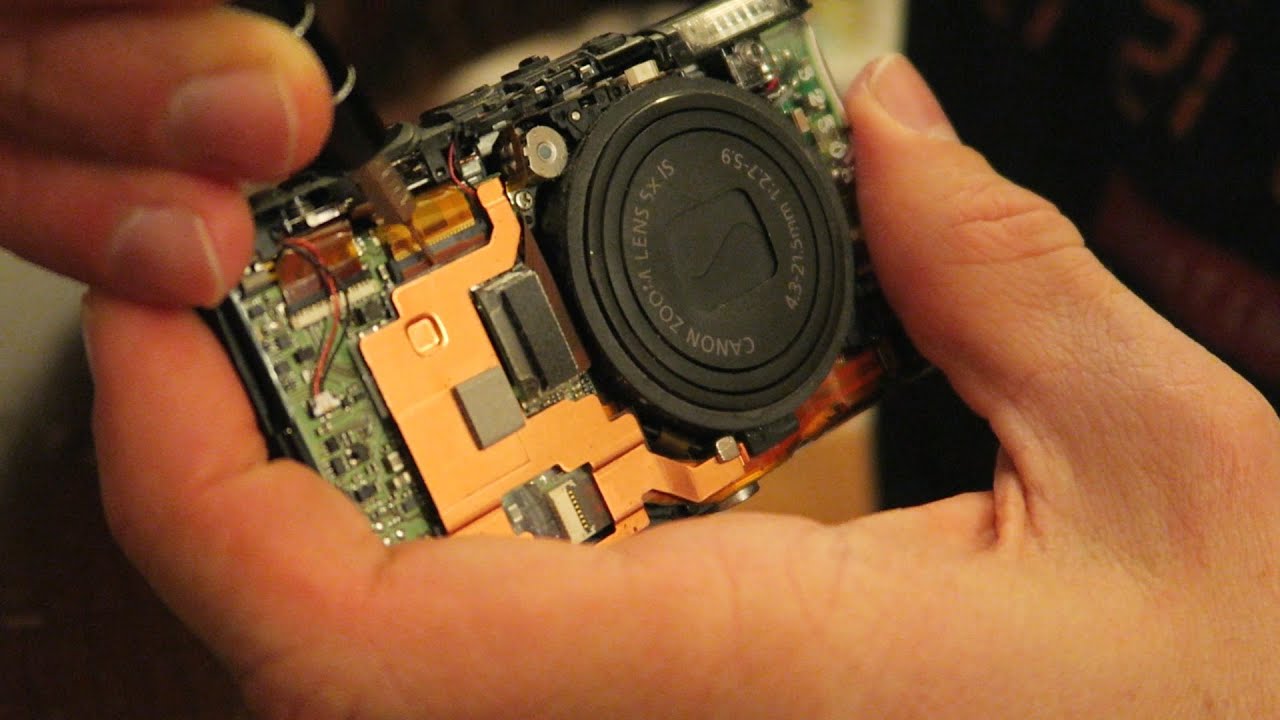
Cleaning the Lens from the Inside
While cleaning the exterior of your camera lens is important, it is equally crucial to clean the lens from the inside to maintain optimal image quality. Here’s how you can clean the lens from the inside:
- Consult the camera manual: Before proceeding, consult your camera’s manual or manufacturer’s guidelines to determine if the lens is designed to be opened and cleaned from the inside. Some lenses have a sealed construction and should only be cleaned by a professional.
- Ensure a clean working environment: Find a clean and dust-free area to work in. Ideally, use a lens cleaning station or a clean tabletop with ample lighting to clearly see the lens elements.
- Remove the lens from the camera: Detach the lens carefully from the camera body following the manufacturer’s instructions. Be cautious not to touch the front or rear lens elements with your fingers.
- Inspect the lens elements: Use a lens loupe or a bright light source to inspect the lens elements for any visible dirt, dust, or smudges. Pay close attention to any areas that may be affecting image quality.
- Use an air blower: Gently use an air blower to blow away any loose dust or debris from the lens elements. Start from the center and gradually move towards the edges, ensuring you cover each element.
- Apply lens cleaning solution: If there are stubborn smudges or grease on the lens elements, apply a small amount of lens cleaning solution on a clean, lint-free microfiber cloth or lens cleaning tissue. Use gentle circular motions to wipe the affected areas.
- Remove fingerprints: For fingerprints or stubborn marks, use a lens cleaning pen with a soft cleaning pad. Gently apply the pad to the affected areas, following the manufacturer’s instructions.
- Reassemble the lens: Once you are satisfied with the cleaning, carefully reattach the lens to the camera body, making sure it is securely attached. Follow the manufacturer’s instructions for proper reattachment.
Remember, cleaning the lens from the inside should only be done if necessary and with caution. If you are uncertain or uncomfortable with cleaning the lens internally, it is best to seek professional assistance to prevent any damage to the lens elements.
Tips for Maintaining a Clean Lens
Keeping your camera lens clean is an ongoing process. Here are some helpful tips to maintain a clean lens and ensure optimal image quality:
- Use lens caps and filters: When your camera is not in use, always use lens caps to protect the front and rear elements from dust, dirt, and accidental scratches. Additionally, consider using filters to provide an extra layer of protection for your lens.
- Avoid exposing the lens to harsh conditions: Try to avoid exposing your camera and lens to extreme temperatures, high humidity, and dusty environments. These conditions can increase the likelihood of dust and moisture accumulation on the lens surface.
- Handle the lens with care: When changing lenses or handling your camera, be mindful of how you hold and manipulate the lens. Avoid touching the front and rear elements directly with your fingers. Instead, use the lens hood or hold the lens by the barrel.
- Regularly clean the lens: Make a habit of regularly cleaning your lens to remove any dust, smudges, or fingerprints. A simple routine of gentle cleaning using a microfiber cloth or lens cleaning solution can go a long way in maintaining a clean lens.
- Protect the lens during shooting: While shooting, take precautions to shield your lens from elements like rain, sand, and splashes. Use lens hoods, protective filters, or even an umbrella to provide an extra layer of protection.
- Store your equipment properly: When not in use, store your camera and lens in a clean and dry environment. Invest in a camera bag or case that provides adequate protection and helps keep out dust and debris.
- Regularly inspect and clean lens accessories: Don’t forget to regularly inspect and clean lens accessories such as lens caps, lens hoods, and filters. These can also collect dust and dirt, which may transfer to the lens if not kept clean.
By following these tips, you can maintain a clean lens, maximize the lifespan of your equipment, and ensure that your images are consistently captured with the sharpest and clearest quality possible. Remember, prevention and regular maintenance are key in keeping your lens in optimal condition.
Conclusion
Cleaning the lens of your digital camera should be an essential part of your photography routine. By keeping the lens clean, you can ensure the highest level of image quality, prevent autofocus issues, and avoid potential scratches or damage to the lens.
In this article, we discussed the importance of cleaning the lens, the tools and materials needed, and provided a step-by-step guide for cleaning both the outside and inside of the lens. We also emphasized the significance of using a lens cleaning solution correctly and shared tips for maintaining a clean lens.
Remember, a clean lens not only enhances your photography results but also extends the lifespan of your equipment. By following proper cleaning techniques, handling your lens with care, and implementing preventive measures, you can capture stunning images with sharpness, clarity, and vibrancy.
Take the time to regularly clean your lens, create a clean working environment, and invest in quality cleaning tools. By incorporating lens cleaning into your photography routine, you can consistently produce images that truly reflect your vision and talent.