Introduction
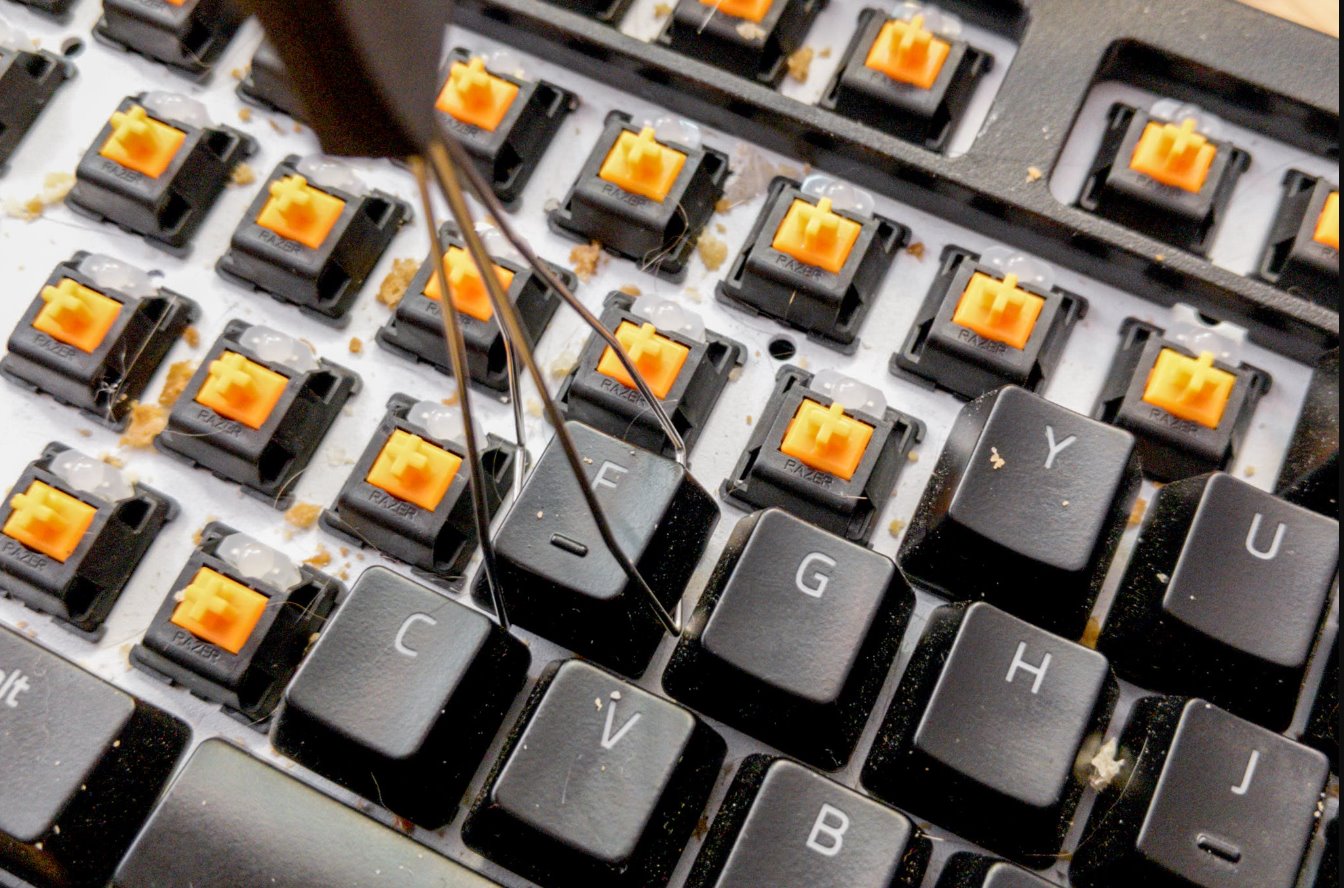
Welcome to our guide on how to clean a wireless keyboard. When it comes to keeping our devices clean, we often overlook one important component: the keyboard. Whether you use your wireless keyboard for work, gaming, or general browsing, over time it can become a breeding ground for dirt, dust, and bacteria.
Regular cleaning not only helps maintain the performance and longevity of your keyboard, but it also ensures a hygienic and pleasant typing experience. Cleaning a wireless keyboard may seem like a daunting task, but fear not! With a few simple tools and techniques, you can restore your keyboard to its sparkling clean and fully functional state in no time.
In this guide, we will walk you through the step-by-step process of cleaning your wireless keyboard, from removing debris to disinfecting the surface. No matter what type of wireless keyboard you have – be it a membrane, mechanical, or scissor-switch keyboard – the principles of cleaning remain the same. So, grab your cleaning supplies and let’s get started!
Before we dive into the cleaning process, let’s explore why it’s essential to keep your wireless keyboard clean and well-maintained.
Why Clean Your Wireless Keyboard?
Keeping your wireless keyboard clean goes beyond just maintaining its physical appearance. Here are some important reasons why you should make regular cleaning a priority:
- Improved Performance: Over time, dust, crumbs, and debris can accumulate between the keys of your wireless keyboard. This can lead to keys getting stuck, unresponsive, or causing typing errors. By cleaning your keyboard, you can ensure smooth and accurate keystrokes, improving your overall typing experience.
- Hygiene and Health: Our hands come into contact with countless surfaces throughout the day, making them potential carriers of dirt, germs, and bacteria. When we use a wireless keyboard, these contaminants can transfer onto the keys, creating a breeding ground for harmful microbes. Regular cleaning and disinfection can help reduce the risk of illness and promote a healthier workspace.
- Prolonged Lifespan: Dust and debris can accumulate inside the key switches of a mechanical or scissor-switch wireless keyboard, causing them to malfunction or wear out prematurely. By keeping your keyboard clean, you can prevent the build-up of debris and extend its lifespan, saving you money in the long run.
- Aesthetics: A clean and well-maintained keyboard not only looks more visually appealing but also reflects positively on your overall workspace. It creates a professional and organized impression and can enhance your productivity and focus.
- Easier Maintenance: Regular cleaning of your wireless keyboard makes it easier to maintain in the long run. It prevents stubborn dirt and grime from accumulating, making future cleaning sessions quicker and more straightforward.
Now that we understand the importance of keeping our wireless keyboards clean, let’s move on to the supplies you will need for the cleaning process.
Supplies You Will Need
Before you begin cleaning your wireless keyboard, gather the following supplies:
- Canned Air: This is an essential tool for removing dust, crumbs, and other debris from between the keys and hard-to-reach areas. It is a quick and efficient method of cleaning without causing any damage to the keyboard.
- A Soft, Lint-free Cloth: Choose a cloth that is gentle and won’t scratch the surface of your keyboard. Microfiber or cotton cloths work well for this purpose.
- Mild Cleaning Solution: Prepare a solution of mild dish soap or a universal electronics cleaning solution. Avoid using harsh chemicals or abrasive cleaners as they may damage the keyboard’s surface or key labels.
- Isopropyl Alcohol: Isopropyl alcohol is an effective disinfectant that can help kill bacteria and germs on your keyboard. Ensure that the alcohol concentration is at least 70% for optimal effectiveness.
- Cotton Swabs: Cotton swabs are ideal for cleaning hard-to-reach areas and removing grime from crevices, corners, and gaps between keys.
- A Small Brush: Use a soft-bristled brush, such as a toothbrush or a keyboard cleaning brush, to gently remove dust and debris from the keyboard’s surface and between the keys.
Having these supplies on hand will make the cleaning process much easier and more effective. Now that you’re equipped with the necessary tools, let’s dive into the step-by-step process of cleaning your wireless keyboard.
Step 1: Turn off and Disconnect Your Keyboard
The first step in cleaning your wireless keyboard is to ensure that it is turned off and disconnected from your computer or device. This is important to prevent any accidental keystrokes or damage during the cleaning process.
Follow these steps to safely turn off and disconnect your wireless keyboard:
- Save your work: Before powering off your computer or device, save any open documents or files to avoid losing any unsaved work.
- Turn off your computer: Shut down your computer or device as you would normally.
- Disconnect the wireless receiver: If your wireless keyboard uses a USB receiver, unplug it from the USB port on your computer. Place the receiver in a safe place where it won’t get lost or damaged.
- Remove batteries: If your wireless keyboard uses batteries, remove them to prevent any accidental power or interference while cleaning.
By ensuring that your keyboard is turned off and disconnected, you can clean it safely without any interruptions or potential damage. Let’s move on to the next step: shaking out loose debris.
Step 2: Shake out Loose Debris
Once your wireless keyboard is turned off and disconnected, it’s time to shake out any loose debris that may have accumulated between the keys. Over time, crumbs, dust, and other small particles can get trapped and affect the keyboard’s performance.
Follow these steps to shake out the loose debris:
- Hold the keyboard upside down: Turn your wireless keyboard upside down to allow any loose debris to fall out. Gently tap the back of the keyboard to encourage the debris to dislodge.
- Use a soft cloth or brush: If there are stubborn particles that won’t come out with shaking, you can use a soft cloth or brush to gently wipe or brush away the debris. Be careful not to press too hard or use excessive force to avoid damaging the keys or keyboard surface.
- Pay attention to the corners and crevices: Focus on shaking out the debris from the corners and crevices of the keyboard. These areas often collect the most dirt and crumbs.
Shaking out loose debris is a simple yet effective way to remove larger particles from your wireless keyboard. However, for smaller particles and dust that may still remain, we’ll move on to the next step: using canned air to remove dust and crumbs.
Step 3: Use Canned Air to Remove Dust and Crumbs
After shaking out loose debris from your wireless keyboard, it’s time to tackle smaller particles and dust that may still be lingering between the keys. One of the most effective tools for this task is canned air. Canned air blasts a stream of compressed air, allowing you to dislodge and remove stubborn dust and crumbs from your keyboard.
Follow these steps to use canned air:
- Hold the canned air upright: Ensure that the can of compressed air is held in an upright position. Tilting the can or using it upside down can release liquid propellant, which can damage your keyboard.
- Position the nozzle: Point the nozzle of the canned air towards the gaps between the keys. Keep a distance of about an inch or two from the keyboard to avoid excessive force or damage.
- Blow the air: Press the trigger on the canned air to release bursts of air into the gaps between the keys. Move systematically across the entire keyboard, covering all areas.
- Focus on stubborn areas: Pay closer attention to areas where dust or crumbs are more stubborn. Apply short bursts of air to dislodge and remove the debris effectively.
Using canned air will help remove dust and crumbs that are trapped between the keys and difficult to reach by shaking alone. However, note that canned air may not completely remove all particles. For a more thorough cleaning, proceed to the next step: cleaning the keys and surface with a damp cloth.
Step 4: Clean the Keys and Surface with a Damp Cloth
Now that you have removed loose debris and used canned air to get rid of dust and crumbs from your wireless keyboard, it’s time to clean the keys and surface using a damp cloth. This step will help remove any remaining dirt, fingerprints, or smudges that may be present.
Follow these steps to clean the keys and surface of your keyboard with a damp cloth:
- Prepare a damp cloth: Moisten a clean, lint-free cloth with a small amount of water. Ensure that the cloth is damp, not wet, to prevent moisture from seeping into the keyboard.
- Gently wipe the keys: Starting from the top left corner of the keyboard, gently wipe each key with the damp cloth. Use light pressure and circular motions to clean the keys thoroughly. Pay attention to any sticky or stained keys, giving them a little extra cleaning if needed.
- Clean the surface: After cleaning the keys, move on to wiping the surface of the keyboard using the damp cloth. Remove any smudges or dirt that may be present. Be careful not to let excess water drip into the keyboard.
- Dry with a dry cloth: Once you have finished cleaning, use a dry, lint-free cloth to wipe away any remaining moisture and ensure that the keyboard is completely dry.
By cleaning the keys and surface with a damp cloth, you can remove dirt and smudges that may affect the appearance and functionality of your wireless keyboard. However, for disinfecting your keyboard and ensuring a hygienic environment, proceed to the next step: disinfecting the keyboard.
Step 5: Disinfect the Keyboard
Disinfecting your wireless keyboard is an important step to maintain a clean and hygienic workspace. Keyboards can harbor bacteria and germs, especially in shared environments or during flu seasons. By disinfecting your keyboard, you can help reduce the risk of illness and promote a healthier environment.
Follow these steps to disinfect your keyboard:
- Prepare a disinfecting solution: Dilute isopropyl alcohol with water in a 1:1 ratio, creating a mild disinfecting solution. This concentration is sufficient to kill germs and bacteria without damaging the keyboard. Alternatively, you can use disinfecting wipes with at least 70% isopropyl alcohol.
- Dampen a cloth or wipe: Moisten a clean cloth or disinfecting wipe with the diluted solution or use pre-moistened disinfecting wipes.
- Wipe the keys and surface: Gently wipe each key and the surface of the keyboard with the damp cloth or disinfecting wipe. Ensure that the solution is not dripping or excessive, as excessive moisture may damage the keyboard.
- Pay attention to high-touch areas: Focus on disinfecting frequently touched areas such as the spacebar, enter key, and other keys that are commonly used. These areas tend to harbor more bacteria and require extra attention.
- Allow it to dry: Let the keyboard air dry or use a dry cloth to remove any excess moisture. Ensure that the keyboard is completely dry before reconnecting it to your computer or device.
Disinfecting your wireless keyboard regularly can help maintain a clean and healthy workspace. However, it’s important to keep in mind that excessive use of disinfectants or liquid cleaners may damage the key labels or the keyboard’s external coating. Now that you have completed the disinfection process, let’s move on to the next step: drying the keyboard thoroughly.
Step 6: Dry the Keyboard Thoroughly
After disinfecting your wireless keyboard, it’s crucial to ensure that it is thoroughly dried before reconnecting it to your computer or device. Excess moisture can cause damage and malfunction, so it’s important to take the time to dry it properly.
Follow these steps to dry your keyboard thoroughly:
- Use a dry cloth: Take a clean, lint-free cloth and gently pat the keys and the surface of the keyboard to remove any excess moisture. Be sure to reach all areas, paying extra attention to any crevices or gaps.
- Allow air circulation: Place the keyboard in a well-ventilated area or near a fan, allowing the air to circulate around it. This will help speed up the drying process.
- Be patient: It’s important to be patient and allow sufficient time for the keyboard to dry completely. Rushing the drying process may result in residual moisture, which can cause damage or interfere with the keyboard’s functionality.
- Double-check: Before reconnecting the keyboard, visually inspect it to ensure that it is completely dry. Look for any signs of moisture or dampness on the keys and surface.
Drying your wireless keyboard thoroughly is crucial to prevent any moisture-related issues and ensure its proper functioning. Once you are confident that the keyboard is completely dry, it’s time for the final step: reconnecting and enjoying your clean wireless keyboard!
Step 7: Reconnect and Enjoy Your Clean Wireless Keyboard
Congratulations! You’ve successfully cleaned and dried your wireless keyboard. Now it’s time to reconnect it to your computer or device and start enjoying a clean and refreshed typing experience.
Follow these steps to reconnect your clean wireless keyboard:
- Insert the wireless receiver: If your wireless keyboard uses a USB receiver, insert it into an available USB port on your computer. Make sure it is securely plugged in.
- Turn on the keyboard: If your wireless keyboard has an on/off switch, turn it on. Some keyboards may automatically power on after reconnecting the receiver.
- Synchronize the keyboard (if necessary): In some cases, you may need to synchronize your keyboard with the wireless receiver. Look for the synchronization button on your keyboard and the receiver, follow the instructions in your keyboard’s manual, and sync them accordingly.
- Test the keyboard: Once the keyboard is connected, test it by typing on the keys and ensuring that all keys are functioning properly. Check for any issues such as unresponsiveness or stuck keys.
- Enjoy your clean keyboard: With your wireless keyboard clean and reconnected, you can now enjoy a fresh and hygienic typing experience. Appreciate the improved performance and aesthetics of your clean keyboard!
Remember to maintain the cleanliness of your wireless keyboard by regularly removing loose debris, dusting, and disinfecting it. Keeping your keyboard clean is not only important for its longevity but also for your overall hygiene and comfort while using it.
Congratulations once again on successfully cleaning and reconnecting your wireless keyboard. Happy typing!
Conclusion
Cleaning your wireless keyboard is a simple yet essential task that is often overlooked. By following the steps outlined in this guide, you can maintain a clean and hygienic keyboard, enhance its performance, and prolong its lifespan.
Regularly removing debris, using canned air to remove dust, and cleaning the keys and surface with a damp cloth will help keep your keyboard looking and functioning like new. Disinfecting the keyboard is crucial for maintaining a healthy workspace and reducing the risk of germs and bacteria.
Remember to dry your keyboard thoroughly before reconnecting it to your computer or device to prevent any moisture-related damage. Once you have completed the cleaning process and reconnected your keyboard, enjoy the refreshing and improved typing experience.
Make it a habit to clean your wireless keyboard at regular intervals, especially if you use it frequently or in shared environments. By doing so, you can maintain a clean and pleasant workspace and ensure the longevity of your keyboard.
Thank you for following our guide on how to clean a wireless keyboard. We hope you found it helpful and that your keyboard shines and performs brilliantly after the cleaning process. Happy typing!


