Introduction
Welcome to the world of 3D printing! Whether you’re a beginner or an experienced enthusiast, it’s important to understand the maintenance and care required for your 3D printer. One crucial aspect of printer maintenance is cleaning the nozzle.
The nozzle is a key component of a 3D printer responsible for extruding the filament and depositing it layer by layer to create 3D objects. Over time, the nozzle can become clogged with debris, filament residue, and other impurities, resulting in poor print quality or even failed prints.
Cleaning the nozzle regularly not only ensures optimal performance but also extends the lifespan of your printer. Neglecting nozzle maintenance can lead to increased filament waste, print defects, and potentially damage to the entire extruder assembly.
This comprehensive guide will take you through the step-by-step process of cleaning the nozzle on your 3D printer, equip you with essential safety precautions, and provide tips for preventing clogs in the future.
But before we dive into the cleaning process, it’s crucial to prioritize your safety. Always make sure to turn off and unplug your 3D printer before performing any maintenance tasks, including cleaning the nozzle. Additionally, wearing protective gloves and goggles is strongly recommended to avoid injury.
Now, without further ado, let’s gather the necessary tools and materials and embark on this journey to maintain the peak performance of your 3D printer!
Why it’s important to clean your 3D printer nozzle
Regularly cleaning your 3D printer nozzle is essential for several reasons. Let’s explore why this maintenance task should be a priority for every 3D printing enthusiast.
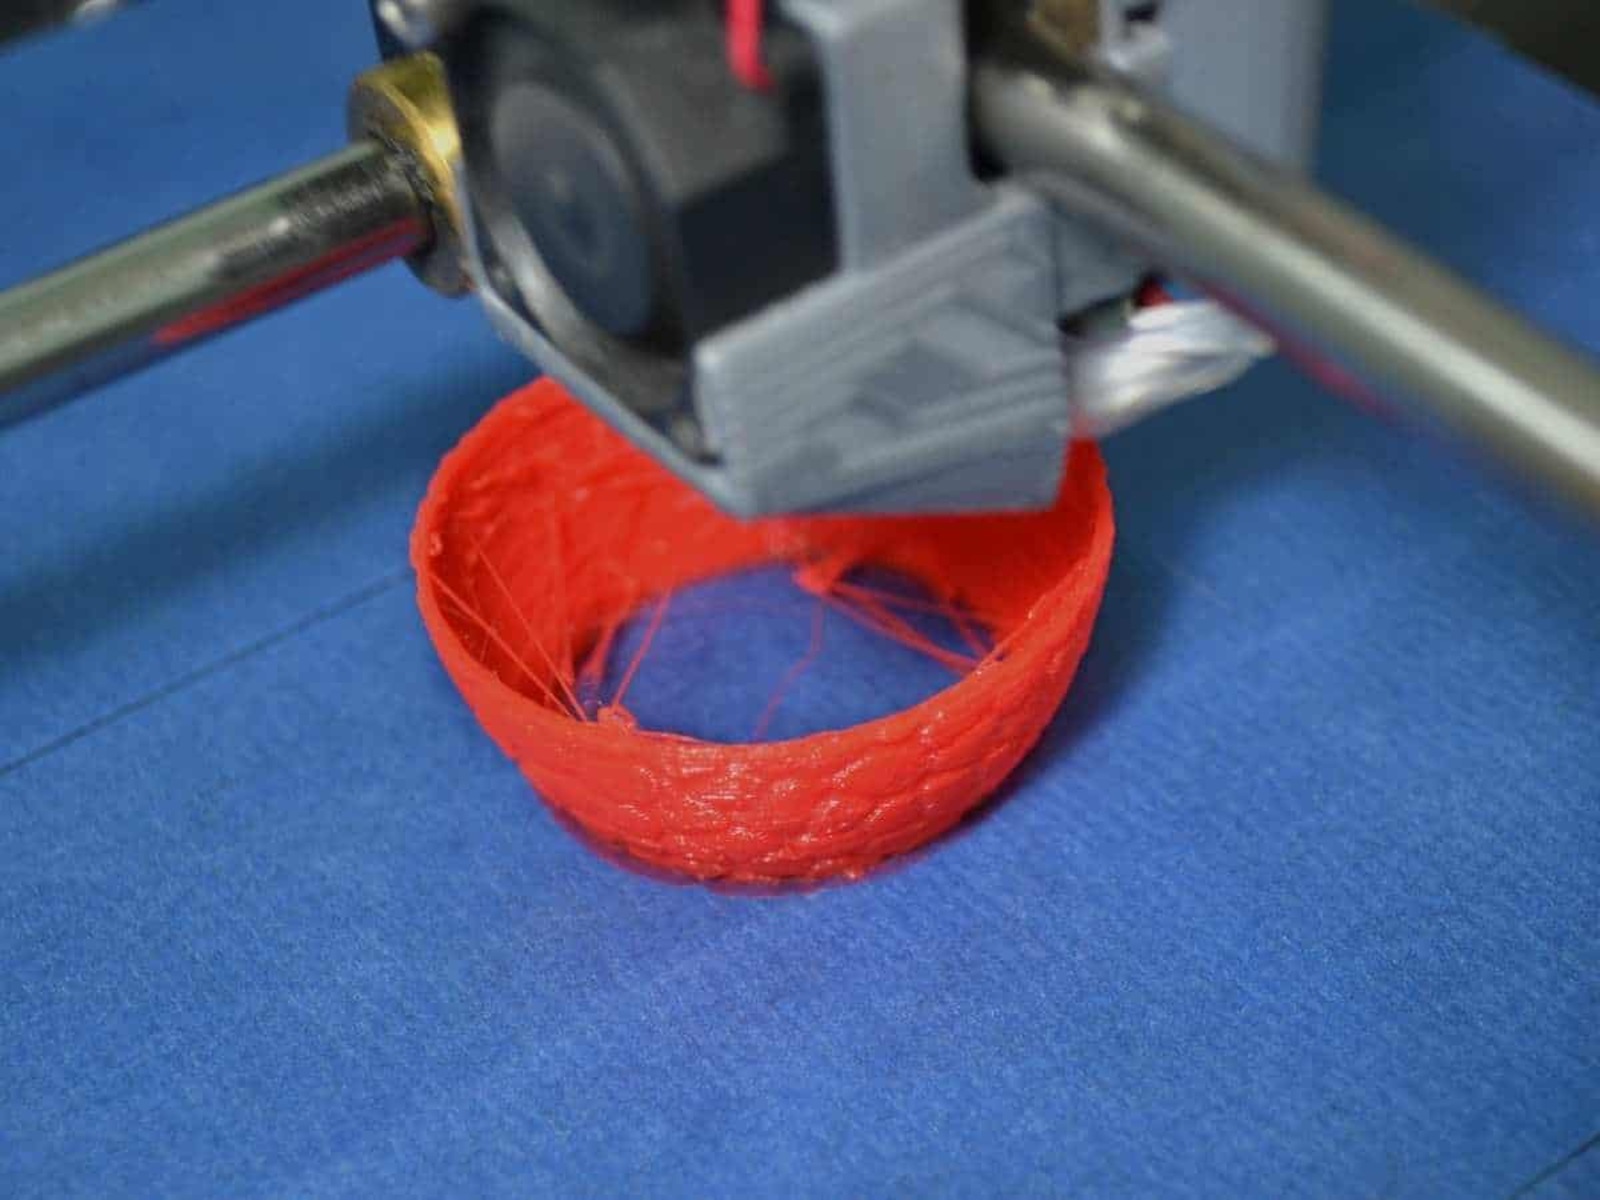
1. Ensuring optimal print quality: A clean nozzle plays a vital role in producing high-quality 3D prints. When the nozzle is clogged or contaminated, it can lead to inconsistent extrusion, resulting in uneven layers, stringing, or even failed prints. By regularly cleaning the nozzle, you can prevent these issues and achieve flawless prints every time.
2. Preventing filament clogs: Over time, debris, dust, and accumulated filament residue can build up in the nozzle, causing blockages. When a clog occurs, the filament flow gets disrupted, leading to under-extrusion or no extrusion at all. Cleaning the nozzle helps remove these obstructions, ensuring a smooth and uninterrupted flow of filament.
3. Extending the lifespan of your printer: Neglecting nozzle maintenance can lead to costly repairs or even the need to replace the entire extruder assembly. Regular cleaning helps prevent excessive wear and tear on the nozzle and other components, prolonging the lifespan of your 3D printer.
4. Saving filament and reducing waste: Clogs and poor nozzle performance often result in failed prints. The time and filament wasted on unsuccessful prints can add up quickly. By keeping your nozzle clean and in optimal condition, you can minimize wasted filament and make the most of your printing resources.
5. Enhancing print consistency: A clean nozzle ensures consistent extrusion and deposition of filament, which is crucial for achieving precise and accurate 3D prints. By removing any impurities or blockages, you can maintain a consistent flow and improve the overall quality of your prints.
By understanding the importance of nozzle cleanliness, you can take proactive measures to keep your 3D printer in optimal condition and avoid common printing problems. Now that we know the significance of cleaning the nozzle, let’s move on to the next section to learn about the safety precautions to follow before starting the cleaning process.
Safety Precautions
Before embarking on the task of cleaning your 3D printer nozzle, it is essential to prioritize your safety. Taking proper precautions will help ensure a smooth and incident-free maintenance process. Here are some important safety measures to keep in mind:
1. Turn off and unplug the printer: Always disconnect the power supply and turn off your 3D printer before performing any maintenance tasks. This step will minimize the risk of electrical shock or accidental movement of printer components.
2. Allow the printer to cool down: The nozzle and other parts of the printer can become extremely hot during operation. Allow sufficient time for the printer to cool down before attempting to clean the nozzle. This will reduce the risk of burns or other injuries.
3. Wear protective gloves and goggles: When cleaning the nozzle, it is advisable to wear protective gloves to shield your hands from any sharp or hot surfaces. Additionally, wearing safety goggles will protect your eyes from any debris or cleaning solutions that might splash during the cleaning process.
4. Work in a well-ventilated area: Some cleaning solutions used for nozzle maintenance may emit fumes or have strong odors. It is recommended to work in a well-ventilated area to minimize exposure to these substances. If necessary, use a fume extractor or open windows to improve air circulation.
5. Follow manufacturer guidelines: Each 3D printer model may have specific instructions or recommendations for nozzle maintenance. Familiarize yourself with the manufacturer’s guidelines and adhere to them to ensure the proper cleaning process and avoid any potential warranty issues.
6. Be cautious with tools: When removing or cleaning the nozzle, use appropriate tools such as wrenches or pliers as recommended by the printer manufacturer. Improper use of tools or excessive force can damage delicate components or cause injury. Always exercise caution and follow instructions provided by the manufacturer.
7. Keep cleaning solutions away from electrical components: If you are using any cleaning solutions, be cautious not to allow the solution to come into contact with electrical components of the printer, such as the control board. This can damage the electronics and compromise the printer’s functionality.
By following these safety precautions, you can ensure a safe and hassle-free experience while cleaning your 3D printer nozzle. Now that we have discussed the necessary safety measures, let’s gather the tools and materials needed for the cleaning process in the next section.
Tools and Materials Needed
Before diving into the process of cleaning your 3D printer nozzle, it’s essential to gather the necessary tools and materials. Having everything prepared in advance will streamline the process and ensure that you have everything you need at your fingertips. Here’s a list of the tools and materials necessary to clean your 3D printer nozzle:
1. Allen wrench or screwdriver: Depending on your printer model, you may need an Allen wrench or screwdriver to remove the nozzle. Check the printer’s user manual or manufacturer’s instructions to determine the appropriate tool size.
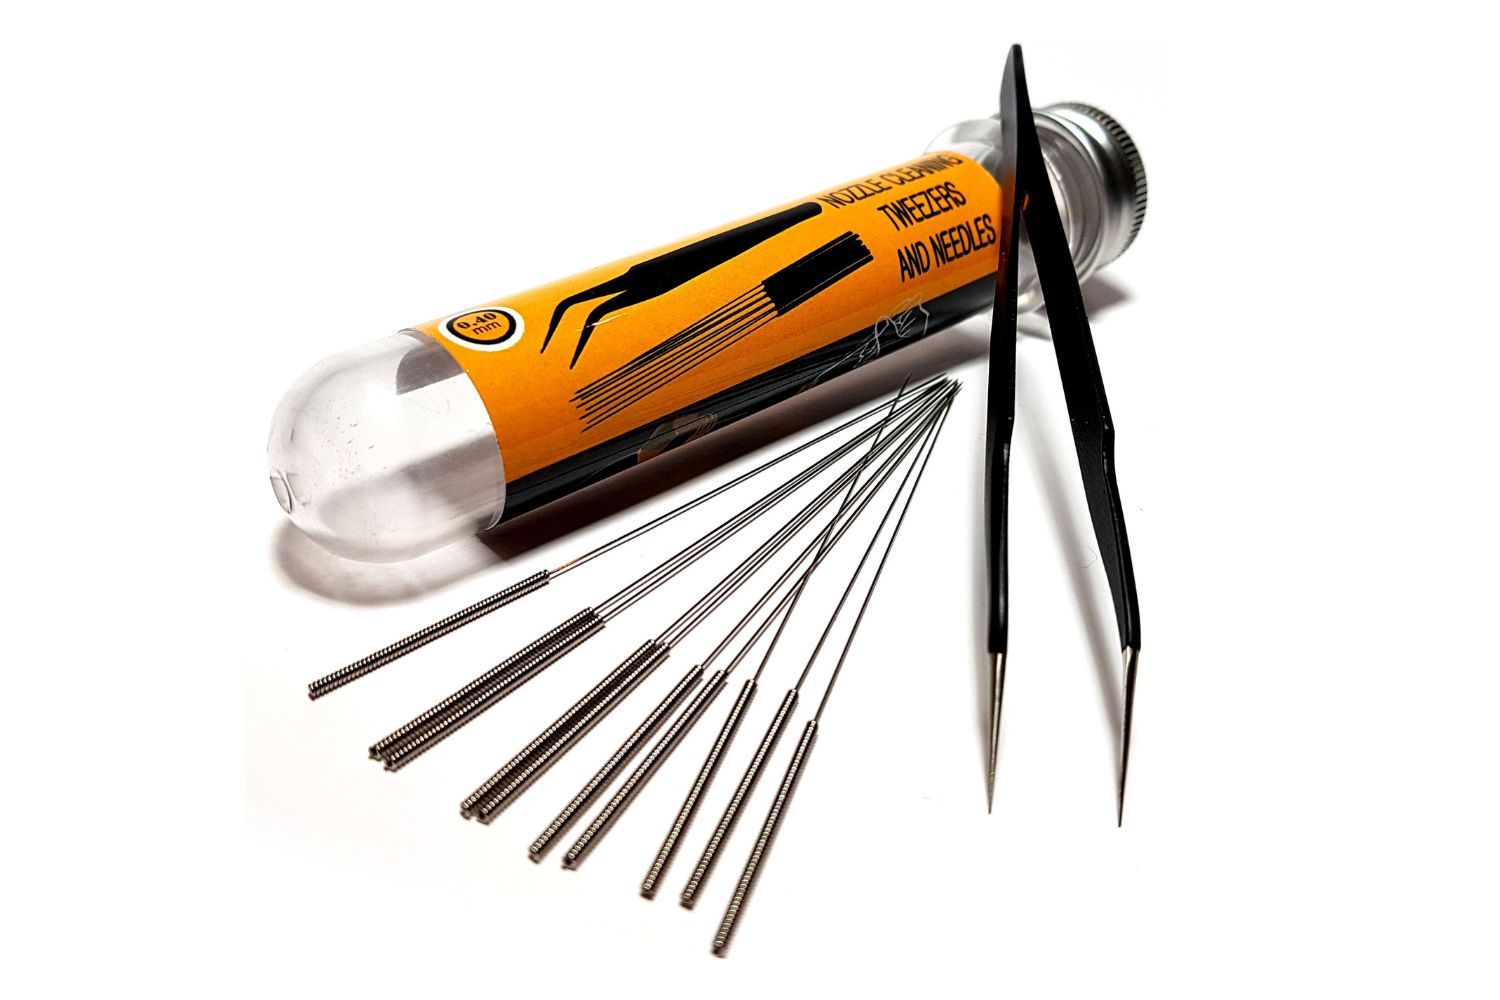
2. Needle or nozzle cleaning tools: A small-diameter needle or specialty nozzle cleaning tool is crucial for manually removing any stubborn clogs or debris from the nozzle. These tools help ensure a thorough cleaning and restore optimal filament flow.
3. Cleaning filament: Cleaning filament is specially designed to clean the extruder assembly, including the nozzle. It has a higher temperature resistance and is more effective at removing residual filament compared to regular filament used for printing. Make sure to have a sufficient amount of cleaning filament for the maintenance process.
4. Cleaning solution: Depending on the level of contamination in your nozzle, you may need a cleaning solution to assist in dissolving and removing any built-up residue or impurities. Isopropyl alcohol or a specialized nozzle cleaning solution can be effective options. Take care to choose a solution that is safe to use with your printer’s components.
5. Soft cloth or paper towels: Having a soft cloth or paper towels handy is useful for cleaning the nozzle, removing any excess cleaning solution, and wiping away any residue or debris. Ensure that the cloth or towels are lint-free to avoid leaving behind any fibers or particles that could interfere with the printing process.
6. Safety gloves and goggles: As discussed in the previous section, it is crucial to protect yourself during the cleaning process. Wear safety gloves to shield your hands from any sharp or hot surfaces, and safety goggles to protect your eyes from potential splashes or fumes.
7. Pliers or adjustable wrench: If your printer’s nozzle is tightly secured, you may need pliers or an adjustable wrench to provide additional grip and leverage when removing or reassembling the nozzle.
8. Container or bowl: Having a container or bowl large enough to submerge the nozzle is necessary if you plan to soak the nozzle in a cleaning solution. Ensure the container is chemical-resistant and deep enough to fully immerse the nozzle.
By gathering these tools and materials beforehand, you’ll be ready to tackle the nozzle cleaning process efficiently and effectively. In the next section, we’ll provide a step-by-step guide to walk you through the cleaning process.
Step-by-step guide: Cleaning the nozzle
Now that you have all the necessary tools and materials ready, let’s begin the process of cleaning your 3D printer nozzle. Follow these step-by-step instructions to ensure a thorough and successful cleaning:
Step 1: Preparing the printer
Start by turning off and unplugging your 3D printer, ensuring that it is completely powered down. This will prevent any accidental movements and minimize the risk of injury.
Step 2: Removing the nozzle
Using the appropriate tool, loosen and remove the nozzle from the printer’s extruder assembly. Take care not to damage the surrounding components or apply excessive force. Place the removed nozzle on a clean and safe surface.
Step 3: Cleaning the nozzle manually
If there are visible obstructions or residual filament stuck in the nozzle, use a small-diameter needle or specialized nozzle cleaning tool to carefully remove them. Gently insert and maneuver the tool within the nozzle, being cautious not to damage the delicate opening.
Step 4: Soaking the nozzle in a cleaning solution
If the nozzle requires a more thorough cleaning, prepare a container or bowl with a suitable cleaning solution. Submerge the nozzle in the solution, ensuring that it is fully immersed. Allow it to soak for a recommended period, which may vary depending on the cleaning solution you are using.
Step 5: Reassembling the nozzle
Once the nozzle has been cleaned, remove it from the cleaning solution and rinse it thoroughly under running water. Use a soft cloth or paper towels to dry the nozzle and ensure there is no moisture left. Carefully reassemble the nozzle back into the extruder assembly, making sure it is properly secured.
Step 6: Running a test print
With the nozzle cleaned and reassembled, it’s time to run a test print to ensure everything is functioning correctly. Choose a simple and quick test print that will allow you to examine the quality of the extrusion and detect any remaining issues. Make any necessary adjustments based on the test print results.
Following these step-by-step instructions will help you clean your 3D printer nozzle effectively and ensure optimal performance. In the next section, we’ll provide some tips on preventing clogs in the future.
Step 1: Preparing the printer
Before diving into the process of cleaning your 3D printer nozzle, it’s important to adequately prepare the printer. Following this step will ensure a smooth and safe cleaning process. Here’s what you need to do:
1. Turn off and unplug the printer
Make sure that your 3D printer is completely powered down by turning off the main switch. Unplug the power cord from the wall outlet to ensure that there is no electrical current running through the printer. This step is crucial for your safety and prevents any accidental movements during the cleaning process.
2. Allow the printer to cool down
After shutting off the printer, give it sufficient time to cool down. The nozzle and other components can reach high temperatures during operation, and attempting to clean a hot nozzle can result in burns or other injuries. Wait at least 15-20 minutes to ensure that all parts of the printer have cooled down to a safe temperature.
3. Prepare a clean and organized workspace
Clear a dedicated workspace for the cleaning process. Remove any objects or materials that might obstruct your access to the printer and nozzle. Keep a clean surface or a protective mat on which you can place the disassembled printer components, such as the nozzle and screws. Having an organized workspace will help you keep track of the parts and avoid misplacing anything during the cleaning process.
4. Wear safety gloves and goggles
Prioritize your safety by wearing protective gloves and goggles. Safety gloves protect your hands from sharp edges or any residual heat that may still be present in the printer. Goggles safeguard your eyes from any potential splashes of cleaning solutions or debris during the cleaning process. Additionally, wearing gloves will prevent any oils from your hands from transferring onto the nozzle or other components, which could impact print quality.
5. Familiarize yourself with the printer’s manual or instructions
Take a moment to review the printer’s manual or refer to the manufacturer’s instructions specific to your 3D printer model. This step will give you important insights into the disassembly and reassembly process of the nozzle. Familiarize yourself with any special precautions, recommended tools, or specific instructions that the manufacturer provides for cleaning or maintaining the nozzle. This knowledge will ensure that you follow the correct procedures for your specific printer, minimizing the risk of damage or voiding any warranties.
By thoroughly preparing your printer and workspace, you are ready to move on to the next steps of cleaning the nozzle. In the subsequent sections, we will guide you through the process, step by step.
Step 2: Removing the nozzle
Now that you have prepared your 3D printer for the cleaning process, the next step is to remove the nozzle from the extruder assembly. Follow these instructions to safely and effectively remove the nozzle:
1. Heat up the printer (if necessary)
Some 3D printers require the nozzle to be heated up before removing it. Refer to your printer’s manual or manufacturer’s instructions to determine if your printer falls into this category. If heating is necessary, follow the recommended temperature settings and allow the nozzle to reach the desired temperature.
2. Turn off the printer
Whether you needed to heat up the printer or not, it is important to turn off the printer before proceeding with nozzle removal. This ensures that the printer is completely powered down and eliminates any risk of accidental movements or electric shock during the process.
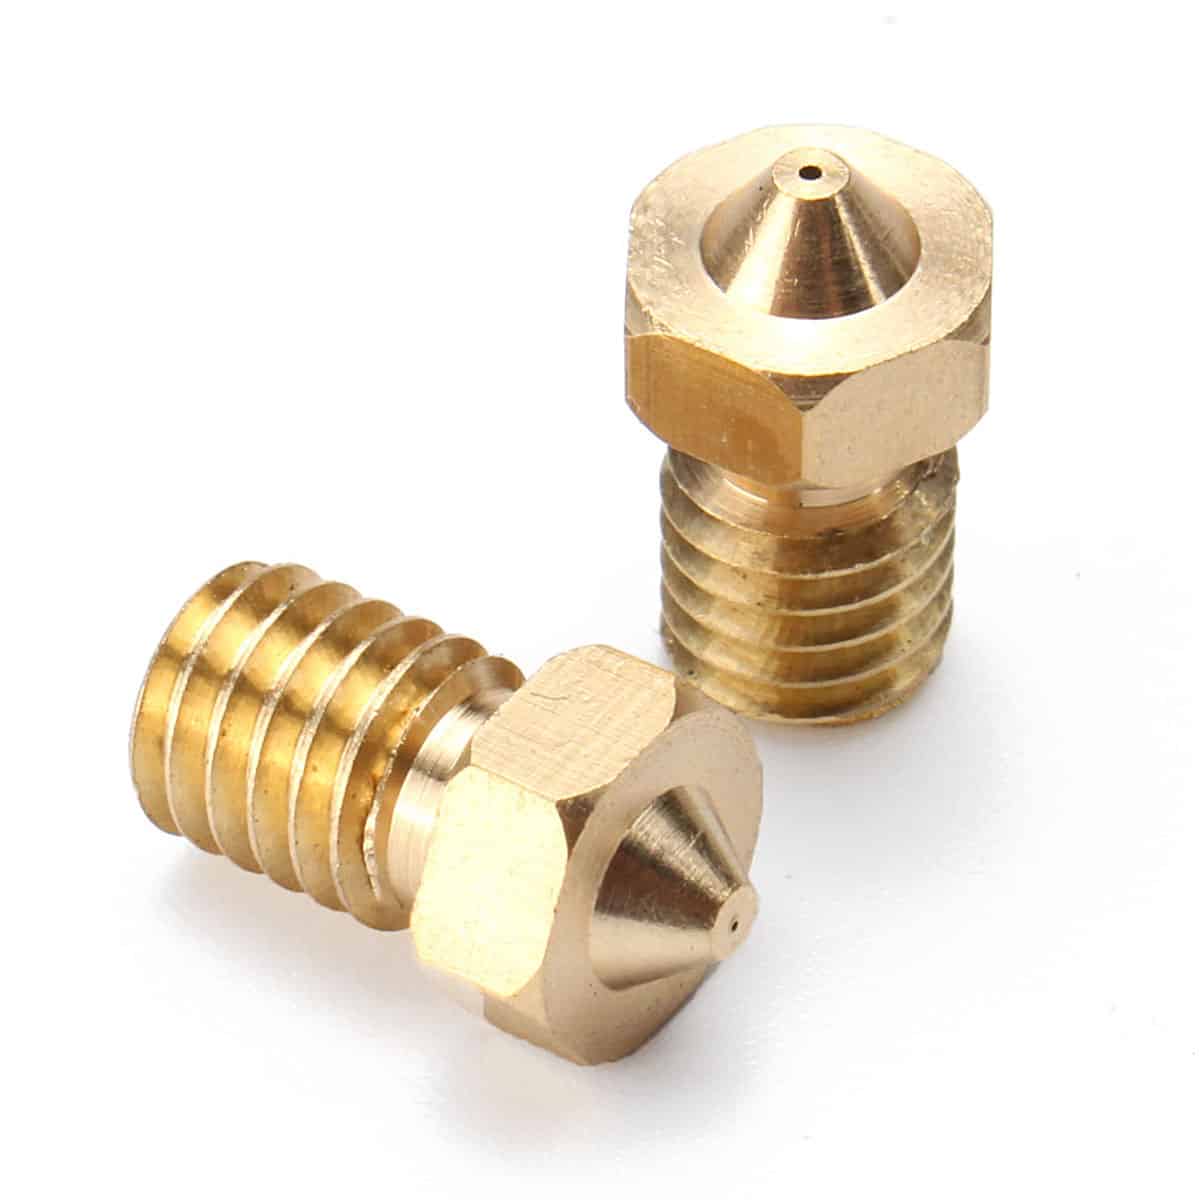
3. Locate the nozzle
Identify the nozzle on your 3D printer’s extruder assembly. It is typically a cylindrical component located at the end of the heater block or hot end. The nozzle is threaded and secured into place.
4. Use the appropriate tool
Depending on your printer model, there may be different types of nozzles and corresponding tools required for removal. Common tools include Allen wrenches or screwdrivers. Check the printer’s manual or manufacturer’s instructions to determine the appropriate tool size and type needed for your specific nozzle.
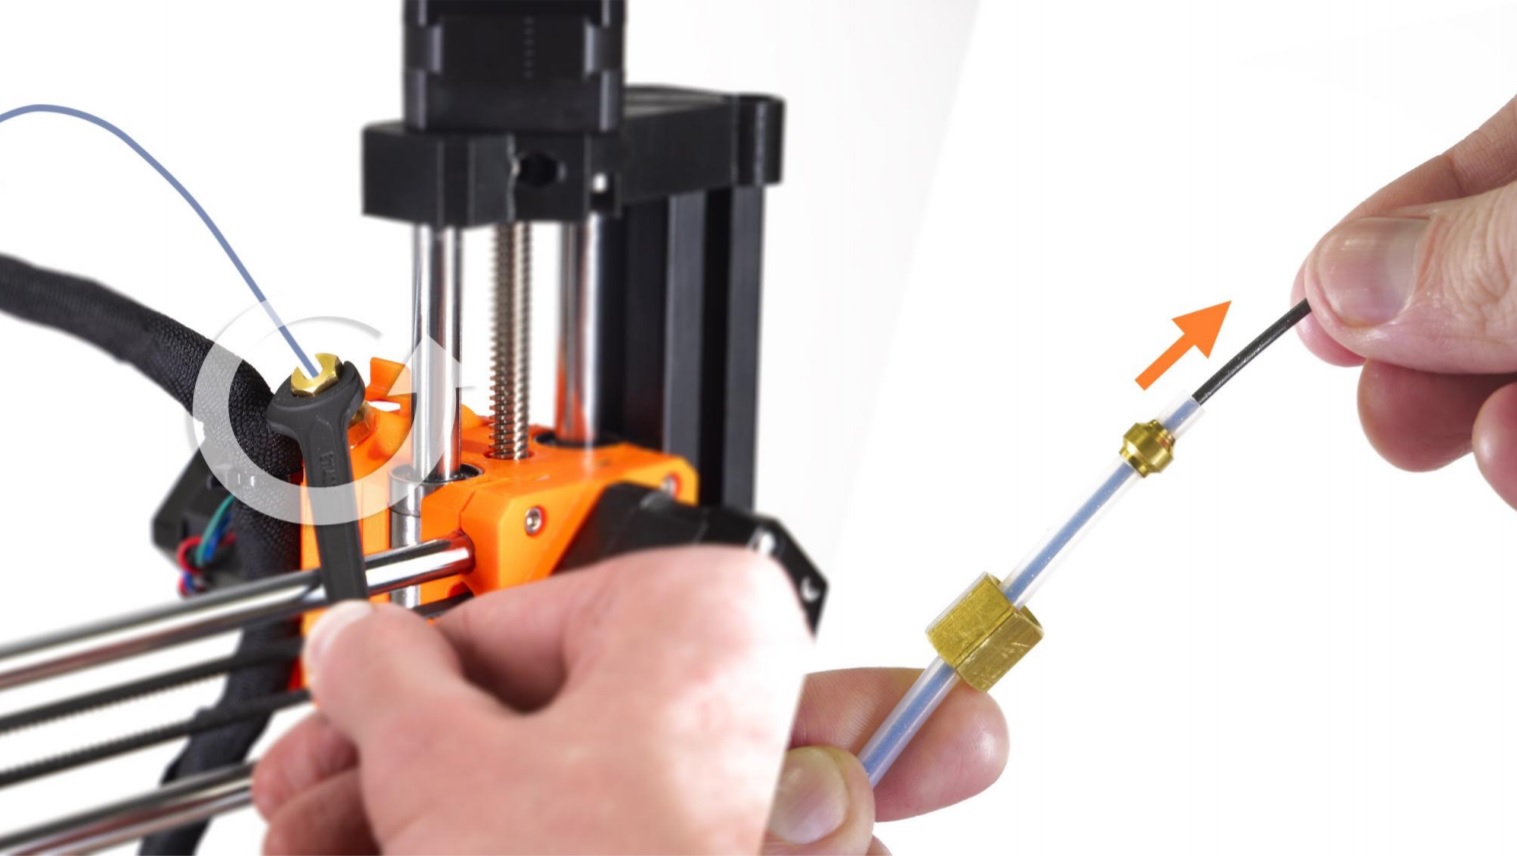
5. Loosen and remove the nozzle
Gently insert the appropriate tool into the nozzle’s heating block and carefully loosen it by turning it counterclockwise. Be cautious not to apply excessive force or to damage any surrounding components. Once the nozzle is loosened, continue turning it by hand until it is completely detached from the extruder assembly.
6. Place the nozzle in a safe location
After removing the nozzle, place it on a clean and safe surface. You can use a protective mat or a designated container to prevent any damage or contamination of the nozzle. Ensure that the surface is stable and free from any debris or sharp objects.
By following these step-by-step instructions, you can easily remove the nozzle from your 3D printer’s extruder assembly. In the upcoming sections, we will delve into the process of cleaning the nozzle itself and getting it ready for reassembly.
Step 3: Cleaning the nozzle manually
Now that you have successfully removed the nozzle from your 3D printer, it’s time to manually clean it to remove any accumulated debris or filament residue. Follow these step-by-step instructions to effectively clean the nozzle:
1. Examine the nozzle
Take a close look at the nozzle to assess its condition. Look for any visible debris, clogs, or signs of filament residue. This initial inspection will help determine the level of cleaning required.
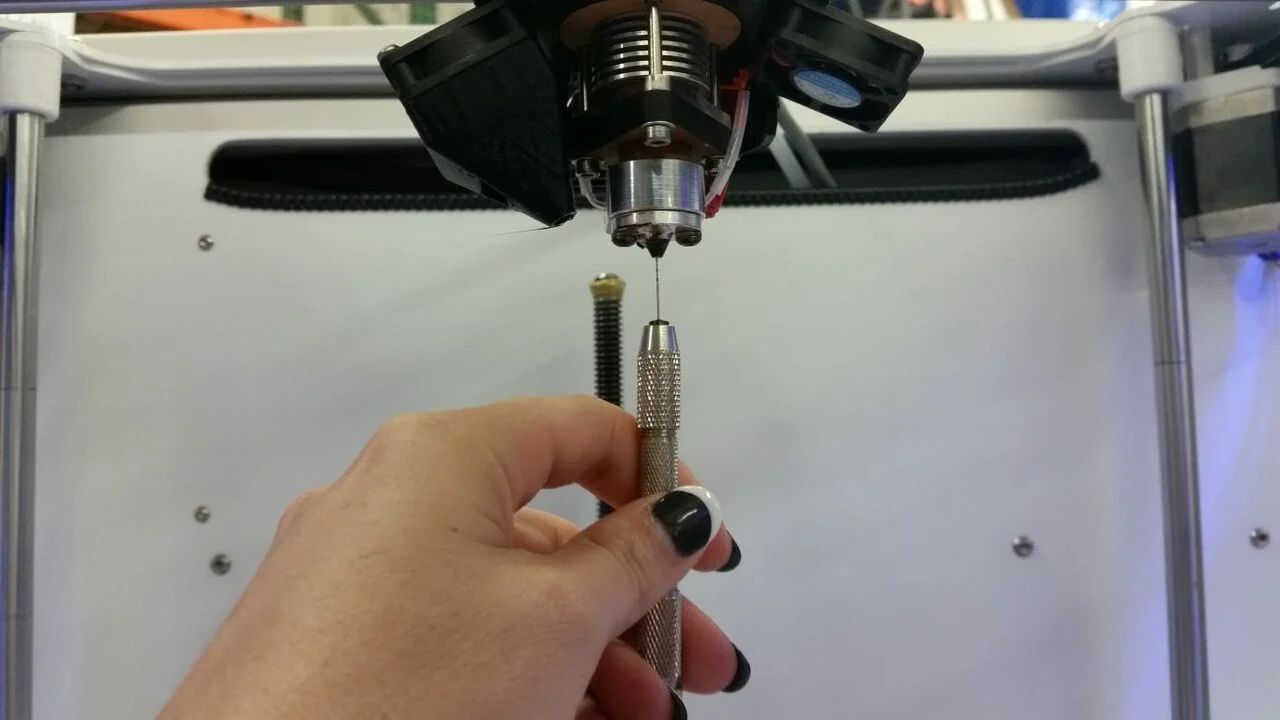
2. Use a small-diameter needle or specialized nozzle cleaning tool
If you notice any visible obstructions or residue in the nozzle opening, grab a small-diameter needle or a specialized nozzle cleaning tool. Gently insert the tool into the nozzle, being careful not to damage the delicate opening. Use a twisting or scrubbing motion to dislodge any debris or filament that may be blocking the flow.
3. Clear the nozzle opening
Continue working the needle or tool within the nozzle until the opening is clear of any visible obstructions. Take your time and be patient, as thorough cleaning will ensure optimal extrusion and prevent future clogs.
4. Remove any residual filament
If you notice any residual filament sticking to the nozzle or inside the heating block, use the needle or tool to carefully scrape it away. Be gentle to avoid causing any damage to the nozzle surface.
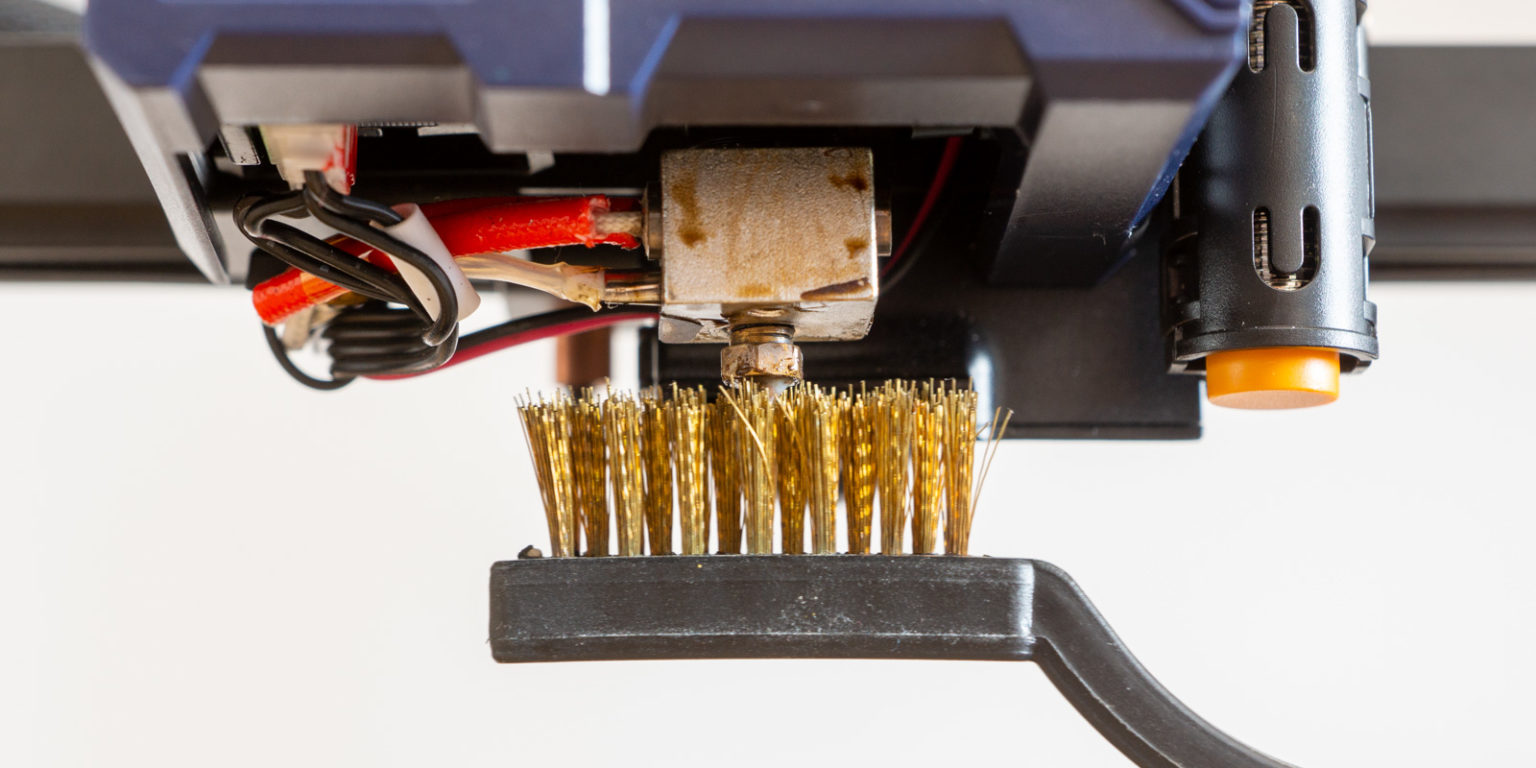
5. Clean the exterior of the nozzle
Use a soft cloth or paper towel to wipe the exterior of the nozzle, removing any dirt, dust, or filament residue. This step will help ensure cleanliness and optimize the nozzle’s performance.
Inspect for remaining debris-
After completing the manual cleaning process, visually inspect the nozzle again to ensure that no debris or filament residue remains. It should appear clean and free from any visible obstructions.
By following these step-by-step instructions, you can manually clean your 3D printer nozzle effectively. In the next section, we will discuss a method to further deep clean the nozzle by soaking it in a cleaning solution.
Step 4: Soaking the nozzle in a cleaning solution
If the manual cleaning did not completely remove all debris or filament residue from your 3D printer nozzle, soaking it in a cleaning solution can provide a deeper clean. Follow these step-by-step instructions to effectively soak the nozzle:
1. Choose a suitable cleaning solution
Select a cleaning solution that is compatible with your 3D printer and nozzle material. Isopropyl alcohol is a commonly used cleaning solution, but there are also specialized nozzle cleaning solutions available. Follow the manufacturer’s instructions for any specific dilution requirements or recommended cleaning times.
2. Prepare a container or bowl
Find a container or bowl that is deep enough to fully submerge the nozzle. Make sure the container is chemical-resistant and won’t react with the cleaning solution. It’s best to use a container dedicated solely to the cleaning process to prevent any contamination.
3. Fill the container with the cleaning solution
Pour the cleaning solution into the container, ensuring there is enough to completely cover the nozzle. Be mindful not to overfill and cause spillage during the soaking process.
4. Submerge the nozzle
Carefully place the nozzle into the container, fully immersing it in the cleaning solution. Ensure that no air bubbles are trapped within the nozzle, as this may prevent thorough cleaning. Gently swirl the solution to dislodge any remaining debris.
5. Soak the nozzle for the recommended time
Refer to the cleaning solution’s instructions for the recommended soaking time. Typically, it ranges from 15 minutes to a few hours or overnight. Avoid prolonged soaking times that may damage the nozzle or its coating.
6. Remove the nozzle and rinse
Once the recommended soaking time has elapsed, carefully remove the nozzle from the cleaning solution. Rinse it under running water to remove any residual solution. Use a soft cloth or paper towel to dry the nozzle thoroughly.
7. Inspect and reassemble the nozzle
Inspect the cleaned nozzle for any remaining debris or residue. If necessary, repeat the manual cleaning process to ensure it is completely clean. Once satisfied with the cleanliness, reassemble the nozzle back into the extruder assembly, following the manufacturer’s instructions.
By following these step-by-step instructions for soaking the nozzle in a cleaning solution, you can effectively remove stubborn debris or filament residue. In the next section, we will guide you through the process of reassembling the nozzle and conducting a test print.
Step 5: Reassembling the nozzle
After cleaning and drying the 3D printer nozzle, the next step is to reassemble it back into the extruder assembly. Follow these step-by-step instructions to ensure a successful reassembly:
1. Gather the necessary tools
Before starting the reassembly process, make sure you have the appropriate tools on hand. These may include pliers, an adjustable wrench, or the specific tool recommended by your printer manufacturer for tightening the nozzle.
2. Clean the threads
Inspect the threads on both the nozzle and the extruder assembly. Ensure that they are clean and free from any debris or filament residue. Use a soft cloth or brush to gently clean the threads if necessary.
3. Apply heat-resistant tape (optional)
If desired, you can apply a small strip of heat-resistant tape to the threads of the nozzle. This can help create a tighter seal and prevent any filament leaks during future printing. Make sure the tape does not cover the nozzle opening.
4. Insert and tighten the nozzle
Carefully insert the cleaned nozzle into the extruder assembly, ensuring it aligns correctly with the heating block. Use your fingers to hand-tighten the nozzle until it is snug. Avoid applying excessive force, as this may damage the components.
5. Final tightening with tools
Using pliers or an adjustable wrench, carefully grip the nozzle and tighten it further to ensure a secure fit. Be cautious not to overtighten, as it may cause damage or prevent future removal if necessary. Refer to your printer’s manual or manufacturer’s instructions for recommended torque specifications.
6. Verify proper alignment
Confirm that the nozzle is aligned properly and sits flush with the heating block. It should be centered and not protruding excessively. If adjustments are needed, loosen the nozzle slightly and reposition it until it is correctly aligned.
7. Perform a visual inspection
Inspect the reassembled nozzle and surrounding components to ensure everything is in place and secure. Check for any signs of misalignment, loose connections, or filament residue.
By following these step-by-step instructions, you can confidently reassemble the nozzle back into your 3D printer’s extruder assembly. In the next step, we will run a test print to ensure the printer is functioning optimally.
Step 6: Running a test print
After reassembling the 3D printer nozzle, it’s crucial to perform a test print to ensure that everything is functioning properly. Follow these step-by-step instructions to run a successful test print:
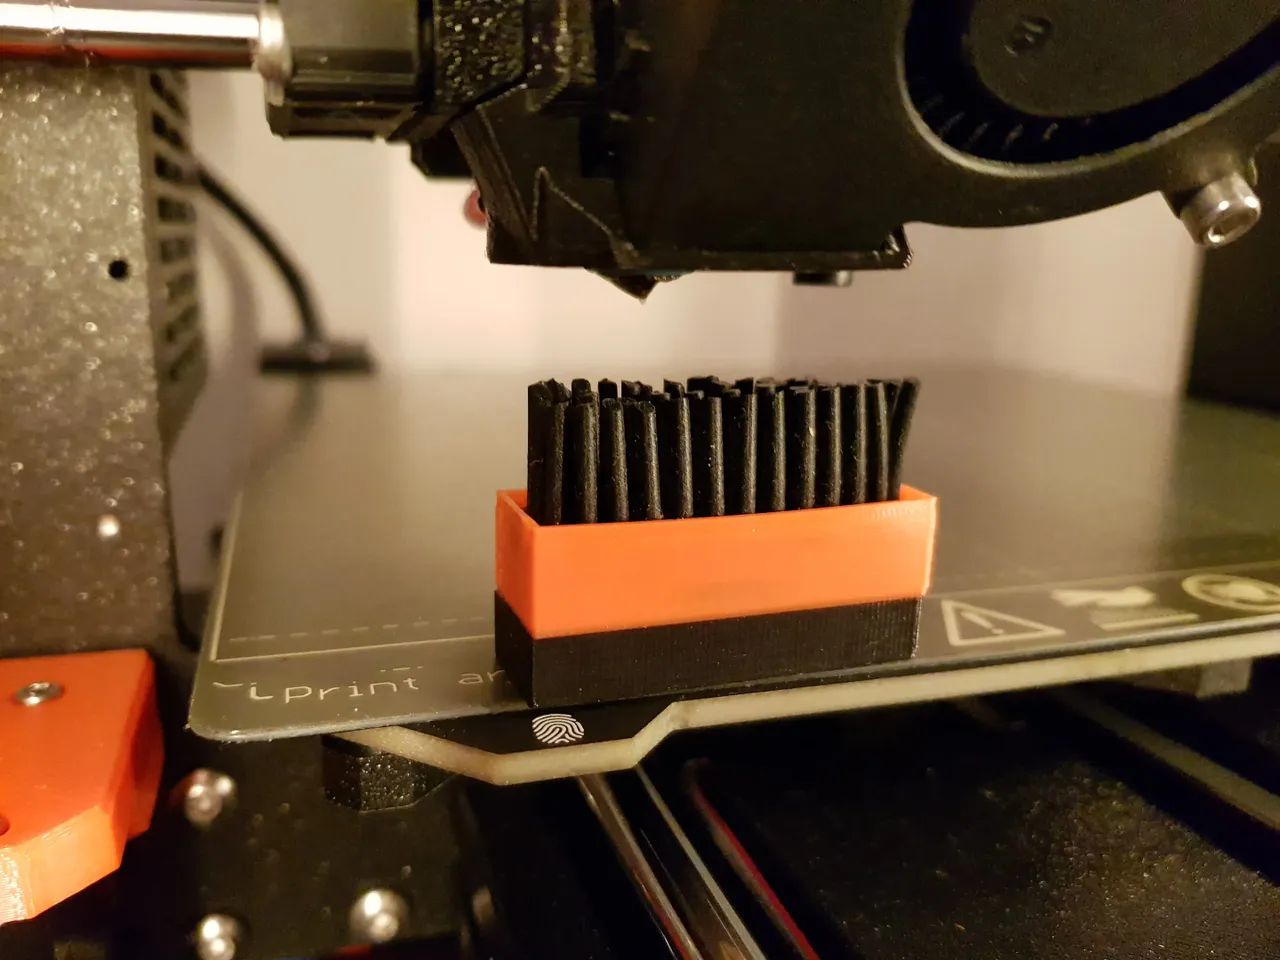
1. Choose a suitable test file
Select a simple and quick test file that will allow you to evaluate the printer’s performance and nozzle functionality. It could be a small calibration cube or a basic shape. The purpose of the test print is to check for proper extrusion, filament flow, and overall print quality.
2. Load the filament
Ensure that you have loaded the appropriate filament into the printer. Use the same filament type that you typically use for regular printing. Make sure the filament is inserted properly into the extruder assembly, following the manufacturer’s instructions.
3. Set the print parameters
Configure the print parameters on your 3D printer, including layer height, print speed, and temperature, based on the filament manufacturer’s recommendations and your printer’s capabilities. Make any necessary adjustments to these settings to ensure optimal print quality.
4. Start the test print
Send the test file to the printer and initiate the print job according to your printer’s control interface. Observe the printer as it begins printing the test object, paying close attention to the extrusion and filament flow during the initial layers.
5. Monitor the print progress
Throughout the print job, monitor the progress to ensure that the nozzle is extruding filament consistently and evenly. Check for any signs of under-extrusion, over-extrusion, or filament clogs. Look for any abnormalities in the print structure, such as gaps, stringing, or layer misalignment.
6. Evaluate the quality of the test print
Once the test print is complete, carefully examine the printed object for any defects or imperfections. Check for even layer adhesion, proper dimensional accuracy, and overall print quality. Evaluate the performance of the nozzle based on the outcome of the test print.
7. Make adjustments if necessary
If you notice any issues or inconsistencies during the test print, take note of them and make the necessary adjustments. This may involve recalibrating the print settings, rechecking the nozzle alignment, or further troubleshooting the printer if required.
By following these step-by-step instructions and assessing the quality of the test print, you can ensure that your 3D printer nozzle is functioning optimally after the cleaning process. In the next section, we will provide some helpful tips for preventing clogs in the future.
Tips for Preventing Clogs in the Future
Preventing nozzle clogs is key to maintaining the optimal performance of your 3D printer. By implementing these helpful tips, you can minimize the risk of clogs and enjoy trouble-free printing:
1. Use high-quality filament
Invest in high-quality filament from reputable manufacturers. Cheap or low-quality filament can contain impurities that increase the likelihood of clogs. Opt for filaments with consistent diameters and good dimensional accuracy to ensure smooth and reliable printing.
2. Store filament properly
Store your filament in a dry and dust-free environment. Moisture can cause filament to absorb water, leading to inconsistent extrusion and potential clogs. Use airtight containers or desiccant packs to keep your filament dry and in optimal condition.
3. Calibrate your extruder
Regularly calibrate your extruder to ensure accurate filament flow. Use calibration guides or software tools recommended by your printer manufacturer to fine-tune the extrusion rate, minimizing the risk of over-extrusion or under-extrusion that can lead to clogs.
4. Clean the print bed regularly
Clean the print bed regularly to prevent loose filament or debris from interfering with the printing process. A clean and level print bed promotes proper adhesion and helps avoid nozzle collisions or filament blockages during printing.
5. Perform routine maintenance
Regularly perform maintenance tasks such as cleaning the build surface, lubricating moving parts, and checking the tightness of belts and screws. A well-maintained printer operates more smoothly, reducing the chances of issues that could contribute to nozzle clogs.
6. Avoid printing at extremes
Avoid printing at extremely high or low temperatures, as it can negatively affect the flow of filament and contribute to clogging. Follow the recommended temperature range for your filament and adjust the settings accordingly to maintain optimal extrusion.
7. Use print cooling features
If your printer has a print cooling fan, utilize it to control the temperature of the printed layers. Proper cooling can help solidify the filament quickly, reducing the chances of filament oozing or stringing that can cause clogs.
8. Regularly clean the nozzle and perform cold pulls
Periodically clean the nozzle and perform cold pulls to remove any residual filament or debris. Cold pulls involve heating the nozzle and then quickly cooling it with a lower temperature filament to help pull out any trapped contaminants. This helps maintain a clean and clear nozzle for optimal extrusion.
By following these tips, you can minimize the risk of nozzle clogs and enhance the performance of your 3D printer. Remember that regular maintenance and proactive preventive measures are crucial in keeping your printer in prime condition.
Conclusion
Cleaning the nozzle on your 3D printer is a crucial maintenance task that ensures optimal print quality, prevents clogs, and extends the lifespan of your printer. By following the step-by-step guide provided in this article, you can effectively clean your nozzle and keep your 3D printer in excellent working condition.
We emphasized the importance of safety precautions, such as turning off and unplugging the printer, wearing protective gloves and goggles, and working in a well-ventilated area. These measures help safeguard your well-being while performing maintenance tasks.
Throughout the cleaning process, it is important to be meticulous and thorough. From preparing the printer and removing the nozzle to manually cleaning it, soaking it in a cleaning solution, and reassembling it, every step contributes to achieving a clean and functional nozzle.
Running a test print serves as the final validation of a successful cleaning process. By evaluating the print quality, extrusion, and overall performance, you can ensure that your printer is ready for producing high-quality 3D prints.
Additionally, we provided valuable tips for preventing clogs in the future. Implementing these preventive measures, such as using high-quality filament, storing filament properly, and performing routine maintenance, can significantly reduce the risk of nozzle clogs and enhance your 3D printing experience.
Remember, regular maintenance, proper filament handling, and ongoing attention to nozzle cleanliness are key to the longevity and performance of your 3D printer. By incorporating these practices into your printing routine, you can enjoy consistent, reliable, and high-quality prints for all your creative projects.