Introduction
A Belkin power bank is a portable charger that allows you to charge your electronic devices on the go. Whether you’re traveling, hiking, or just need some extra power during the day, a power bank can be a lifesaver. However, if you’re new to using a power bank or have recently purchased a Belkin power bank, you might be wondering how to charge it.
In this article, we’ll guide you through the step-by-step process of charging a Belkin power bank. With just a few simple steps, you’ll have your power bank fully charged and ready to keep your devices powered up.
Before we get started, it’s essential to check the battery level of your power bank. Most Belkin power banks come with LED indicators that display the battery level. This will help you determine whether your power bank needs to be charged or not.
Now, let’s dive into the details and learn how to charge your Belkin power bank efficiently.
Step 1: Check the power bank’s battery level
Before starting the charging process, make sure to check the current battery level of your Belkin power bank. This step is essential to determine whether your power bank needs to be charged or not.
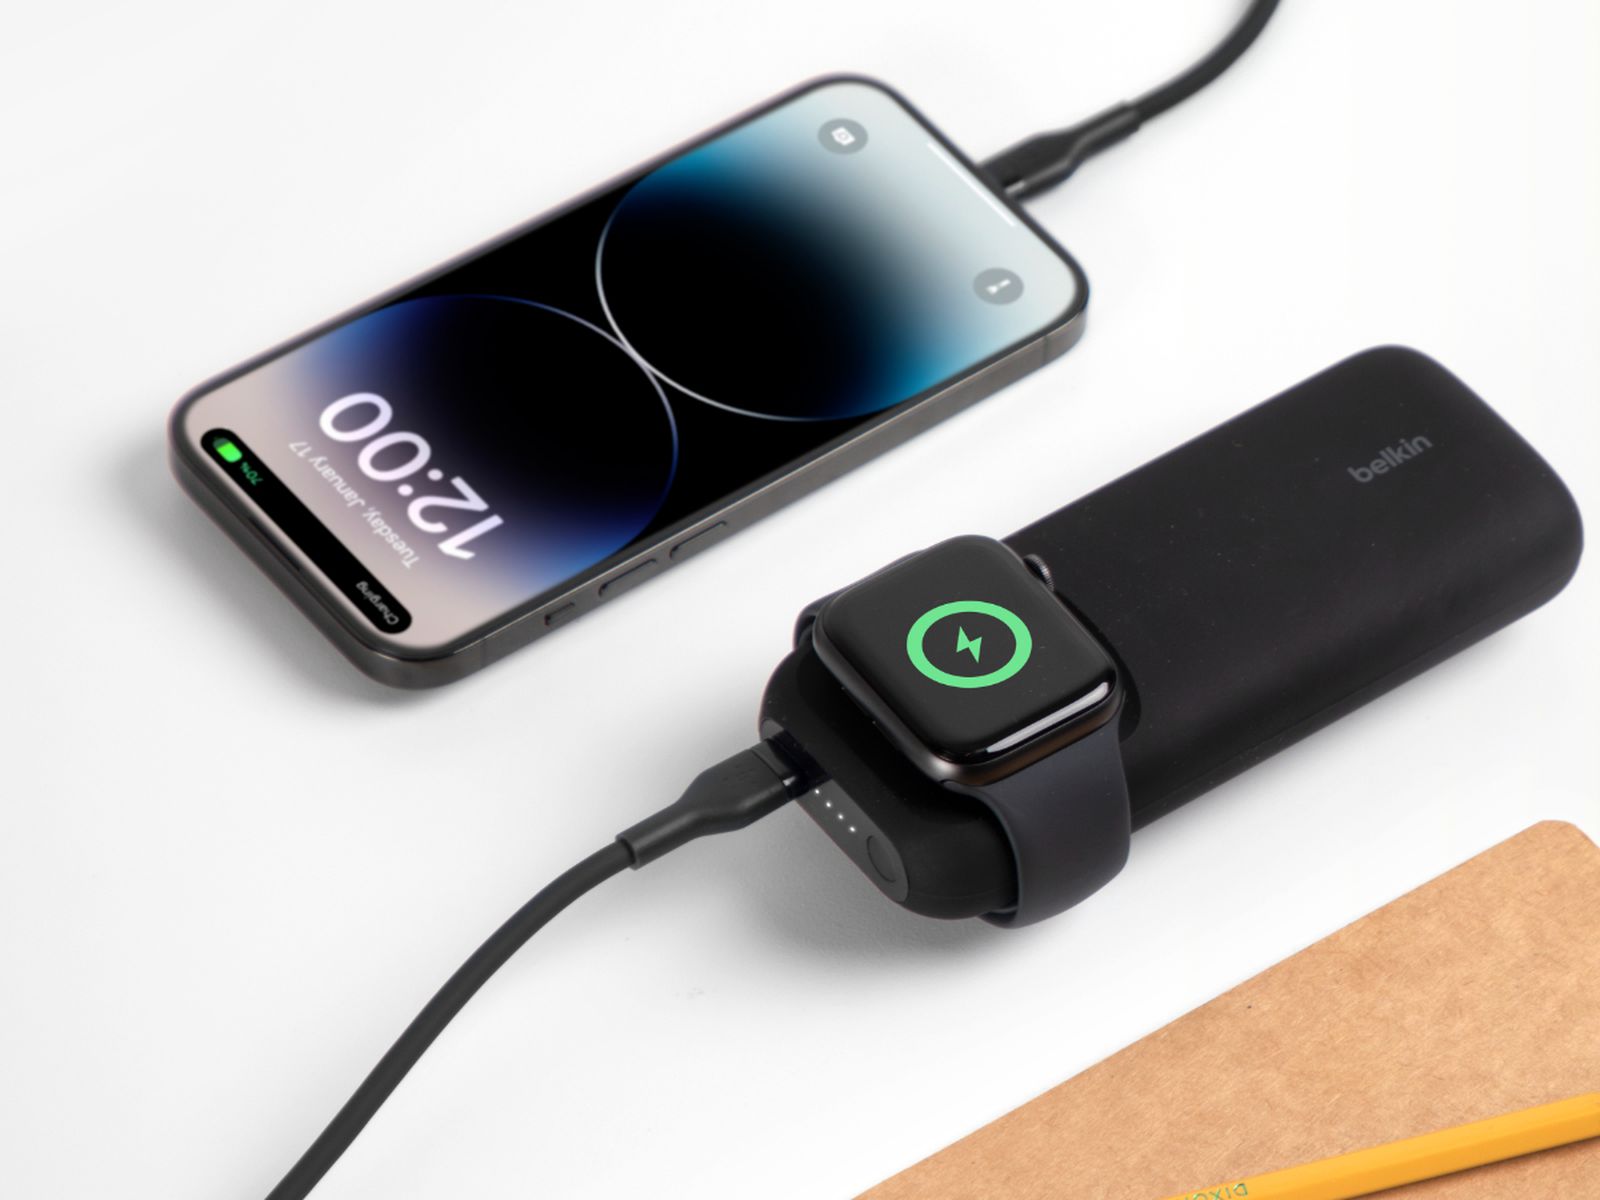
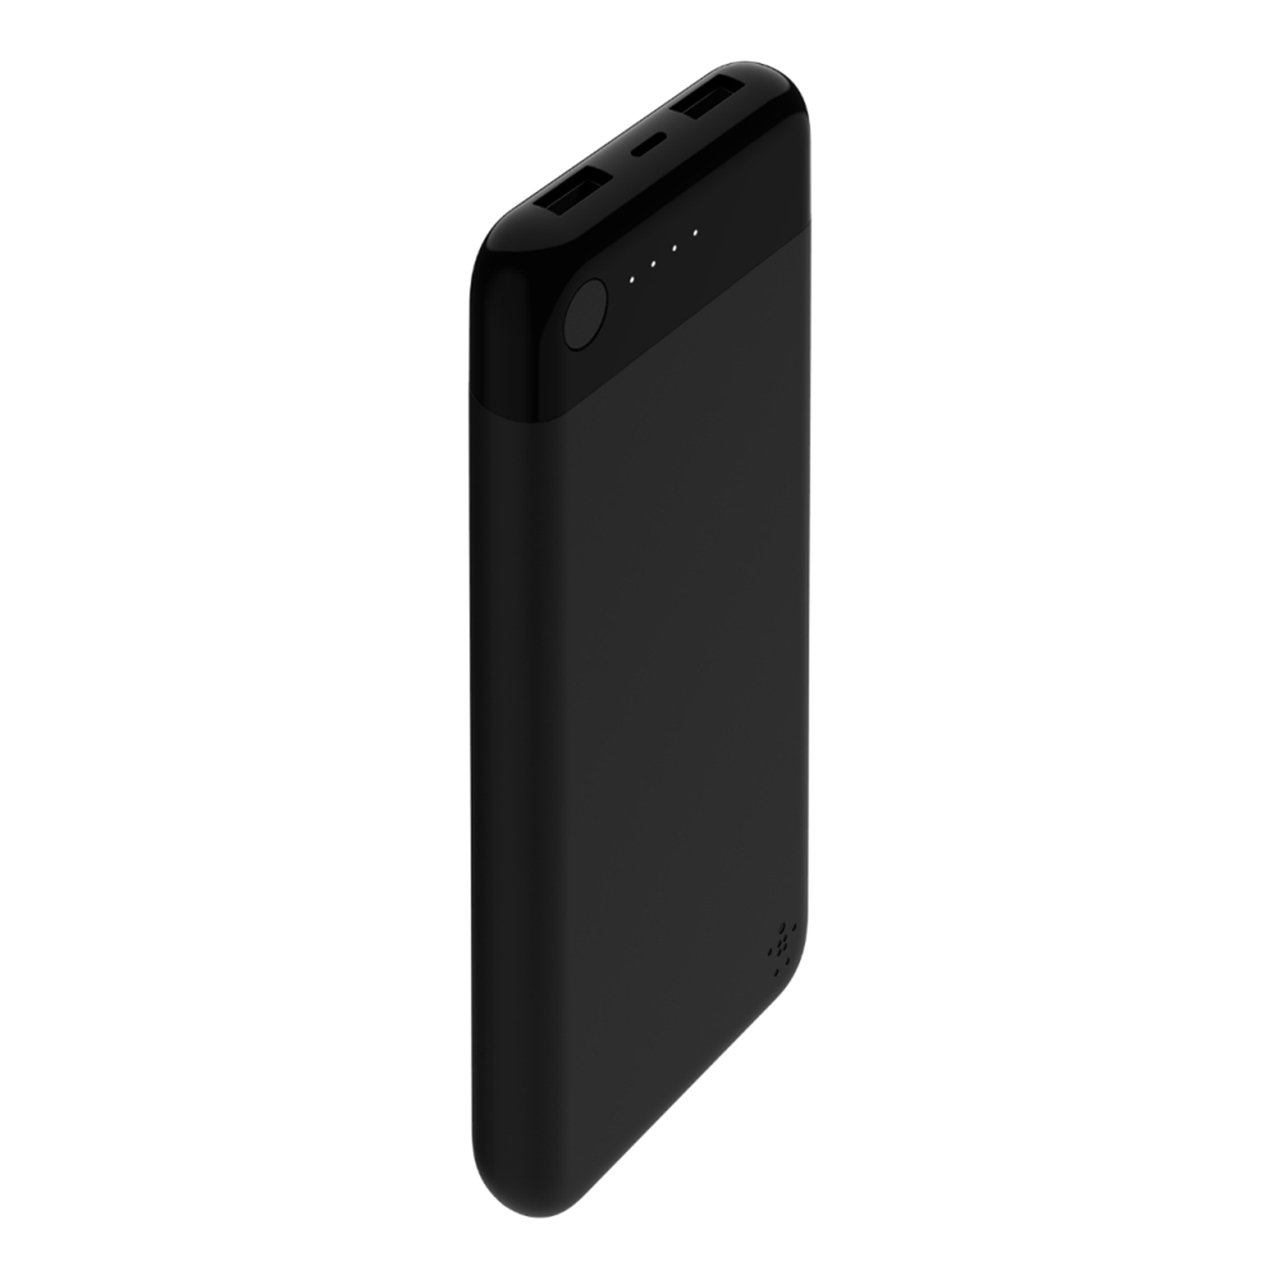
To check the battery level, locate the LED indicators on your power bank. Most Belkin power banks have four LED lights that represent different battery levels. Each light typically corresponds to 25% of the battery capacity.
If all four LED lights are illuminated, it means your power bank is fully charged. However, if only one or two lights are on or no lights are lit, it indicates that your power bank’s battery level is low and in need of charging.
It’s crucial to check the battery level before charging the power bank to avoid any interruptions while using it in the future. Once you have determined the battery level, you can proceed to the next step and begin charging your Belkin power bank.
Step 2: Connect the power bank to a power source
After checking the battery level, it’s time to connect your Belkin power bank to a power source. You have a few options when it comes to the power source:
- Wall Adapter: You can use the wall adapter that came with your power bank. Simply plug the adapter into a wall outlet.
- USB Port: Another option is to connect the power bank to a USB port on your computer or laptop. This is convenient if you’re working or traveling with your device.
- Car Charger: If you’re on the road, you can use a car charger to connect your power bank to the vehicle’s power outlet. This is ideal for long drives or road trips.
Choose the most suitable option for your situation and ensure that the power source is reliable and safe to use.
Once you have selected a power source, locate the charging port on your Belkin power bank. It is usually located on the side or at the top of the power bank, depending on the model.
Next, take the charging cable that came with your power bank. One end of the cable should have a USB connector, while the other end might have a micro-USB, USB-C, or Lightning connector, depending on the power bank model and your device compatibility.
Now, you’re ready to connect the power bank to the power source using the charging cable. Proceed to the next step for further instructions.
Step 3: Use the appropriate charging cable
Using the appropriate charging cable is crucial to ensure a proper and efficient charging process for your Belkin power bank. Different power banks have different charging requirements, so it’s important to use the cable that is specifically designed for your power bank model.
Belkin power banks usually come with their own charging cables. These cables are often compatible with multiple devices and feature different connectors on each end. The type of connector you need depends on the power bank model as well as the device you want to charge.
Here are a few common types of charging cables and their corresponding connectors:
- Micro-USB: This is a popular connector used for many Android devices, cameras, and other electronics.
- USB-C: The USB-C connector is becoming increasingly common and is found on newer devices such as smartphones, tablets, and laptops.
- Lightning: Lightning connectors are exclusively used by Apple devices like iPhones, iPads, and iPods.
Before connecting the cable to your power bank, make sure you have the correct connector on both ends. If you’re unsure, check the user manual or the packaging of your power bank for the appropriate cable.
Using the wrong cable can result in slow charging or even damage to your power bank and devices. Therefore, it’s always better to double-check and use the cable recommended by Belkin for optimal charging performance.
Once you have the correct charging cable, proceed to the next step for instructions on how to connect it to your power bank.
Step 4: Plug in the charging cable to the power bank
Now that you have the appropriate charging cable for your Belkin power bank, it’s time to connect it to the power bank itself. Follow these simple steps:
- Locate the charging port on your power bank. It is usually located on the side or top of the power bank, depending on the model.
- Take the charging cable and insert the appropriate connector into the charging port of your power bank. Make sure the connector fits securely and snugly into the port.
- Gently push the connector into the port until it is fully inserted. You should feel a satisfying click or connection.
- Double-check that the cable is firmly plugged in and there are no loose connections or wiggle. A secure connection is essential for effective charging.
By following these steps, you have successfully plugged in the charging cable into your Belkin power bank, and you’re one step closer to charging it.
Now, it’s time to move on to the next step, where we will connect the other end of the cable to a power source. Keep reading to learn more.
Step 5: Connect the other end of the cable to a power source
With the charging cable securely connected to your Belkin power bank, it’s time to connect the other end of the cable to a power source. Follow these steps:
- Choose the power source that you identified in Step 2. This could be a wall adapter, USB port, or car charger.
- If you’re using a wall adapter, plug it into a nearby wall outlet. If you’re using a USB port or car charger, ensure they are properly connected and functioning.
- Take the end of the charging cable with the appropriate connector and insert it into the corresponding port on your chosen power source. Again, make sure the connector fits securely and snugly into the port.
- Ensure that the cable is firmly plugged in and there are no loose connections. A stable connection is essential for successful charging.
Once you have connected the other end of the charging cable to a power source, the charging process will begin. You may notice LED indicators on your power bank starting to blink or light up, indicating that it is now being charged.
Now that you have connected both ends of the charging cable to the power bank and the power source, you’re ready to move on to the next step, where we will confirm that the power bank is indeed charging. Read on to learn more.
Step 6: Confirm the power bank is charging
After connecting your Belkin power bank to a power source, it’s important to confirm whether the power bank is charging properly or not. This will ensure that the charging process is initiated and your power bank can replenish its battery effectively. Follow these steps to confirm that your power bank is charging:
- Observe the LED indicators on your power bank. These indicators are typically located on the front or top of the power bank and provide information about the charging status.
- Refer to the user manual or packaging of your power bank to understand the meaning of the LED indicators. In most cases, a steady or blinking light indicates that the power bank is charging.
- Wait for a few seconds, and if the LED indicators start to blink or change color, it’s a positive sign that your power bank is indeed charging.
- In some cases, your power bank may have a specific button that you need to press to activate the charging process. Refer to the user manual for any additional instructions on confirming the charging status.
- If you’re still unsure whether your power bank is charging or not, leave it connected to the power source for a few minutes and check the LED indicators again. The indicators should show a progressing charging status.
Once you have confirmed that your Belkin power bank is charging, you can move on to the next step, where we will discuss monitoring the charging progress. Keep reading to learn more.
Step 7: Monitor the charging progress
Once your Belkin power bank is successfully charging, it’s important to monitor the charging progress to ensure that it reaches its full capacity. Here are a few ways to monitor the charging progress:
- Keep an eye on the LED indicators on your power bank. These indicators may flash or change color to show the level of charge. As the power bank charges, you may notice the LED indicators progressing or lighting up one by one.
- Use a compatible device that is connected to the power bank to monitor the charging progress. Some power banks have built-in features or apps that allow you to check the current battery level from your device’s screen.
- Set a timer or reminder to periodically check the charging progress. This can help you keep track of how long the power bank has been charging and how much longer it may need to reach a full charge.
- Avoid overcharging your power bank. Once it reaches 100% or the LED indicators indicate a full charge, unplug it from the power source to prevent overcharging, which can affect the overall battery life.
Monitoring the charging progress will give you an idea of how much time it takes for your power bank to charge fully. This knowledge will be useful for future charging needs and planning your usage accordingly.
Continue to the next step, where we will discuss how to safely disconnect the power bank once it is fully charged.
Step 8: Disconnect the power bank once fully charged
Once your Belkin power bank has reached its full capacity and is fully charged, it’s important to disconnect it from the power source to ensure its longevity and safety. Follow these steps to safely disconnect your power bank:
- Check the LED indicators on your power bank. If all the lights are solid or indicate a full charge, it means that your power bank has reached its maximum capacity.
- Unplug the charging cable from the power source. This could be a wall adapter, USB port, or car charger.
- Gently remove the charging cable from the power bank by pulling it out from the charging port.
- Double-check that the cable is fully detached from the power bank and there are no loose connections. This will ensure that no power is being drawn unnecessarily.
It is important to disconnect your power bank once it is fully charged to avoid overcharging, which can negatively impact the battery’s performance and lifespan. Overcharging may also pose a safety risk.
By following these steps, you have successfully charged your Belkin power bank and disconnected it from the power source. Your power bank is now ready to use, providing you with a portable power supply for your electronic devices whenever you need it.
Remember to store your power bank safely and in appropriate conditions when not in use, as this will help maintain its overall performance and longevity.
Conclusion
Charging your Belkin power bank is a simple process that ensures you always have a reliable power source for your electronic devices. By following the step-by-step instructions outlined in this article, you can efficiently charge your power bank and keep it ready for use whenever you need it.
Remember to start by checking the battery level of your power bank before beginning the charging process. This will help you determine if it needs to be charged or not.
Next, connect your power bank to a suitable power source using the appropriate charging cable. Ensure that the cable is securely connected to both the power bank and the power source for a stable and reliable charging process.
Once connected, confirm that the power bank is charging by observing the LED indicators or any designated charging features. These indicators will give you valuable information about the charging progress and the status of your power bank.
Continue to monitor the charging progress and avoid overcharging your power bank. Once it reaches its full capacity, safely disconnect it from the power source to preserve its battery life and ensure its longevity.
By following these steps and taking care of your power bank, you can confidently rely on your Belkin power bank to keep your devices charged and ready to use, whether you’re on a trip, at work, or simply on the go.
So, go ahead and charge your Belkin power bank with confidence and enjoy the convenience of having a portable power supply at your fingertips!