Overview
Changing the Wi-Fi password on your Mediacom router is an essential step to ensure the security of your internet connection. It prevents unauthorized access and helps protect your personal information from being compromised. Thankfully, the process of changing the password is relatively straightforward, and you can do it yourself without the need for technical expertise.
In this article, we will guide you through the step-by-step process of changing your Mediacom Wi-Fi password. We will explain how to access the router’s settings, locate the Wi-Fi password settings, and apply the changes. Additionally, we will provide tips on reconnecting your devices to the network after the password change.
Before we dive into the process, it is essential to note that Mediacom routers come in different models, and the exact steps to change the Wi-Fi password may vary slightly. However, the general principles remain the same, and we will provide enough guidance to help you navigate through the process regardless of your specific router model.
It is also worth mentioning that changing the Wi-Fi password will disconnect all devices connected to your network. Therefore, you will need to reconnect your devices using the new password after completing the password change process. This ensures that only authorized users can access your Wi-Fi network.
Now that you have a general understanding of what to expect, let’s get started with the step-by-step instructions on changing the Wi-Fi password on your Mediacom router.
Step 1: Accessing the Mediacom Router Settings
Before you can change the Wi-Fi password on your Mediacom router, you need to access the router’s settings. To do this, follow the steps below:
- Ensure that you are connected to the Mediacom Wi-Fi network. You can do this by connecting to the Wi-Fi network using your computer or mobile device.
- Open a web browser of your choice, such as Google Chrome, Mozilla Firefox, or Microsoft Edge.
- In the address bar of the web browser, type in the default IP address for Mediacom routers, which is usually “192.168.0.1” or “192.168.1.1”. Press Enter.
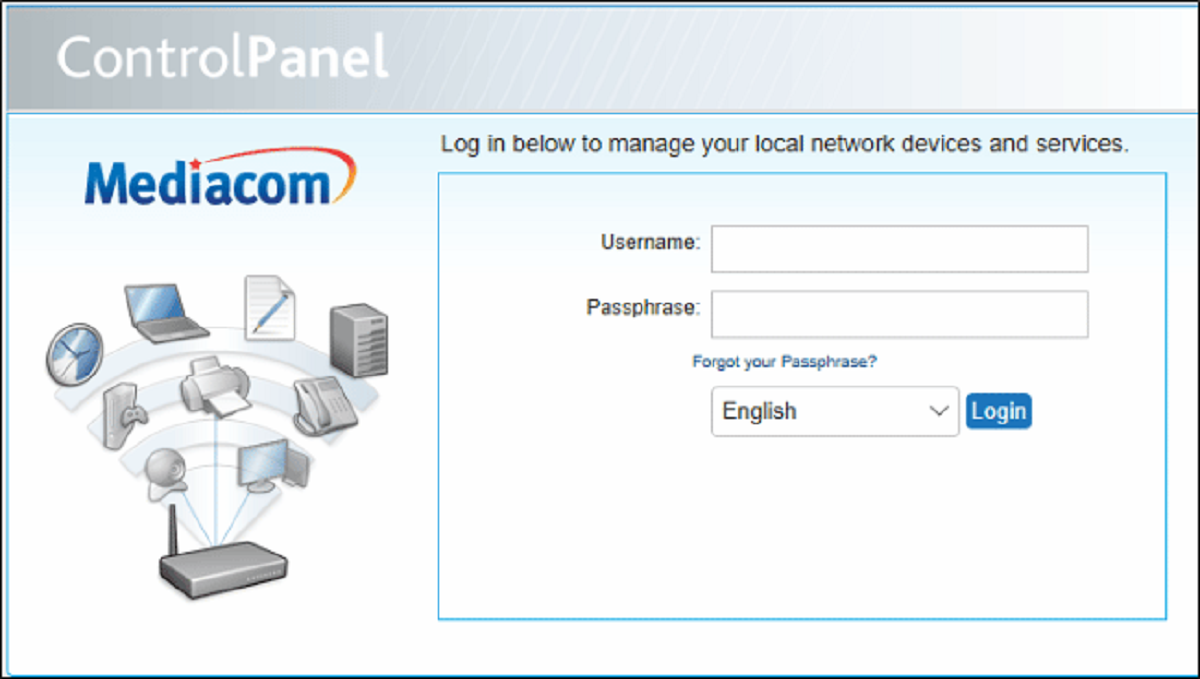
- A login page will appear, prompting you to enter your router’s username and password. If you have not changed these default login credentials, you can find them on the router itself or in the documentation provided by Mediacom.
- Enter the username and password into the corresponding fields and click on the Login or Submit button to proceed.
- If the login credentials are correct, you will be redirected to the router’s admin panel or settings page.
Congratulations! You have successfully accessed the Mediacom router’s settings, and now you can proceed to the next step of changing the Wi-Fi password. In the next section, we will guide you through the process of logging into the router’s admin panel.
Step 2: Logging into the Router’s Admin Panel
After accessing the Mediacom router’s settings page, the next step is to log into the router’s admin panel. Here’s how you can do it:
- On the router’s settings page, you will see a login prompt asking for your username and password.
- Enter the username and password in the respective fields. If you haven’t changed them from the default settings, you can find them on the label attached to the router or in the documentation provided by Mediacom.
- Click on the Login or Submit button to proceed.
- If the login credentials are correct, you will be granted access to the router’s administrative panel.
It is important to note that changing the login password for the router’s admin panel is also crucial to enhance the security of your network. If you are using the default username and password, it is highly recommended to change them to prevent unauthorized access.
By successfully logging into the router’s admin panel, you are now ready to move on to the next step: locating the Wi-Fi settings. This will allow you to change the Wi-Fi password for your Mediacom router. We will cover this in the following section.
Step 3: Locating the Wi-Fi Settings
Once you have logged into the router’s admin panel, the next step is to locate the Wi-Fi settings. Here’s how you can do it:
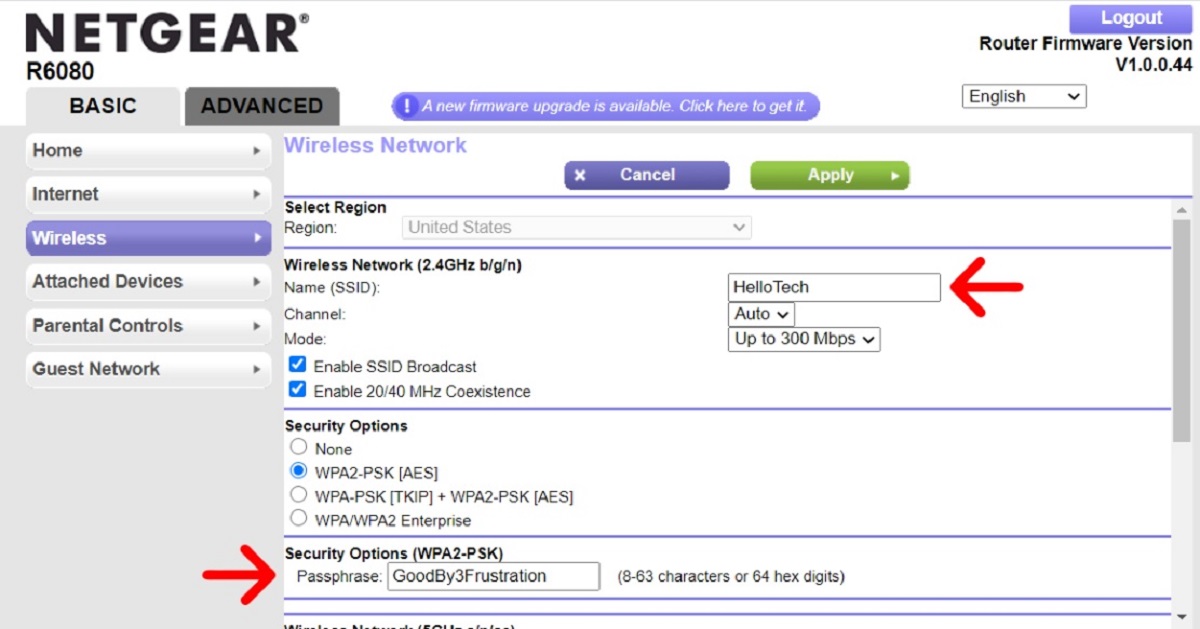
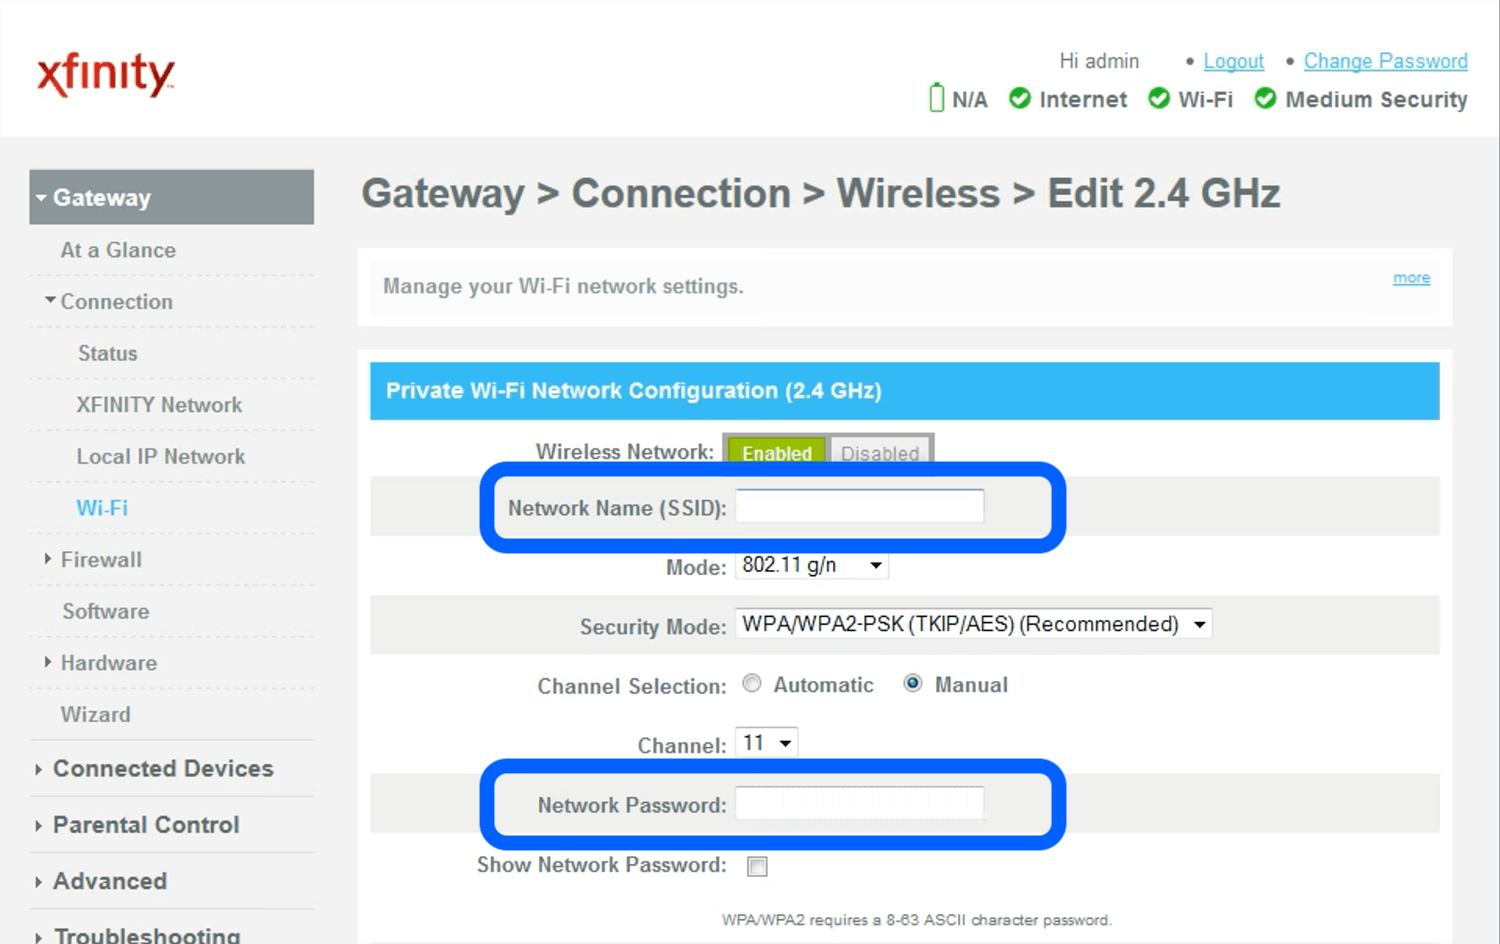
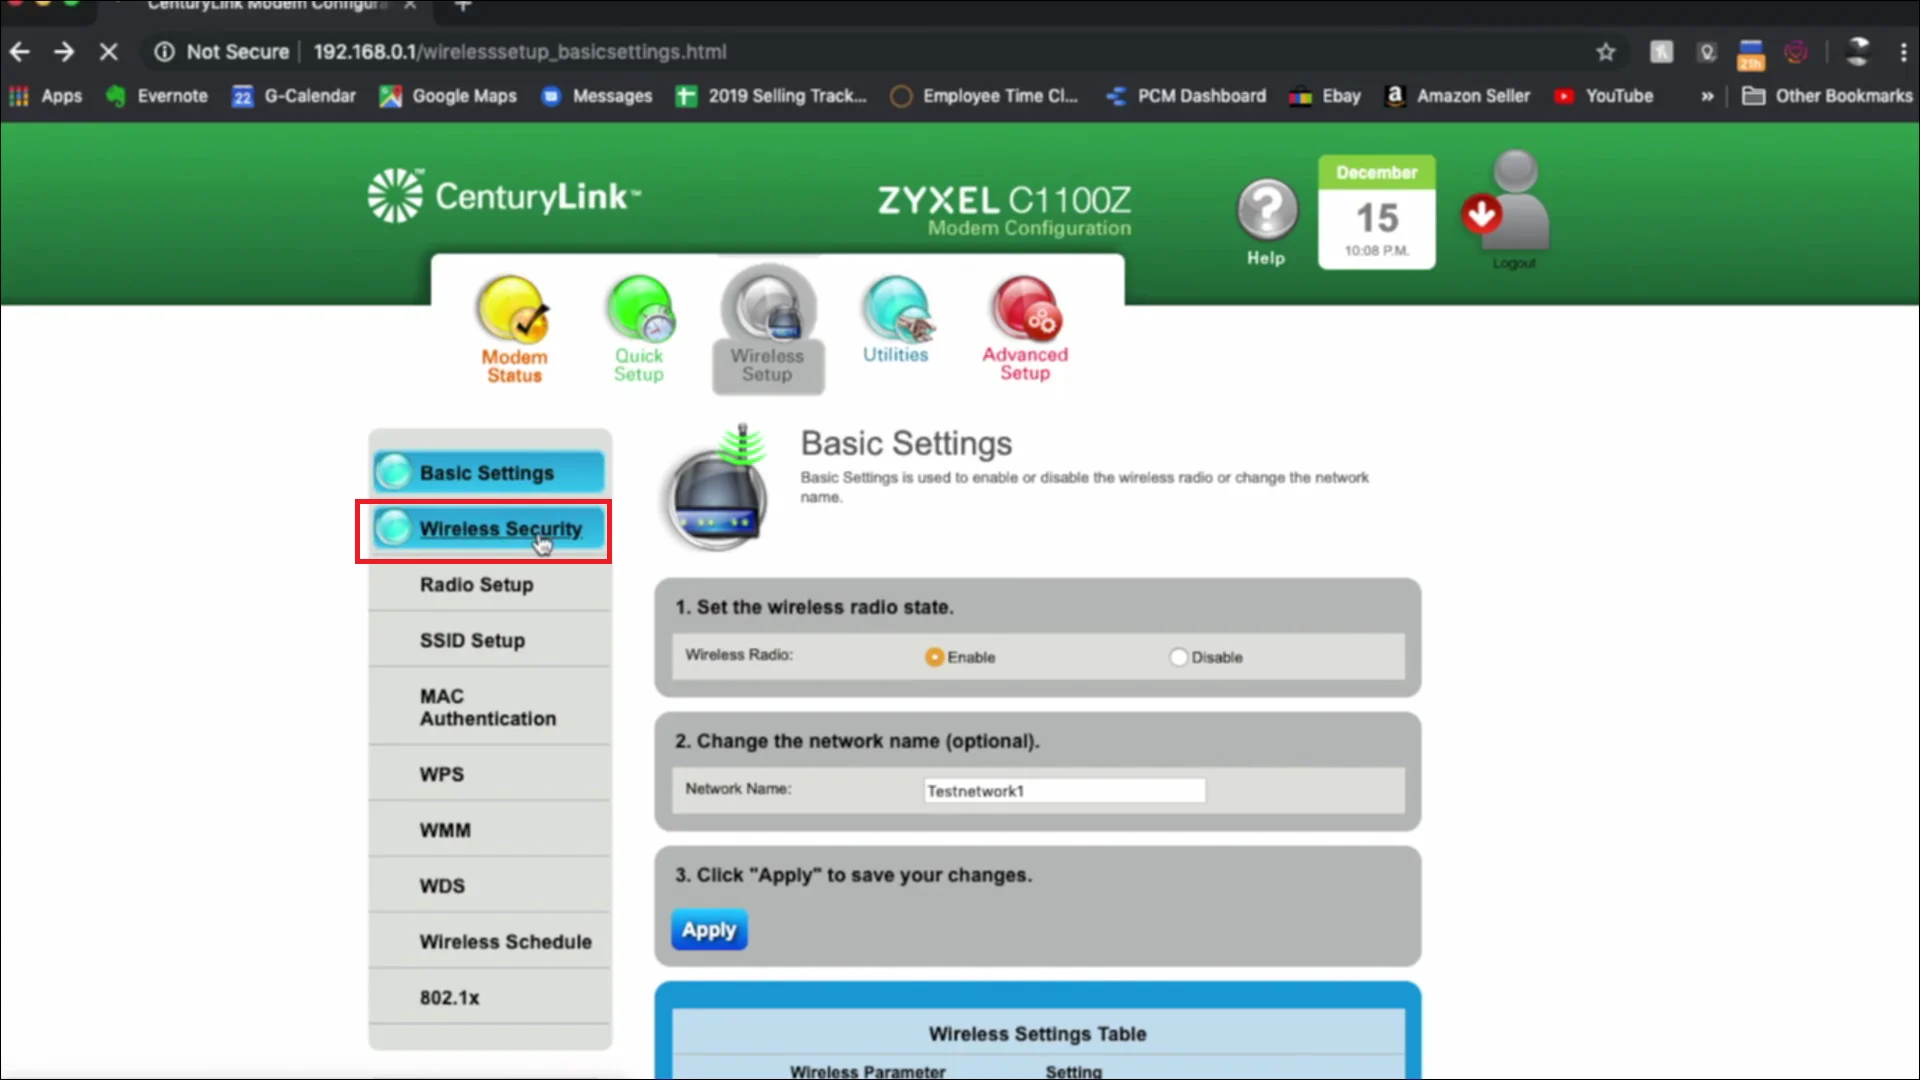
- Look for a tab or menu option labeled “Wireless,” “Wi-Fi,” or “Network Settings.” The exact label may vary depending on your router model.
- Click on the tab or menu option to access the Wi-Fi settings.
- Within the Wi-Fi settings, you will find different options related to your wireless network, including the SSID (network name) and the current Wi-Fi password.
- Take note of the current Wi-Fi password, as you will need it when changing the password.
It is always a good practice to choose a strong and unique password that includes a combination of letters, numbers, and special characters. This helps to increase the security of your Wi-Fi network and makes it harder for unauthorized users to guess or access your network.
Now that you have located the Wi-Fi settings and have noted down the current password, you can proceed to the next step: changing the Wi-Fi password. We will cover this in detail in the following section.
Step 4: Changing the Wi-Fi Password
Changing the Wi-Fi password on your Mediacom router helps protect your network from unauthorized access. Here’s how you can change the Wi-Fi password:
- Within the Wi-Fi settings, look for an option to change the Wi-Fi password. This option may be labeled as “Password,” “Security Key,” or something similar.
- Click on the option to proceed with changing the password.
- In the password field, enter your new desired Wi-Fi password. Make sure to choose a strong and unique password that includes a combination of letters, numbers, and special characters.
- Optional: Some routers may have a password strength indicator that shows the strength of your chosen password. If available, take note of the indicator and try to choose a password that is considered strong or secure.
- After entering the new password, confirm the password by re-entering it in the designated field.
- Save or apply the changes to update the Wi-Fi password.
It is important to remember the new Wi-Fi password as you will need to provide it to all devices that want to connect to your network.
Once you have successfully changed the Wi-Fi password, you can move on to the next step: applying the settings to save the changes. We will cover this in detail in the upcoming section.
Step 5: Applying the Settings
After changing the Wi-Fi password on your Mediacom router, the next step is to apply the settings to save the changes. This ensures that the new password is updated and in effect. Here’s how you can apply the settings:
- Look for a button or option that allows you to save or apply the changes within the Wi-Fi settings page.
- Click on the save or apply button to apply the new Wi-Fi password.
- Wait for the changes to be saved and applied. This may take a few moments, during which your router may reboot or restart.
- Once the changes are applied, you will receive a notification or confirmation message indicating that the settings have been successfully updated.
Congratulations! You have successfully changed the Wi-Fi password on your Mediacom router and applied the new settings. Your network is now secured with a stronger password.
However, there is one final step remaining: reconnecting your devices to the Wi-Fi network using the new password. We will cover this important step in the next section to ensure that all your devices can access the network without any issues.
Step 6: Reconnecting Devices to the Wi-Fi Network
After changing the Wi-Fi password on your Mediacom router, you need to reconnect your devices to the network using the new password. Follow the steps below to reconnect your devices:
- On each device that was previously connected to the Wi-Fi network, navigate to the Wi-Fi settings or network settings.
- Find the name of your Wi-Fi network (SSID) in the list of available networks.
- Select your Wi-Fi network and click on the Connect or Join button.
- Enter the new Wi-Fi password that you set in the previous steps.
- Click on the Connect or Join button to connect to the network.
- Wait a few moments for the device to establish a connection with the Wi-Fi network.
- Repeat these steps for each device that you want to connect to the network.
It is normal for devices to take a little time to reconnect to the network after changing the Wi-Fi password. If any devices fail to connect or encounter issues, double-check that you have entered the correct password and repeat the steps.
By reconnecting your devices using the new Wi-Fi password, you can ensure that only authorized users can access your network and enjoy a secure browsing experience.
With all devices reconnected to the Wi-Fi network, you have successfully completed the process of changing the Wi-Fi password on your Mediacom router. Your network is now protected with a new, more secure password.
Conclusion
Changing the Wi-Fi password on your Mediacom router is a simple yet important task that helps secure your network and protects your personal information from unauthorized access. By following the step-by-step instructions outlined in this guide, you can easily change the Wi-Fi password and enhance the security of your network.
We began by providing an overview of the importance of changing the Wi-Fi password and the general steps involved in the process. Then, we guided you through each step, including accessing the router’s settings, logging into the admin panel, locating the Wi-Fi settings, changing the password, applying the settings, and reconnecting devices to the network.
Remember, it is crucial to choose a strong and unique Wi-Fi password, combining letters, numbers, and special characters, to maximize security. Additionally, be sure to keep the new password in a safe place and update it periodically for added protection.
By changing the Wi-Fi password and regularly updating it, you can minimize the risk of unauthorized access and protect your network and personal information from potential threats.
Now that you are equipped with the knowledge and understanding of how to change the Wi-Fi password on your Mediacom router, take action to ensure the security of your network. Safeguard your internet connection and enjoy a safe and reliable online experience.


