Introduction
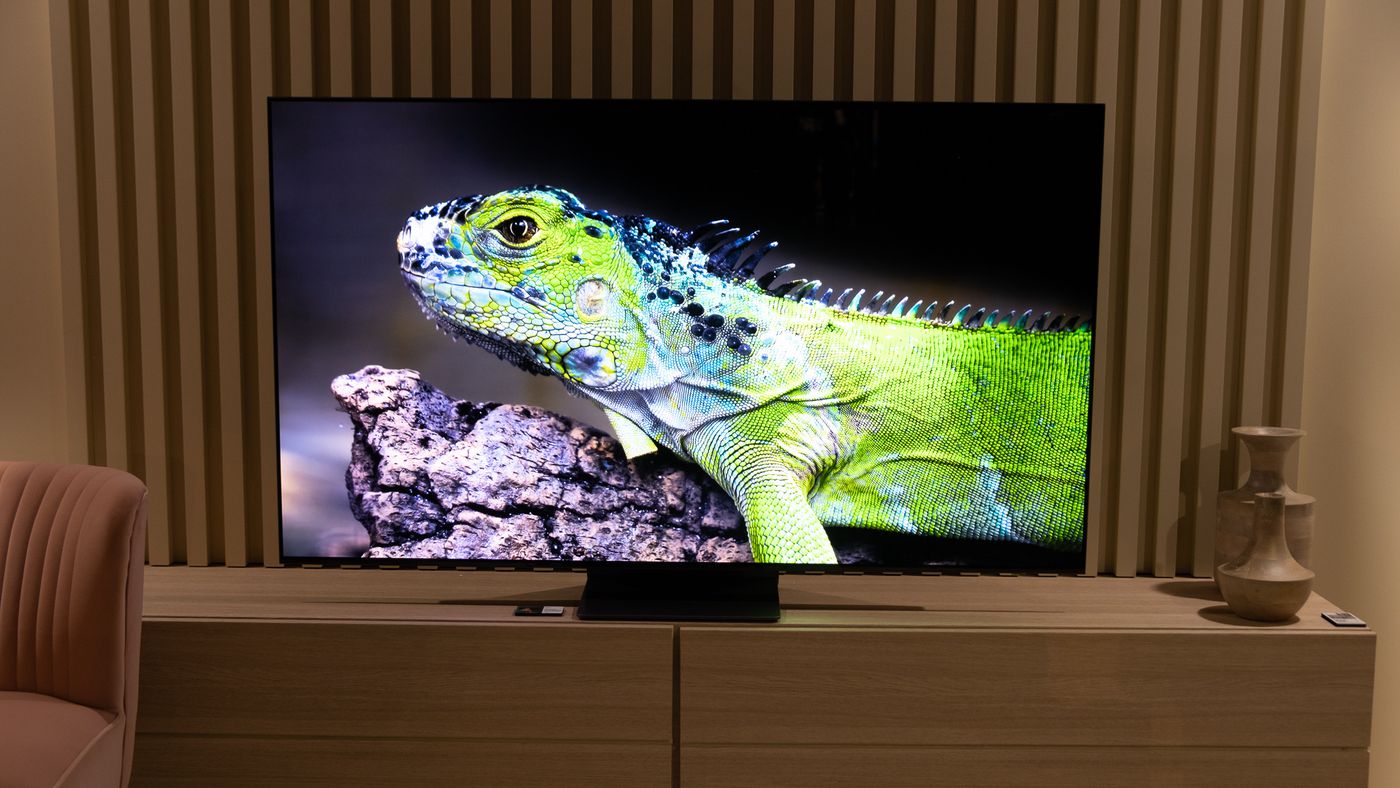
Welcome to the world of LG OLED TVs, where stunning picture quality meets advanced technology. If you’re the proud owner of an LG OLED TV, you’re already experiencing the breathtaking visual experience it delivers. However, did you know that you can further enhance your viewing experience by adjusting the HDMI settings on your LG OLED TV?
Whether you’re a movie buff, a gamer, or simply love watching your favorite TV shows, understanding and optimizing the HDMI settings can make a significant difference in picture and sound quality. The HDMI (High-Definition Multimedia Interface) is a standard connection that allows you to transmit high-quality audio and video signals from your devices to your TV.
By fine-tuning the HDMI settings on your LG OLED TV, you can get the most out of your content, ensuring vibrant colors, sharp details, and immersive audio. However, it’s important to note that each HDMI input on your TV can have its own settings, so make sure to adjust them accordingly based on your specific needs.
In this article, we’ll explore the different types of HDMI settings available on your LG OLED TV and guide you through the process of accessing and adjusting them. Whether you’re looking to enhance picture quality, adjust aspect ratio, enable HDMI deep color, optimize black levels, or fine-tune picture and sound settings, we’ll provide you with the necessary steps.
So, if you’re ready to take your viewing experience to the next level, let’s dive into the world of HDMI settings and discover how to make the most out of your LG OLED TV!
Why Adjusting HDMI Settings on LG OLED TV is Important
Adjusting the HDMI settings on your LG OLED TV is crucial for optimizing your viewing experience and getting the best possible picture and sound quality. With the ability to customize various aspects of the HDMI settings, you can tailor your TV’s performance specifically to your preferences and the content you’re watching. Here are a few reasons why adjusting HDMI settings on your LG OLED TV is important:
1. Enhanced Picture Quality: By adjusting the HDMI settings, you can fine-tune parameters such as picture mode, aspect ratio, black levels, and more. This customization allows you to enhance the colors, contrast, and sharpness of the images on your screen. Whether you’re watching a movie, playing a video game, or streaming your favorite shows, optimizing the picture quality ensures a visually captivating experience.
2. Optimized Aspect Ratio: Adjusting the aspect ratio in the HDMI settings is crucial for preserving the correct proportions of the content you’re watching. Whether you prefer the standard 16:9 aspect ratio for widescreen content or need to switch to a different ratio, such as 4:3 for older TV shows or 21:9 for cinematic films, correctly setting the aspect ratio ensures that images aren’t distorted or stretched on your LG OLED TV screen.
3. Better Color Depth with HDMI Deep Color: Enabling HDMI Deep Color allows your LG OLED TV to display a wider range of colors, resulting in a more immersive and lifelike visual experience. With HDMI Deep Color, you’ll notice more vibrant hues, smoother gradients, and a greater level of detail in each frame. This feature is particularly beneficial when watching HDR (High Dynamic Range) content, as it enables the TV to reproduce the full color spectrum provided by the source.
4. Improved Black Levels: LG OLED TVs are renowned for their exceptional black levels, which contribute to superior contrast and overall picture quality. However, adjusting the HDMI settings allows you to control the black level output even further. By fine-tuning the black levels, you can ensure that dark scenes appear rich and nuanced without any loss of detail, providing a more immersive viewing experience.
5. Customized Picture and Sound Settings: LG OLED TVs offer a wide range of advanced settings to customize the picture and sound according to your preferences. From adjusting color temperature and noise reduction to enabling motion smoothing and adjusting the audio equalizer, optimizing these settings in the HDMI menu allows you to tailor the viewing experience to your liking.
By taking the time to adjust the HDMI settings on your LG OLED TV, you can unlock the full potential of your device and enjoy a truly immersive and personalized viewing experience for all your favorite content.
Types of HDMI Settings on LG OLED TV
Your LG OLED TV offers a variety of HDMI settings that allow you to customize and optimize your viewing experience. Each setting plays a significant role in enhancing different aspects of picture and sound quality. Here are the key HDMI settings you’ll find on an LG OLED TV:
1. Picture Mode: This setting allows you to choose from various predefined picture modes, such as Standard, Cinema, Sports, or Game. Each mode applies different settings to optimize the picture quality based on the content you’re watching. For example, the Cinema mode might enhance the contrast and color accuracy for movies, while the Game mode may prioritize low input lag for a smoother gaming experience.
2. Aspect Ratio: The aspect ratio setting determines how the content will be displayed on your LG OLED TV screen. You can choose from options like 16:9 (widescreen), 4:3 (standard television), or even 21:9 (cinematic). Selecting the correct aspect ratio ensures that images don’t appear stretched or distorted.
3. HDMI Deep Color: Enabling HDMI Deep Color allows your LG OLED TV to support a wider color gamut, providing more vivid and accurate colors. This setting is particularly beneficial when watching HDR (High Dynamic Range) content, as it enables the TV to reproduce a greater range of colors and shades.
4. HDMI Black Level: The HDMI Black Level setting determines the range of black levels that your LG OLED TV will display. You can choose between High and Low settings to optimize the contrast and detail in darker scenes. Experimenting with this setting is crucial to ensure that black levels appear deep and rich without losing any shadow details.
5. Picture adjustments: LG OLED TVs offer a range of picture adjustment options to fine-tune the visuals to your liking. These settings include contrast, brightness, sharpness, color temperature, noise reduction, and more. Adjusting these parameters allows you to customize the picture quality according to your preferences and the content you’re watching.
6. Sound adjustments: LG OLED TVs also provide various sound adjustment options to optimize audio performance. These settings include equalizer controls, sound mode selection (such as Standard, Music, or Movie mode), and additional features like surround sound simulation. Tailoring the sound settings ensures that you have a rich and immersive audio experience that complements the visuals.
By understanding and utilizing these different HDMI settings on your LG OLED TV, you can tailor your viewing experience and unlock the full potential of your device. Experimenting with these settings and finding the optimal configuration for your preferences and content types will result in a truly immersive and satisfying viewing experience.
How to Access HDMI Settings on LG OLED TV
Accessing the HDMI settings on your LG OLED TV is a straightforward process that allows you to make the necessary adjustments to optimize your viewing experience. Here’s a step-by-step guide on how to access the HDMI settings:
1. Turn on your LG OLED TV: Ensure that your TV is powered on and displaying an image.
2. Open the settings menu: Using your TV remote, press the “Settings” or “Home” button to open the main menu.
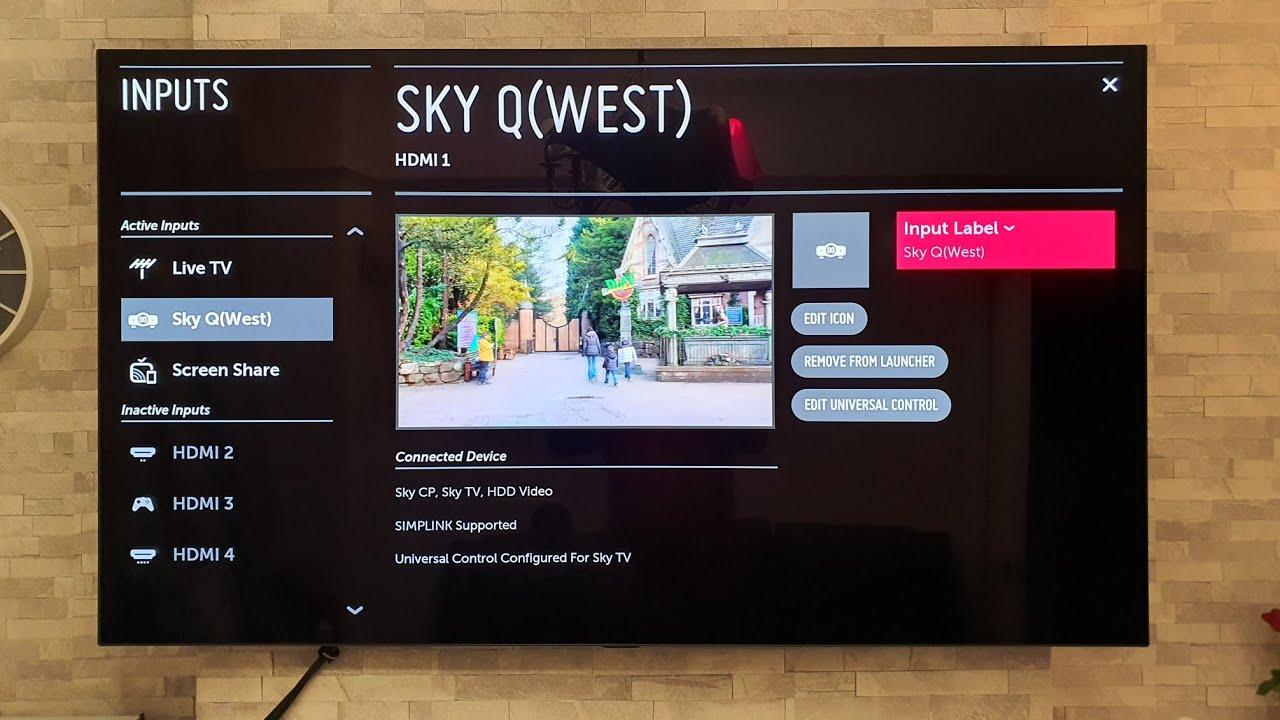
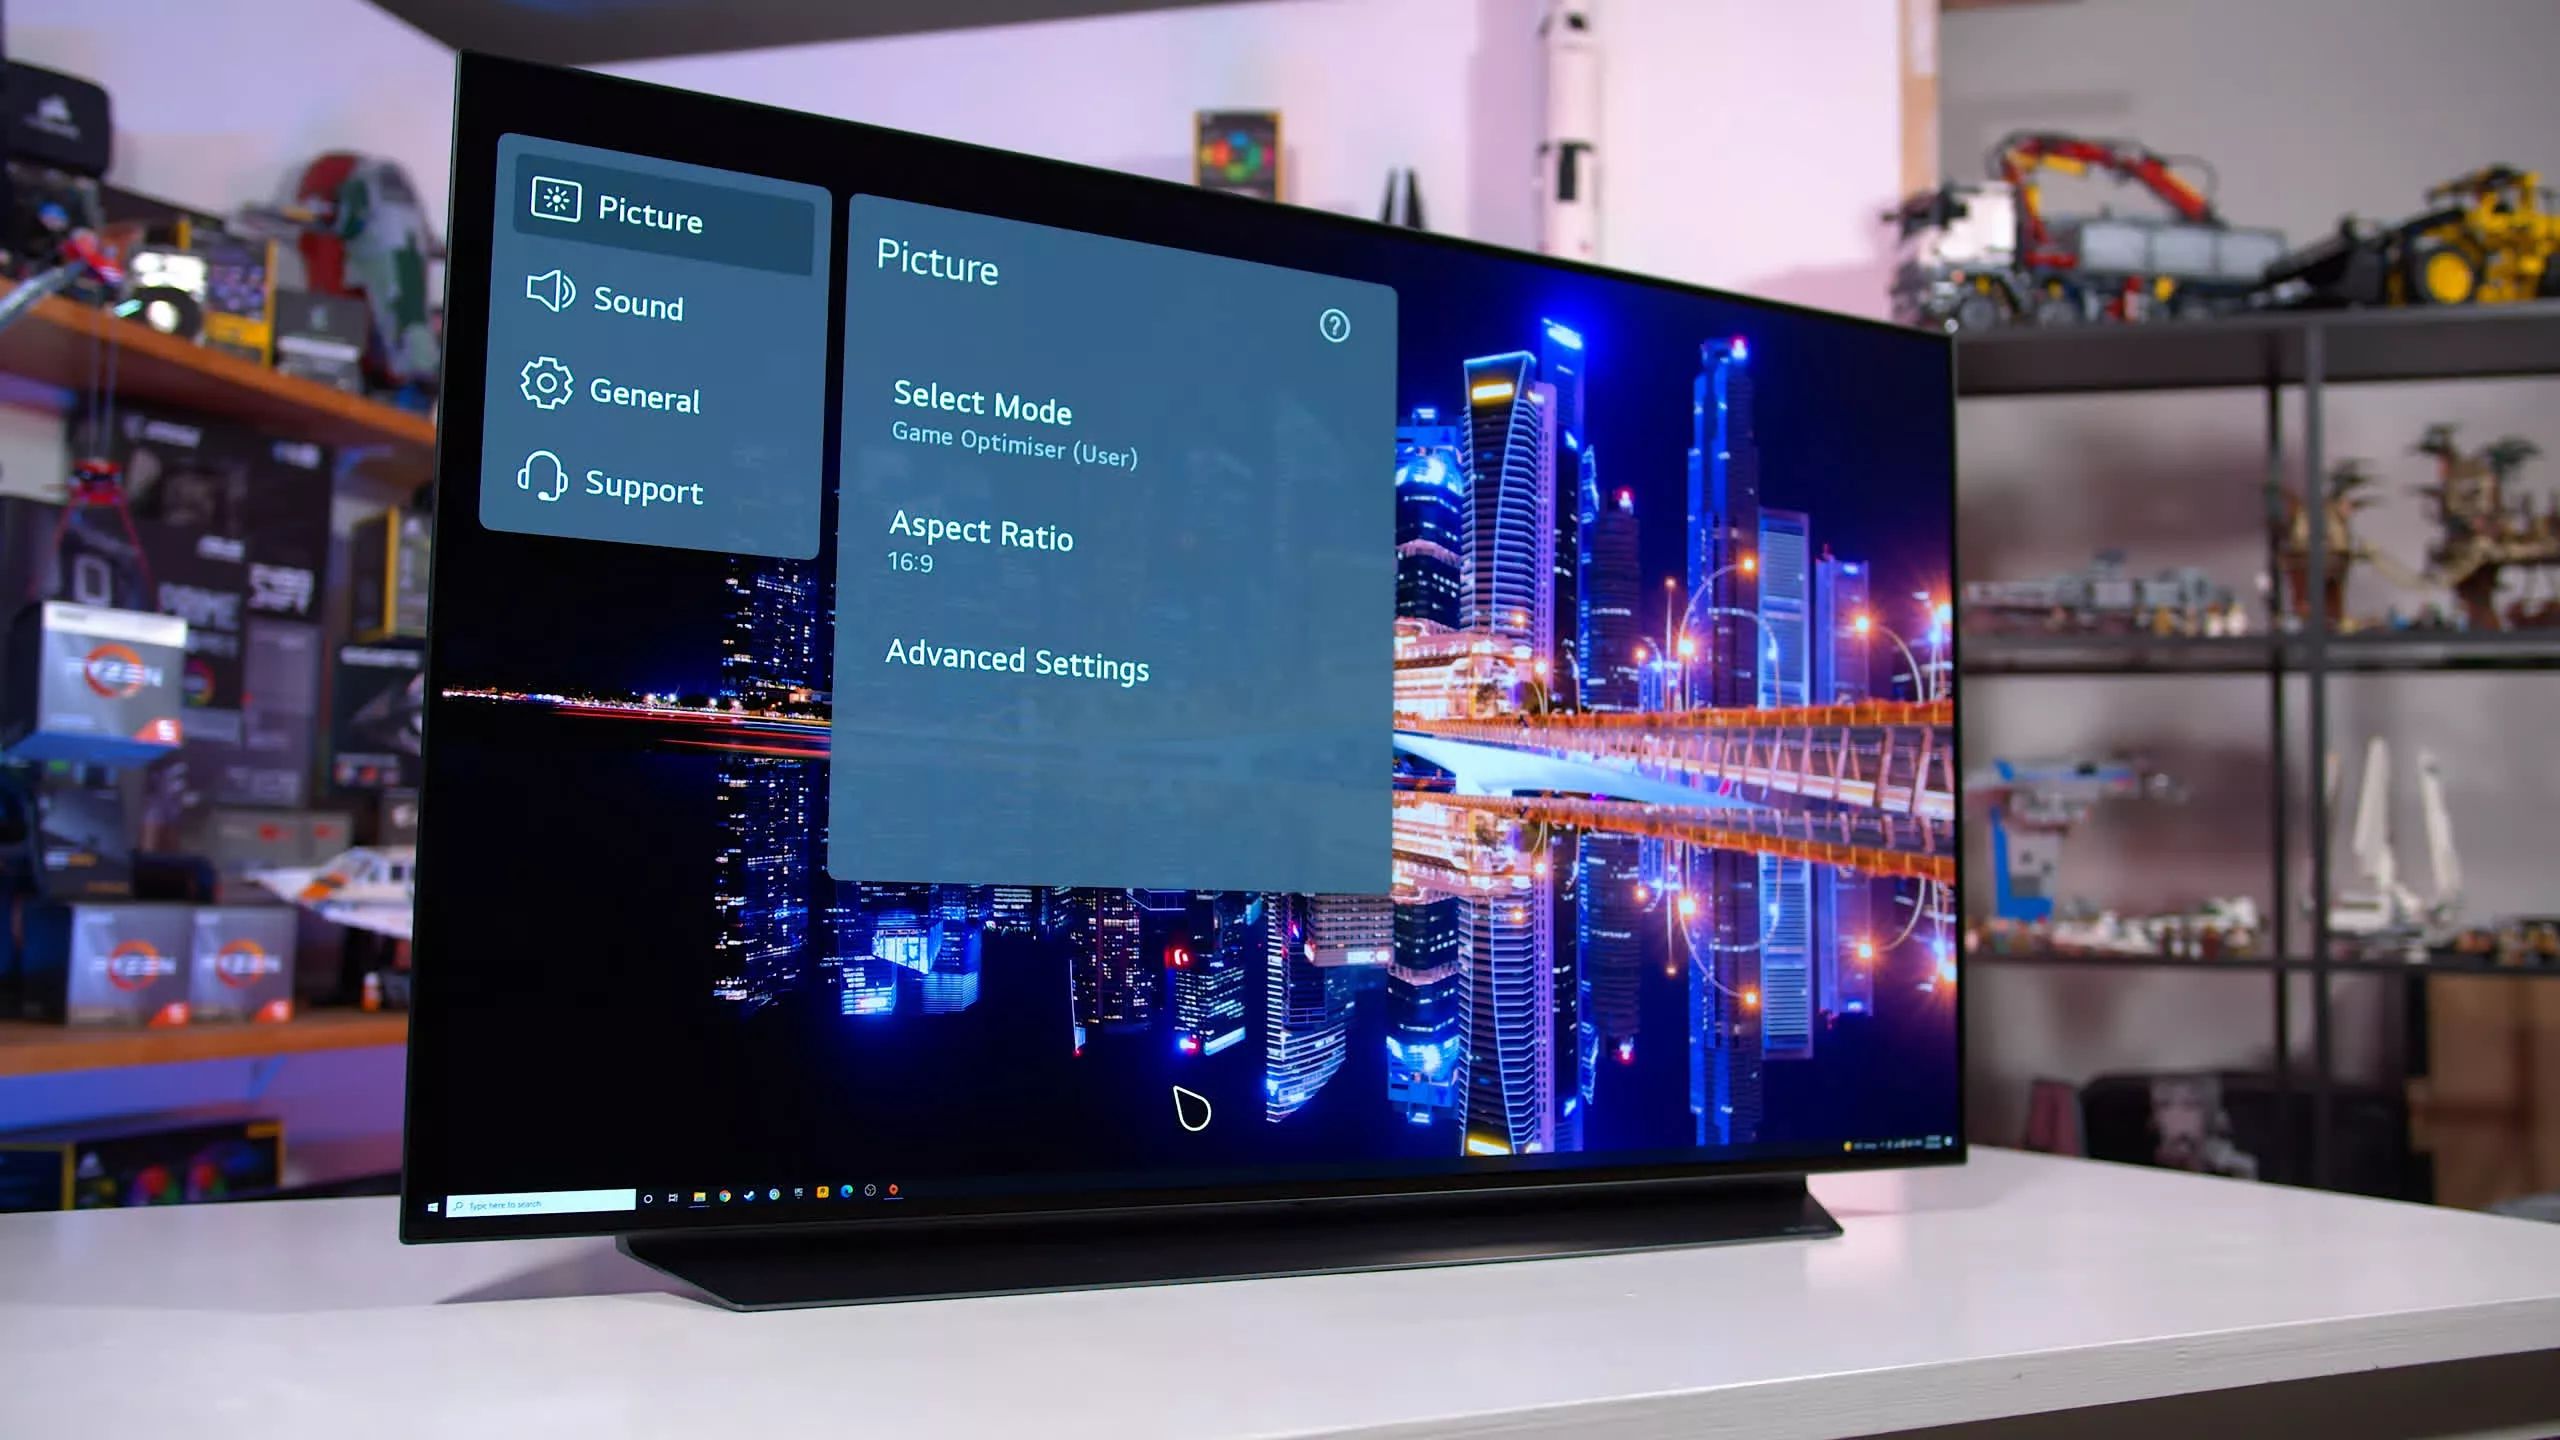
3. Navigate to the HDMI settings: In the settings menu, locate and select the “Picture” or “Image” option. Then, scroll down or navigate to the “HDMI” settings submenu.
4. Select the HDMI input: Your LG OLED TV may have multiple HDMI inputs, usually labeled as HDMI 1, HDMI 2, etc. Use the arrow keys on your remote to select the HDMI input you want to adjust the settings for.
5. Access the HDMI settings: Once you have selected the desired HDMI input, press the “Enter” or “OK” button on your remote to access the individual HDMI settings for that input.
6. Adjust the settings: Depending on your LG OLED TV model, you will see a range of HDMI settings that you can customize. Use the arrow buttons on your remote to navigate through the settings and the “Enter” or “OK” button to make changes or selections.
7. Save your changes: After making adjustments to the HDMI settings, remember to save your changes. Use the on-screen prompts or buttons on your remote to confirm and save your settings.
8. Repeat for other HDMI inputs: If you have multiple HDMI inputs on your LG OLED TV, repeat the steps above for each input to adjust the settings accordingly.
It’s worth noting that the specific menu names and navigation options may vary slightly depending on the model of your LG OLED TV. Additionally, your TV’s remote may have dedicated buttons or shortcuts for accessing the HDMI settings, so refer to your TV’s user manual for any additional instructions specific to your device.
By accessing and adjusting the HDMI settings on your LG OLED TV, you can optimize the picture, sound, and other parameters to suit your preferences and enjoy a fully customized viewing experience.
Changing Picture Mode in HDMI Settings
One of the key HDMI settings on your LG OLED TV is the ability to change the picture mode. Picture modes allow you to optimize the display settings based on the type of content you’re watching. Here’s how you can change the picture mode in the HDMI settings:
1. Access the HDMI settings as mentioned in the previous section.
2. Select the HDMI input for which you want to change the picture mode.
3. Look for the “Picture Mode” option in the HDMI settings menu and press the “Enter” or “OK” button on your remote to enter the picture mode submenu.
4. Navigate through the available picture modes using the arrow keys on your remote. Typical picture mode options may include Standard, Cinema, Sports, Game, and Vivid.
5. Once you’ve selected the desired picture mode, press the “Enter” or “OK” button to apply the changes.
6. You can also customize the picture mode further by adjusting parameters such as contrast, brightness, sharpness, color temperature, and more. These settings may be available directly within the picture mode submenu or under a separate “Picture Settings” option.
7. Experiment with different picture modes to find the one that best suits the content you’re viewing. For example, the Cinema mode may provide accurate colors and optimal contrast for movies, while the Game mode may offer lower input lag for gaming.
8. Remember to save your changes before exiting the HDMI settings menu.
Changing the picture mode in the HDMI settings allows you to optimize the visuals and ensure that the content you’re watching looks its best. Whether you’re watching a movie, playing games, or enjoying sports, selecting the appropriate picture mode enhances colors, contrast, and overall image quality to deliver a more immersive viewing experience.
It’s worth noting that some LG OLED TVs may also offer advanced picture settings specific to each picture mode. These settings allow you to fine-tune parameters such as gamma, black level, noise reduction, and more within each picture mode. Experimenting with these settings can help you further customize the picture quality to your liking.
Adjusting Aspect Ratio in HDMI Settings
Another important HDMI setting on your LG OLED TV is the ability to adjust the aspect ratio. The aspect ratio determines the proportional relationship between the width and height of the displayed content. By adjusting the aspect ratio, you can ensure that the content is displayed correctly on your TV screen. Here’s how you can adjust the aspect ratio in the HDMI settings:
1. Access the HDMI settings menu as described earlier.
2. Select the HDMI input for which you want to adjust the aspect ratio.
3. Look for the “Aspect Ratio” or “Screen Size” option in the HDMI settings menu and press the “Enter” or “OK” button on your remote to enter the aspect ratio submenu.
4. Navigate through the available aspect ratio options using the arrow keys on your remote. Common aspect ratio options include 16:9 (widescreen), 4:3 (standard television), and 21:9 (cinematic).
5. Choose the desired aspect ratio that best suits the content you’re watching. For example, select 16:9 for most modern widescreen content or 4:3 for older TV shows.
6. It’s important to note that some LG OLED TVs also offer additional aspect ratio options, such as “Original” or “Just Scan,” which display the content in its original aspect ratio without any stretching or cropping.
7. Once you’ve selected the desired aspect ratio, press the “Enter” or “OK” button to apply the changes.
8. If available, you may also have the option to adjust the position or zoom of the content within the selected aspect ratio. These settings allow you to fine-tune how the content is displayed on your screen.
9. Save your changes before exiting the HDMI settings menu.
Adjusting the aspect ratio in the HDMI settings ensures that the content you’re watching is displayed correctly without any distortion or cropping. By choosing the appropriate aspect ratio, you can enjoy a visually pleasing and immersive viewing experience.
It’s important to note that some content may have a fixed aspect ratio, and changing the aspect ratio on your TV won’t have any effect on how that content is displayed. In such cases, the aspect ratio setting in the HDMI settings menu may be disabled or grayed out.
Experimenting with different aspect ratio options allows you to find the best display format for various types of content, ensuring that you’re getting the optimal viewing experience on your LG OLED TV.
Enabling or Disabling HDMI Deep Color
HDMI Deep Color is an advanced feature available on your LG OLED TV that allows it to display a wider range of colors and shades. Enabling HDMI Deep Color enhances the visual experience by delivering more vibrant and accurate colors, especially when watching HDR (High Dynamic Range) content. Here’s how you can enable or disable HDMI Deep Color in the HDMI settings:
1. Open the HDMI settings menu on your LG OLED TV as described earlier.
2. Select the HDMI input for which you want to enable or disable HDMI Deep Color.
3. Locate the “HDMI Deep Color” or “Deep Color Output” option in the HDMI settings menu and press the “Enter” or “OK” button on your remote to enter the Deep Color settings submenu.
4. Toggle the HDMI Deep Color setting to “On” or “Enable” to enable the feature. This allows the TV to support a wider color gamut, resulting in more vivid and accurate colors.
5. If you wish to disable HDMI Deep Color, toggle the setting to “Off” or “Disable”. Disabling this feature will limit the color range to the standard colors supported by the TV.
6. Remember to save your changes before exiting the HDMI settings menu.
Enabling HDMI Deep Color on your LG OLED TV is particularly beneficial when watching HDR content. HDR content is encoded with a wider color gamut, and enabling HDMI Deep Color ensures that your TV can reproduce these rich and vibrant colors accurately.
It’s important to note that not all devices or content may support HDMI Deep Color. Incompatible devices or content may not display correctly or may lose color accuracy when HDMI Deep Color is enabled. If you encounter any issues, consider disabling HDMI Deep Color to revert to the standard color range.
By enabling HDMI Deep Color when watching HDR content, you can enjoy a more immersive viewing experience with enhanced color depth and accuracy on your LG OLED TV. However, it’s recommended to disable this feature for non-HDR content to avoid any color inconsistencies or compatibility issues.
Controlling HDMI Black Level
HDMI Black Level is an important setting on your LG OLED TV that allows you to control the range of black levels displayed on the screen. Adjusting the HDMI Black Level ensures optimal contrast and detail in darker areas of the image. Here’s how you can control the HDMI Black Level in the HDMI settings:
1. Access the HDMI settings menu on your LG OLED TV as mentioned before.
2. Select the HDMI input for which you want to adjust the black level.
3. Look for the “HDMI Black Level” or “Black Level” option in the HDMI settings menu. Press the “Enter” or “OK” button on your remote to enter the black level settings submenu.
4. You will typically find two options: “High” and “Low”. The “High” setting displays a wider range of black levels, while the “Low” setting restricts the black levels closer to pure black.
5. Choose the black level that suits your preference or the content you’re watching. The “High” setting is recommended for most situations, as it preserves more detail in darker scenes.
6. If you’re unsure which black level to select, there may be a “Default” option available that sets the black level to the TV’s recommended setting for the HDMI input.
7. Save your changes before exiting the HDMI settings menu.
Controlling the HDMI Black Level allows you to optimize the contrast and detail of the darker areas of the image on your LG OLED TV. By selecting the appropriate black level, you can ensure that dark scenes appear rich and nuanced without losing any shadow details.
It’s important to note that the optimal black level setting can vary depending on the content you’re watching and the external devices connected to your TV. For example, some devices may output a different black level, and you may need to adjust the HDMI Black Level on your TV accordingly to maintain accurate contrast.
Experimenting with different black level settings and comparing them with the content you’re viewing can help you find the best balance for a visually pleasing and immersive viewing experience.
Remember to adjust the black level individually for each HDMI input on your LG OLED TV, as different devices or sources may require different settings to achieve optimal black levels.
Fine-tuning HDMI Picture Settings
Your LG OLED TV provides a range of advanced picture settings that allow you to fine-tune the visuals to your liking. These settings can be accessed through the HDMI settings menu, giving you precise control over the picture quality. Here’s how you can fine-tune the HDMI picture settings on your LG OLED TV:
1. Open the HDMI settings menu on your LG OLED TV using the steps mentioned earlier.
2. Select the HDMI input for which you want to fine-tune the picture settings.
3. Look for the “Picture Settings” or “Advanced Picture” option in the HDMI settings menu and press the “Enter” or “OK” button on your remote to enter the advanced picture settings submenu.
4. Here, you will find a range of parameters that can be adjusted, such as contrast, brightness, sharpness, color temperature, noise reduction, and more.
5. Use the arrow keys on your remote to navigate through the available settings and make adjustments to suit your preferences.
6. As you make changes, monitor the effect on the displayed image and make further adjustments as needed. You can toggle between different content to check how the settings impact different types of digital media.
7. It’s worth noting that some settings may have preset options, such as “Low,” “Medium,” or “High.” These presets provide a quick way to adjust the parameter without individually fine-tuning each setting.
8. Experiment with different combinations of picture settings to find the optimal configuration that delivers the desired visual experience.
9. Save your changes before exiting the HDMI settings menu.
Fine-tuning the HDMI picture settings allows you to customize the visual aspects of the displayed content on your LG OLED TV. You can adjust parameters like contrast to enhance the difference between light and dark areas, brightness to control overall brightness levels, sharpness to fine-tune image detail, color temperature to achieve warmer or cooler tones, and noise reduction to reduce any digital artifacts.
By accessing these advanced picture settings within the HDMI menu, you have the flexibility to adapt the visuals based on personal preferences and the specific content you’re watching. Tailoring these settings to your liking ensures an immersive and visually pleasing viewing experience.
It’s important to note that while these settings offer customization options, it’s advisable to avoid excessive adjustments that may result in an unnatural or distorted image. Striving for a balance that complements the original content is key to achieving an optimal viewing experience.
Optimizing HDMI Sound Settings
Optimizing the HDMI sound settings on your LG OLED TV is essential for achieving the best audio experience while enjoying your favorite content. Your TV offers various options to customize the sound output and ensure it complements the visuals perfectly. Here’s how you can optimize the HDMI sound settings:
1. Access the HDMI settings menu on your LG OLED TV using the previously mentioned steps.
2. Select the HDMI input for which you want to optimize the sound settings.
3. Look for the “Sound” or “Audio” option in the HDMI settings menu and press the “Enter” or “OK” button on your remote to enter the sound settings submenu.
4. Within the sound settings submenu, you’ll find various options to customize the audio output. These may include sound mode selections (such as Standard, Music, Movie, or Game), equalizer controls, balance adjustments, and additional features like surround sound simulation.
5. Use the arrow keys on your remote to navigate through the available settings and make adjustments according to your preferences.
6. When it comes to sound modes, experiment with different options to find the one that suits the content you’re watching. For example, the Movie mode may enhance dialogue clarity and deliver a more immersive soundstage, while the Music mode could prioritize audio fidelity for music playback.
7. If available, customize the equalizer settings to fine-tune the audio frequencies to your liking. This allows you to enhance or reduce specific frequency ranges to achieve the desired audio balance.
8. Additional features, such as surround sound simulation or advanced audio processing, can provide a more immersive audio experience. Enable or adjust these settings based on the content you’re watching and your audio preferences.
9. Save your changes before exiting the HDMI settings menu.
Optimizing the HDMI sound settings on your LG OLED TV ensures that the audio complements the visual experience, enhancing your overall enjoyment of movies, music, games, and more.
It’s important to consider the acoustic characteristics of your viewing space when adjusting the sound settings. Factors such as room size, furniture placement, and speaker positioning can affect the audio performance. Experimenting with various settings and making adjustments based on your specific setup will help you achieve the best possible sound quality.
Additionally, if you have an external sound system or speakers connected to your LG OLED TV via HDMI, make sure to optimize the audio settings on that device as well to ensure seamless integration and a consistent audio experience.
By customizing the HDMI sound settings on your LG OLED TV, you can create a personalized audio experience that complements the stunning visuals and immerses you in your favorite content.
Conclusion
Adjusting the HDMI settings on your LG OLED TV is crucial for optimizing your viewing experience and ensuring the best possible picture and sound quality. By accessing the HDMI settings menu, you have the ability to customize various aspects of the display and audio to suit your preferences and the content you’re watching.
Throughout this article, we explored the importance of adjusting HDMI settings on your LG OLED TV. We learned about the different types of HDMI settings available, including picture mode, aspect ratio, HDMI Deep Color, HDMI black level, and the ability to fine-tune picture and sound settings.
Changing picture modes allows you to optimize the visuals based on the type of content, while adjusting the aspect ratio ensures that the content is displayed correctly on your screen. Enabling HDMI Deep Color enhances color depth and accuracy, while controlling the HDMI black level allows you to achieve optimal contrast and detail in dark scenes. Fine-tuning the HDMI picture settings and optimizing sound settings further enhance the overall viewing experience.
Remember, each HDMI input on your LG OLED TV can have its own settings, so make sure to adjust them according to your specific needs for each device or content source.
In conclusion, by taking the time to adjust the HDMI settings on your LG OLED TV, you can unlock the full potential of your device and enjoy a truly immersive and personalized viewing experience for all your favorite content. So, explore the HDMI settings menu and tailor your TV’s performance to your preferences, discovering a whole new level of visual and audio excellence.