Introduction
Welcome to our guide on how to change the Caller ID on your Android device. If you’ve ever wondered about the possibility of modifying the Caller ID that appears when you make phone calls, you’ve come to the right place. In this article, we will explore various methods you can use to change your Caller ID on an Android device, along with a discussion on the legality of such actions.
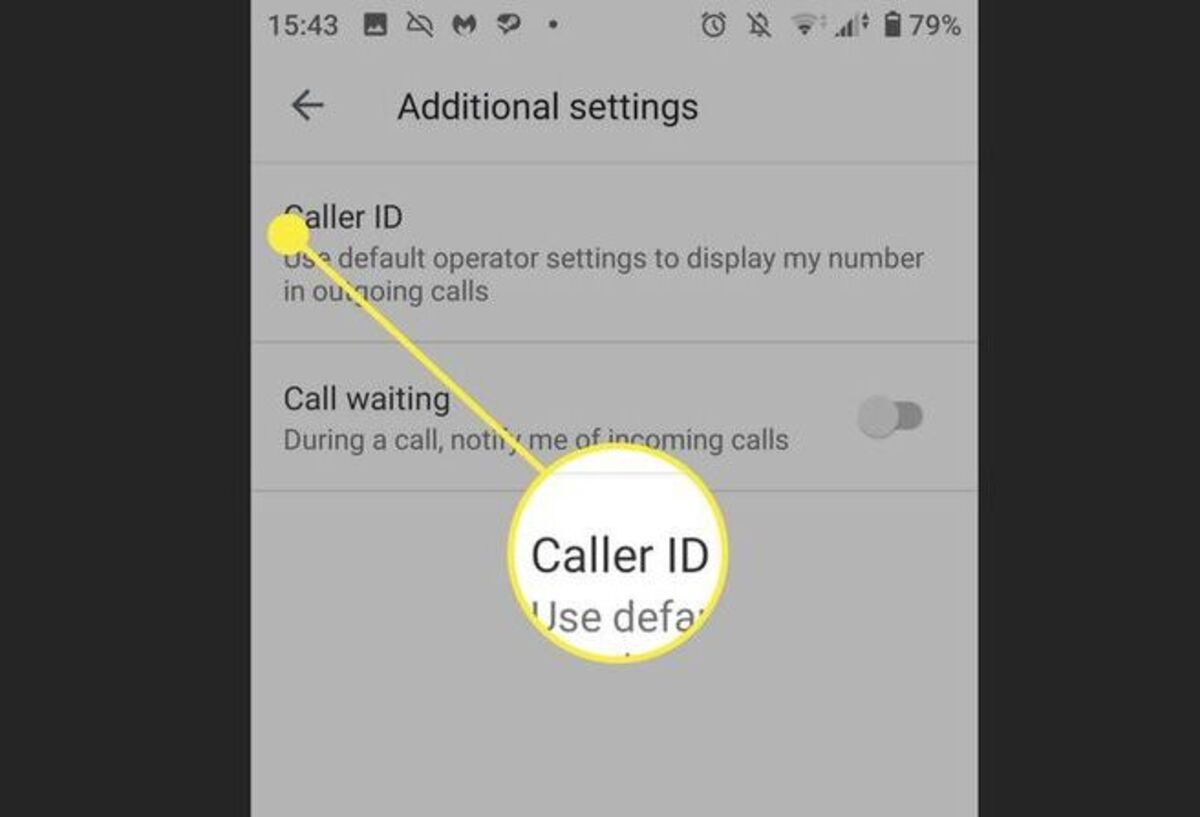
Caller ID is a feature that displays the phone number or name of the person calling you before you answer the call. It allows you to recognize incoming calls and decide whether to answer or ignore them. By default, Android devices use the phone number assigned to your SIM card as the Caller ID, but there are situations where you might want to change it for personal or professional reasons.
Changing your Caller ID can be useful in several scenarios. For instance, if you run a business and you want to display your business number instead of your personal number when making calls to clients or customers, modifying the Caller ID allows you to do just that. Another common use case is when you wish to protect your privacy by hiding your personal phone number and displaying a temporary or virtual number instead.
Before we dive into the methods, it’s important to address the legality of changing your Caller ID. While changing your Caller ID is technically feasible, it’s essential to understand that there may be legal restrictions depending on your location and the purpose for which you are changing it. Misusing Caller ID spoofing for illegal activities, such as fraud or harassment, is strictly prohibited and can result in severe consequences.
In this guide, we will focus on legitimate methods to change your Caller ID on Android devices. These methods include using Caller ID spoofing apps, contacting your carrier, utilizing Google Voice, using third-party calling services, or even rooting your Android device.
Now that we’ve set the stage, let’s explore each of these methods and see how you can change your Caller ID on Android devices.
Why Would You Want to Change Your Caller ID?
Changing your Caller ID on your Android device can serve various purposes depending on your needs and circumstances. Let’s take a closer look at some of the common reasons why individuals and businesses may want to modify their Caller ID:
1. Protecting Privacy: One of the main reasons people choose to change their Caller ID is to maintain their privacy. By using a different number, you can prevent others from recognizing your real phone number and potentially tracing it back to your personal information.
2. Business Use: If you own a business or work in sales, it’s common to use a dedicated business phone number when contacting clients or customers. By changing your Caller ID to display your business number, you create a more professional image and maintain a clear distinction between personal and professional calls.
3. Anonymity: Sometimes, you may want to make a call without revealing your actual identity. Changing your Caller ID allows you to mask your true identity, which can be useful in situations where you want to maintain confidentiality or conduct undercover investigations.
4. Temporary Numbers: In some cases, using a temporary or disposable phone number can be beneficial. This is particularly useful when engaging in online transactions, advertising, or any situation where you want to avoid sharing your actual phone number for long-term communication.
5. Virtual Numbers: Virtual phone numbers provide an additional layer of communication and convenience. By changing your Caller ID to a virtual number, you can make and receive calls using a separate number that doesn’t require an additional physical SIM card. This is useful for individuals who want to establish a separate line for specific purposes, such as international calling or dedicated business lines.
Whatever your reason may be, it’s essential to understand the potential implications and legal aspects of changing your Caller ID. Ensure that you comply with local regulations and only use these options for legitimate purposes. Now that we’ve explored why you may want to change your Caller ID, let’s delve into the various methods available to achieve this on your Android device.
How Does Caller ID Work on Android?
Caller ID is a standard feature on Android devices that allows you to identify incoming calls by displaying the phone number or name of the caller before you answer. Understanding how Caller ID works on Android can help you grasp the intricacies involved in changing or modifying this feature.
When someone makes a phone call to your Android device, the caller’s information is transmitted along with the call signal. This information includes the caller’s phone number, and if available, their name. Android devices retrieve this information and display it on the incoming call screen using the Caller ID feature.
Caller ID information is received either through the cellular network or via internet-based services. If the caller is in your contact list, the Caller ID feature matches the incoming phone number with the contact information stored on your device and displays the associated name. If the caller’s number is not in your contact list, the Caller ID may show only their phone number or try to fetch their name from online databases.
Android devices use a combination of sources to gather Caller ID information:
- Phone’s Address Book: The Caller ID feature compares incoming phone numbers with the contacts saved in your phone’s address book. If there’s a match, it displays the associated name. This is why it’s helpful to keep your contacts updated.
- Online Databases: Android devices often rely on online databases to fetch Caller ID information for numbers not stored in your contacts. These databases maintain a vast collection of phone numbers and associated names and are regularly updated.
- Caller ID Services: Some service providers, such as Google Voice, offer their own Caller ID functionality. These services leverage their databases to provide accurate caller information, including names, even for numbers not present in your contacts.
It’s important to note that Caller ID functionality can vary depending on your carrier, device model, and Android version. Some devices and carriers may offer additional features, such as spam call detection and blocking, to enhance the Caller ID experience.
Now that you have a better understanding of how Caller ID works on Android devices, you’re ready to explore the methods available to change or modify your Caller ID. Keep in mind that altering your Caller ID may have legal implications, so ensure that you follow the appropriate guidelines and regulations in your region.
Is It Legal to Change Your Caller ID?
The legality of changing your Caller ID varies depending on your jurisdiction and the purpose for which you are changing it. While it is technically possible to modify your Caller ID on an Android device, it’s crucial to understand the legal implications and adhere to the relevant regulations.
In general, it is considered legal to change your Caller ID for legitimate purposes, such as protecting your privacy, maintaining professionalism in business calls, and ensuring security in certain situations. However, the legality can differ between countries and states, so it’s essential to research and understand the specific laws governing Caller ID spoofing in your area.
In many jurisdictions, using Caller ID spoofing for illegal activities, such as fraud, harassment, or impersonation, is strictly prohibited and can result in severe penalties. It’s important to respect the privacy and rights of others when considering changing your Caller ID, and only use these methods responsibly and within the confines of the law.
Additionally, it is important to note that some countries have specific guidelines and regulations that govern the use of Caller ID spoofing services and technologies. Some jurisdictions may require explicit consent from the recipient before displaying a different Caller ID, while others may have restrictions on using certain Caller ID spoofing apps or services altogether.
To ensure you are in compliance with the applicable laws, it is advisable to consult legal resources and familiarize yourself with the regulations specific to your region. This will help you understand any limitations or requirements before modifying your Caller ID on your Android device.
Always prioritize ethical conduct and respect the rights and privacy of others when changing your Caller ID. By using these methods responsibly, you can leverage the feature in a legal and appropriate manner while enjoying the benefits it provides.
Now that we’ve addressed the legal considerations surrounding changing your Caller ID, let’s explore the methods you can use to modify your Caller ID on Android devices. Remember, always use these methods responsibly and within the boundaries of the law.
Method 1: Use a Caller ID Spoofing App
One of the ways you can change your Caller ID on an Android device is by using a Caller ID spoofing app. These apps allow you to modify the outgoing Caller ID information, displaying a different phone number or name to the recipient of your call. However, it is essential to use these apps responsibly and within the boundaries of the law and the terms of service of the app you choose.
Step 1: Research and Choose a Reliable App: Start by researching and selecting a reputable Caller ID spoofing app from the Google Play Store. Read reviews, check the app’s ratings, and ensure it has a good track record of user satisfaction and reliability. It’s also important to review the app’s terms of service to understand any restrictions or limitations.
Step 2: Install and Configure the App: Once you have chosen an app, download and install it from the Google Play Store. Follow the app’s instructions for configuration, which may involve granting necessary permissions and setting up your desired Caller ID information.
Step 3: Place a Call: Open the Caller ID spoofing app and enter the desired Caller ID information for your outgoing call. This could be a different phone number, a specific name, or a combination of both, depending on the capabilities of the app. Follow the app’s instructions on how to initiate the call.
Step 4: Verify the Caller ID: Before making the call, ensure that the Caller ID information is displayed correctly by checking the preview provided by the app. This verification step is crucial to ensure that the intended Caller ID is transmitted to the recipient.
Step 5: Make the Call: Once you have verified the Caller ID information, proceed with making the call as you would normally. The app will handle the necessary modifications to display the specified Caller ID to the recipient.
It’s important to note that using Caller ID spoofing apps may have legal restrictions and should only be used for legitimate purposes. Be aware of the laws and regulations in your area regarding the use of these apps to avoid any legal consequences or violating the terms of service of the app you’re using.
Caller ID spoofing apps may offer additional features such as call recording, call scheduling, and customization options. Some apps may have usage limits or charge fees for certain functionalities, so be sure to review the app’s documentation and terms of service to understand their specific offerings.
Now that you are familiar with using a Caller ID spoofing app, let’s explore another method for changing your Caller ID on Android: contacting your carrier.
Method 2: Contact Your Carrier
Another method to change your Caller ID on an Android device is by contacting your mobile service provider or carrier. This method involves reaching out to your carrier’s customer support and requesting to change the Caller ID associated with your phone number. Here’s how you can go about it:
Step 1: Gather Information: Before contacting your carrier, make sure you have all the necessary information ready, such as your account details, phone number, and any specific details regarding the Caller ID change you desire.
Step 2: Contact Customer Support: Dial the customer support number provided by your mobile service provider and follow the prompts to connect with a representative. Alternatively, you may have the option to initiate a support request online or via email.
Step 3: Explain Your Request: Once you’re connected with a customer support representative, explain that you would like to change the Caller ID associated with your phone number. Provide them with the specific details of the change you want, whether it’s displaying a different phone number or using a business name instead of your personal name.
Step 4: Follow the Carrier’s Instructions: The customer support representative will guide you through the process and provide any necessary instructions to complete the Caller ID change. This may involve verifying your identity, submitting a formal request, or agreeing to any associated fees or terms specified by your carrier.
Step 5: Confirm the Change: After the Caller ID change request has been processed, follow up with your carrier to confirm that the modification has been successfully implemented. Test it by making a call to see if the new Caller ID information is displayed correctly.
It’s important to note that not all carriers may offer the option to change the Caller ID, or there may be limitations to what can be changed. Some carriers may require additional documentation or proof for certain modifications, especially for business-related Caller ID changes.
Keep in mind that carrier-supported Caller ID changes typically apply to your entire phone number and may affect all outgoing calls. If you only need to change the Caller ID for specific calls or situations, other methods like using Caller ID spoofing apps or services may offer more flexibility.
Remember to comply with any legal requirements and respect the terms and guidelines set by your mobile service provider when changing your Caller ID. Now that you know how to contact your carrier for Caller ID modifications, let’s explore another method: using Google Voice.
Method 3: Use Google Voice
If you’re looking for a convenient and reliable way to change your Caller ID on an Android device, you can consider using Google Voice. Google Voice is a VoIP (Voice over Internet Protocol) service offered by Google that allows you to make and receive calls using a virtual phone number. Here’s how you can use Google Voice to change your Caller ID:
Step 1: Set up a Google Voice Account: If you haven’t already, sign up for a Google Voice account. You can do this by visiting the Google Voice website or downloading the Google Voice app from the Play Store. Follow the instructions provided to set up your Google Voice account and choose a virtual phone number.
Step 2: Link Your Mobile Number: After setting up your Google Voice account, you have the option to link your mobile phone number to the service. This allows you to use Google Voice to make and receive calls through your existing phone number while utilizing the Caller ID capabilities of Google Voice.
Step 3: Customize Caller ID Settings: Within the Google Voice settings, you can customize your Caller ID settings to display your Google Voice number or any other linked numbers when making outgoing calls. This enables you to change your Caller ID to your Google Voice number, even if you’re using your personal phone.
Step 4: Make Calls with Google Voice: To take advantage of the modified Caller ID, make calls using the Google Voice app or the Google Voice website. When you initiate a call, Google Voice will use the specified Caller ID information associated with your account. The recipient will see the Caller ID you have set in your Google Voice settings.
Using Google Voice to change your Caller ID provides you with the flexibility to display a separate phone number when making calls, protecting your privacy or maintaining a professional image for business-related communications. It’s important to note that Google Voice may have its own limitations and restrictions, so it’s advisable to review their terms of service for clarification.
Keep in mind that while Google Voice can modify your Caller ID for outgoing calls, it may not affect the Caller ID displayed for incoming calls. The Caller ID shown to you when receiving calls will still depend on the settings and capabilities of your regular phone service provider.
By utilizing the features and capabilities of Google Voice, you can effectively change your Caller ID on your Android device to suit your preferences and needs. Now that you understand how to use Google Voice, let’s explore another method: utilizing a third-party calling service.
Method 4: Use a Third-Party Calling Service
If you’re looking for alternative methods to change your Caller ID on an Android device, utilizing a third-party calling service can be a viable option. These services provide additional features and flexibility to modify your Caller ID according to your preferences. Here’s how you can use a third-party calling service to change your Caller ID:
Step 1: Research and Choose a Reliable Service: Begin by researching and selecting a reputable third-party calling service that offers Caller ID customization. Look for services that have positive reviews and a track record of reliability and customer satisfaction.
Step 2: Sign up and Set up an Account: Once you’ve chosen a third-party calling service, sign up for an account on their website or through their mobile app. Follow the provided instructions to set up and configure your account.
Step 3: Configure Caller ID Settings: Within the settings of the third-party calling service, locate the Caller ID configuration options. Depending on the service, you may be able to customize the phone number or name that is displayed as your Caller ID when making outgoing calls.
Step 4: Make Calls through the Service: To use the modified Caller ID, make calls using the third-party calling service’s app or dialer. When dialing a number, the service will utilize the Caller ID information you have configured, allowing you to display a different phone number or name to the recipient.
Step 5: Follow the Service’s Guidelines: It’s important to adhere to the terms of service and guidelines provided by the third-party calling service. Respect their usage policies and ensure that you use the service responsibly and within the boundaries of the law.
Third-party calling services may offer additional features such as call recording, call forwarding, and international calling options. Some services may have associated costs or subscription fees for certain functionalities, so it’s crucial to review their pricing and terms before making use of their Caller ID customization options.
When using a third-party calling service to change your Caller ID, keep in mind that the efficacy and reliability of the service may vary. It’s essential to choose a reputable and well-established service to ensure a smooth and reliable Caller ID modification experience.
Now that you understand how to utilize a third-party calling service to change your Caller ID, let’s explore another method that involves advanced customization: rooting your Android device.
Method 5: Root Your Android Device
If you’re technically inclined and looking for advanced customization options, you can consider rooting your Android device to change your Caller ID. Rooting allows you to gain administrative access to your device’s operating system, giving you more control over system files and settings. Here’s how you can change your Caller ID by rooting your Android device:
Step 1: Understand the Risks and Precautions: Before proceeding, it’s important to understand that rooting your Android device has certain risks, such as voiding your device’s warranty or potentially causing software or hardware issues. Research and familiarize yourself with the rooting process specific to your device model and Android version.
Step 2: Backup Your Data: Prior to rooting, back up all your important data, such as contacts, photos, and documents, to ensure you don’t lose any information during the rooting process.
Step 3: Choose a Rooting Method: Select a reputable rooting method that is compatible with your device model and Android version. Various resources and online communities provide step-by-step instructions and tools for different rooting methods. Follow the instructions carefully and proceed with caution.
Step 4: Install a Custom ROM or Modification: Once you have successfully rooted your device, you can install a custom ROM (a modified version of the Android operating system) or a modification that allows you to change your Caller ID. Research and choose a reliable custom ROM or modification that offers the desired Caller ID customization capabilities.
Step 5: Configure the Caller ID: After installing the custom ROM or modification, navigate to the settings and locate the Caller ID customization options. Depending on the ROM or modification you’ve installed, you may have various options to change your Caller ID, such as modifying the displayed phone number or name.
It’s crucial to note that rooting your Android device can have serious consequences if not done correctly. It’s recommended to proceed only if you are familiar with rooting procedures and have a good understanding of the associated risks.
Rooting your device not only allows you to change your Caller ID but also provides access to a wide range of additional customization options. However, keep in mind that the process can void your device’s warranty and may hinder future system updates from the manufacturer.
Now that you understand how to change your Caller ID by rooting your Android device, it’s essential to weigh the risks and rewards before proceeding. Consider seeking advice or assistance from experienced users or reliable online communities to ensure a smooth and successful rooting experience.
Conclusion
Changing your Caller ID on an Android device can be useful for various reasons, such as protecting your privacy, maintaining professionalism in business calls, or utilizing temporary or virtual numbers. However, it’s important to approach Caller ID modifications responsibly and within the boundaries of the law.
In this guide, we explored five different methods to change your Caller ID on an Android device. Using a Caller ID spoofing app allows you to modify the outgoing Caller ID information, while contacting your carrier gives you the opportunity to request a Caller ID change directly. Utilizing Google Voice provides a virtual phone number with customizable Caller ID options, and third-party calling services offer additional features and flexibility. Lastly, rooting your Android device provides advanced customization options, including changing the Caller ID.
Before implementing any of these methods, it’s crucial to consider the legal implications and adhere to the regulations specific to your jurisdiction. Misusing Caller ID modifications for illegal activities, such as fraud or harassment, is strictly prohibited and can result in severe consequences.
Remember to prioritize ethical conduct, respect others’ privacy, and comply with the terms of service and guidelines of any apps or services you utilize for Caller ID modifications. By doing so, you can change your Caller ID in a responsible and appropriate manner while enjoying the benefits it provides.
Whether you choose to use a Caller ID spoofing app, contact your carrier, utilize Google Voice, employ a third-party calling service, or root your Android device, always ensure that your actions are in line with the law and with respect for others. Enjoy the flexibility and customization options available to you, and make calls with confidence knowing that your Caller ID is displayed as desired.