Introduction
Welcome to the thrilling world of racing drones! Whether you are a hobbyist looking for an adrenaline rush or an aspiring drone pilot wanting to participate in professional racing events, building your own racing drone is an exhilarating and rewarding experience. In this guide, we will walk you through the steps of building a racing drone from scratch, ensuring you have the knowledge and skills to customize and optimize your machine for maximum speed and performance.
Building a racing drone allows you complete control over its design, components, and capabilities. From selecting the right frame to fine-tuning the flight controller, each decision you make will impact the overall performance and handling of your drone. By understanding the intricacies of the build process, you can create a racing drone that perfectly aligns with your flying style and racing goals.
Before we dive into the technical aspects, it’s important to note that building a racing drone requires a basic understanding of electronics, soldering, and programming. While it may be challenging for beginners, the learning curve is part of the excitement and satisfaction that comes with building your own high-performance racing machine.
Throughout this guide, we will provide step-by-step instructions and valuable tips to help you navigate the building process with ease. We will cover everything from choosing the right components to configuring and fine-tuning your drone for optimal performance. So, buckle up and get ready to embark on an exciting journey in the world of racing drones!
Choosing the Right Components
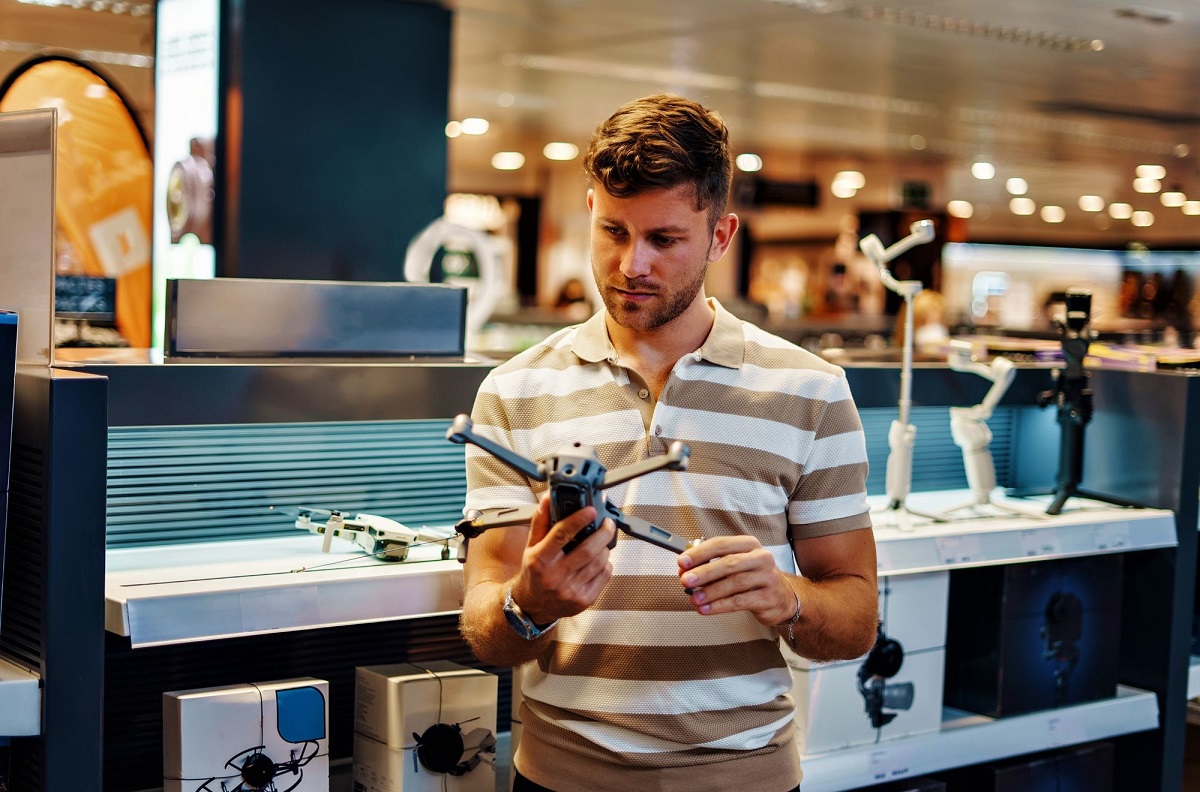
When it comes to building a racing drone, selecting the right components is crucial for achieving the best performance and durability. Each component plays a vital role in the overall functionality and capabilities of your drone. Here are the key components you need to consider:
- Frame: The frame is the foundation of your racing drone and determines its overall strength, weight, and aerodynamics. Look for a frame made from a lightweight yet durable material, such as carbon fiber, to ensure the drone’s stability and responsiveness during high-speed maneuvers.
- Flight Controller: The flight controller is the brain of your drone, responsible for stabilizing and controlling its movements. Choose a flight controller with advanced features, such as a built-in gyroscope and accelerometer, to enhance the drone’s responsiveness and maneuverability.
- Electronic Speed Controllers (ESCs) and Motors: The ESCs regulate the speed of your motors, while the motors generate the thrust needed for flight. Opt for high-quality ESCs with a high amp rating to handle the power demands of racing. Choose motors with a high KV rating for increased speed and responsiveness.
- Propellers: Propellers are responsible for generating thrust and maneuvering the drone. Look for durable propellers with a pitch and diameter that suit your racing style. Carbon fiber propellers tend to be popular among racing enthusiasts due to their strength and performance.
- FPV System: The FPV (First Person View) system allows you to see what your drone sees in real-time, giving you a pilot’s perspective during races. Select a high-quality FPV camera with low latency to ensure a smooth and immersive racing experience.
- Receiver and Transmitter: The receiver and transmitter are essential for controlling and maneuvering your drone. Choose a reliable and responsive radio transmitter with a compatible receiver to ensure stable and precise control during high-speed racing.
- Battery: The battery powers your drone and is a vital component for flight time and performance. Look for high-quality LiPo (Lithium Polymer) batteries with a high discharge rate to provide sufficient power for intense racing sessions.
It’s important to research and choose components from reputable manufacturers to ensure quality and compatibility. Reading reviews and seeking advice from experienced racing drone pilots can help you make informed decisions.
Remember, the components you choose will have a significant impact on the weight, speed, and maneuverability of your racing drone. Finding the right balance between performance, durability, and cost is key to building a competitive racing machine.
Assembling the Frame
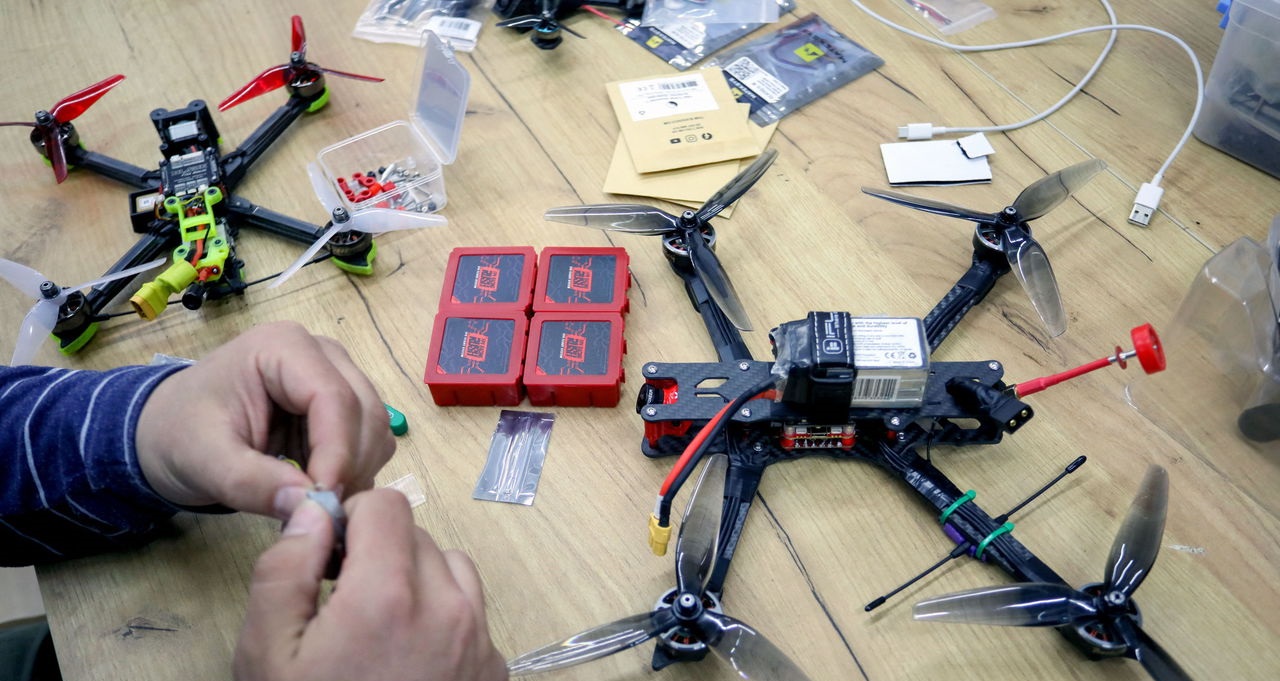
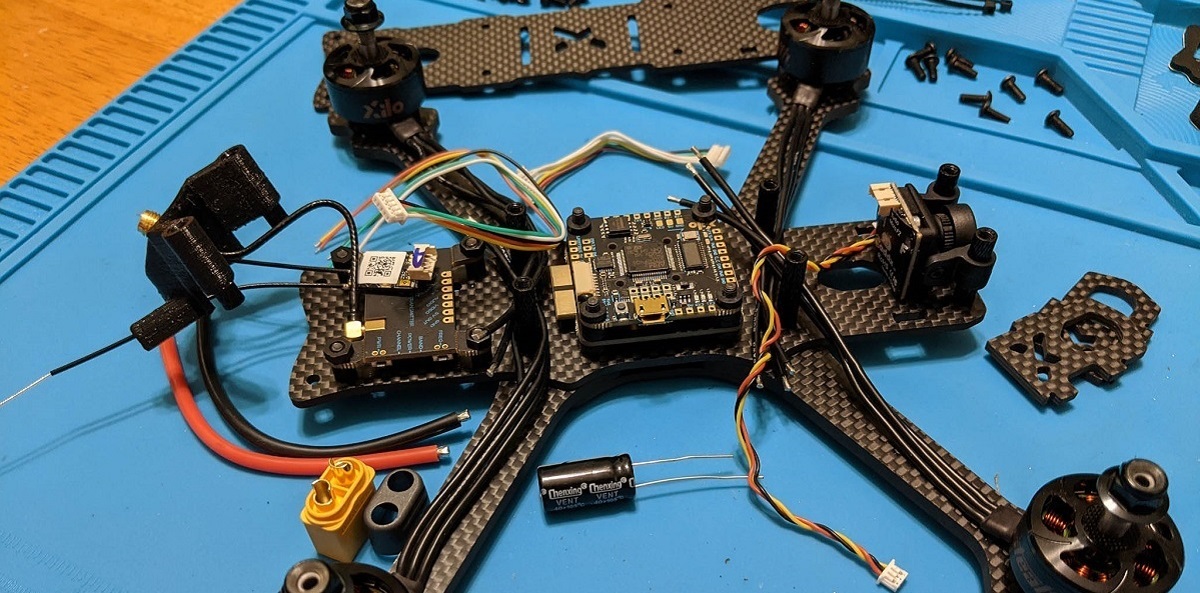
Once you have selected the frame for your racing drone, it’s time to assemble the various components onto it. Proper assembly ensures a sturdy and well-balanced frame that can withstand the intense speeds and maneuvers of racing. Follow these steps to assemble your drone frame:
- Gather your components: Lay out all the necessary components, including the frame, flight controller, ESCs, and motors, in a well-organized manner. Ensure you have all the necessary screws, standoffs, and other hardware.
- Attach the ESCs: Using the provided screws, mount the ESCs onto the designated spots on the frame. Make sure the ESCs are securely attached and aligned properly.
- Mount the motors: Attach the motors to the frame using the motor screws. Be careful to align the motor cables correctly and ensure they are long enough to reach the flight controller.
- Install the flight controller: Depending on the frame design, mount the flight controller onto the appropriate location on the frame. Use nylon standoffs to secure the flight controller and reduce vibrations.
- Connect the ESCs to the flight controller: Connect each ESC to the corresponding motor output on the flight controller. Double-check the wiring to ensure that each motor spins in the correct direction.
- Secure all connections: After connecting the ESCs, secure the wiring using zip ties or electrical tape. This helps prevent loose wires that can interfere with the drone’s performance.
- Mount the battery: Determine the optimal placement for the battery on the frame. Use Velcro straps or a battery mount to securely attach the battery to the frame.
- Double-check all connections: Before proceeding, carefully inspect all connections and ensure they are secure. Check that the motors spin freely and that all screws are tightened properly.
It is important to follow the manufacturer’s instructions for your specific drone frame, as assembly steps may vary. Additionally, pay attention to the alignment and positioning of components to achieve a balanced and symmetrical frame.
After assembling the frame, you can proceed to the next step of installing the flight controller and wiring the ESCs and motors.
Installing the Flight Controller
The flight controller is a crucial component that ensures stability, control, and navigation of your racing drone. It processes data from various sensors and adjusts the motor speeds accordingly to keep the drone level and responsive. Here’s a step-by-step guide on installing the flight controller:
- Prepare the flight controller: Before installation, ensure that your flight controller is updated with the latest firmware. This will ensure optimal performance and compatibility with other components.
- Locate the mounting holes: Identify the mounting holes on the flight controller and align them with the corresponding holes on the frame. Most flight controllers have standard hole patterns that match the frames.
- Secure the flight controller: Use nylon standoffs or vibration-damping mounts to fix the flight controller to the frame. This helps reduce vibrations and ensures proper functionality.
- Connect the power supply: Locate the power supply pads on the flight controller. Connect the positive (+) and negative (-) wires from the battery to these pads. Make sure the polarity is correct to prevent damage.
- Connect the ESCs: Depending on the flight controller, there will be designated motor output pads or pins. Connect the signal wires from the ESCs to these pads, ensuring the correct motor-to-pads mapping.
- Attach the receiver: If using a separate receiver for remote control, connect its signal wires to the appropriate receiver port on the flight controller. Follow the receiver’s manual for specific connection instructions.
- Check the connections: Verify that all the connections are secure and properly seated. Double-check the wiring and ensure there are no loose or exposed wires that may cause electrical issues.
- Configure the flight controller: Using a USB cable, connect the flight controller to your computer and configure the settings using the manufacturer’s firmware software. This includes calibrating the sensors, setting up flight modes, and adjusting PID settings for optimal performance.
It is crucial to read and follow the instructions provided by the flight controller manufacturer to ensure proper installation and configuration. Additionally, make sure to securely mount the flight controller and double-check the wiring before proceeding to the next steps.
With the flight controller installed, you are ready to move on to the next phase of wiring the ESCs and motors.
Wiring the ESCs and Motors
Wiring the ESCs (Electronic Speed Controllers) and motors correctly is essential for proper communication and control of your racing drone. The ESCs are responsible for regulating the speed of the motors, while the motors generate the necessary thrust for flight. Follow these steps to ensure a proper wiring setup:
- Identify the ESC and motor connections: Each ESC will have three wires: one for power (+), one for ground (-), and one for signal. Similarly, each motor will have three corresponding wires labeled A, B, and C.
- Solder motor wires to ESCs: Solder the three motor wires (A, B, and C) to the three motor pads on the ESC, ensuring proper polarity. It’s important to follow color-coded instructions provided by the manufacturer.
- Connect ESCs to the flight controller: Identify the motor output pads on the flight controller. Connect the three signal wires from each ESC to the corresponding motor output pads on the flight controller. Refer to the flight controller’s manual for the correct mapping.
- Power the ESCs: Connect the power and ground wires from each ESC to the appropriate pads on the flight controller or a designated power distribution board. Ensure proper polarity and that the positive and negative connections match.
- Secure the wiring: Use zip ties or adhesive tape to neatly secure the ESC and motor wiring to the frame. This will prevent loose wires from getting tangled or interfering with the drone’s performance.
- Double-check the connections: Once all the wiring is in place, carefully inspect each connection for stability and proper seating. Ensure there are no loose or exposed wires that may cause a short circuit.
- Test the motors: Before proceeding, test each motor to ensure it spins in the correct direction and at the appropriate speed. This can be done through the flight controller software or a separate configuration tool.
Take your time with the wiring process and double-check all connections for accuracy. Mistakes in wiring can result in motor direction errors, unstable flight behavior, or even damage to the components. If you are uncertain about the wiring, consult the documentation or seek guidance from experienced builders or online forums.
With the ESCs and motors properly wired, you are one step closer to completing your racing drone assembly. Next, we will discuss how to add the FPV (First Person View) system.
Adding the FPV System
The FPV (First Person View) system is what makes flying a racing drone an immersive and thrilling experience. It allows you to see real-time video footage from the drone’s perspective, giving you a pilot’s-eye view as you navigate through the racecourse. Here’s how you can add an FPV system to your racing drone:
- Select the FPV camera: Choose a quality FPV camera that provides a clear and low-latency video feed. Look for cameras with a wide dynamic range and adjustable settings to optimize the image quality.
- Mount the camera: Find a suitable location on your drone’s frame to mount the FPV camera. It should be positioned at a slight angle for better visibility during high-speed flights. Use a camera mount or adjustable mount to securely attach the camera.
- Connect the FPV camera: Connect the camera to the designated video transmitter (VTX) using a video cable. Make sure to check the camera’s voltage requirements and provide the necessary power supply.
- Install the VTX: The VTX is responsible for transmitting the video signal wirelessly to your FPV goggles or receiver. Mount the VTX in a secure location, away from other electronic components to minimize interference.
- Connect the VTX: Connect the VTX to the FPV camera using a coaxial cable. Take note of the pin layout, as different cameras and VTXs may use different pin configurations.
- Antenna installation: Attach the antenna to the VTX. Ensure that the antenna is secured properly and positioned vertically for optimal signal transmission.
- Power up the FPV system: Connect the VTX to a power source, usually the drone’s main battery. Ensure the voltage is compatible with the VTX. Follow the manufacturer’s instructions for power supply and wiring connection.
- Test the FPV system: Power on your drone and the FPV goggles or receiver. Check if you have a clear and stable video feed. Adjust the camera angle if necessary to achieve the desired field of view.
While adding the FPV system, pay attention to the weight distribution and balance of your drone. Mounting the camera and VTX in an optimal location can help minimize the impact on flight performance.
Always follow local regulations and guidelines when using FPV systems to ensure safe and responsible flying. With your FPV system successfully added, you are now ready to install the receiver and transmitter for remote control.
Installing the Receiver and Transmitter
The receiver and transmitter are crucial components that enable you to control your racing drone remotely. The receiver receives the signals from your remote control transmitter and relays them to the flight controller, while the transmitter allows you to send commands to the drone. Here’s how you can install the receiver and transmitter:
- Select the receiver and transmitter: Choose a receiver and transmitter system that is compatible with each other and your remote control transmitter. Consider factors such as range, signal strength, and ease of use.
- Find a suitable location: Locate a secure and accessible spot on your drone’s frame to mount the receiver. Make sure it is away from motor interferences and other electronic components.
- Mount the receiver: Securely attach the receiver using double-sided tape or Velcro. Ensure that the antenna is positioned correctly, preferably in a vertical orientation.
- Connect the receiver: Connect the signal wires from the receiver to the designated input pins or pads on the flight controller. Follow the instructions provided by the receiver manufacturer for the correct connections.
- Power the receiver: Most receivers require power from the flight controller or a separate power source. Connect the positive (+) and negative (-) power wires to the appropriate pads or ports on the flight controller.
- Follow the binding process: If your receiver and transmitter require binding, refer to their respective manuals for the specific binding process. This ensures a secure and stable connection between the two.
- Install the transmitter: Attach the transmitter module to your remote control transmitter. Follow the manufacturer’s instructions for proper installation. Ensure that the transmitter is powered and that it is set to the correct frequency and channel.
- Calibrate the remote control: Once the receiver and transmitter are connected, calibrate your remote control to ensure that the flight controller accurately responds to your input commands. This can be done through the flight controller software or via the receiver’s binding process.
During the installation process, make sure all the connections are secure and properly insulated to prevent any interference or loose connections. Double-check the compatibility of the receiver and transmitter with your system to ensure smooth communication.
With the receiver and transmitter properly installed, you are now ready to configure and calibrate the racing drone to optimize its performance.
Configuring and Calibrating the Racing Drone
Configuring and calibrating your racing drone is essential to ensure its stability, responsiveness, and overall performance. It involves adjusting settings and parameters to optimize flight characteristics and ensure proper communication between components. Here are the key steps to configure and calibrate your racing drone:
- Connect the flight controller: Use a USB cable to connect the flight controller to your computer. Ensure that you have the necessary firmware software installed for your specific flight controller.
- Configure the flight modes: Set up different flight modes, such as acro mode, stabilizing mode, and self-leveling mode, based on your flying preferences and skill level. Adjust the sensitivity and rates to match your desired maneuverability.
- Calibrate the sensors: The flight controller relies on sensors like the gyroscope and accelerometer to maintain stability. Follow the manufacturer’s instructions to calibrate these sensors for accurate readings and precise control.
- Adjust PID settings: The PID (Proportional, Integral, Derivative) settings control how the flight controller responds to input and maintains stability. Fine-tune these settings to optimize the drone’s flight performance for your racing style.
- Configure the receiver: Use the flight controller software to map the receiver’s input channels to the appropriate flight modes and auxiliary functions. Check that each control input correctly corresponds to the desired action.
- Set up failsafe: Configure the failsafe settings to ensure that the drone automatically returns to a safe state if the signal is lost or interrupted. This could involve setting a predetermined action such as landing or returning to home.
- Test and verify: After configuring the settings, perform a thorough test flight in a controlled environment. Check that the drone responds accurately to your inputs and maintains stability. Make any necessary adjustments if required.
Configuration and calibration may require trial and error, as each drone’s setup and pilot preferences can vary. It’s important to spend time experimenting and fine-tuning the settings to achieve the best performance and control.
Remember to always adhere to safety guidelines and regulations while configuring and testing your racing drone. With the configuration and calibration complete, your racing drone is ready for fine-tuning its performance for optimal racing prowess.
Fine-Tuning the Racing Drone Performance
Fine-tuning the performance of your racing drone is an ongoing process that allows you to optimize its speed, agility, and handling to suit your racing style. By making minor adjustments and optimizations, you can achieve peak performance and responsiveness. Here are some key areas to focus on when fine-tuning your racing drone:
- Adjust motor and propeller combinations: Experiment with different motor and propeller combinations to find the balance between speed and efficiency. Higher KV motors paired with low-pitch propellers provide more agility and top speed, while lower KV motors with higher-pitch propellers provide improved efficiency and longer flight times.
- Tune PID settings: Fine-tune the PID settings to optimize the drone’s stability and response to different flight commands. Adjust the proportional, integral, and derivative gains to find the right balance between stability and agility.
- Balance the drone: Ensure that your drone is properly balanced to improve flight performance. Check that the weight distribution is even, and make adjustments as needed. A well-balanced drone will be more stable and responsive during high-speed maneuvers.
- Optimize power distribution: Ensure that the power distribution within your drone is efficient. Examine the wiring, connectors, and power supply to minimize voltage drops and improve overall performance.
- Experiment with flight modes and rates: Test different flight modes and rates to find the ideal settings for your racing style. Adjust the rates to increase or decrease the drone’s sensitivity to control inputs, depending on your preferences and skill level.
- Consider camera angle: Experiment with different camera angles to find the optimal view for racing. A higher camera angle provides better visibility of the race track ahead, while a lower angle enhances speed perception. Find the angle that helps you navigate through the racecourse more efficiently.
- Monitor and analyze flight data: Use flight data logging and analysis tools to track and analyze your drone’s performance. This data can provide insights into areas that may need improvement and help you make more informed adjustments.
Fine-tuning your racing drone requires patience and experimentation. Make one adjustment at a time and test the drone’s performance before making additional changes. Keep a record of the modifications and their effects to help you track progress and refine your drone’s setup.
Constantly learning and adapting your drone setup will ensure that you stay competitive and continuously improve your racing skills. With each adjustment, you’ll find your drone responding more precisely to your inputs, resulting in a thrilling and exhilarating racing experience.
Tips for Flying Your Racing Drone
Flying a racing drone requires skill, practice, and a good understanding of its capabilities. To help you become a better pilot and make the most out of your racing experience, here are some valuable tips to keep in mind:
- Start in a safe and open area: Begin your flights in a spacious and open area, away from obstacles and people. This will give you ample space to practice maneuvers and ensure the safety of yourself and others.
- Master the basics: Before attempting advanced aerial stunts, focus on mastering the basics of flying. Practice maintaining a stable hover, performing smooth take-offs and landings, and precise control of throttle and yaw.
- Use propeller guards: Consider using propeller guards, especially during your initial practice sessions. They provide an added layer of protection and help prevent damage to the propellers in case of collisions or crashes.
- Fly in different weather conditions: As you gain more experience, try flying in various weather conditions. This will help you adapt to different flying challenges and improve your ability to handle the drone in diverse environments.
- Practice line-of-sight flying: While FPV flying is exhilarating, it’s important to regularly practice flying line-of-sight (LOS) as well. This will enhance your spatial awareness and make you a better pilot overall.
- Learn from others: Join local drone racing communities or online forums to connect with experienced pilots. Learning from others’ experiences and tips can significantly accelerate your progress and help you avoid common mistakes.
- Understand and comply with regulations: Familiarize yourself with local drone regulations and follow them diligently. Respect no-fly zones, flight restrictions, and privacy concerns to ensure the safety and legality of your flights.
- Practice drone maintenance: Regularly inspect and maintain your racing drone to ensure its longevity and reliability. Check the propellers, motors, frame, and connections before each flight. Cleaning and properly storing your drone will also contribute to its longevity.
- Record and analyze flights: Use onboard DVR or record FPV footage to review your flights. Analyze your maneuvers and identify areas for improvement. This will help you fine-tune your skills and become a more precise and efficient pilot.
- Never fly beyond your limitations: It’s important to know your limits and avoid pushing yourself beyond what you are comfortable with. Gradually increase your skills and confidence to ensure safe and enjoyable flights.
Remember, flying a racing drone is not just about speed and agility; safety and responsible piloting are paramount. Always prioritize the safety of yourself, others, and the environment around you. With practice, patience, and adherence to best practices, you’ll become a skilled pilot and enjoy the thrilling world of racing drones to the fullest.
Conclusion
Building and flying a racing drone is an exhilarating journey that combines the joy of engineering and the thrill of high-speed racing. By following the steps outlined in this guide, you can create a custom racing drone that aligns perfectly with your flying style and racing goals.
We discussed the importance of choosing the right components, such as frames, flight controllers, ESCs, motors, and FPV systems, to ensure optimal performance and durability. We also explored the process of assembling these components, wiring the ESCs and motors, and installing the flight controller, FPV system, receiver, and transmitter.
In addition, we covered the essential steps of configuring and calibrating the racing drone, fine-tuning its performance, and provided valuable tips for flying. These tips will help you become a skilled and responsible pilot, allowing you to navigate racecourses with precision and confidence.
As you embark on your drone racing journey, remember to prioritize safety at all times. Familiarize yourself with local regulations, fly in open and suitable locations, and maintain your drone regularly. By following these guidelines, you can ensure a pleasant and safe racing experience.
Always be open to learning and experimenting with different settings and techniques to continuously improve your skills. Participate in local drone racing communities, share your experiences, and learn from other pilots to enhance your knowledge and adapt to new and exciting challenges.
Building and flying a racing drone is a blend of passion, skill, and creativity. So, embrace the excitement, push your limits, and enjoy the incredible thrill of racing through the skies with your very own custom-built racing drone!